Overview
After signing up for Clocklocked, your next step is to Connect and Set up an Account. This allows you to view and manage different aspects of any profiles associated with your connected account.
You can view campaign statistics, create and configure campaigns and keywords, and even view information about active listings and orders. Anything you set up here automatically synchronizes over to your channel ads account.
In this article, you will learn how to manage your campaigns from Clocklocked.
Profile Management
To manage a profile on Clocklocked:
- Log in to Clocklocked at https://app.clocklocked.com/.
- Click one of your Accounts.
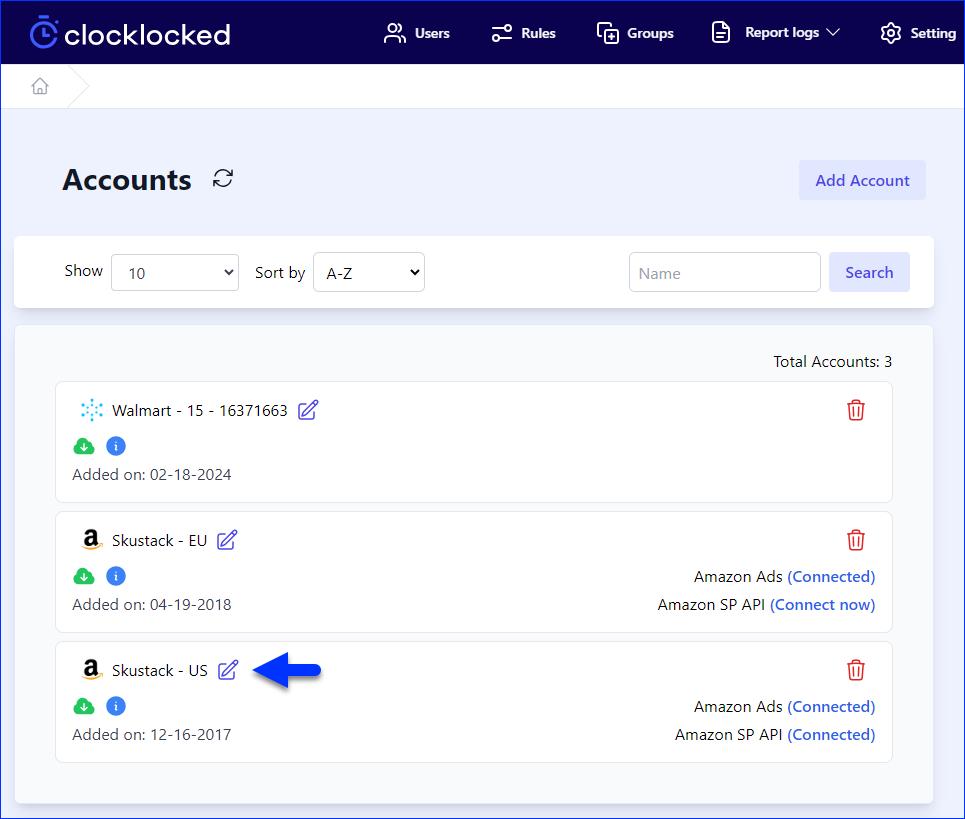
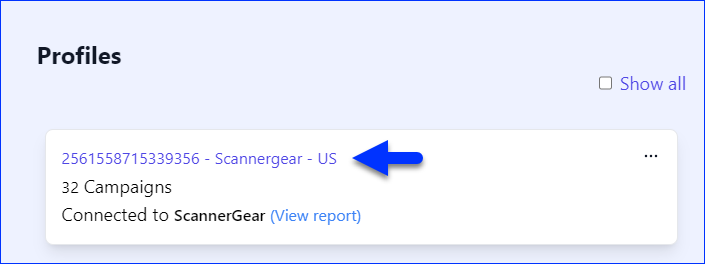
- Click one of your Profiles. If you don’t see a profile, check Show all.
- This takes you to your Profile Management page. The left-side menu allows you to switch between five different tabs:
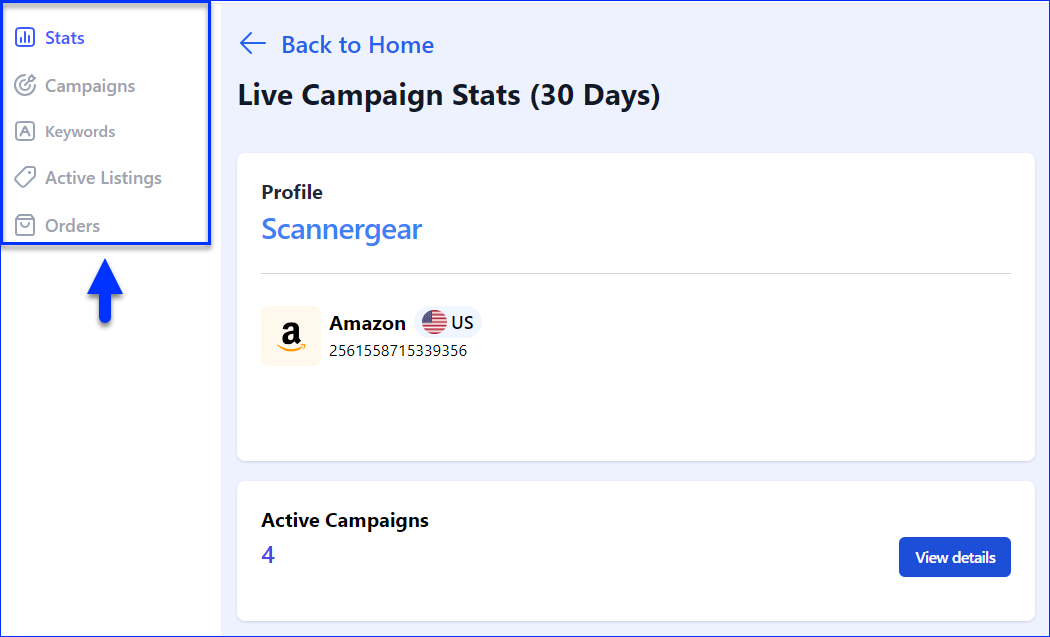
- Stats – See live campaign statistics, such as specific metrics based on selected goals.
- Campaigns – Add, view, and manage campaigns.
- Keywords – Add, view, and manage campaign keywords.
- Active Listings – View the connected profile’s current active listings and access product information, inventory history, related campaigns, and sales data.
- Orders – View orders from campaigns created on the selected profile.
See the following sections for a detailed breakdown of each tab.
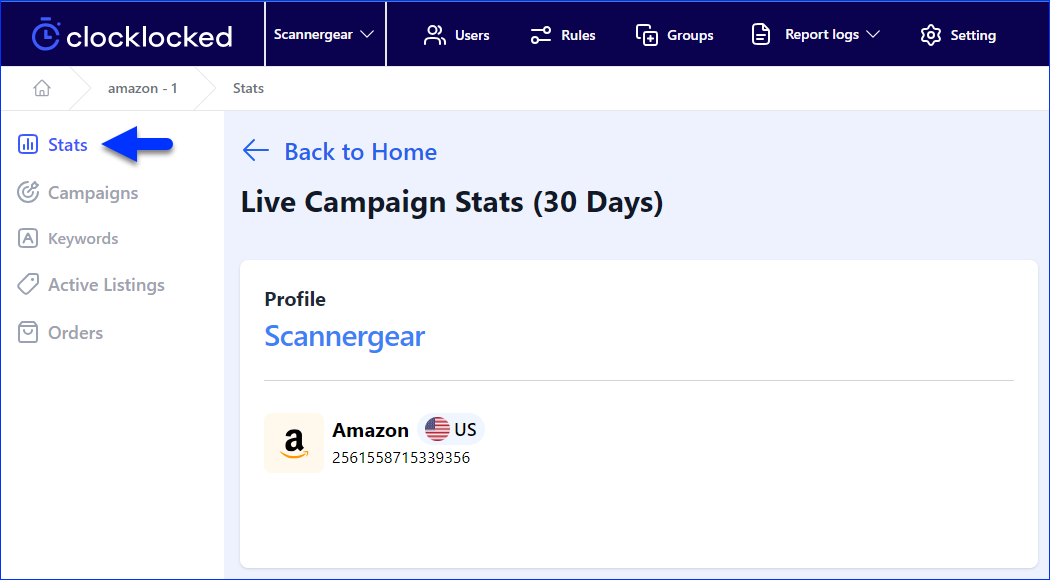
Stats
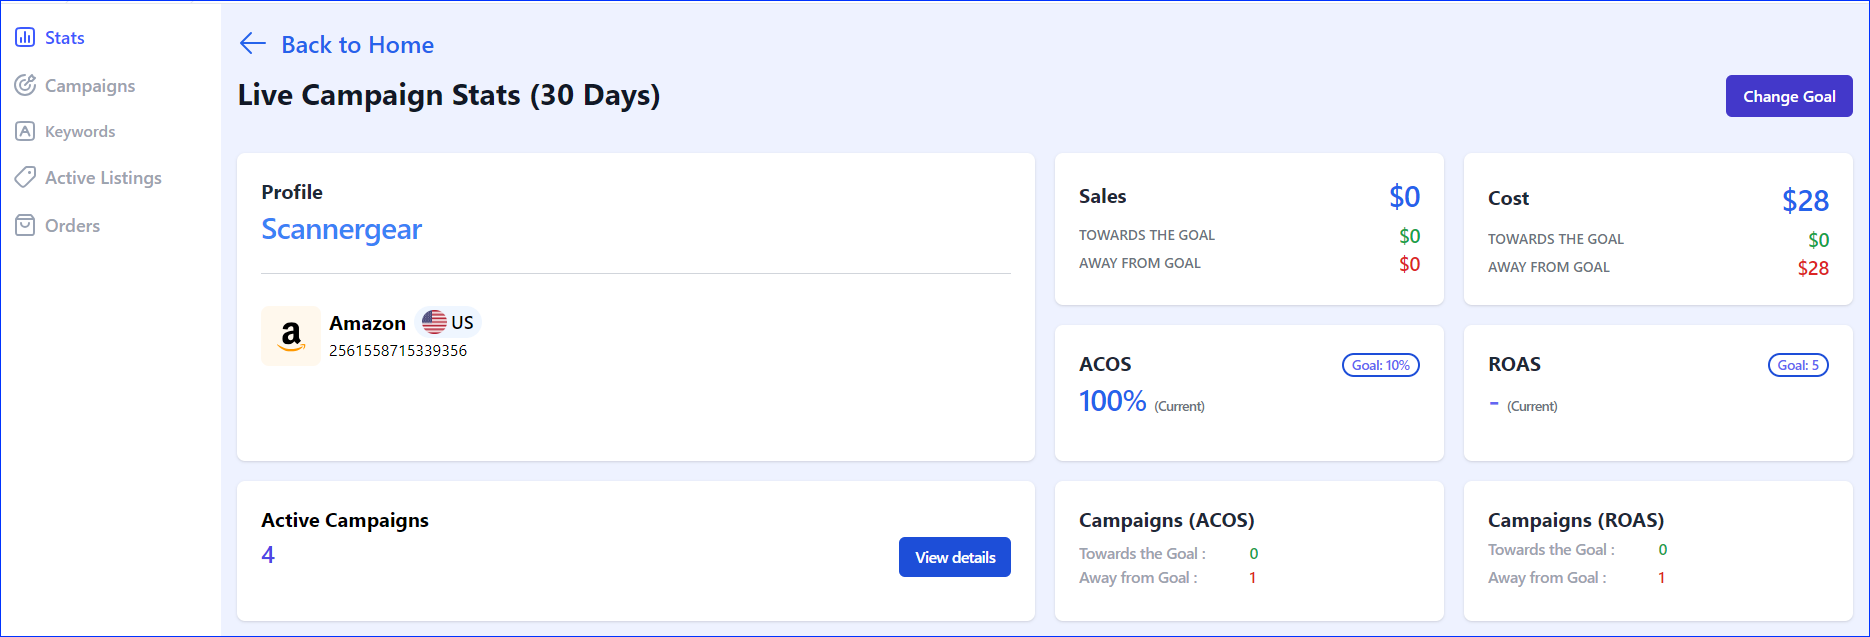
Stats is the default tab you land on when going to a Profile Management page in Clocklocked. This tab shows live campaign statistics, including specific metrics based on your selected goals.
The Stats tab shows the following panels:
- Profile – Shows the currently selected profile. Clicking the link on the profile name takes you to the Campaigns tab.
- Sales – Shows the total amount made from sales linked to campaigns running on the selected profile, detailing your progress towards or away from the selected goal.
- Cost – Shows the cost spent on ad campaigns running on the selected profile, detailing your progress towards or away from the selected goal.
- ACOS – The ACOS (Advertising Cost of Sales) measures the ratio of ad cost to sales. It’s a percentage calculated by dividing total ad spend by total sales generated from advertising, then multiplying by 100 to get the percentage. To set the Target ACOS percentage, click the current Goal shown in the panel or the Change Goal button on top.
- ROAS = Revenue from Ads / Cost of Ads
- For instance, if you spend $50 on ads and those ads generate $500 in sales, your ACOS would be 10% ($50 / $500 * 100 = 10%). This means you’re spending 10 cents on advertising for every dollar in sales generated.
- ROAS – The ROAS (Return on Advertising Spend) measures the revenue generated for every dollar spent on advertising, calculated by dividing the total revenue generated from ads by the total amount spent on those ads. To set the Target ROAS, click the current Goal shown in the panel or the Change Goal button on top.
- ACOS = (Cost of Ads / Revenue from Ads) * 100
- For example, if you spend $200 on advertising and generate $1000 in sales from those ads, your ROAS would be 5x ($1000 / $200 = 5). This means for every dollar spent on advertising, you generate $5 in revenue.
- Active Campaigns – The number of currently active campaigns. Click View Details to see the campaigns.
- Campaigns (ACOS) – The number of campaigns that take you toward and away from your ACOS goal. Click the campaign counts to see actual campaigns.
- Campaigns (ROAS) – The number of campaigns that take you toward and away from your ROAS goal. Click the campaign counts to see actual campaigns.
Campaigns
To see and manage all campaigns under the profile, select the Campaigns tab on the Profile Management page.

Here, you can:
- Find any campaign.
- View campaign details.
- Execute actions on campaigns.
- Add campaigns.
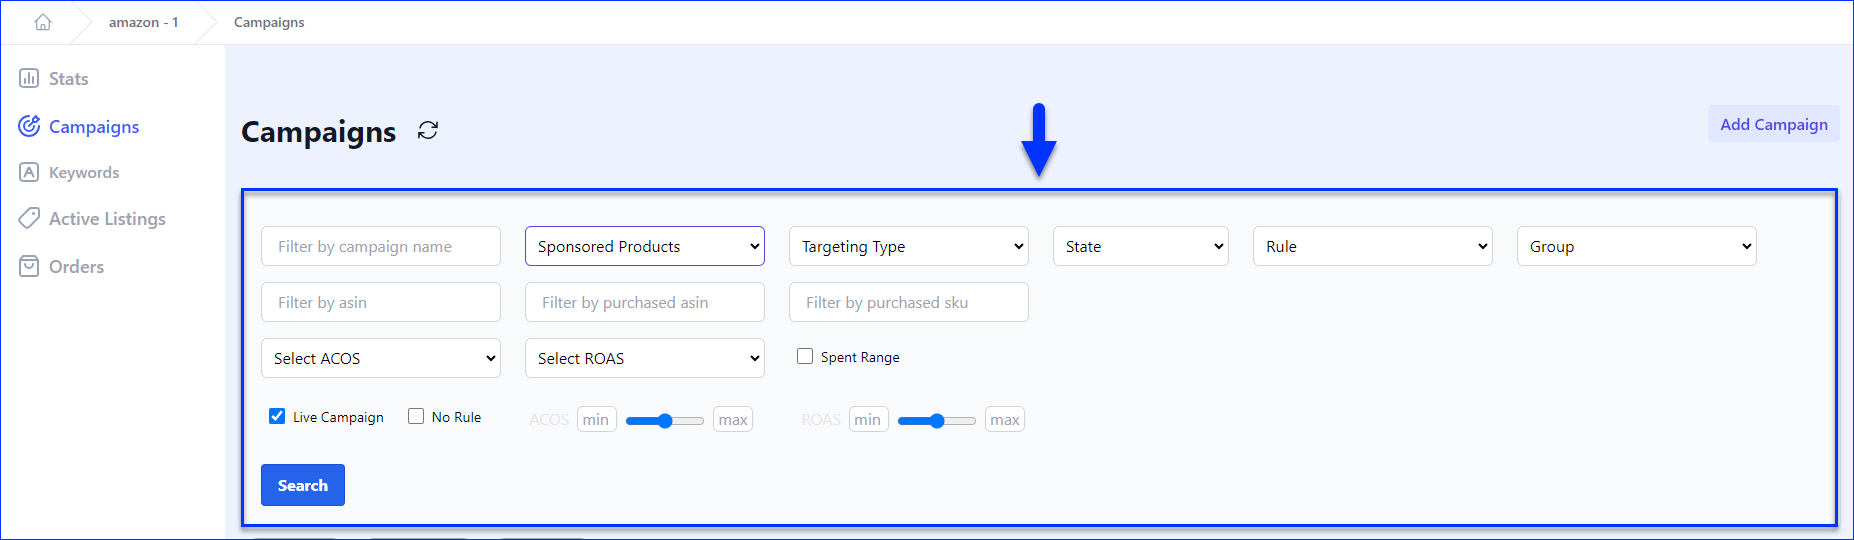
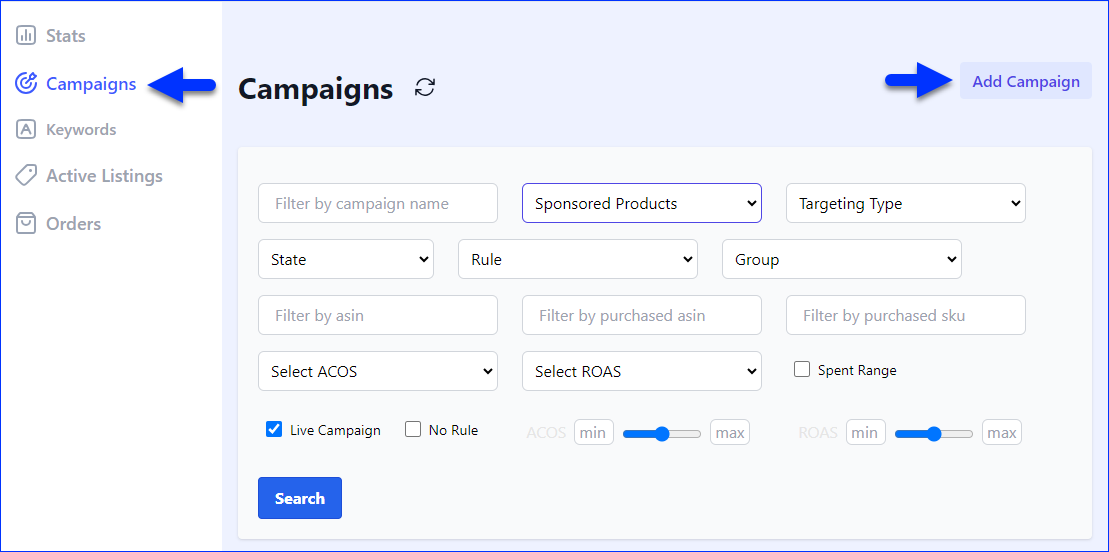
Searching
The Campaigns tab allows you to search for campaigns using the following filters:
- Campaign Name – Filter by campaign name.
- Type – Filter by campaign type: Sponsored Products, Sponsored Display, or Sponsored Brand.
- Targeting Type – Filter by Targeting Type: Manual or Auto.
- State – Filter by campaign state: Enabled, Paused, or Archived.
- Rule – Filter by a specific assigned rule.
- Group – Filter by a specific assigned group.
- ASIN – Filter by ASIN to see campaigns with specific products.
- Purchased ASIN – Filter by purchased ASIN.
- Purchased SKU – Filter by purchased SKU.
- ACOS – Filter by ACOS profit or loss. Additionally, you can filter by specifying a minimum and/or maximum ACOS goal value.
- ROAS – Filter by ROAS profit or loss. Additionally, you can filter by specifying a minimum and/or maximum ROAS goal value.
- Spent Range – Filter by the time range during which money has been spent on ads – Today, Last 7 days, Last 14 days, Last month, or Custom.
- Live Campaign – Filter by campaign status. Check this box to show only live campaigns.
- No Rule – Filter by the presence or absence of assigned rules. Check this box to show only campaigns without any rules.
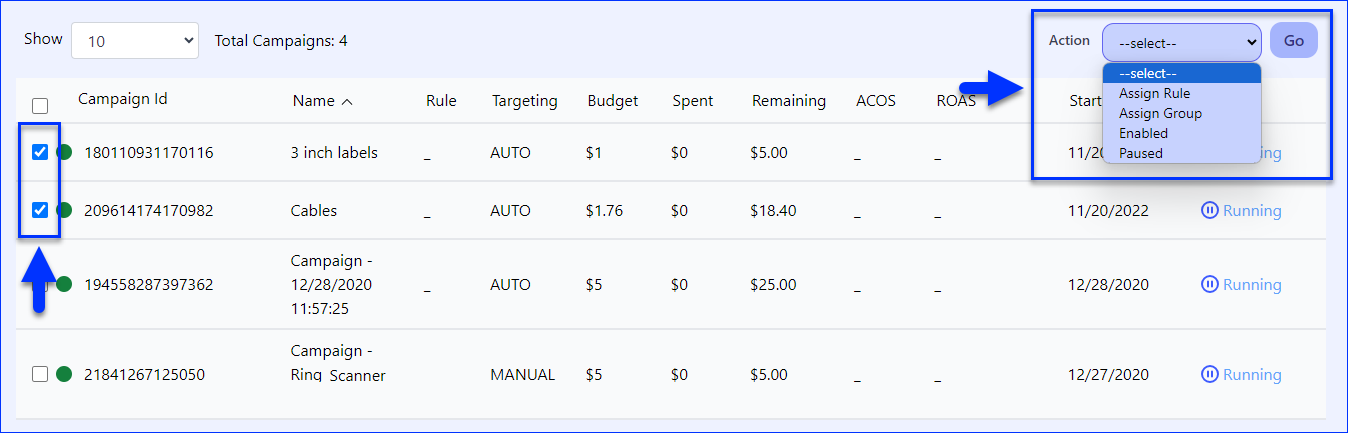
Actions
When you search for campaigns, they will appear in a grid below the search filters. You can check the boxes to the left of one or more campaigns to select them, and then click Action above the grid to select from these actions:
- Assign Rule – Assign a rule to the selected campaigns.
- Assign Group – Add the selected campaigns to a group.
- Enabled – Enable the selected campaigns.
- Paused – Pause the selected campaigns.
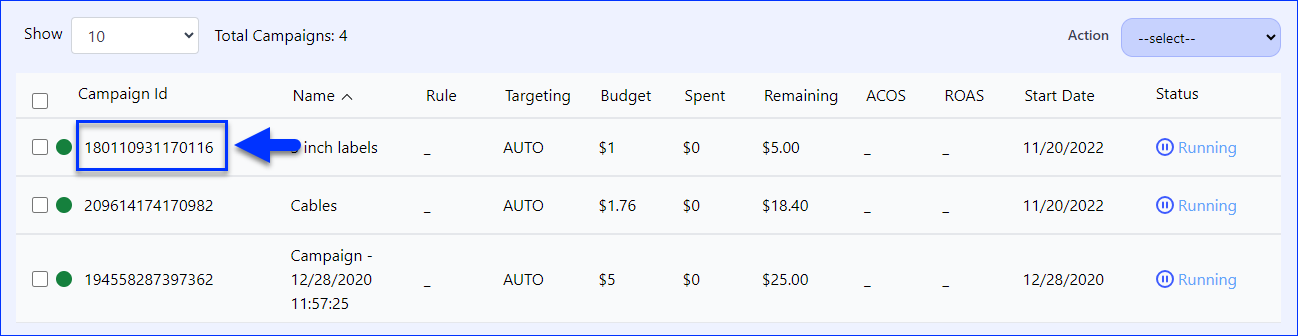
Management
Clicking a Campaign ID in the grid opens a Campaign Management page, which has different tabs containing related data. The tabs are listed below.
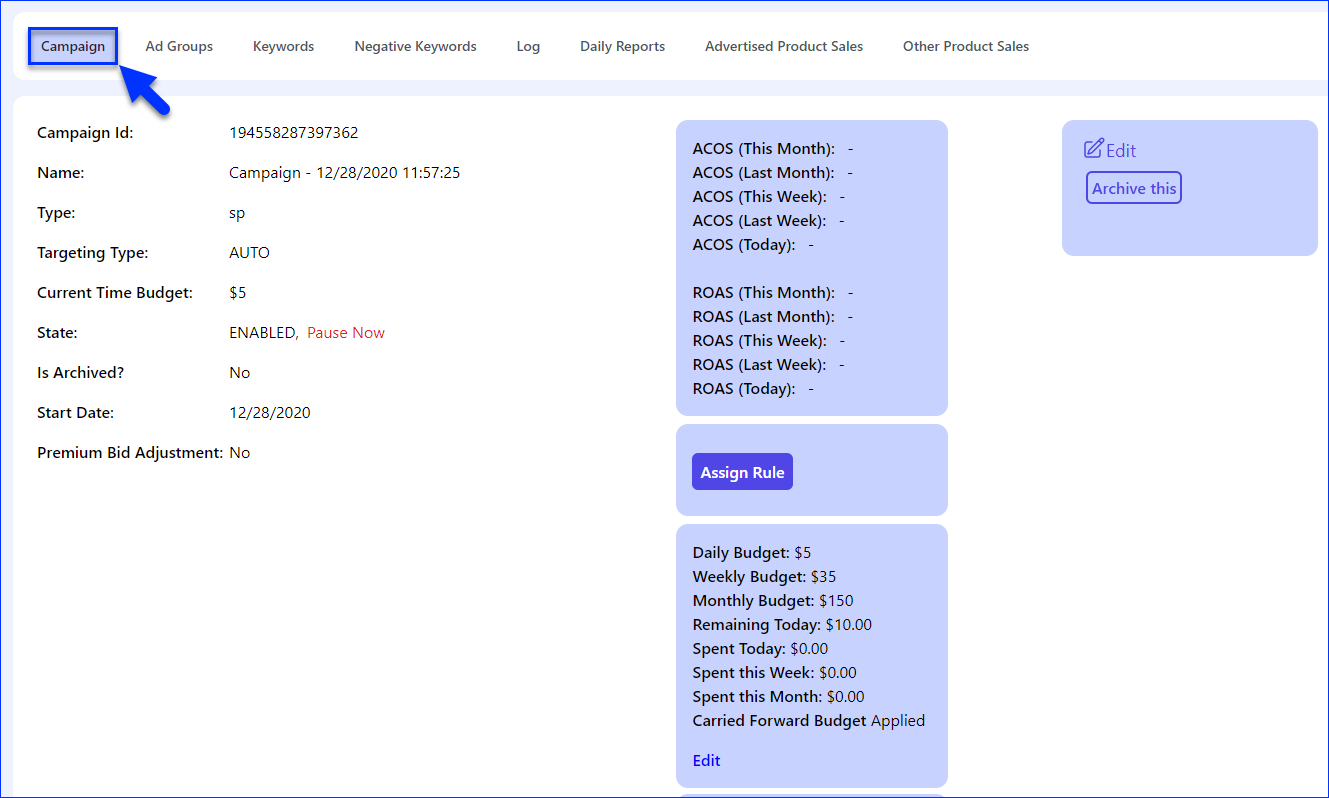
Campaign
The Campaign tab on the Campaign Management page shows general information and statistics about the selected campaign. Here, you can:
- Enable, pause, or archive the campaign. The archive option is visible only on paused campaigns.
- Configure budget settings.
- Assign, change, or unassign a rule.
- Assign, change, or unassign a group.
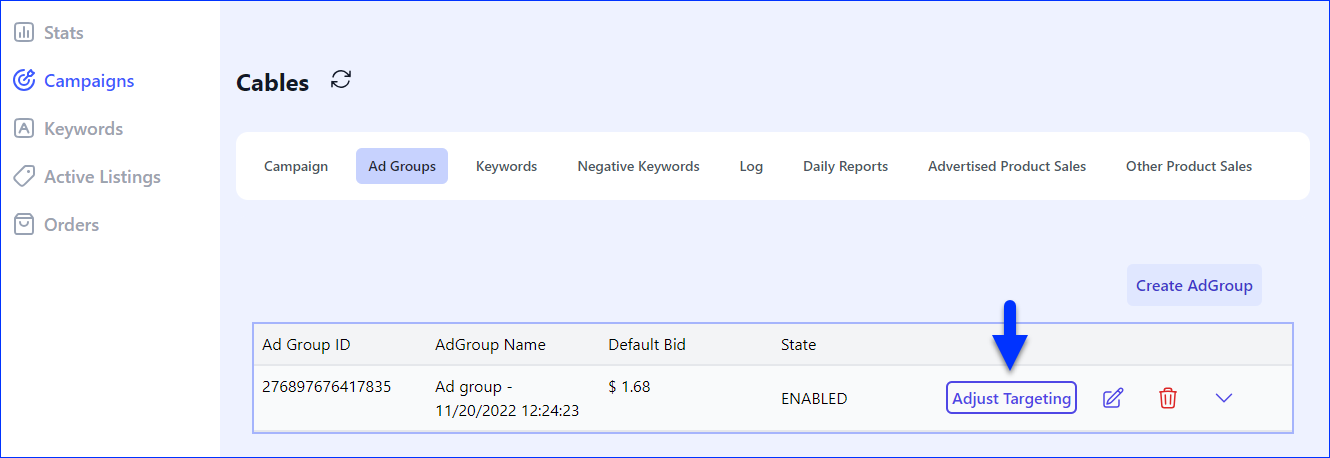
Ad Groups
The Ad Groups tab on the Campaign Management page shows any ad groups created for the selected campaign. You can create, edit, and delete ad groups here.
Clicking an existing ad group in the list displays a dropdown with 3 sections:
- Product Ads – Shows the individual product ads in the ad group.
- Click Add Product Ad to create a new product ad.
- Click a product’s ASIN to view the product on Amazon.
- Suggested keywords – If any suggested keywords are available, they will be listed here.
- Negative keywords – If any negative keywords are available, they will be listed here.

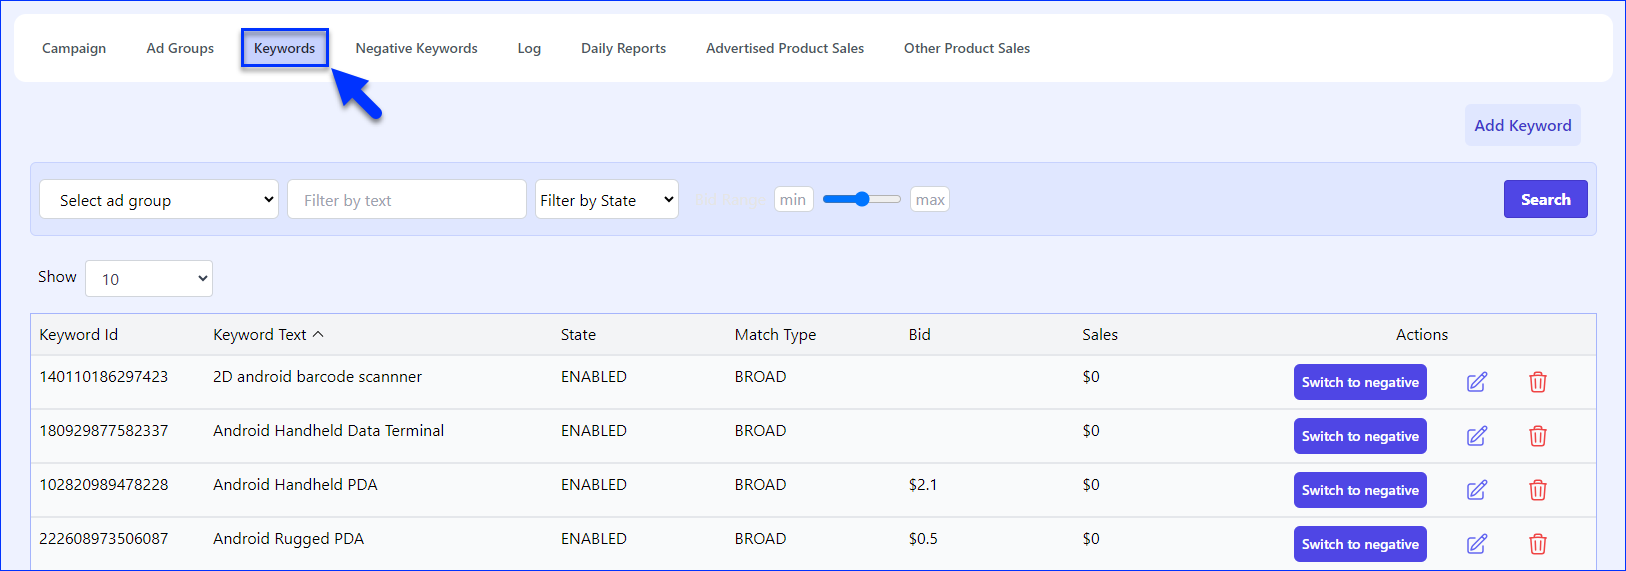
Keywords Tab
By focusing on keywords that are highly relevant to your products and target audience, you can ensure that your ads are seen by users who are more likely to make a purchase, resulting in a higher return on investment (ROI) for your advertising spend.
The Keywords tab on the Campaign Management page shows all keywords targeted by the campaign. Here, you can:
- Click Add Keyword to add a new keyword.
- Filter keywords by Ad Group, Text, State, and Min/Max Bid Range.
- Make specific keywords negative by clicking Switch to Negative.
- Click the Pencil icon to edit keywords or delete them with the Trash icon.
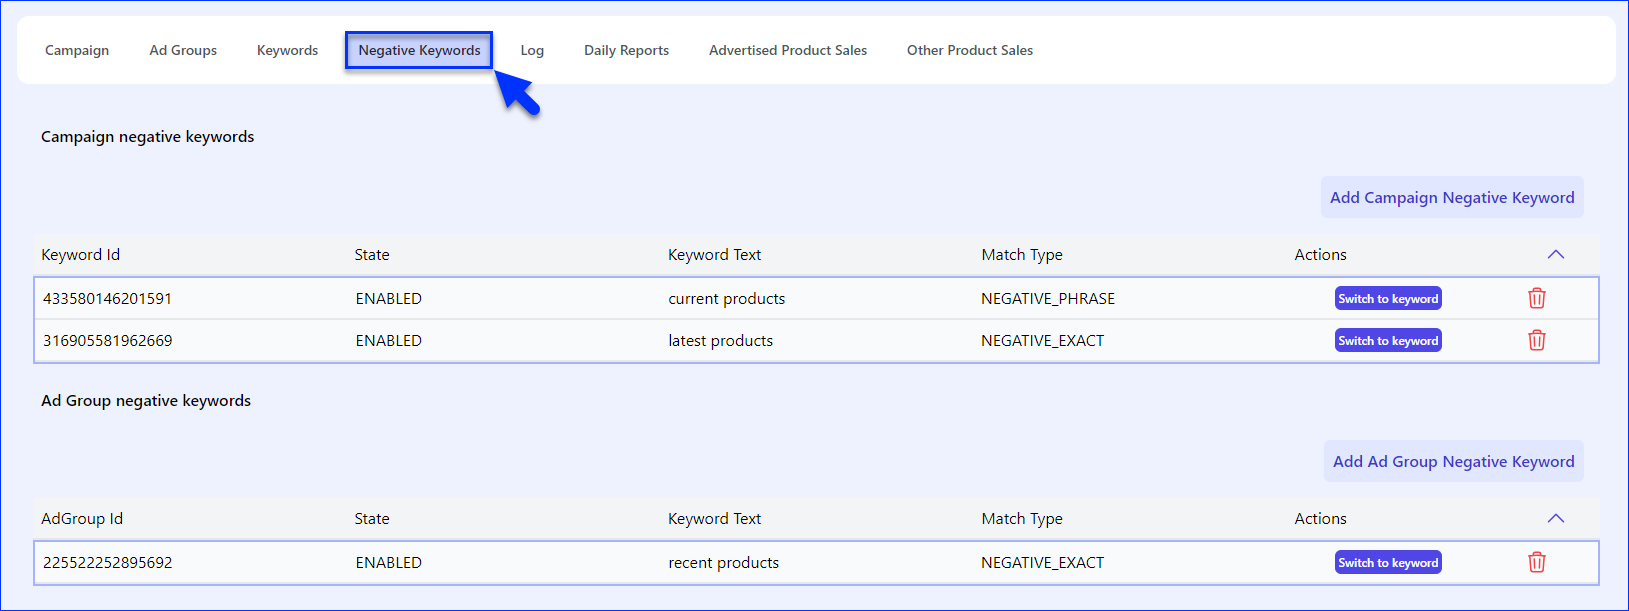
Negative Keywords
Ads created under the selected campaign will not appear when a searcher’s query contains negative keywords. The Negative Keywords tab on the Campaign Management page shows the selected campaign’s negative keywords.
You can add, view, edit, and delete:
- Campaign Negative Keywords – Apply to the whole campaign.
- Ad Group Negative Keywords – Apply only to specific ad groups.
Log
This tab shows a log of changes made to campaigns by users in Clocklocked.

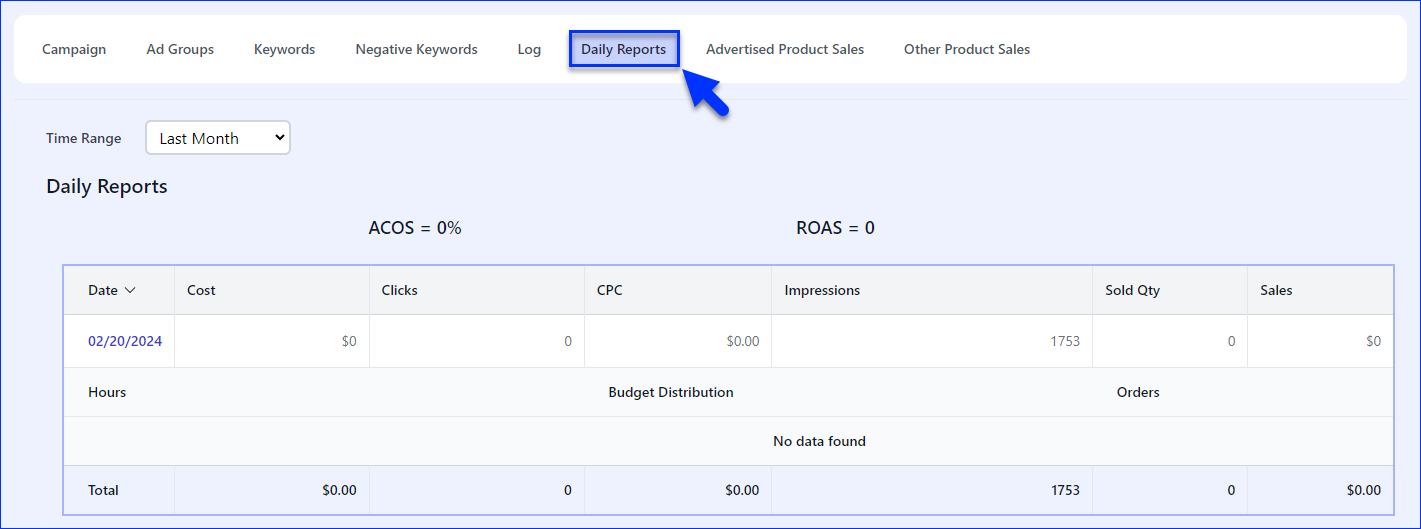
Daily Reports
This tab shows daily reports. Here, you can:
- Filter the reports by Time Range – Today, Last Week, Last Month, or Custom.
- Click on dates to get the related detailed Hourly Budget Distribution.
The reports grid shows these details:
- Date
- Cost
- Clicks
- CPC
- Impressions
- Sold Qty
- Sales
- ACOS
- ROAS
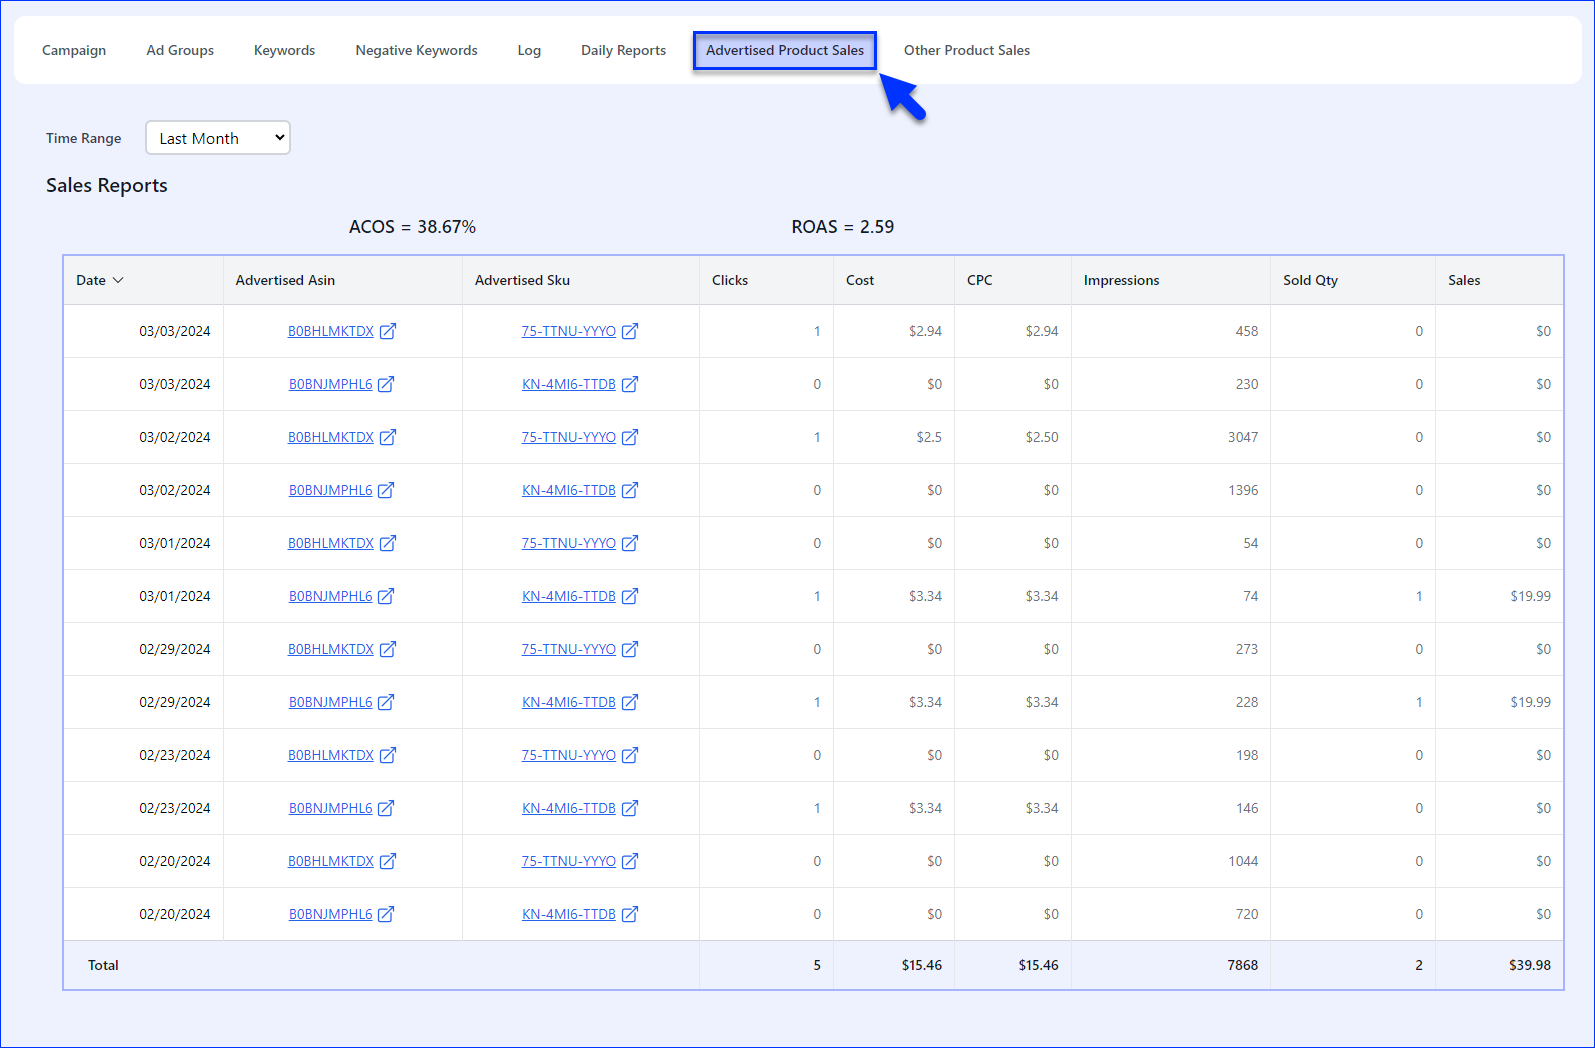
Advertised Product Sales
This tab shows information about sales of products for which you are running ads in the campaign. You can see these details:
- Date
- Advertised ASIN
- Advertised SKU
- Clicks
- Cost
- CPC
- Impressions
- Sold Qty
- Sales
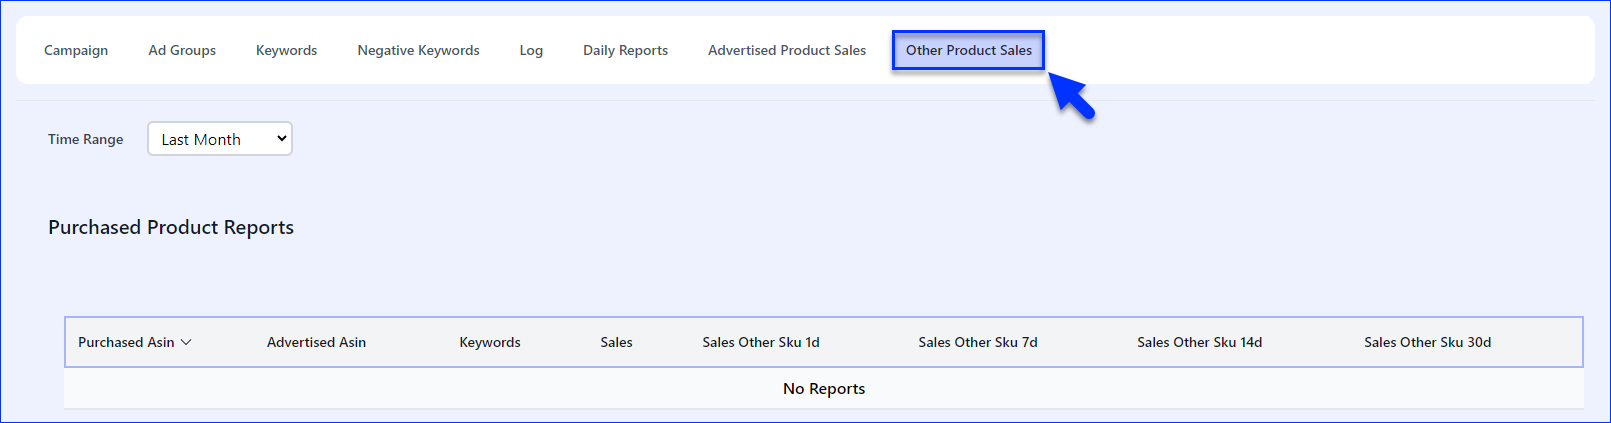
Other Product Sales
This tab shows a report with information about sales of non-advertised products. These are products that you are not actively advertising but have been purchased by a customer after they clicked your product ad. You can see these details:
- Purchased ASIN
- Advertised ASIN
- Keywords
- Sales
- Sales Other SKU 1d
- Sales Other SKU 7d
- Sales Other SKU 14d
- Sales Other SKU 30d
Creation
To add a new campaign:
- Select the Campaigns tab.
- Click the Add Campaign button.
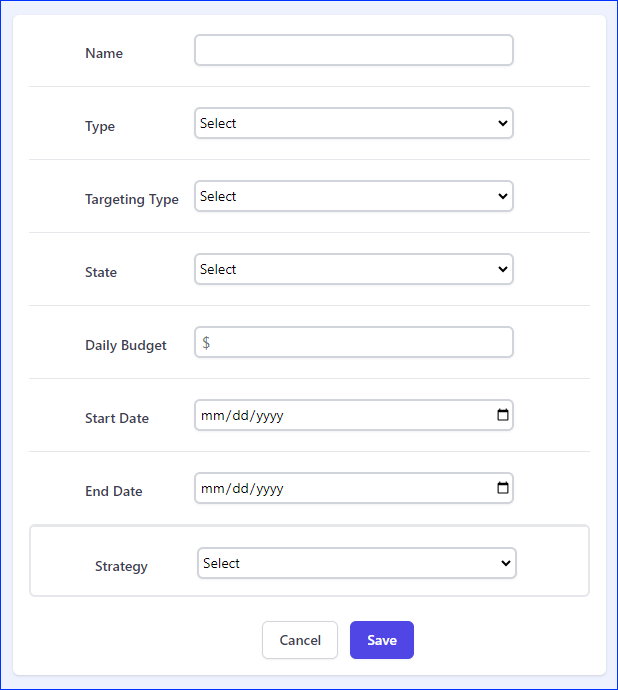
- Enter the required details:
- Name – The campaign name.
- Type – The campaign type: Sponsored Products, Sponsored Display, or Sponsored Brand.
- Targeting Type – The campaign’s Targeting Type: Manual to choose keywords or products to target specific searches and set custom bids or Auto to get Amazon to automatically target keywords and products similar to the products in your ads.
If you select Auto, after you create the campaign, you can configure the targeting groups by going to the Ad Groups tab on the campaign’s page. - State – The campaign state can be Enabled, Paused, or Archived.
- Daily Budget – The daily budget for ads on the campaign.
- Start Date – The campaign’s beginning date.
- End Date – The campaign’s end date.
- Strategy – The Bidding Strategy can be Legacy For Sales, Auto For Sales, or Manual. If you select Manual, you will also have to enter the placementProductPage and placementTop percentage amounts.
- When you are ready, click Save.
Keywords
Keywords in ads are specific terms or phrases that advertisers bid on to target their ads to relevant shoppers. These keywords are crucial as they increase the visibility of your ads and help you reach your desired audience.
To manage the targeted keywords of all campaigns created under your connected profile simultaneously, select the Keywords tab on the Profile Management page.
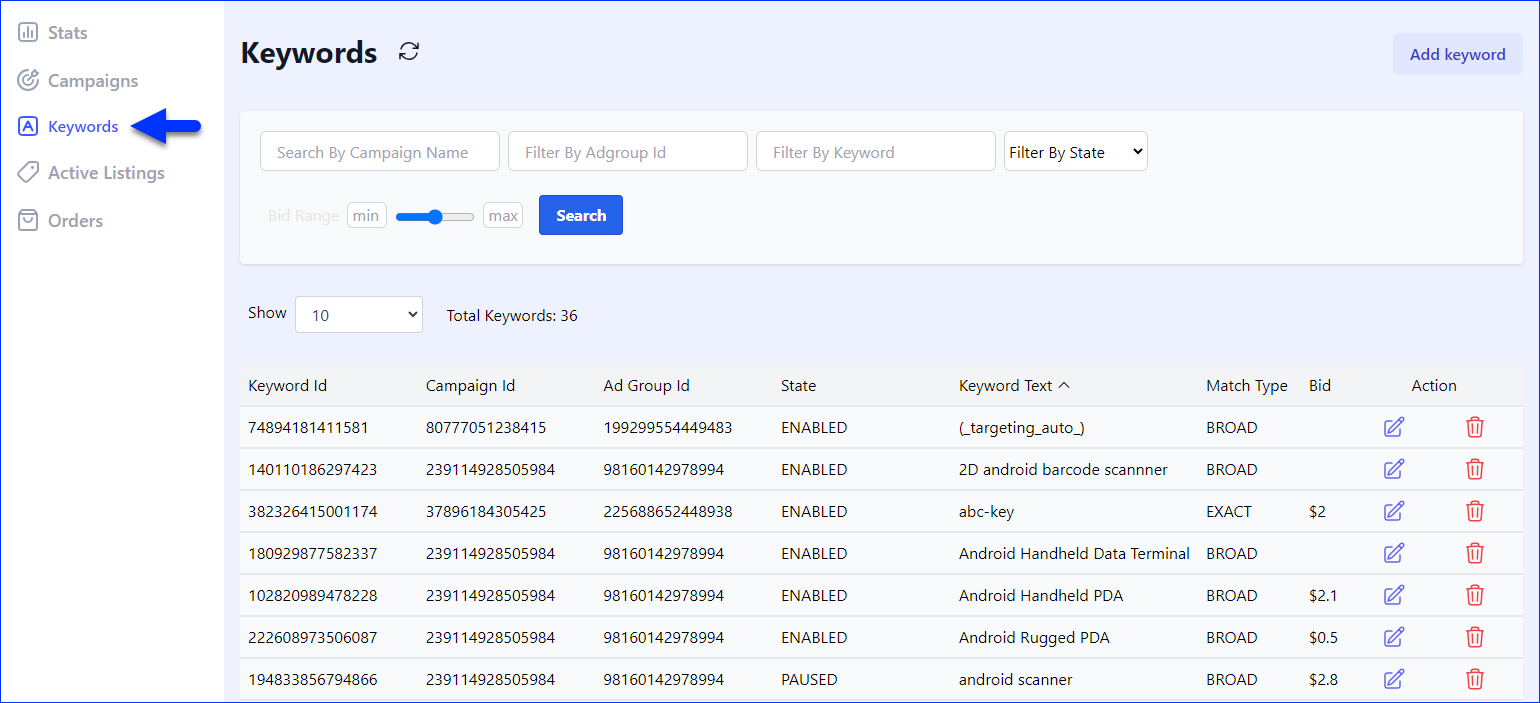
This tab lets you manage all keywords targeted by your campaigns. Here, you can:
- Add, edit, or delete keywords.
- View keywords from any campaign under the selected profile.
- Filter keywords by campaign name, ad group ID, state, or keyword.
- Click a keyword’s Campaign ID to view the corresponding campaign.
Active Listings
Selecting the Active Listings tab on a Profile Management page will take you to a page that shows all currently active listings created under the selected profile.
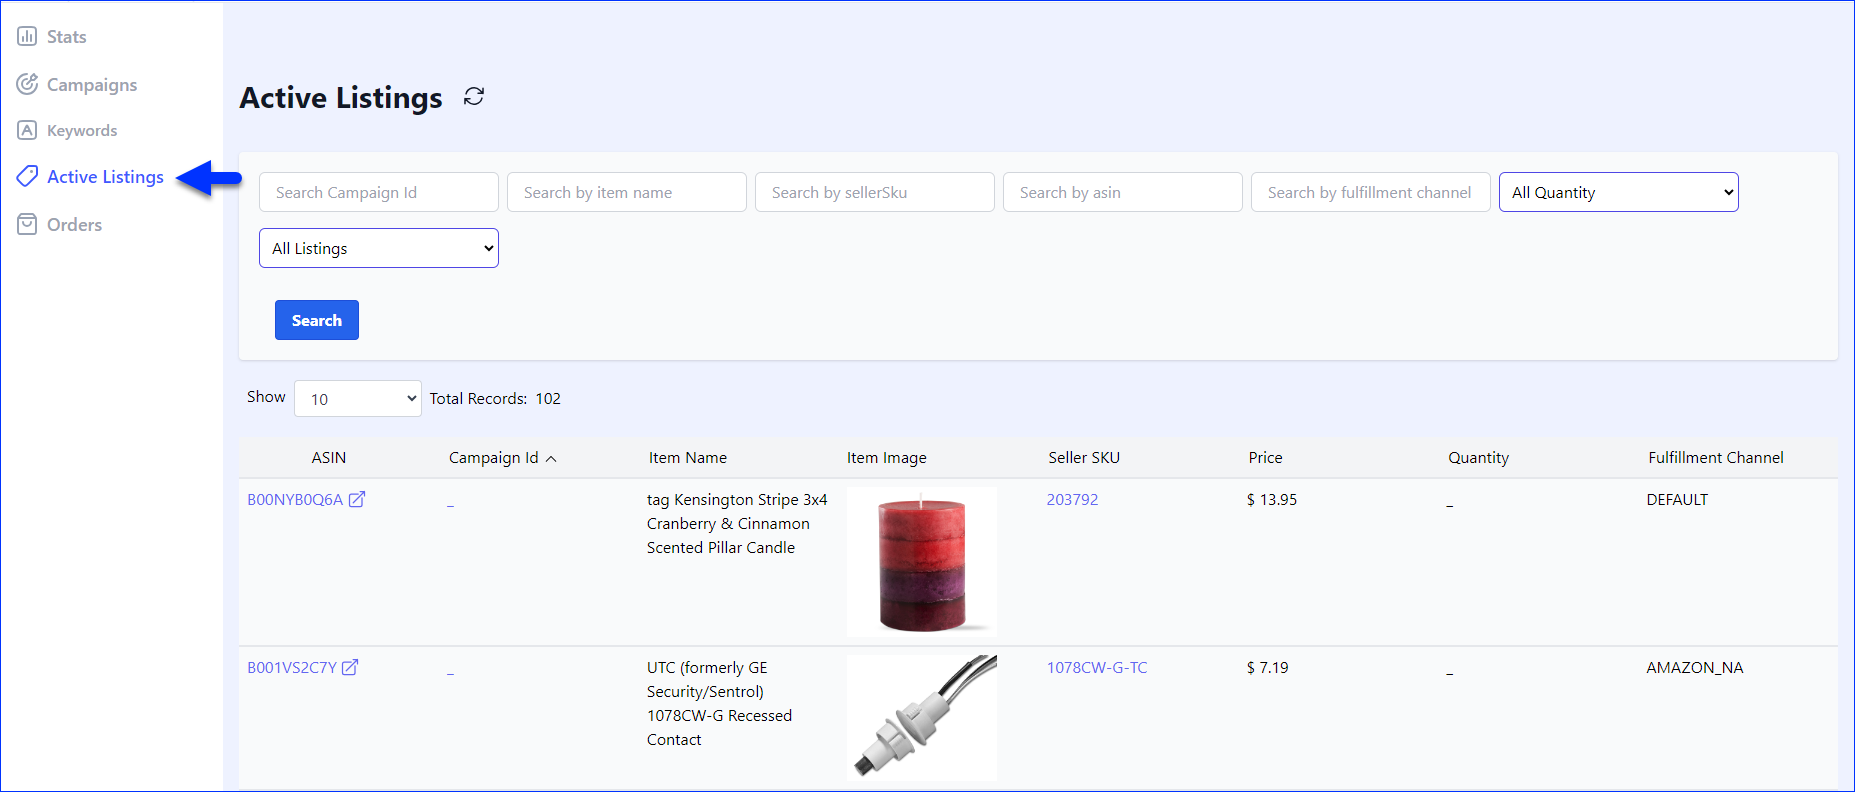
Here, you can:
- View and search for active listings by:
- Campaign ID
- Item Name
- Seller SKU
- ASIN
- Fulfillment Channel
- Available Quantity
- Campaign Involvement
- To view the corresponding campaign, click a listing’s Campaign ID.
- To see a product on Amazon, click its ASIN.
- To see product details, click its Seller SKU. The product details page contains 4 tabs:
- Product: Shows product details and allows you to add the product to a campaign or view it on Amazon.
- Inventory History: Shows the FBA inventory history and the available quantity.
- Related Campaigns: Shows campaigns related to the product.
- Sales: Shows sales of the product.
Orders
The Orders tab on the Profile Management page shows all orders resulting from ads created under the selected profile’s campaigns.
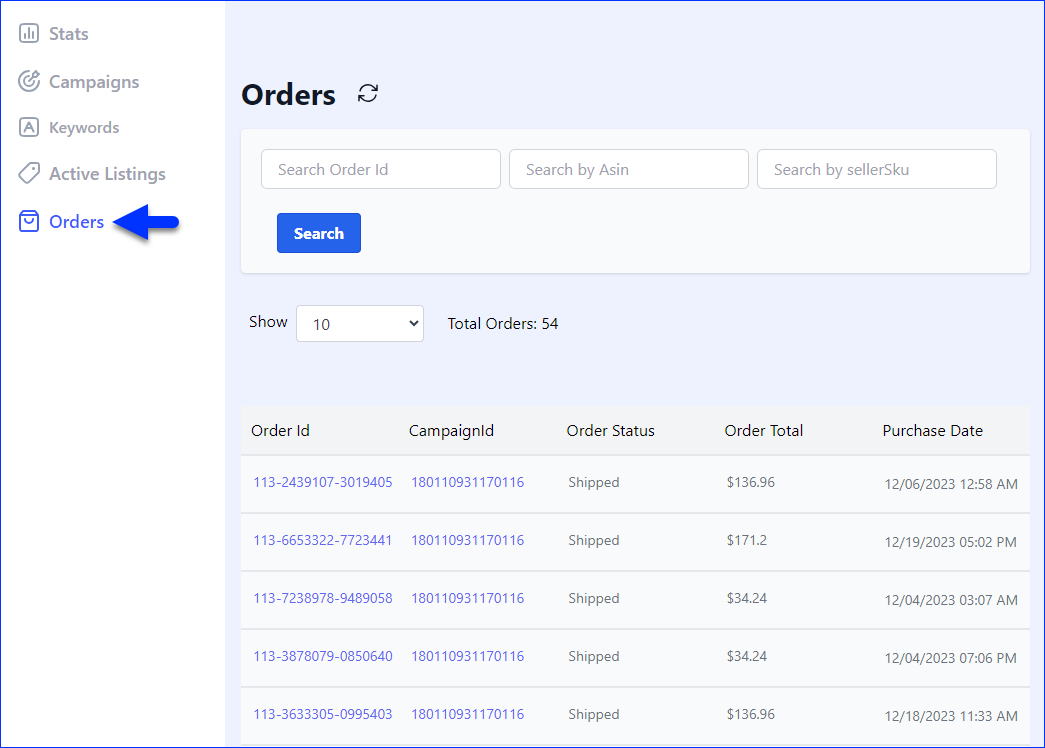
You can filter the search by:
- Order ID
- ASIN
- SKU
The orders grid below the filters shows these details:
- Order ID – Clicking this displays order item details:
- Item ID
- Title
- ASIN
- Seller SKU
- Quantity Ordered
- Campaign ID – Clicking this takes you to the Campaign Management page.
- Order Status
- Order Total
- Purchase Date