Overview
The RMA Dashboard within the Orderback Admin portal serves as a centralized hub for displaying and managing all open RMAs. As an administrator, you can view details about each RMA and update its Receiving and Approval statuses. Additionally, you can send emails to your customers based on your Email Templates, which can include the shipping labels and a link to the Orderback RMA Details page.
The Orderback RMA Details page contains return instructions, details about the RMA, and shipping labels (Show me an example!).
Manage RMAs
To access the RMA Dashboard:
- Log into the Admin Portal.
- Select Manage RMAs in the menu on the left.
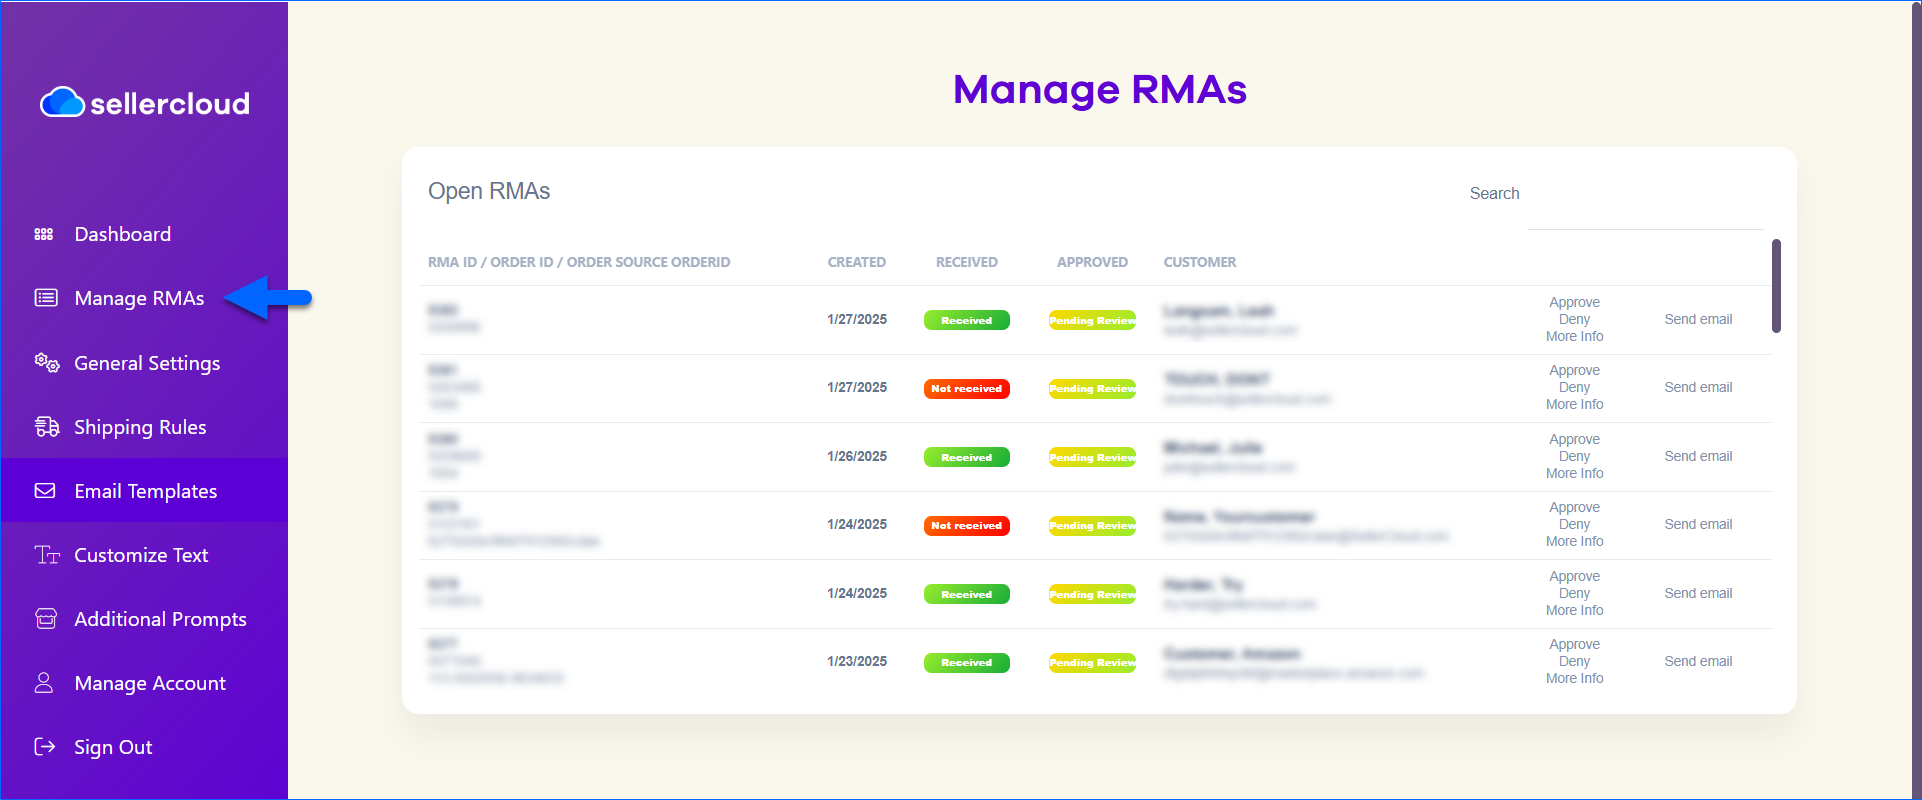
View Details
The columns in the Open RMAs panel on the Dashboard provide the following information:
- Rma Id / Order Id / Order Source OrderId – From top to bottom, this column displays the RMA Number, the Sellercloud Order Number, and, if available, the Channel Order Number.
- Created – Shows the RMA’s creation date.
- Received – Shows if the returned items have been received. Corresponds to the Receiving Status on the RMA page in Sellercloud.
- Approved – Shows if the RMA has been approved. Corresponds to the Receiving Status on the RMA page in Sellercloud. You can control if approval is required with the Require approval before shipping RMA setting on the General Settings page.
- Customer – Shows the customer’s name and email address.
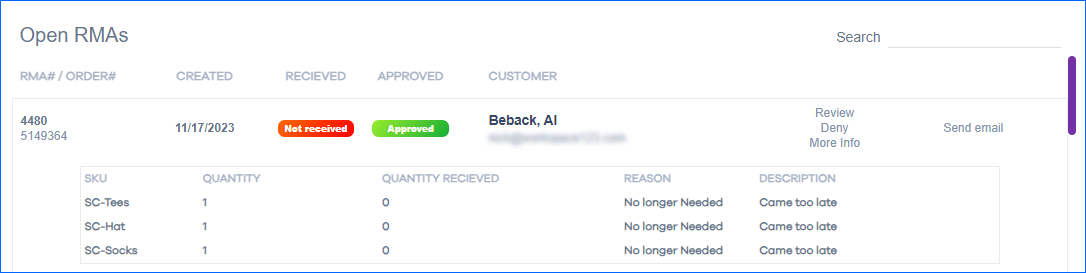
Click on an RMA to view further details:
- SKU – Shows the order SKUs that are included in the RMA.
- Quantity – Shows the item quantity added to the RMA.
- Quantity Received – Shows the quantity that you have received back from the customer.
- Reason – Shows the selected predefined reason for the return. You can modify the available return reasons with the Return reasons setup setting on the General Settings page.
- Description – Shows the customer’s freeform description of the return reason.
You can use the Search field on the top right to search for RMAs by RMA # or Order #.
By default, the Open RMAs panel will show RMAs from all companies, channels, and dates. You can control this behavior in the Orders panel on the General Settings page.
Update RMA
These actions are available on the right side of each RMA in the Open RMAs panel:
- Approve – Mark the RMA as approved and change the Approved column’s status to Approved. Once you approve an RMA, the shipping label becomes available on the Orderback RMA Details page. You can control if approval is required with the Require approval before shipping RMA setting on the General Settings page.
- Deny – Mark the RMA as denied and change the Approved column’s status to Denied. No shipping label will be generated if you deny the request.
- More info – Change the Approved column’s status to Awaiting More Info and replace the More info option with the Review option on the right.
- Review – Change the Approved column’s status to Pending Review and replace the Review option with the More info option on the right.
- Send email – Send an email to the Customer email address on the Order Details Page. The email content is based on the second template you have configured on the Email Templates page. It should include a link to the Orderback RMA Details page, where the customer can find the return instructions and shipping labels. Optionally, you can also add the RMA shipping label.
The statuses you change here correspond to the Approval Status field on the Sellercloud RMA Details page. Updating the status in Orderback also updates the status in Sellercloud and vice-versa.