Overview
Inventory and PO management within PeopleVox enables real-time visibility into stock levels, locations, and movements within your warehouse. It ensures precise inventory tracking, streamlined order fulfillment, and efficient product replenishment.
Sellercloud’s PeopleVox Account Integration allows you to export POs, import receiving details, and sync inventory information between the two platforms.
Prerequisites
Before you can sync inventory and purchase order information with PeopleVox, complete the following requirements.
- Warehouse Mapping – PeopleVox locations must be mapped to their corresponding Sellercloud warehouses on the PeopleVox Warehouse Mapping page.
- SKU Mapping – If the PeopleVox SKU (also referred to as Item Code) differs from the Sellercloud SKU, the corresponding values must be populated in the Peoplevox_MerchantSKU field of the PeopleVox Product Properties page.
- Purchase Order IDs – To successfully export a PO to PeopleVox, the Sellercloud PO ID must be a higher number than the latest PO in your PeopleVox account. Otherwise, we will not be able to send new POs, as they will be considered duplicates on their side. If your PO IDs in Sellercloud overlap with the existing ID in PeopleVox, open a ticket with Sellercloud Support.
Set Up a Dedicated Warehouse
Sellercloud tracks inventory through warehouses, and it is strongly recommended that you set up a dedicated warehouse to track all PeopleVox-related movements and quantity changes.
To do that:
- Navigate to Settings > Inventory > Add New Warehouse.
- In the General panel, enter your warehouse name, for example, “PeopleVox Warehouse“.
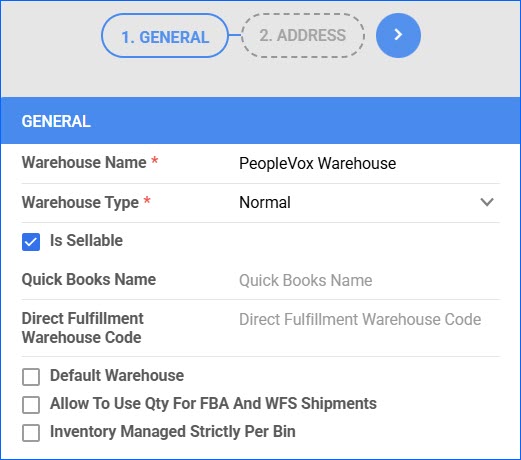
- Select Normal as the warehouse type and enable the Is Sellable checkbox to make this inventory available on your connected sales channels.
- Click the Blue arrow icon to proceed to the next step.
- In the Address panel, enter the location details.
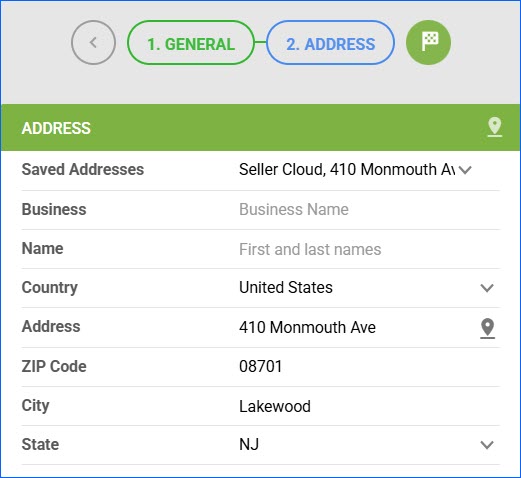
- Click the Green Flag icon to create your warehouse.
Warehouse Mapping
Once a dedicated warehouse is created, you can map it to a physical PeopleVox site. All PeopleVox-related movements and quantity changes will be recorded according to your mapping configuration. This warehouse will also be used in various order and purchase order operations. Before you can sync PeopleVox with Sellercloud:
- Create your PeopleVox location/s in Sellercloud.
- Map them to your Sellercloud warehouses.
To do that:
- Navigate to Settings > Companies > Manage Companies > Select a Company.
- Access the Toolbox > Peoplevox > Warehouse Mapping.
- In the PeopleVox Warehouse Mapping panel, click the + icon.
- Enter the Site Code of the location as seen in PeopleVox and click Add.
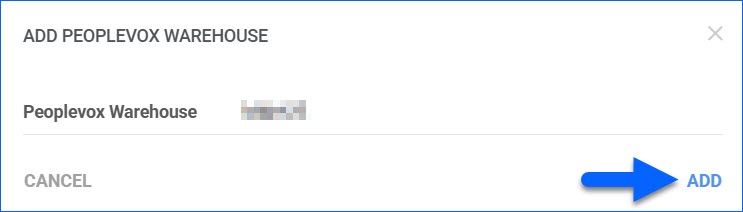
- Repeat the process as needed to add multiple warehouses based on the number of PeopleVox locations you manage.
- Next, click Edit and map your PeopleVox location/s to the corresponding Local Warehouse in Sellercloud.
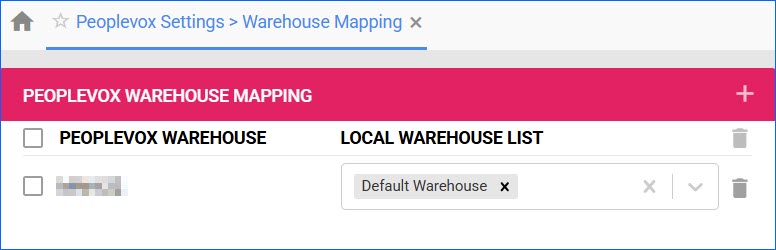
- Once done, click Save.
Inventory Import
Maintaining accurate stock levels is essential to prevent overselling. Inventory is imported from PeopleVox to Sellercloud approximately every 15 minutes in the warehouse/s specified in your Warehouse Mapping configuration.
Automate Inventory Import
To enable the automated inventory import:
- Navigate to Settings > Companies > Manage Companies > Select a Company.
- Access the Toolbox > Peoplevox > General Settings.
- Click Edit.
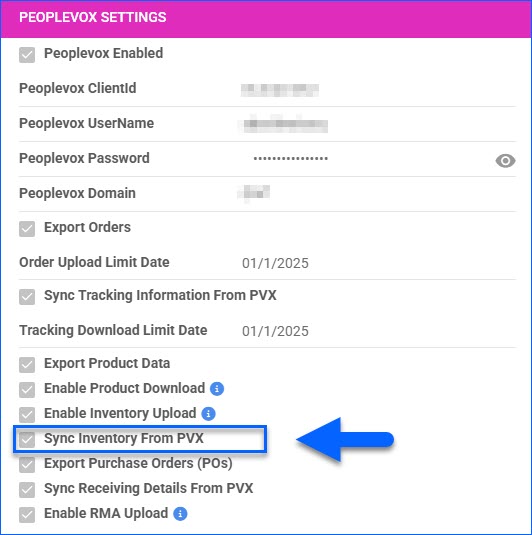
- In the PeopleVox Settings panel, enable the Sync Inventory From PVX option.
- Click Save.
Purchase Order Export
POs are the primary tool used to manage the procurement process within the system and order units from your vendors, allowing you to identify products with low or depleted stock levels and take proactive measures to replenish them.
When adding an item to a PO, the Vendor SKU and Price will automatically populate based on the vendor on that purchase order. Ensure that you have the correct vendor SKU and price assigned to each item in your PO. Additionally, ensure that the Peoplevox Supplier Reference option is configured correctly for the vendors you intend to use.
Create Saved View
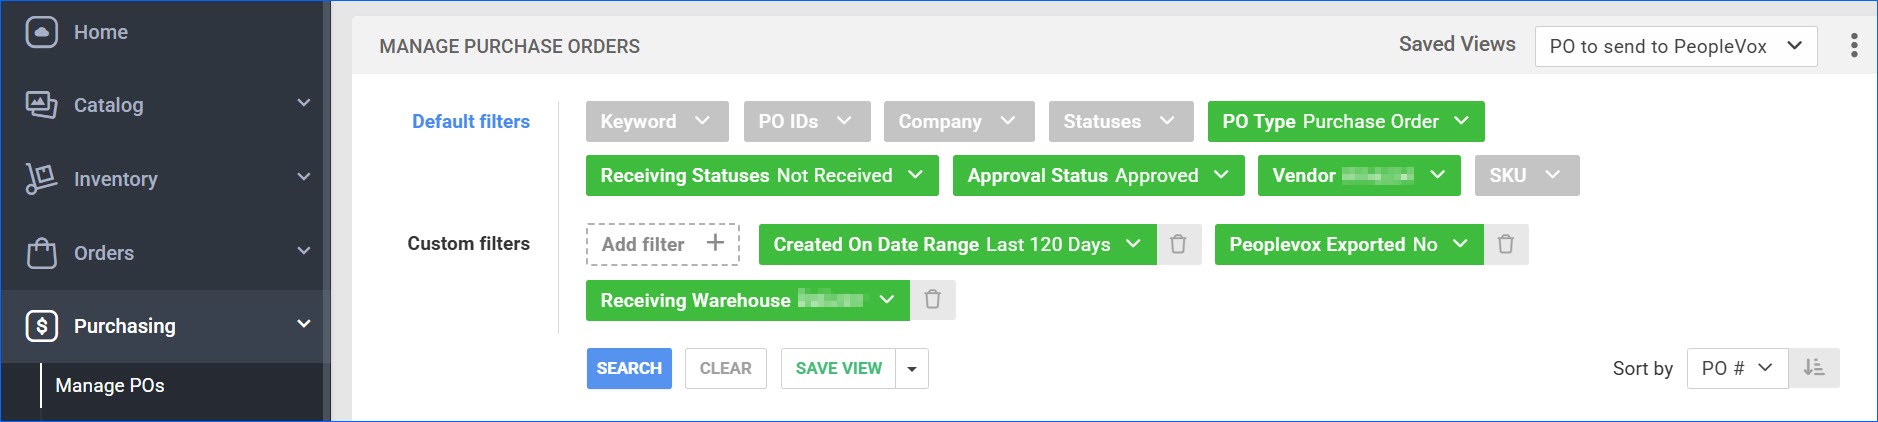
First, create a Saved View filtered by:
- PO Type = Purchase Order
- Receiving Statuses = Not Received
- Peoplevox Exported = No
You can also add any additional filters based on your preference, e.g. Vendor, Receiving Warehouse, etc.
Automate Purchase Order Export
To enable the automated PO export and sync receiving details:
- Navigate to Settings > Companies > Manage Companies > Select a Company.
- Access the Toolbox > Peoplevox > General Settings.
- Click Edit.
- In the Saved View panel, select the User ID for PO Saved View and the Saved Search for PO Export based on the search you created earlier.

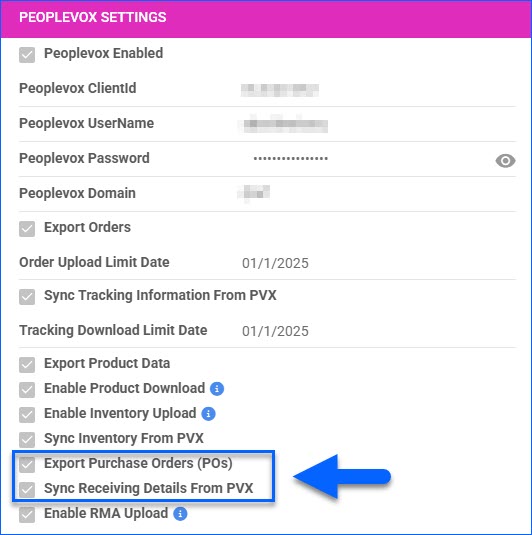
- In the PeopleVox Settings panel, enable the Export Purchase Orders (POs) and Sync Receiving Details From PVX options.
- Click Save.
PO Creation Details
Each PO exported to PeopleVox is created with the following information:
Purchase Order
- PurchaseOrderNumber – Purchase.ID
- Status – Status (i.e., Saved, Ordered, Received)
- Reference – Purchase.PurchaseTitle
- SupplierReference – Peoplevox Supplier Reference (configured on the Preferences panel of the Vendor Details page)
- SubmittedDate – Purchase.DateOrdered
- ExpectedDeliveryDate – Purchase.ExpectedDeliveryDate
- Site – Matching SiteCode based on your PeopleVox Warehouse Mapping
Purchase Order Item:
- PurchaseOrderNumber – PurchaseItem.PurchaseID
- ItemCode – PurchaseItem.ProductID
- Status – PurchaseItem.Status
- Quantity – PurchaseItem.QtyOrdered
- Line – PurchaseItem.ID
- CostPrice – PurchaseItem.AdjustedPrice
- ExpectedDeliveryDate – PurchaseOrderItem.ExpectedDeliveryDate
Receiving Details
The receiving details include purchase order references, delivery dates, item information (such as the item code, name, description, UPC barcode, serial-related data), and logistics details (site reference, quantities, supplier info). They also include prices, dimensions (weight, height, width, depth), and additional attributes like color and size.