Overview
After you integrate WFS into Sellercloud and prepare your inventory, the next step is to send your products to Walmart’s fulfillment centers. You can manage this in Sellercloud by creating and processing WFS Shipment Plans.
This article provides a comprehensive walkthrough of the typical WFS Shipment Plan Workflow, including creating, preparing, and shipping a WFS shipment.
For a full breakdown of all available actions and settings relating to WFS Shipment Plans, refer to our Manage WFS Shipment Plans article.
Prerequisites
Before you can begin, you must:
Ensure that your Ship From Warehouse is configured to Allow To Use Qty For FBA/AWD/WFS Shipments.
Shipment Setup
To start setting up your shipment:
- Create a new shipment plan and add products to the shipment. See Create WFS Shipment Plans for detailed instructions.
- When adding products to a shipment plan, you may want to reserve the quantity to ship from your sellable quantity. You can do it automatically or manually:
- Automatically: By enabling the Client Setting Auto Reserve when adding Product to FBA and WFS Shipment, when you add product units to a shipment, the inventory automatically becomes Reserved, and it won’t be included in the Available Qty for sale.

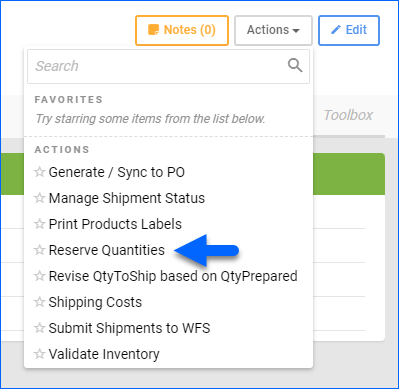
- Manually: Click Actions on the WFS shipment page and select Reserve Quantities.
- After you have added all the Shipment Items, go to Actions and click Submit Shipments to WFS.
- Automatically: By enabling the Client Setting Auto Reserve when adding Product to FBA and WFS Shipment, when you add product units to a shipment, the inventory automatically becomes Reserved, and it won’t be included in the Available Qty for sale.
Prepare Inventory
Next, prepare your inventory for the shipment and group your items into boxes.
If your From Warehouse is bin-enabled, you must use Skustack’s WFS Picking module to pick your items before you can proceed with the next steps.
Arrange the items within your boxes through a simple drag-and-drop method. Be sure to enter expiration dates for items that are marked as expirable.
- Pick the desired product quantities to update the Qty Picked column in the Shipments panel (only required for bin-enabled warehouses).
- Prepare your boxes and assign products to each box. To do that:
-
- Click Edit.
- Click on the + icon in the Boxes panel to create additional boxes as necessary.

- Enter the weight and dimensions of each box or select a pre-defined Box Defaults profile. Configuring Shipment Box Defaults in advance can significantly expedite your workflow if you typically use boxes of the same size.
- Search for items and move them into boxes by hovering over any SKU in the Items panel and dragging it to your desired box.
- When all items are boxed, the Shipments panel’s Boxed column will display a green checkmark to indicate that you are ready to proceed.
Box content information is for internal reference only and is not sent to Walmart. -
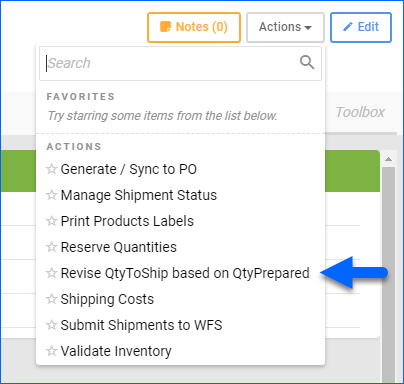
- (Optional) Before shipping, click Actions and select Revise QtyToShip based on QtyPrepared to recalculate the Qty To Ship in the Shipments panel based on the prepared quantities (i.e. boxed).
- On the shipment page, click Actions and select:
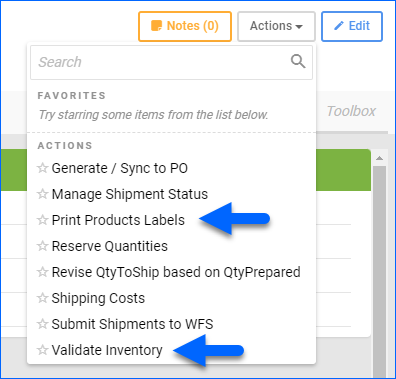
- Validate Inventory to confirm that you have enough inventory to ship.
- Print Product Labels to print UPC-based product labels.
Label Boxes
Next, to label your boxes:
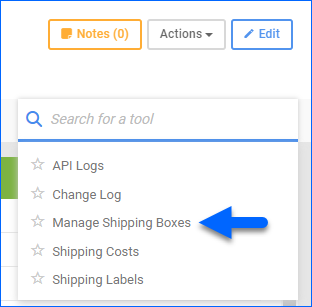
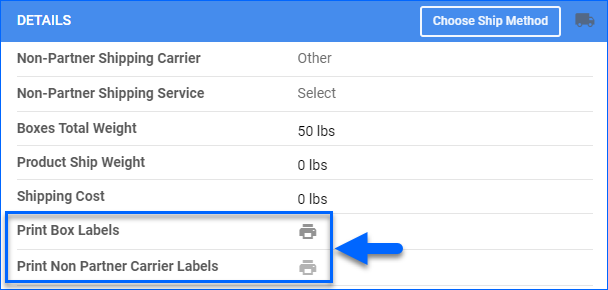
- On the shipment page, click Toolbox and select Manage Shipping Boxes.
- Click the icon next to Print Box Labels, then label each of the boxes with the required Walmart Box Label.
- You can generate non-partner shipping labels using your own carrier credentials by clicking the icon next to Print Non Partner Carrier Labels.
Add Tracking
To add tracking to your shipment:
Ship to Walmart
Finally, it’s time to ship the products to Walmart:
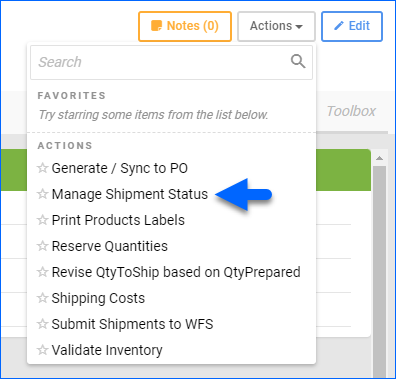
- When you are ready to ship, click Actions, select Manage Shipment Status, and update to Pending Shipment Details.
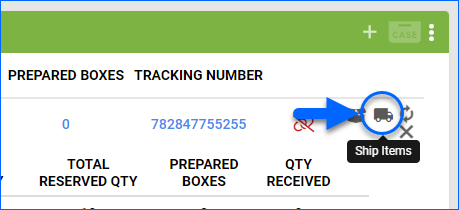
- After sending the shipment, click Actions and select Ship Items. Alternatively, click Edit on top of the page, then click the Ship Items box in the Shipments panel.
- If the action is successful, a confirmation message will appear at the bottom of the page.
- The products’ quantities automatically move from being Reserved at the Ship From Warehouse to being in transit in your Interim Warehouse in Sellercloud.
- Walmart receives the products and generates a report.
- Sellercloud downloads the Product List WFS Inventory report from Walmart, and the inventory is automatically updated from the Interim Warehouse to your WFS Warehouse in Sellercloud.
Other Useful Steps
With the above, the standard shipment plan workflow is complete. Here are some other options that may be useful:
- To set the shipping cost for accurate P&L data, click Toolbox and select Shipping Costs.
- To refresh the shipping status from Walmart, click the Query Shipping Status icon in the Shipments panel. This is useful when you make changes and want to update the status in Sellercloud immediately.
- To view previously generated shipping labels, click Toolbox and select the Shipping Labels tab.
- You can also automate regular WFS Shipment Plans export via a Scheduled Task.
For a full breakdown of all available actions and settings relating to WFS Shipment Plans, refer to our Manage WFS Shipment Plans article.