Overview
Within Sellercloud, you have the ability to set predefined rules that automatically identify and flag specific orders as blacklisted based on certain criteria, making it easier for you to manage them on a case-by-case basis.
For instance, if a customer consistently places orders and provides bad reviews, you may choose to identify and cancel any future orders from that customer. In addition, you might opt to block orders associated with a freight forwarder’s shipping address to avoid potential issues with delivery services.
These rules only apply to new orders and won’t affect ones that are already placed. Existing orders cannot be blocked. Orders that have already been blacklisted can be cleared from the blacklist rules.
Configure Blacklist Rules
In Sellercloud, you can establish blacklist rules and seamlessly import or export existing ones. Once added, you can tailor these rules to your specific requirements and preferences. Should you find yourself no longer in need of a particular rule/s, you can easily delete them.
Add Blacklist Rules
You can add blacklist rules individually or import multiple ones in bulk via file import.
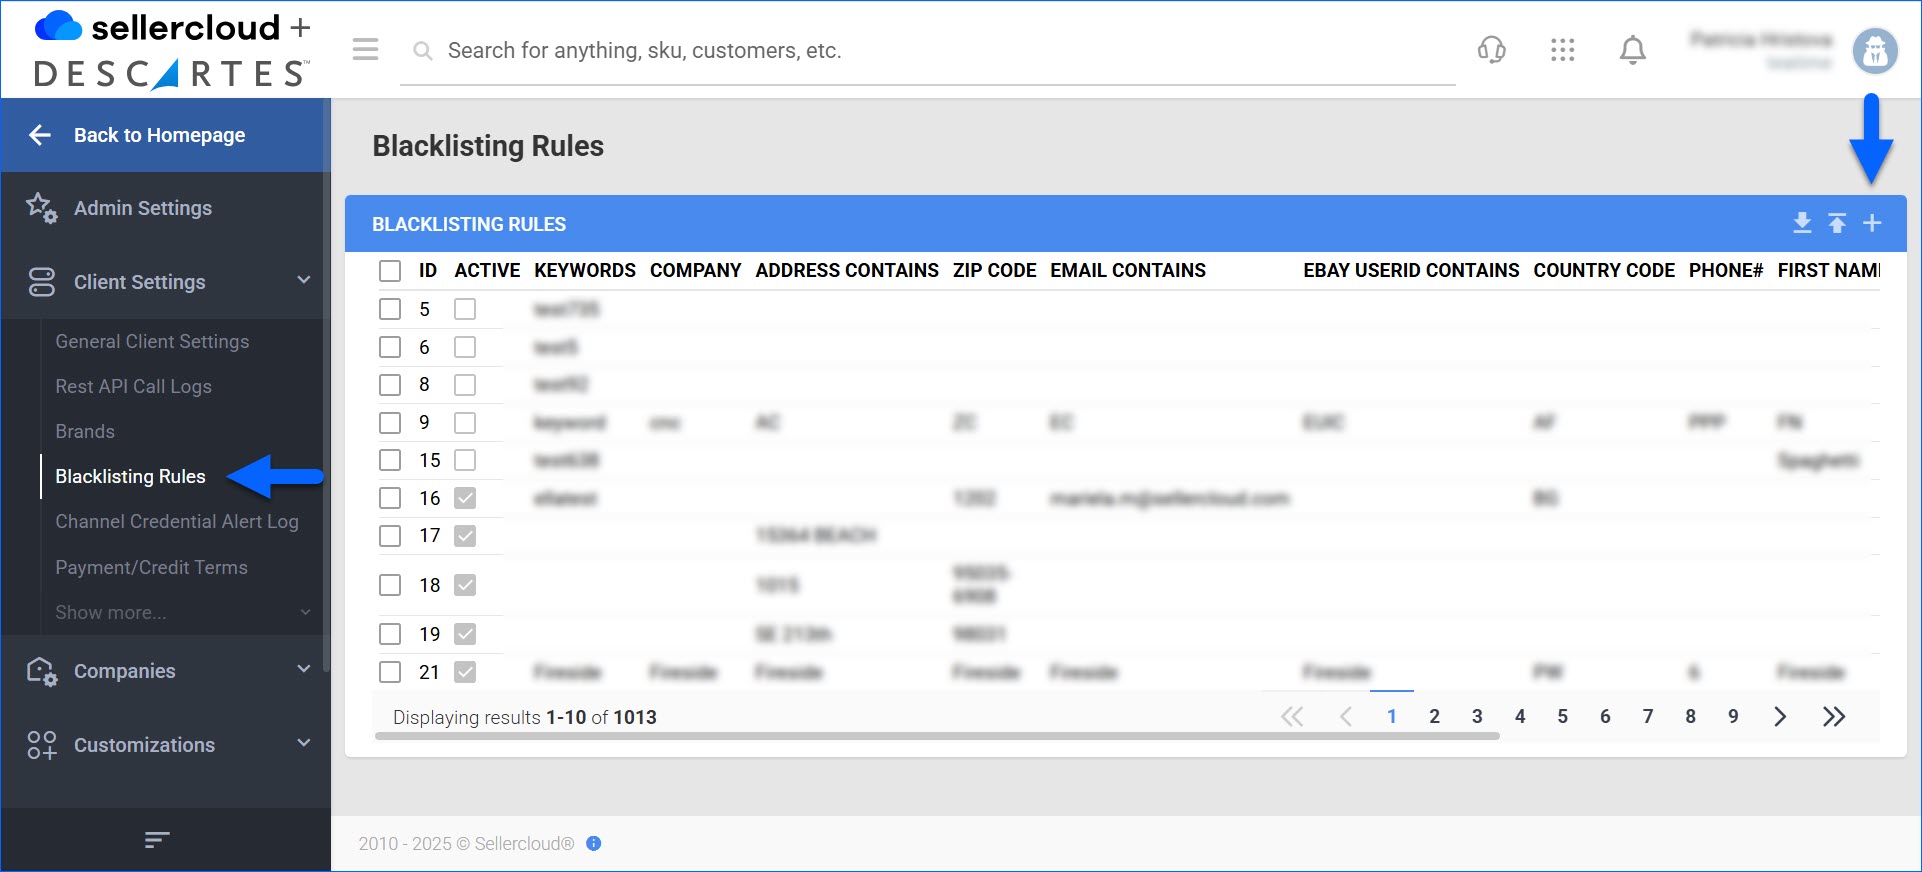
- Go to Settings > Client Settings > Blacklisting Rules.
- Click the + icon to add a new rule.
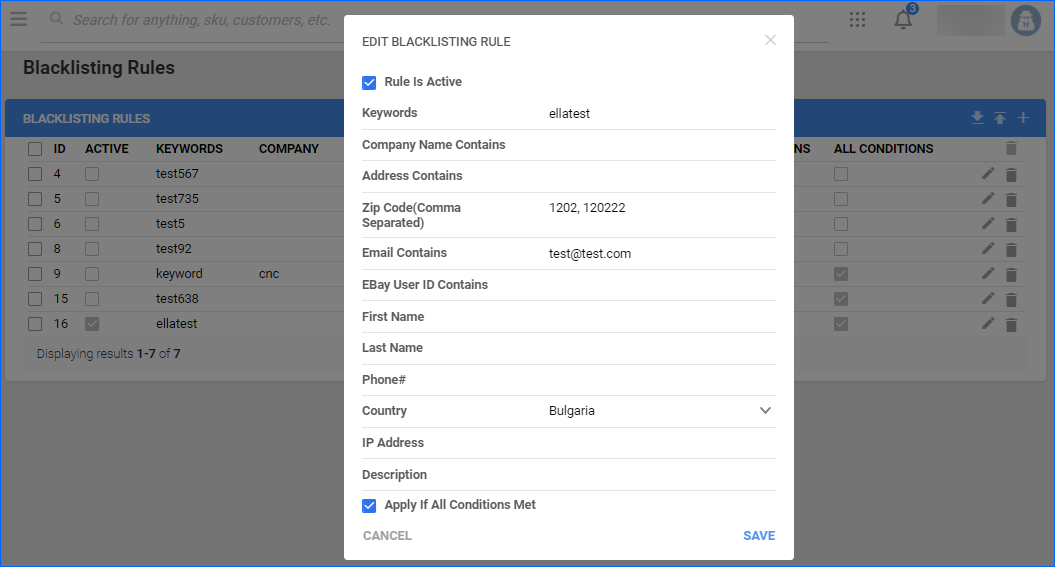
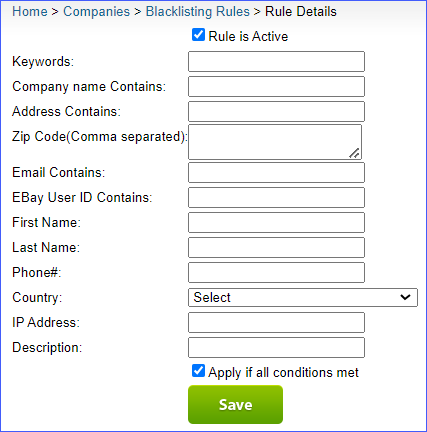
- Fill in the respective fields:
- Rule Is Active – Check this box to activate/deactivate the rule.
- Keywords
- Company Name Contains
- Address Contains
- Zip Code (Comma Separated)
- Email Contains
- eBay User ID Contains
- First Name
- Last Name
- Phone#
- Country
- IP Address
- Description
- Apply If All Conditions Met – Check this box to blacklist orders only when all conditions are met. If the box is unchecked, the order won’t be blacklisted, even if some conditions are met (like email, zip code, or eBay user ID).
- Click Save.
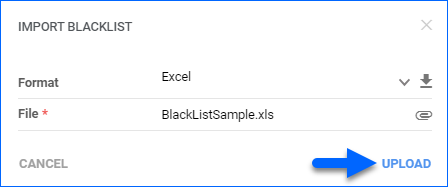
To import blacklist rules at once:
- Click on the Import icon above the grid.
- Download the template and fill in the information mentioned above.
- Save the newly created template and return to Sellercloud.
- Upload the file and click Upload.
Export Blacklist Rules
You have the option to export one or more rules to an Excel sheet.
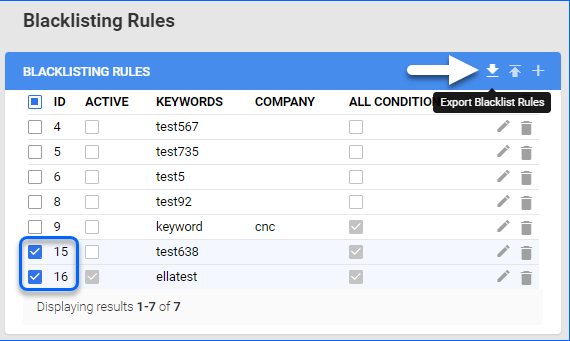
- Go to Settings > Client Settings > Blacklisting Rules.
- Select one or more rules you wish to export.
- Click on the Export icon above the grid.
Delete and Edit Blacklist Rules
You have the option to edit and delete your rules. Once created, if you decide that you need to change some of the conditions or you no longer need a rule, navigate to the edit and delete icons next to each rule in the grid. 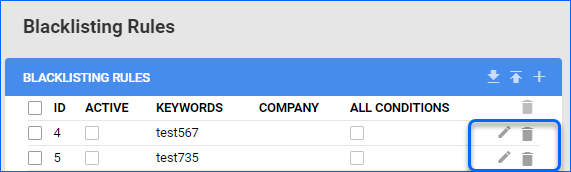
Use Cases
Once you have created your Blacklisted Rules, you can search for blacklisted orders on the Manage Orders Page. Another option you have within Sellercloud is to set orders as Non-Blacklisted from the Action Menu on the Order Details Page.
Filter Blacklisted Orders
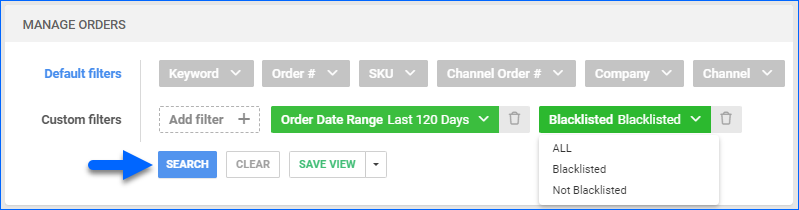
To filter orders by blacklisted status:
- Go to Orders > Manage Orders.
- Select Blacklisted from the Custom Filters.
- Choose between
- All
- Blacklisted
- Not Blacklisted
- Click Search.
Blacklisted Order Status
You have the option to include the Blacklisted Status in the Order Statuses Panel.
- Open the Order and navigate to the Statuses Panel.
- Click on Manage Statuses and select Is Black Listed under Show in Statuses Panel and Show as a Pill Checkboxes.
- Click Save.

You’ll see an Is Black Listed checkbox in the Statuses panel. Additionally, the Pill will appear at the top of the page.
Non-Blacklist Orders
If an order comes in and is marked as blacklisted according to your rules, there might be cases where you need to mark that specific order as not blacklisted.
- Open the Blacklisted Order > Action Menu.
- Click on Set Not Blacklisted.
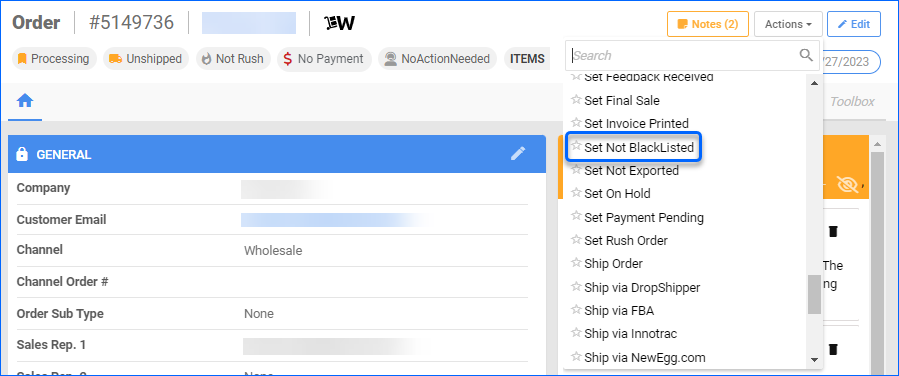
- You will be redirected to a new window to enter a reason for the change.
- Click Submit.
Related Client Settings
The following Client Settings are available:
- Enable Black Listing Rules For Orders
- Enable this setting for blacklist rules to be automatically applied to your incoming orders.
Overview
Within Sellercloud, you have the ability to set predefined rules that automatically identify and flag specific orders as blacklisted based on certain criteria, making it easier for you to manage them on a case-by-case basis.
For instance, if a customer consistently places orders and provides bad reviews, you may choose to identify and cancel any future orders from that customer. In addition, you might opt to block orders associated with a freight forwarder’s shipping address to avoid potential issues with delivery services.
These rules only apply to new orders and won’t affect ones that are already placed. Existing orders cannot be blocked. Orders that have already been blacklisted can be cleared from the blacklist rules.
Configure Blacklist Rules
In Sellercloud, you can establish blacklist rules and seamlessly import or export existing ones. Once added, you can tailor these rules to your specific requirements and preferences. Should you find yourself no longer in need of a particular rule/s, you can easily delete them.
Add Blacklist Rules
You can add blacklist rules individually or import multiple ones in bulk via file import.
- Go to Settings > Blacklisting Rules.
- Click the Add New Rule above the grid and fill in the respective fields.
- Rule Is Active – Check this box to activate/deactivate the rule.
- Keywords
- Company Name Contains
- Address Contains
- Zip Code (Comma Separated)
- Email Contains
- eBay User ID Contains
- First Name
- Last Name
- Phone#
- Country
- IP Address
- Description
- Apply If All Conditions Met – Check this box to blacklist orders only when all conditions are met. If the box is unchecked, the order won’t be blacklisted, even if some conditions are met (like email, zip code, or eBay user ID).
- Click Save.
To import blacklist rules at once:
- Click on Download Sample and fill in the information mentioned above.
- Save the newly created template and return to Sellercloud.
- Click on Choose File next to the Import blacklist icon above the grid.
- Click on Upload blacklist.

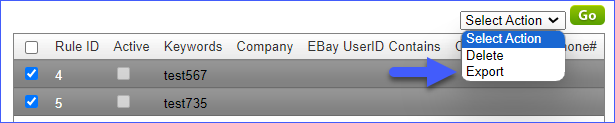
Export Blacklist Rules
You have the option to export one or more rules to an Excel sheet.
- Go to Settings > Blacklisting Rules.
- Select one or more rules you wish to export.
- Action Menu > Click on Export.
Delete Blacklist Rules
You have the option to edit and delete your rules. Once created, if you decide that you no longer need a rule, select it from the grid, navigate to the Action Menu, and select Delete.
Use Cases
Once you have created your Blacklisted Rules, you can search for blacklisted orders on the Manage Orders Page. Another option you have within Sellercloud is to set orders as Non-Blacklisted from the Action Menu on the Order Details Page.
Filter Blacklisted Orders
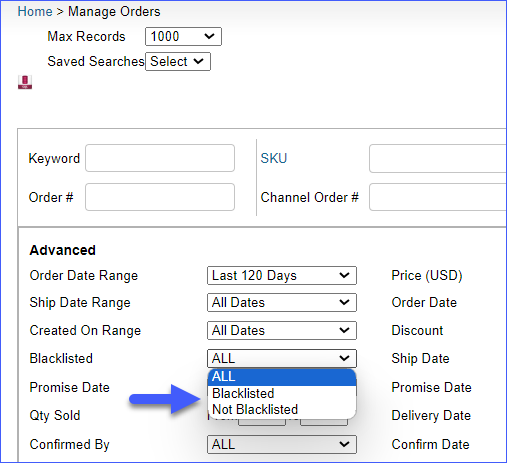
To filter orders by blacklisted status:
- Go to Orders > and select Blacklisted from the Advanced Filters Menu.
- Choose between
- All
- Blacklisted
- Not Blacklisted
- Click Search.
Non-Blacklist Orders
If an order comes in and is marked as blacklisted according to your rules, there might be cases where you need to mark that specific order as not blacklisted.
- Open the Blacklisted Order > Action Menu.
- Click on Set Not Blacklisted > Go.

- You will be redirected to a new window to enter a reason for the change.
- Click Submit.
Related Client Settings
The following Client Settings are available:
- Enable Black Listing Rules For Orders
- Enable this setting for blacklist rules to be automatically applied to your incoming orders.