Overview
When an order comes in for a product that is out of stock, you can either Dropship the product from the vendor or link the order to a purchase order (cross-dock). When linking the order to the PO, the vendor sends the item back to you to ship out. Linking the order to the PO will prevent the order from exporting into Shipbridge until the PO is received.
Link Order to PO
- Go to the Order Details Page.
- Click Actions and select Manage Dropship.
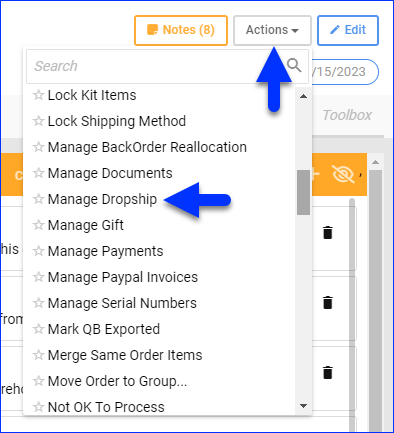
- Select Link To Po (For Cross-Docking) and click Next.

- Enter the Quantity for PO for each item and click the Link to PO icon. If you have multiple items, you can check the boxes to select them and then click the Link selected items to PO icon.

- You have two options:
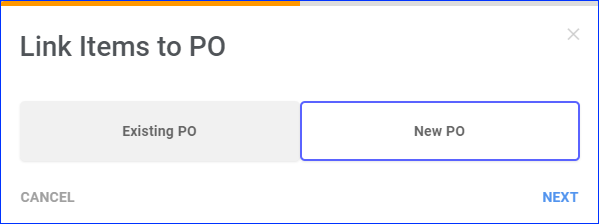
- Select New PO and then select the Company and Vendor and click Link.
- Select Existing PO, type the PO number, and click Link. Note that you can’t link an order to an existing Dropship PO. In this case, you should create a new Dropship PO.
- Click the green flag button to link the item(s) to the PO.
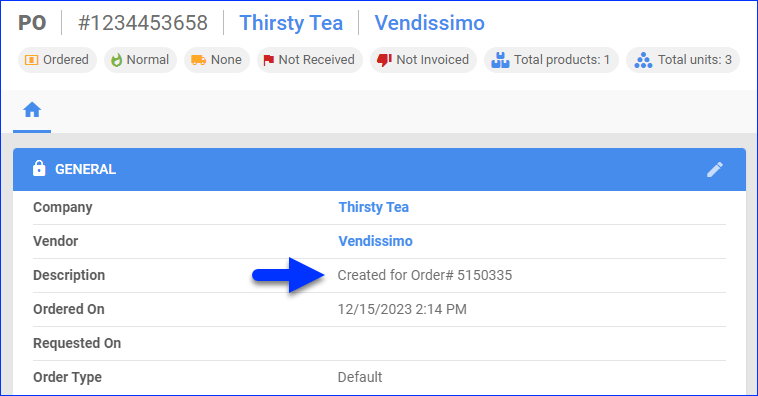
- The order will be referenced in the Description field on the PO Details Page.
- The order will have a Dropship Pending status until the PO is received.
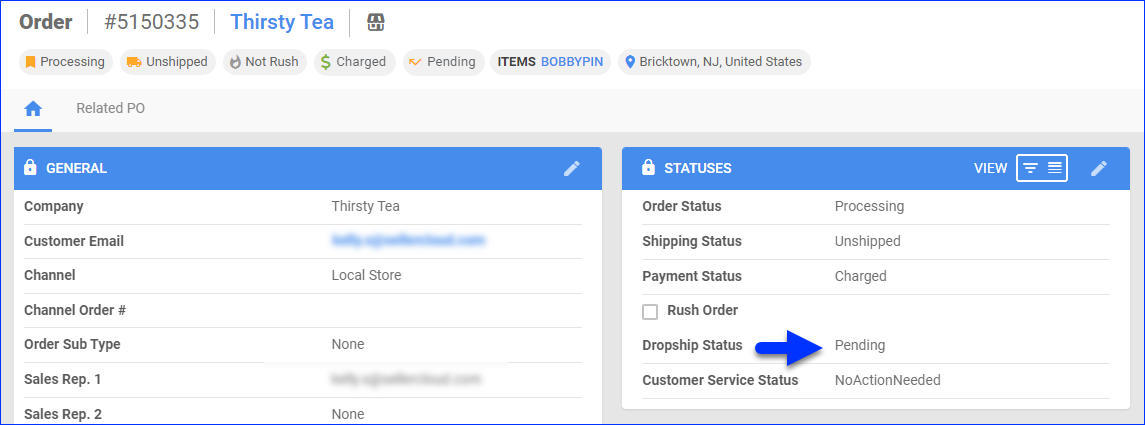
- When the PO is received, the order will automatically go back to Dropship None, allowing it to appear in Shipbridge and be shipped. However, if one order is linked to multiple POs, only when the last PO is received, the order will go back to Dropship None.
Setting the order to Dropship None when the PO is not yet received will remove all products from the PO.When linking kits to the PO app setting, enable the Client Settings EnableOrderLinkToPOAtKitLevel if you want the kit parent to be showing on the PO or the components.
Unlink Order From PO
Following the steps outlined above to link an order to a PO, deleting such a PO would not be possible without first unlinking it from the associated order. Any attempt to delete the PO without unlinking it will trigger an error message showing the related order number.
To unlink the order from the PO:
- Go to the Order Details Page.
- Click Toolbox and select the Related PO tab.
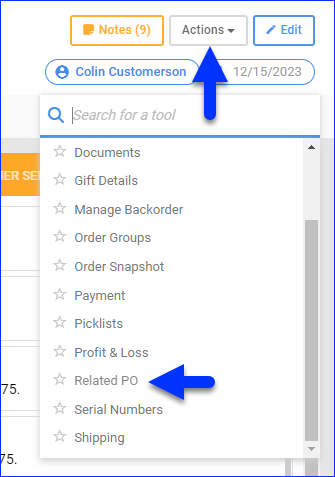
- Click Edit.
- Click the Unink item icon to unlink a single order item from the linked PO.

- Alternatively, click the Unlink all linked items icon to unlink all items at once.

Now, you can proceed to delete the PO on the PO Details Page.
Overview
Let’s say an order came in for a product that is out of stock. You may be able to Dropship the item from the vendor, or you can link the order to a purchase order (cross-dock). When linking an order to a PO the vendor sends the item back to you to ship out. Linking the order to a purchase order will prevent the order from exporting into Shipbridge until the PO is received.
Link Order to PO
Client setting Enable Linking Order to PO must be enabled.
- Navigate to the Order Detail Page or select the order(s) on the Manage Orders page.
- Select Link to PO on the Action Menu.
- Select the item(s) you want to add to a single PO and enter the quantity to add. You cannot choose an item if it is already added to a PO, and you can choose to add to an existing PO or create a new PO.
- Create a new PO or add to the existing PO.
- The Order# will be referenced in the PO’s description field. The order will get a “Dropship Pending” status until the PO is received.
- The PO link will appear on the order detail page on each line item linked to a PO.
- When the PO is received, the order automatically goes back to Dropship None, allowing it to appear in ShipBridge and be shipped. However, if one order is linked to multiple POs, only when the last PO is received will it go back to Dropship None.
- Setting the order to Dropship: None while the PO is not yet received will remove the products from the PO.
- When linking kits to the PO app setting: EnableOrderLinkToPOAtKitLevel controls if the kit parent will be showing on the PO or the components.
Related Client Settings:
- Enable Linking Order to PO – required for the whole workflow.
- Auto update PO when Product ID in Order Changed -checks for any updates on the ProductID and updates on the PO
- Breakup kit components when creating dropship PO
- Delete related PO when Order Dropship set to None
- Enable Dropship Fee
Unlink Order From PO
Following the steps outlined above to link an order to a PO, deleting such a PO would not be possible without first unlinking it from the associated order. Any attempt to delete the PO without unlinking it will trigger an error message showing the related order number.
To unlink the order from the PO:
- Go to the Order Details Page.
- Click Select an Action, select Link Item(s) to PO (Cross-dock), and click Go.
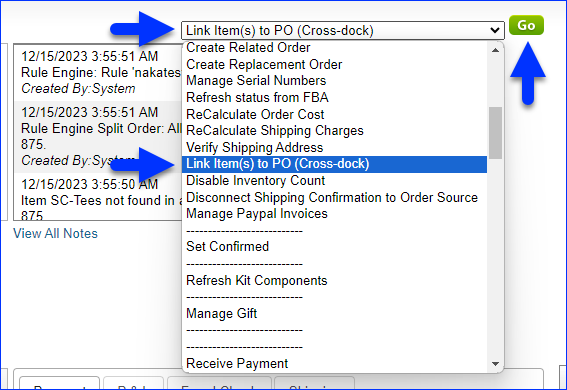
- Click Unink from PO to unlink the order from the PO.

Now, you can proceed to delete the PO on the PO Details Page.