Overview
Starshipit is an Australian-based shipping and fulfillment platform that provides businesses with automated tools for managing their shipping process. It integrates with a wide range of sales platforms and e-commerce systems, as well as over 50 carriers, enabling businesses to ship globally.
Starshipit Account Integration
With this integration, Starshipit regularly requests unshipped orders via our REST API. After an order is processed, they send us the tracking numbers and carrier information, marking the orders as Fully Shipped.
To establish the connection, you must have a valid username and password with all the necessary permissions and configure the integration in the Starshipit portal.
Create API User
You can use your personal Sellercloud account for this integration. However, we recommend creating a dedicated user, which gives you more control over permissions and allows you to keep all related API logs separate.
To create a dedicated user:
- Go to Settings.
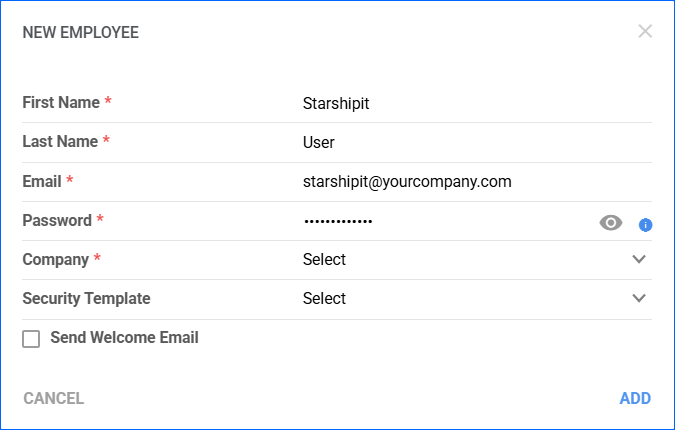
- Click Employees > Manage Employees.
- Click the green + icon to create a new user.
- In the pop-up modal, fill in the required details. You do not need to provide a valid email, it can be [email protected].
- Click Add.

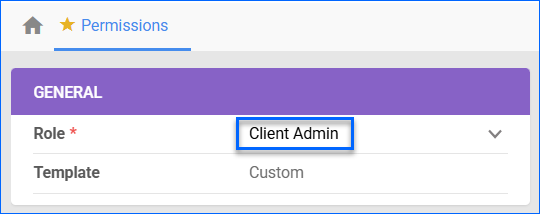
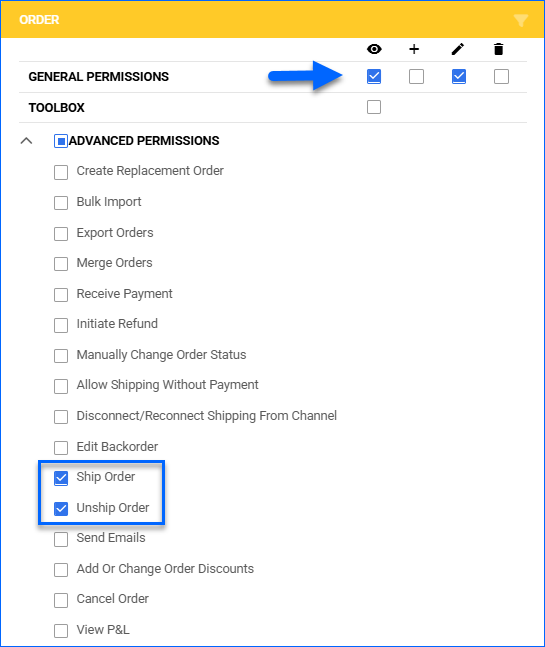
Then, you must configure the user’s permissions:
- Go to the Employee Details page.
- From the Toolbox > Permissions > click Edit.
- Click Save.
Integration Setup
To set up the integration:
- Login to your Starshipit account.
- Go to Settings > Integrations.
- Click Add a new integration and select Sellercloud from the list.
- Enter the Username and Password of the Sellercloud User you created for the integration.
- Enter your Sellercloud subdomain: xx.sellercloud.com where XX is your Server ID. It is the same URL you use to log into your Sellercloud account.
- Click Save.
Next, configure the additional necessary settings:
- In your Starshipit account, go to Settings.
- Click Integrations and select Sellercloud Settings.
- From the dropdown, choose the Status of the orders that should be imported.
- Alternatively, you can provide Saved View IDs separated by ‘;‘ to customize the list of orders. You can find your Saved View IDs by going to the Manage Orders page in Sellercloud and clicking the three-dot menu > Manage Saved Views.
- Click Save.
Once saved, click Fetch latest orders to confirm your integration is working correctly.

