Overview
In this article, you will learn how to integrate UPS Web Services into Shipbridge using the UPS Web Services APIs to see rates and get real-time shipping and tracking details.
Prerequisites
To integrate UPS Web Services with Shipbridge, log into UPS and create an application to obtain your API access credentials, known as Client ID and Client Secret.
- If you don’t have an existing UPS account, you must Sign Up.
- Sign in to your UPS account.
- Even if you are already logged into your UPS account, you must follow the link in this step and log in again to reach the correct page.
- Click My Apps at the top right.
- Click Add Apps.
- Under I need API credentials because, select I want to integrate UPS technology into my business. Then select a shipper account or create a new one, check the box to accept the agreement, and continue.
- For your contact details, consider using a group email available to others on your development team. You can’t change this email later. Enter your Primary Contact information and continue.
- Under App Name, type Shipbridge.
- Under Add Products, select which UPS products to associate with the new API connection. Make sure to enable Rating, Tracking, Authorization (oAuth), Shipping, and Address Validation.
- Click Save.
- Under Credentials, you can now get your Client ID and Client Secret, which are required for the next steps in the setup.
Configure UPS Web Services in Shipbridge
To connect your UPS account to Shipbridge:
- Go to Menu > Options > Carriers > UPS.
- Select Use UPS Web Services.
- Check Upgrade to UPS OAuth 2.0 Security Model and Use production server. Once these are enabled, the former Username and Password fields will be replaced with Client ID and Client Secret.
- Fill in the Client ID and Client Secret fields with the API Credentials you got in Step 10 of the Prerequisites section.
- Add Shipper Number:
- If you are migrating an existing UPS integration, keep the Shipper Number you already have. If you are integrating for the first time, fill in this field.
- Optionally, you can click Additional shipper numbers to add up to 2 more. They should be linked to the same UPS account. Once filled in, Shipbridge will take them into account when calculating rates and rate shopping.
- Click Save.
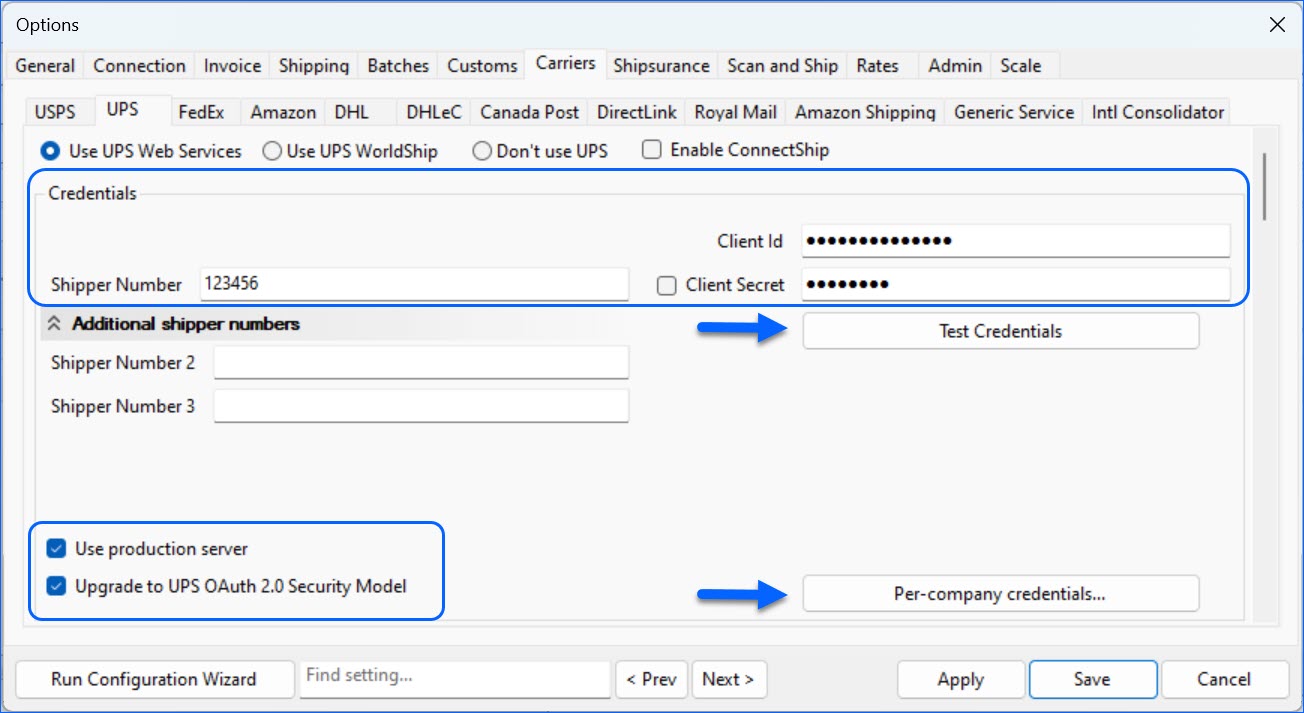
- Click Test Credentials to verify the connection.
Per-Company Configuration
If you are using merchant-specific credentials for multiple companies, you must also migrate the per-company configuration to the new UPS OAuth 2.0. To enter your credentials per company:
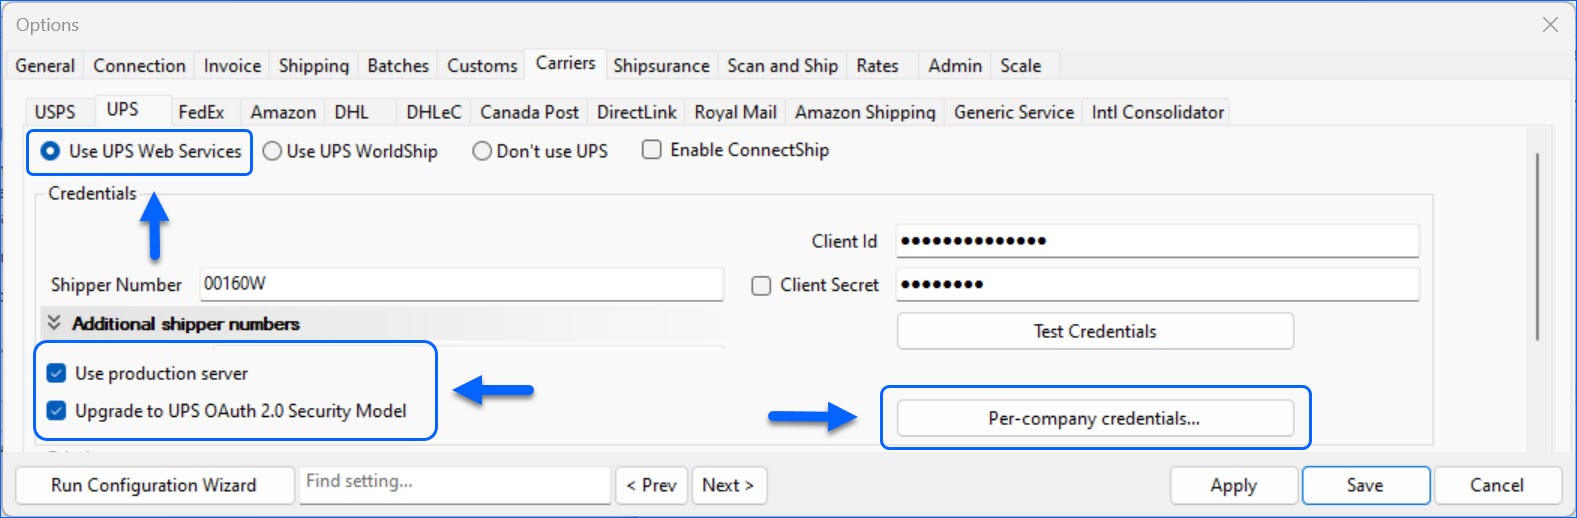
- Go to Menu > Options > Carriers > UPS.
- Use UPS Web Services, Use production server, and Upgrade to UPS OAuth 2.0 Security Model must be enabled.
- Click Per-company credentials.
- Check Use merchant-specific credentials for UPS Web Services.
- Click Edit next to a company in the list.
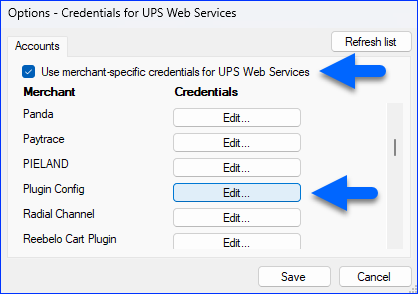
- Enter your Shipper Number, Client ID, and Client Secret. Click Test Credentials.
- If the test is successful, click Save.
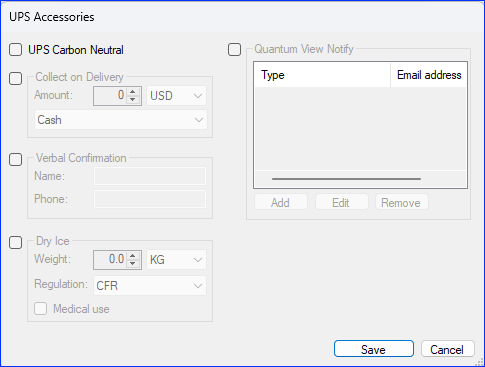
UPS-Specific Order Options
You can enable UPS-specific shipping and delivery options for your orders from Shipbridge, such as:
- Carbon neutral shipping
- Collect on delivery
- Verbal confirmation
- Dry ice shipping
- Quantum View notifications
To manage UPS-specific order options:
- Right-click an order in the Shipbridge grid and select Edit Order.
- Select the Order Details tab.
- Set the Shipping Service to UPS.
- Click the UPS Accessories button.
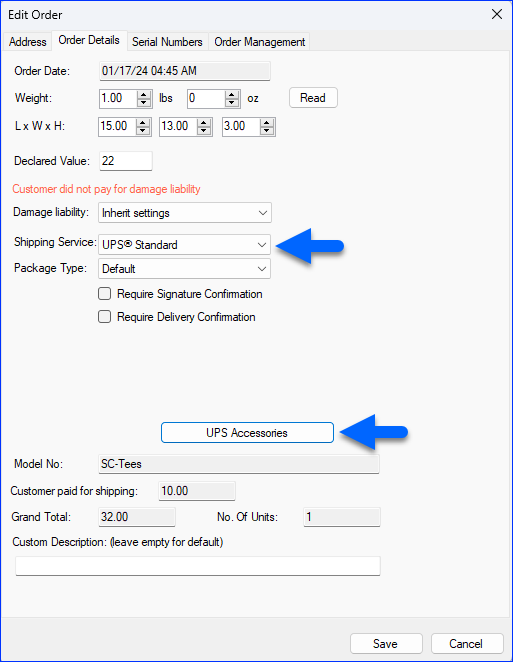
- Enable and configure any preferred services and click Save.
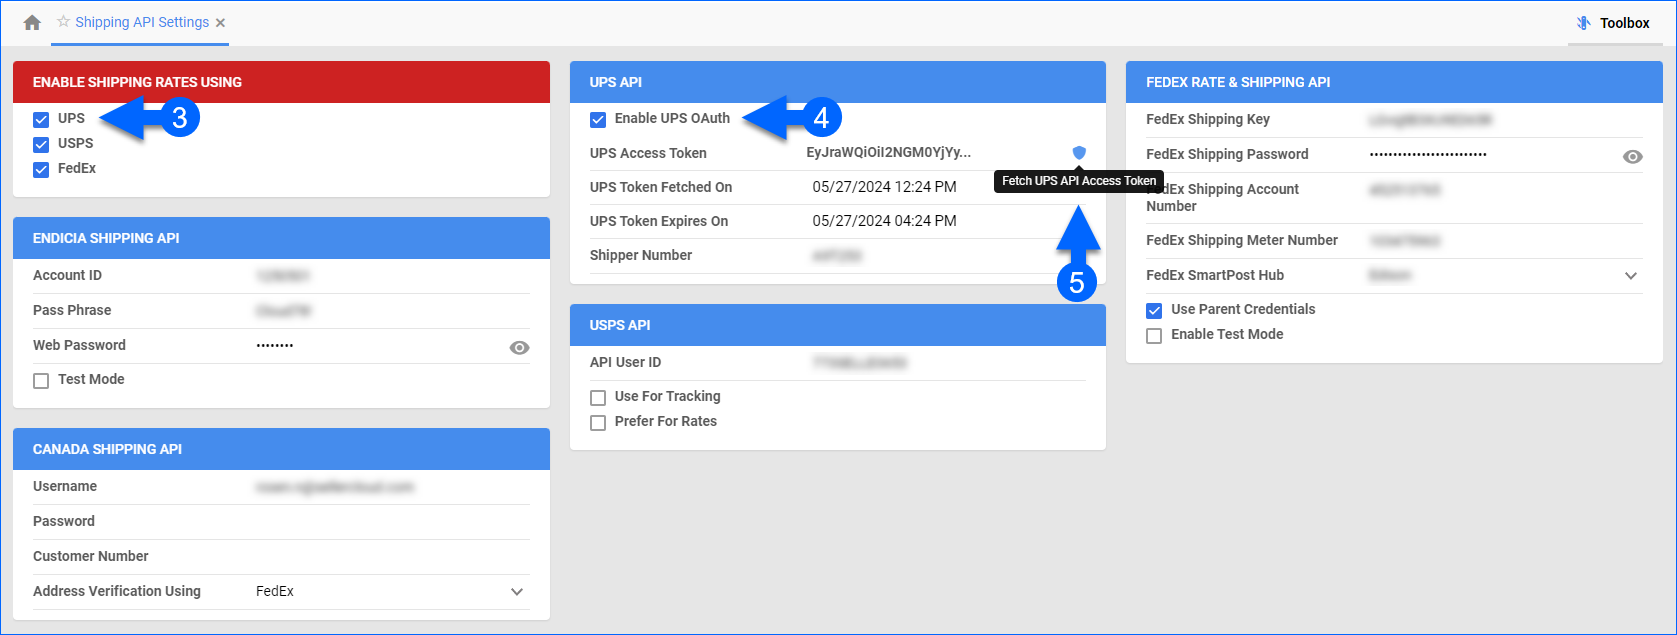
Configure UPS Web Services in Sellercloud
To connect your UPS account and calculate rates in Sellercloud, you must configure your company’s Shipping API settings. To do that:
- Go to Company Settings.
- Toolbox > Shipping > Shipping API Settings > Edit.
- Enable UPS in the Shipping Rates panel.
- Next, select the Enable UPS OAuth checkbox in the UPS API panel.
- Click Fetch UPS API Access Token.
- You will be directed to the UPS login page and prompted to enter your credentials.
- If the login is successful, you will be redirected back to the Shipping API page and the token fields will automatically populate.
- Click Save.
Test Credentials
Once you’ve successfully obtained the UPS OAuth token, you can validate the connection by using the available actions:
- Test UPS Rate Estimate
- Test UPS Address Validation
- Generate UPS Request/Response XMLs