Overview
WayToPay Card Present is a convenient option for collecting in-person payments through your Sellercloud application. This solution works through your WayToPay integration with Stripe and allows you to utilize your Android and iOS devices with NFC capabilities, and Stripe’s smart terminals to process order payments on-site efficiently. Card Present can be used securely at any location, and the collected charges will be reflected in Sellercloud immediately.
Prerequisites
To utilize the WayToPay Card Present workflow, you would need:
- To enable the WayToPay integration with Stripe.
- A smartphone or tablet with an installed Sellercloud application, to manage the payment process. Devices with enabled NFC capabilities can also collect payments. The minimum operational requirements are Android version 11 or above and iOS version 16.7 or above. You can find a list of the most commonly used devices here.
- A Stripe card reader/terminal if you intend to process charges through a POS terminal.
Card Present Payments
Card Present allows you to seamlessly accept on-the-spot payments for your Wholesale, Local store, Website, and Magento orders in Sellercloud.
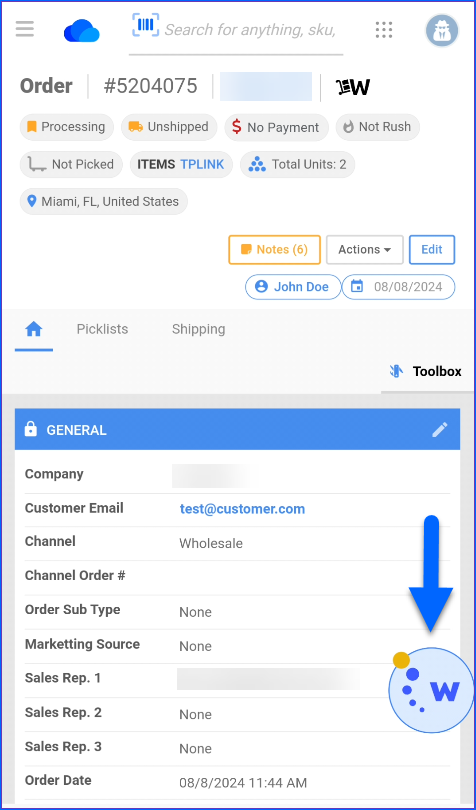
To initiate a charge, simply open an unpaid or partially paid order through your Sellercloud app and tap the WayToPay widget.
The payment status of your order can be easily identified by a colored dot on the widget – orange for pending payment, green for completed and zero value charges, and red for unavailable service and orders ineligible for Card Present. Click on the widget to learn more.
Payment Locations
Once you initiate a charge, you will be prompted to choose or add a Location from which the transaction is processed. This is the merchant identifier that will be displayed on the screen during the payment process.
To add a new address to the list, tap New Location and populate:
- Location Name – The address identifier.
- Country – The location’s country.
- Region – Select the respective state or region.
- City – Type in the closest city name.
- Zip Code – Add a 5-digit ZIP code.
- Address Line 1 – Type in the location’s street details.
- Address Line 2 – Add the building information.
Tap Submit to save the new location.
During the payment workflow, you can select between two collection options:
- Via Smartphones and Tablets
- Via Stripe Smart Reader/Terminal
Smartphones and Tablet Payments
You can accept order payments from contactless cards and digital wallets directly through NFC-enabled smartphones and tablets with installed Sellercloud applications. This option eliminates the need for additional hardware and enhances your setup’s efficiency and portability.
To process payments via an NFC device:
- Log into your Sellercloud application and open the desired order.
- Tap the WayToPay widget to open Card Present.
- Select Pay XXX$ and a message to set up a terminal will appear – tap Get Started.
- Choose a Location from which the transaction is processed. Alternatively, tap New Location to create one.
- Next, select your mobile device for a Terminal Type and tap Continue.
- Once your NFC reader is connected, select Continue.
- The order’s total will be displayed, along with a prompt to tap a card behind the device.
- Once the card is charged, a success message will appear, and the paid order will automatically load on your screen.
Next time you initiate an on-site charge, the system will default to the reader you last used. To use a different terminal, disconnect the reader and restart the charge.
Stripe Terminal Payments
Sellercloud orders can also be paid by connecting a Stripe Terminal to your mobile device or tablet via Bluetooth.
Depending on the utilized terminal type, this option supports the following payment types:
- Chip cards
- Magstripe cards
- Contactless cards and digital wallets
To process payments via a Stripe terminal:
- Log into your Sellercloud application and open the desired order.
- Tap the WayToPay widget to open Card Present.
- Select Pay XXX$ and a message to set up a terminal will appear – tap Get Started.
- Choose a Location from which the transaction is processed. Alternatively, tap New Location to create one.
- Next, select Bluetooth reader for a Terminal Type and tap Continue.
- A list of available Bluetooth terminals will be displayed – select the serial number of the desired reader.
- Once your device is connected, you’ll see its serial and the chosen location. Tap Continue to proceed.
- A Collecting payment message will prompt you to use the terminal.
- Once the card is charged, a success message will appear, and the paid order will automatically load on your screen.
Next time you initiate an on-site charge, the system will default to the reader you last used. To use a different terminal, disconnect the reader and restart the charge.
Readers Information
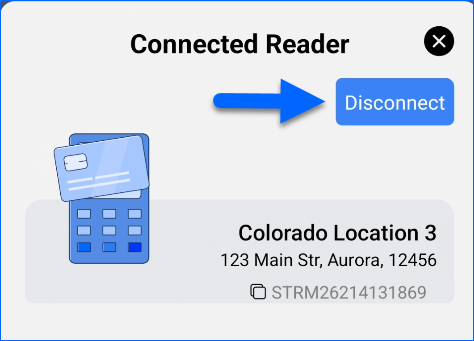
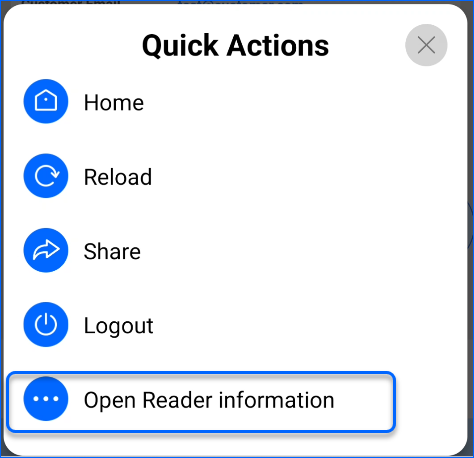
To view the connected reader’s details, open the Quick Actions menu and select Open Reader information.
Disconnect Readers
You can disconnect a reader by tapping Disconnect.
