Overview
Once you’ve successfully Integrated WFS into Sellercloud and Prepared your Products, the next step is to create a WFS shipment to send your products to Walmart. WFS Shipment Plans are crucial in ensuring that your inventory remains well-stocked within Walmart’s fulfillment centers, ultimately facilitating efficient order fulfillment. The entire process of creating, processing, and fulfilling your WFS shipments can be easily created and managed through Sellercloud.
In Sellercloud, there are a few different ways to create a WFS shipment plan:
- From the WFS Shipment Plans section:
- Manually
- By importing from a file
- By importing directly from Walmart
- From the Manage Catalog page
- By linking a PO
This article walks you step by step through each option.
From the WFS Shipment Plans Section
To create a new WFS shipment plan from the WFS Shipment Plans section:
- Go to Inventory > WFS Shipment Plans > Create New WFS Shipment Plan.
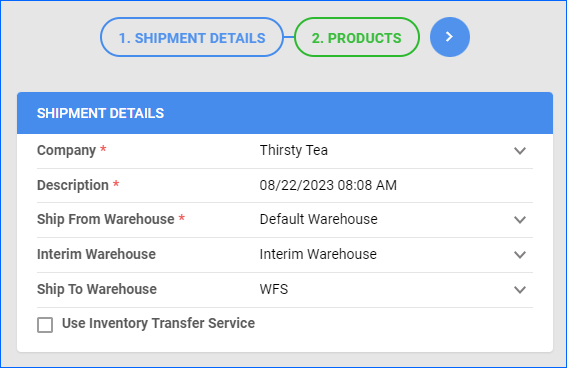
- Specify the Shipment Details.
- Company – Select the company with products to ship.
- Description – Type a name for the shipment plan – usually a date.
- Ship From Warehouse – Select the warehouse to ship from.
The checkbox Allow To Use Qty For FBA and WFS Shipments must be enabled on that warehouse’s details page.
- Interim Warehouse – Select the warehouse for inventory in transit.
- Ship To Warehouse – Select the WFS warehouse.
- Use Inventory Transfer Service – Check to use the Inventory Transfer Service (ITS), where you send inventory to a designated transfer station. Walmart then takes care of allocating enough inventory to the initial fulfillment center to keep your items stocked while the remaining inventory is distributed to other locations.
- Click the Next Step arrow icon.
Next, you can select products manually or upload them from a file. The inventory you add will be reserved for the shipment automatically and will not be made available for sale until it has arrived at a Walmart fulfillment center.
Next, you can select products manually or upload from a file.
If the Client Setting Enable case quantity for new WFS Shipments is enabled for your account, you will not be able to switch off the Case quantity mode from the WFS Shipment Plan Creation Wizard.
Select Products Manually
To select products manually:
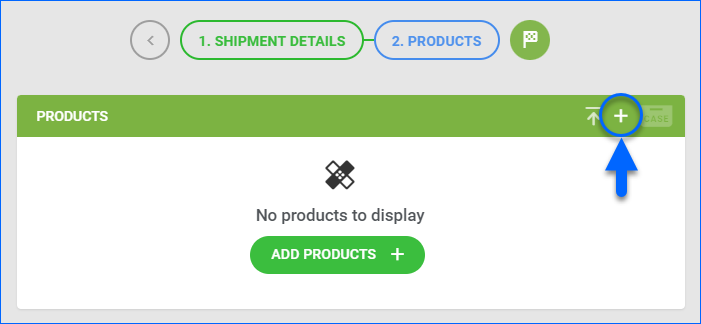
- Click the Add Products icon.
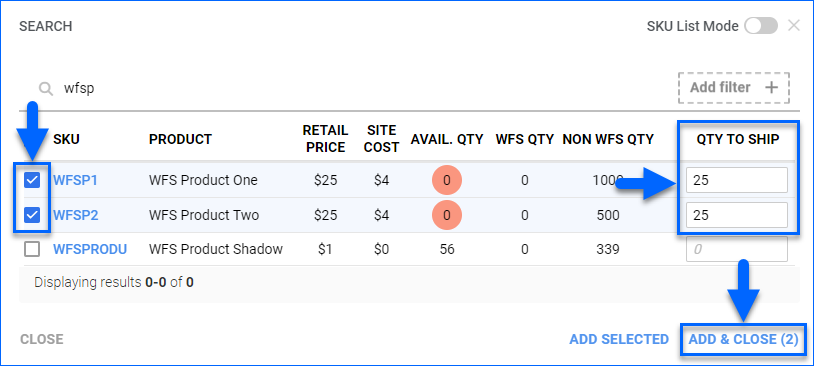
- Search for the products you want to add by name or SKU. Optionally, you can click Add filter to narrow down the search results. If you are using the Sellercloud Mobile Application during this step, you also have the option to scan product barcodes.
- Check the boxes next to products to select them.
- Enter the Qty to Ship for each product.
- Click Add & Close.
- Click the Submit Shipment to WFS flag icon.
- Click Yes, Submit.
Upload From a File
To upload products from a file:
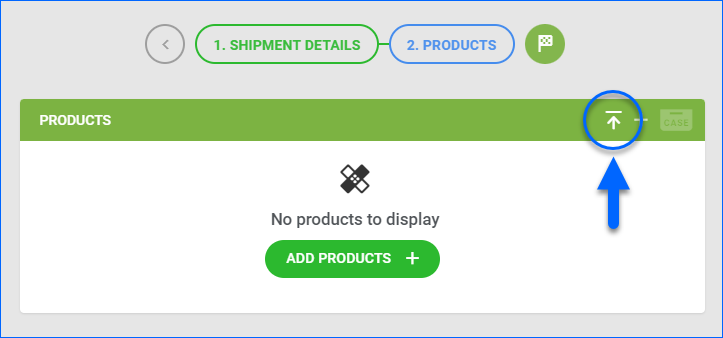
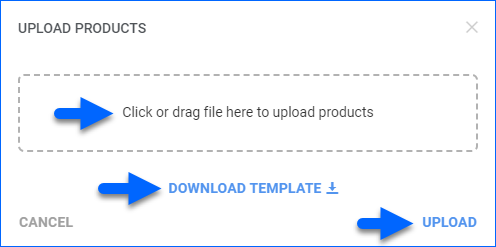
- Click the Upload Products icon.
- Click Download Template to download a spreadsheet template with the following information:
- ShipmentName – The shipment name, usually a date. Products with the same shipment name will be sent together in a single shipment.
- ProductID – The product’s SKU.
- Qty – The product quantity to ship.
- QtyPerCase – The product quantity per case.
- Fill out the template, save it, then click Click or drag file here to upload products to upload the saved template from your device, and click Upload.
- Click the Submit Shipment to WFS flag icon.
- Click Yes, Submit.
Import From Walmart
To import a WFS shipment from Walmart:
- Go to Inventory > WFS Shipment Plans > Import WFS Shipment.
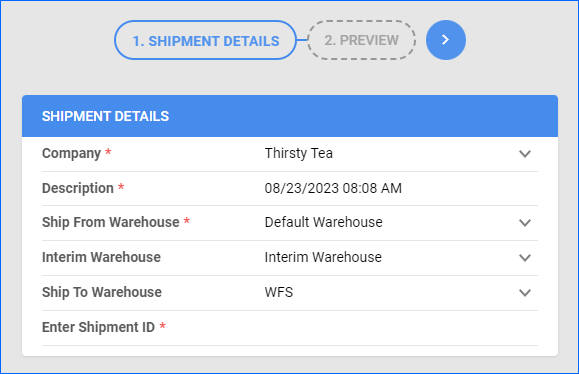
- Specify the Shipment Details.
- Company – Select the company with products to ship.
- Description – Type a name for the shipment plan – usually a date.
- Ship From Warehouse – Select the warehouse to ship from.
- Ship From Warehouse – Select the warehouse to ship from.
The checkbox Allow To Use Qty For FBA and WFS Shipments must be enabled on that warehouse’s details page.- Interim Warehouse – Select the warehouse for inventory in transit.
- Ship To Warehouse – Select the WFS warehouse.
- Enter Shipment ID – Enter a Walmart Marketplace shipment ID.
- Ship From Warehouse – Select the warehouse to ship from.
- Click the Next Step arrow icon.
- Complete the next steps to confirm any details and finish importing the shipment.
From the Manage Catalog Page
You can add products to a new or existing WFS shipment from the Manage Catalog page:
- In Catalog > Manage Catalog.
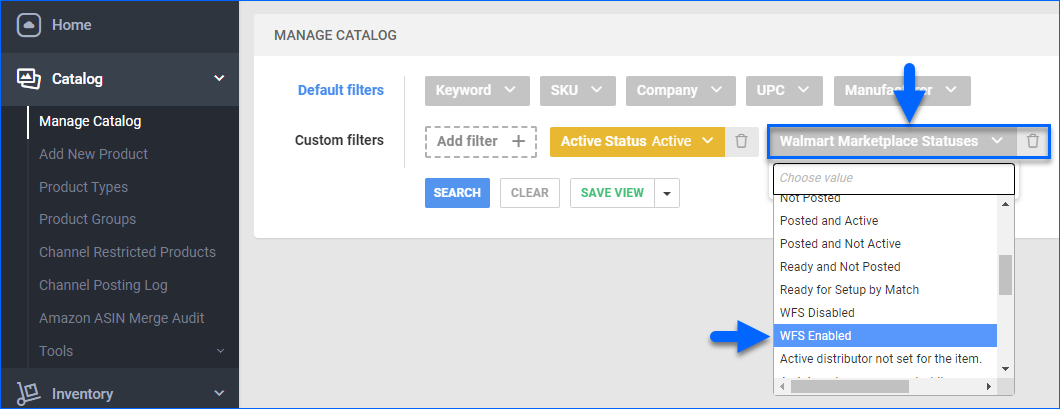
- Click Add filter and add the Walmart Marketplace Statuses filter.
- Click Walmart Marketplace Statuses and select WFS Enabled. Only WFS-enabled products can be added to a shipment – see how to set up products this way in WFS Inventory.
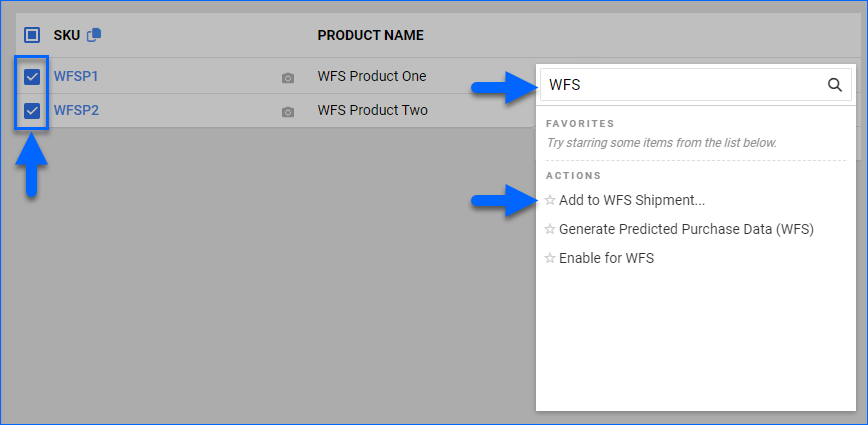
- Search and check the boxes next to SKUs to select them.
- Click the blue Actions icon on the bottom right and select Add to WFS Shipment…
- Enter the Qty to ship and click Next. The inventory you add will be reserved for a shipment automatically and will not be made available for sale until it has arrived at a Walmart fulfillment center.

- Select Existing WFS Shipment or New WFS Shipment.
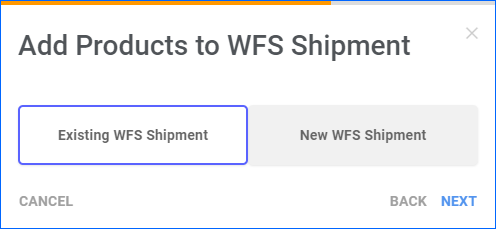
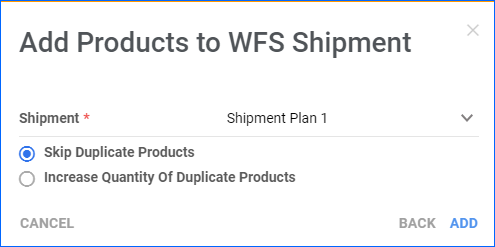
If you choose to add the products to an existing shipment:
- Select the Shipment.
- Select whether you want to Skip Duplicate Products that are already added to the shipment or Increase The Quantity Of Duplicate Products.
- Click Add. You’ll see a notification at the bottom of the page telling you if your products have been added successfully.
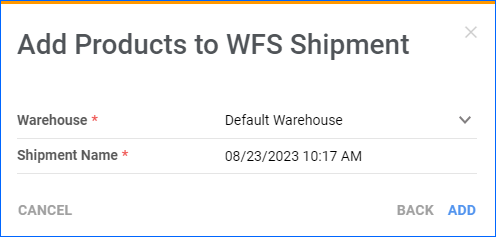
If you choose to add the products to a new shipment:
- Select the Warehouse to ship from. Note that the checkbox Allow To Use Qty For FBA and WFS Shipments must be checked on that warehouse’s details page.
- In the Shipment Name field, type a name for the shipment plan – usually a date.
- Click Add. You’ll see a notification at the bottom of the page, telling you if your products have been added successfully and a link to the new shipment plan.
Link PO to a Shipment Plan
You can link a Purchase Order to a new or existing WFS Shipment Plan. This is a convenient way to streamline the process of purchasing inventory and sending it to Walmart’s Fulfillment Centers. Learn more at Link PO to WFS Shipment Plan.
You can also Link a WFS Shipment Plan to a PO.
