Overview
Confirmation Labels, also known as License Plates, indicate that the items in an order have been accurately put together and are ready for shipping, thus adding an additional layer of precision. This process also lets you set the confirmed packages aside and avoid having to ship them immediately. Once you’re ready to proceed with shipping, simply scan the license plate labels in Shipbridge to retrieve the orders.
This article will guide you through the Confirmation Label workflow as it relates to Scan and Ship in Shipbridge.
Confirmation Codes in Shipbridge
To generate and scan confirmation codes in Shipbridge, you must configure your shipping stations.
To enable the Confirmation Label workflow, follow the steps below:
Step 1: Designate Machine 1 as a Confirmation Station:
- Scan all the required items for your order.
- After scanning the items, a unique Confirmation Code number will print.
Step 2: Designate Machine 2 as a Shipping Station:
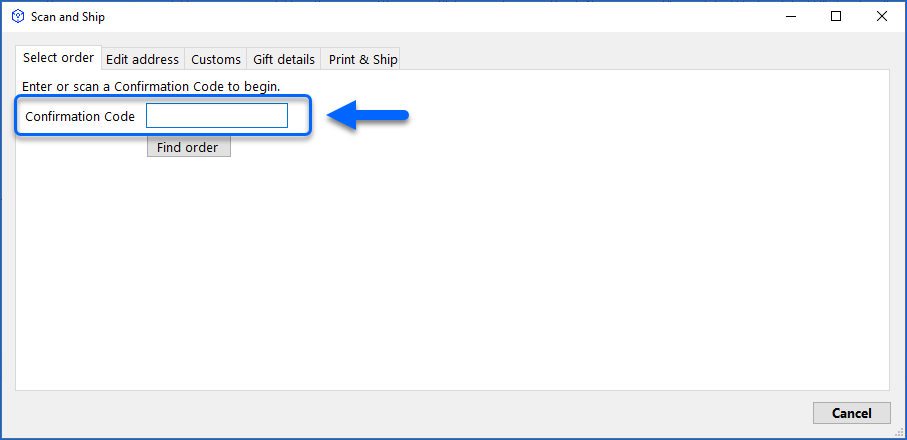
- Instead of scanning individual items or order IDs, scan the Confirmation Code printed by Machine 1.
- After scanning the Confirmation Code, Shipbridge will proceed to print the shipping label.
In Shipbridge, you can restrict shipping orders to only those sorted in Skublox. This feature is controlled by the Only allow shipping of orders sorted in Skublox Admin setting. Open a ticket with Sellercloud Support to configure your Shipbridge installation.
Based on the Allow switching mode in the Scan and Ship dialog setting in Options > Scan and Ship, you can allow users to easily switch between the Confirmation Code Workflow and normal scanning. Once the setting is enabled, you will see a new checkbox in the S&S dialog to Use Confirmation Code to Ship Orders.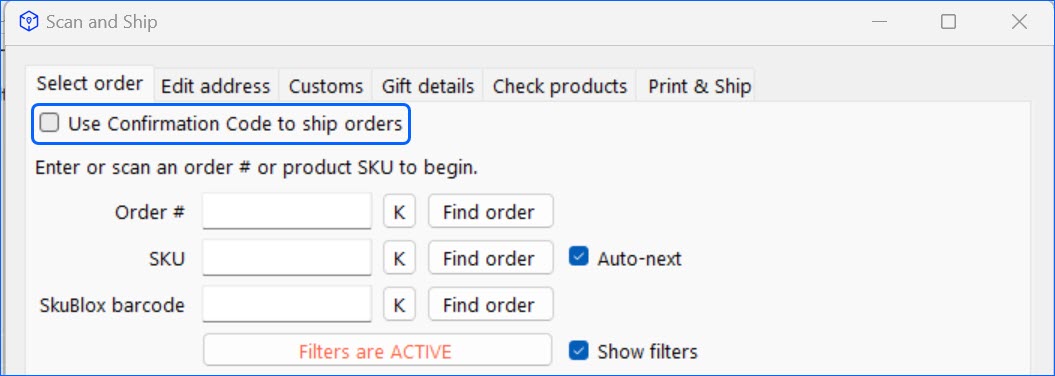
Scanner Side
Once an order is fully assembled, navigate to Scan and Ship in Shipbridge to confirm the order is ready to be shipped.
To utilize the Confirmation Label workflow as a Scanner:
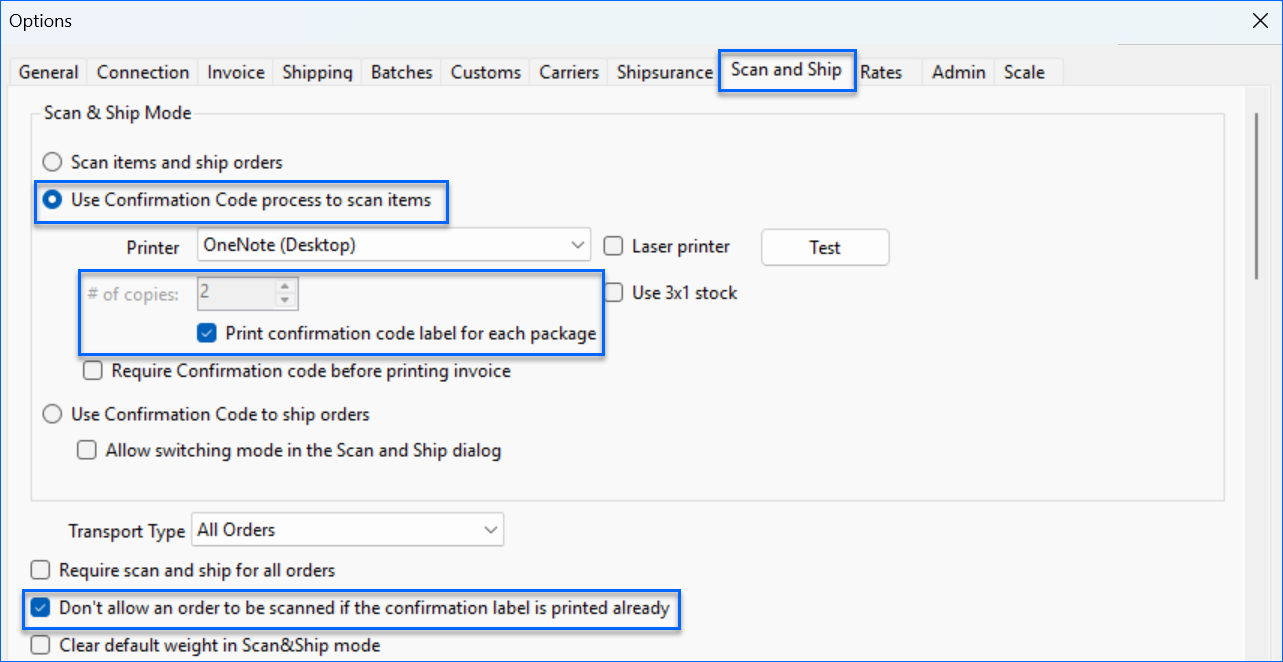
- Navigate to Menu > Options > Scan and Ship.
- Configure the following settings:
- Enable Use Confirmation Code process to scan items.
- Enable Don’t allow orders to be scanned if the confirmation label is printed already.
- You can also select how many confirmation labels would be printed:
- Next, click Scan and Ship to search for your order and scan its SKUs to verify that it is fully assembled.
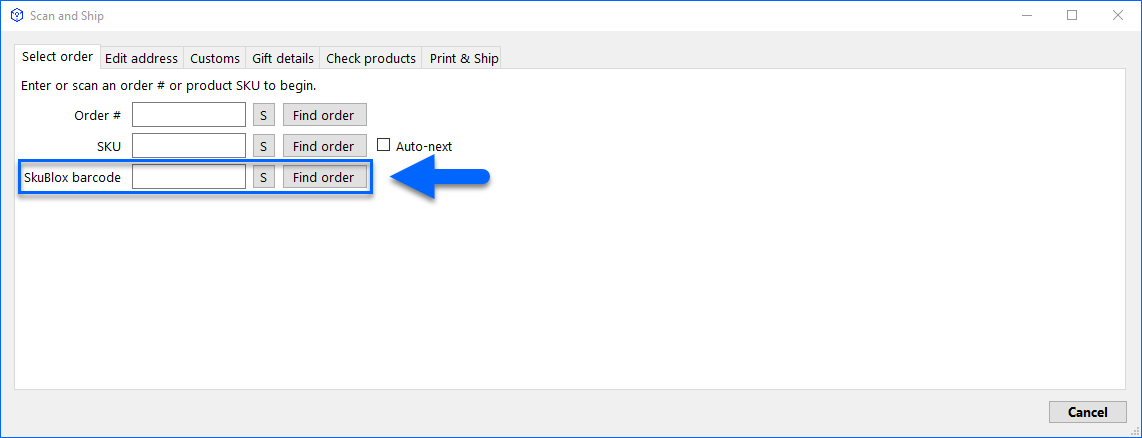
If you’re a Skublox user but prefer to use Shipbridge to print license plates and release the slots on your Skublox wall, enable the Shipbridge setting Show order selection by SkuBlox barcode to allow searching by the slot barcode.
- When you scan all items on the order, the system will generate and print a confirmation code instead of shipping the order immediately.
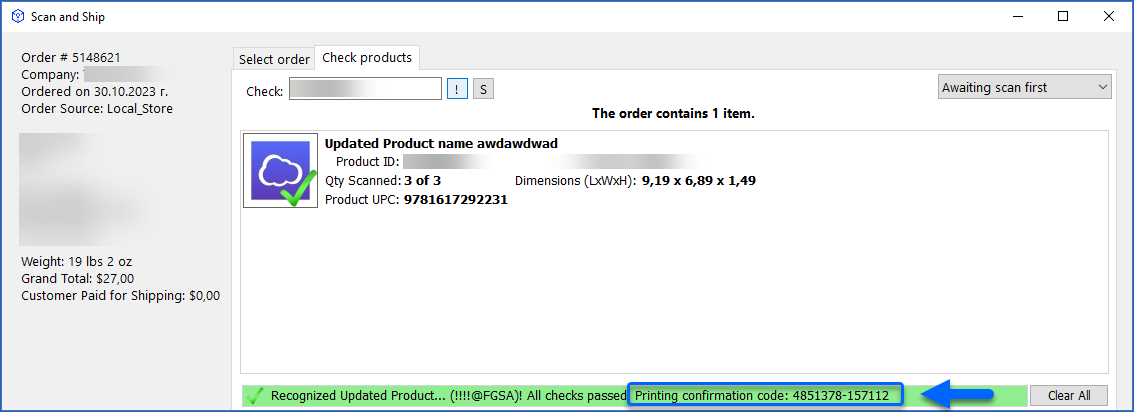
Continue scanning orders as needed. Once completed, the shipper can scan the confirmation codes and proceed with shipping.
Shipper Side
Now that the orders have their confirmation codes printed, navigate to Scan and Ship in Shipbridge to generate shipping labels.
To utilize the Confirmation Label workflow as a Shipper:
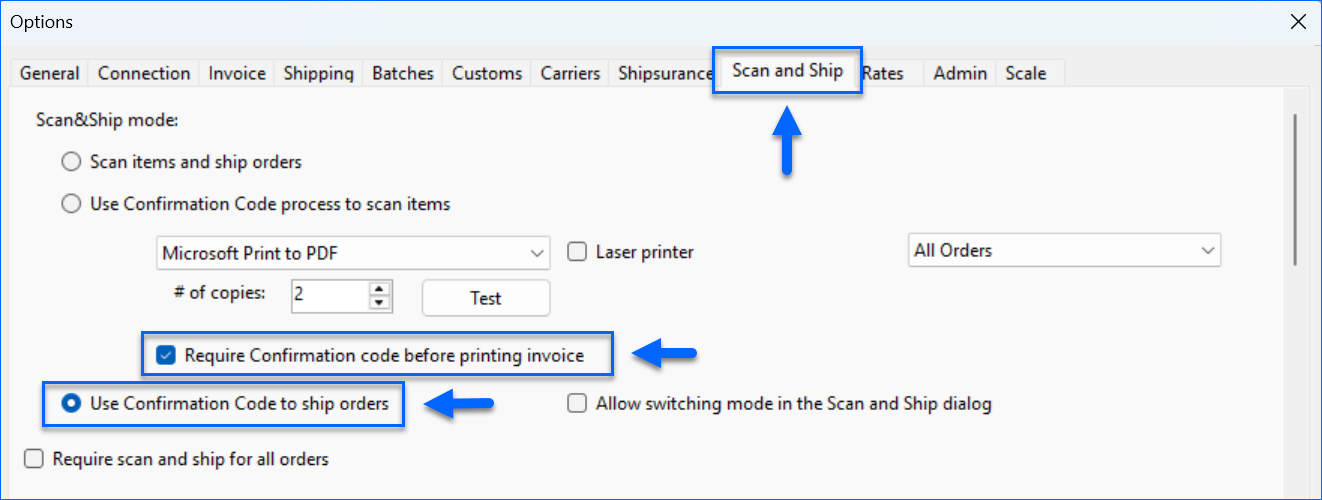
- Navigate to Menu > Options > Scan and Ship.
- Enable the following settings:
- Click Scan and Ship to access the Scan and Ship panel.
- Next, scan your confirmed orders and ship them with your desired carrier.
Learn more about license plate confirmation labels in Skustack and Skublox.
