Overview
Scan and Ship removes the need to manually check the contents of your orders. It allows you to scan your products before shipping them and helps you ensure that your customers receive the products they ordered in the correct quantity.
You can use Scan and Ship in three ways:
- Select orders from the grid and press Scan and Ship
- Click Scan and Ship to scan or enter an order number
- Only use Scan and Ship (disable the grid)
The following video tutorial covers all three methods:
Scan and Ship
The below sections outline the steps for each Scan and Ship workflow, as well as some additional functionalities and best practices.
Select Orders
To select specific orders to scan:
- Click Refresh List to load the Unshipped orders grid.
- Then, check the boxes for the orders you want to process.
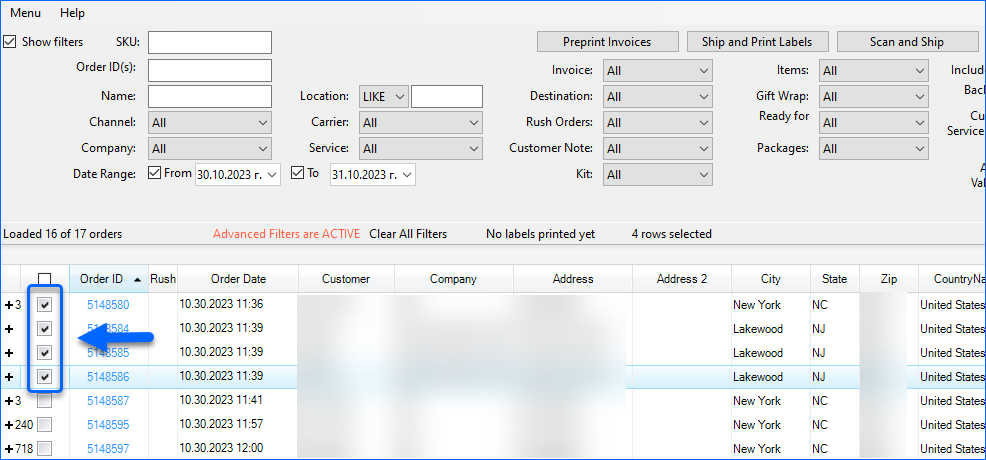
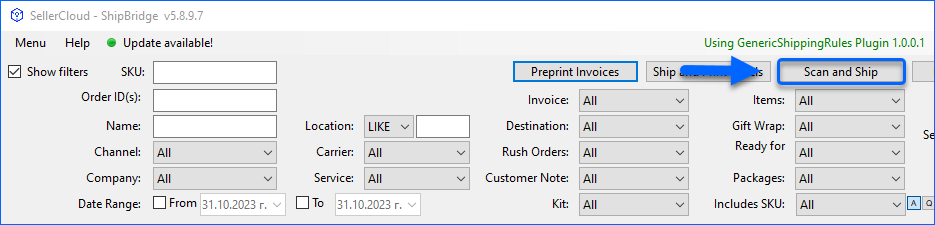
- Click Scan and Ship to open the console.
- Now, verify the order items by scanning or manually entering an identifier: SKU, UPC, or Serial Number. You can switch between Keyboard Input and Scanner Mode by clicking the S/K button next to the Check field. Right-click on any of the products on this tab to see additional options:
- Set as UPC or Alias – this option becomes available if you input an unrecognized identifier. When you click it, it will save the last scanned value in the UPC filed or, if the product already has a UPC, as an Alias of your product in Sellrcloud.
- Read weight from scale – click to override the product’s current Shipping Dimensions and Weight with readings from a scale, such as our 4DScale.
- Set Weight manually – click to open the dialog where you can manually set shipping weight for the product.
- Save weight to product – click to save the current weight to the product in Sellercloud.
- Copy Product ID – click to copy the selected SKU to your clipboard.
During this step you also have the option to Edit Packages or Mark the Order as Requires Attention.

- Optional: Once completed, edit the destination address using the Edit Address tab.
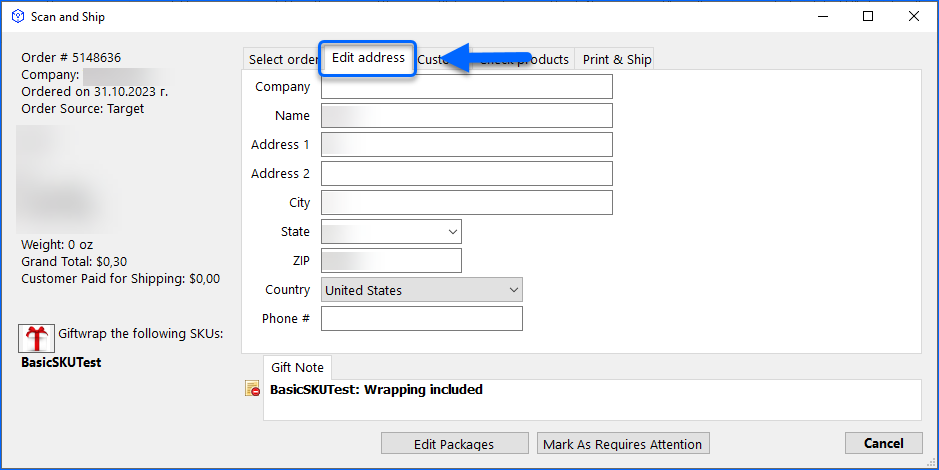
- Review and ensure any accessories or special instructions are included in the shipment.

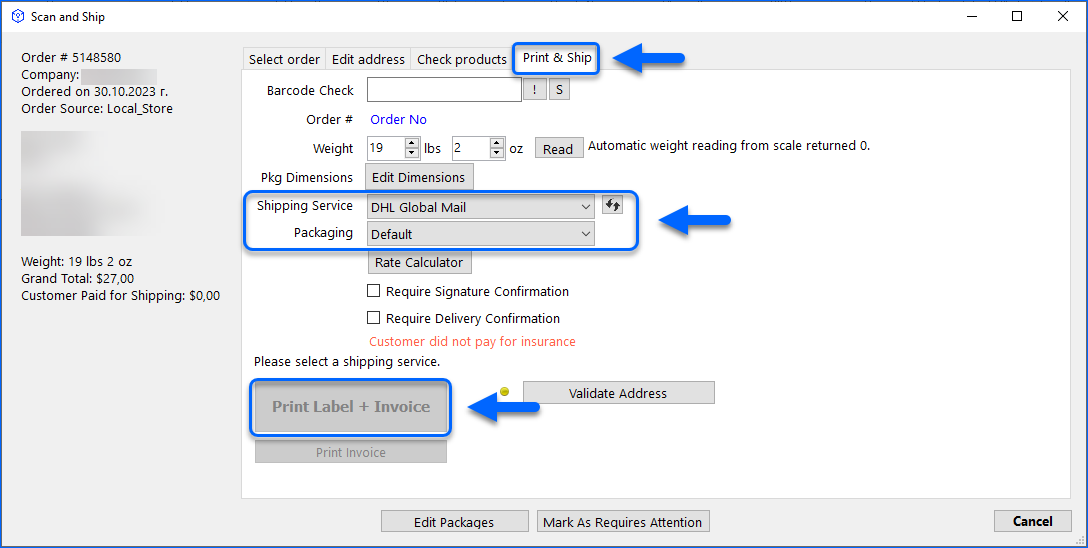
- Go to the Print & Ship tab to verify the shipping values. Then, select the packaging and shipping service. You can print shipping labels and invoices here.
- When the Check and warn for service or dimensions inconsistencies using AI setting from the Scan and Ship tab in the Options menu is enabled, you can see suggested weight and dimensions for your order. The suggestions are based on the Predicted Shipping details of your products, calculated by Sellercloud. Click Apply Suggested to override the current values.
- By default, the suggested weight is calculated and displayed in Lbs (pounds). You can enable the Display suggested and current weight in oz subsetting in Options > Scan and Ship to switch them to ounces.
- When the Show product/packaging info on Print & Ship tab setting from the Scan and Ship tab in the Options menu is enabled, the Print & Ship tab will also display the list of order items for the selected order, as well as their selected packaging.
- Read Weight – click the button indicated in the screenshot below to pull like reading from an integrated scale.
- Scan Package Barcode—Click the icon to open the barcode-scan pop-up dialog. To make this step mandatory when shipping, you can enable Require barcode scan for shipping package type in Menu > Options > Scan and Ship.
- If the order has multiple packages, the number will be indicated in this tab and the Weight will become Total Weight.
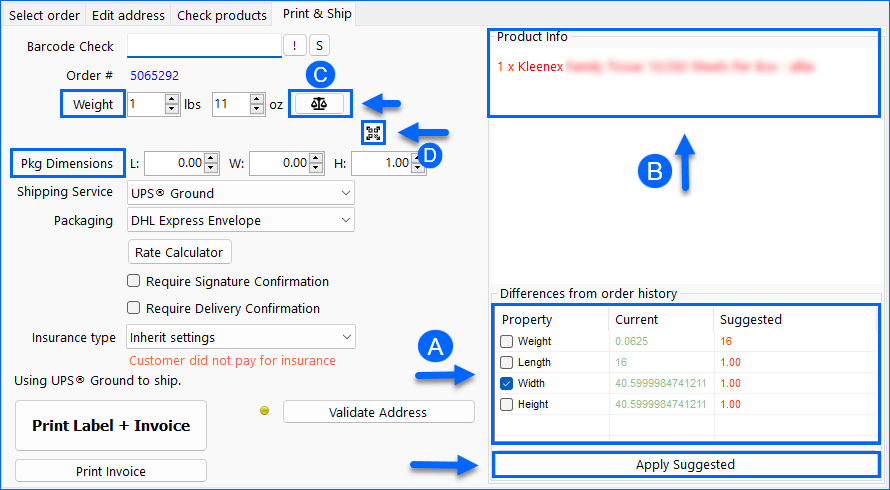
- When the Check and warn for service or dimensions inconsistencies using AI setting from the Scan and Ship tab in the Options menu is enabled, you can see suggested weight and dimensions for your order. The suggestions are based on the Predicted Shipping details of your products, calculated by Sellercloud. Click Apply Suggested to override the current values.
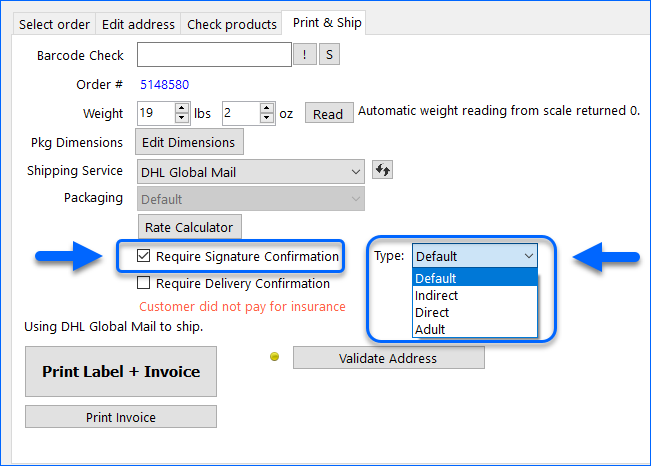
- To require signature confirmation, check the box and select from the drop-down menu.
Find Orders and Products
You can also process orders directly in the Scan & Ship window without loading the Unshipped Orders grid in Shipbridge. To do that:
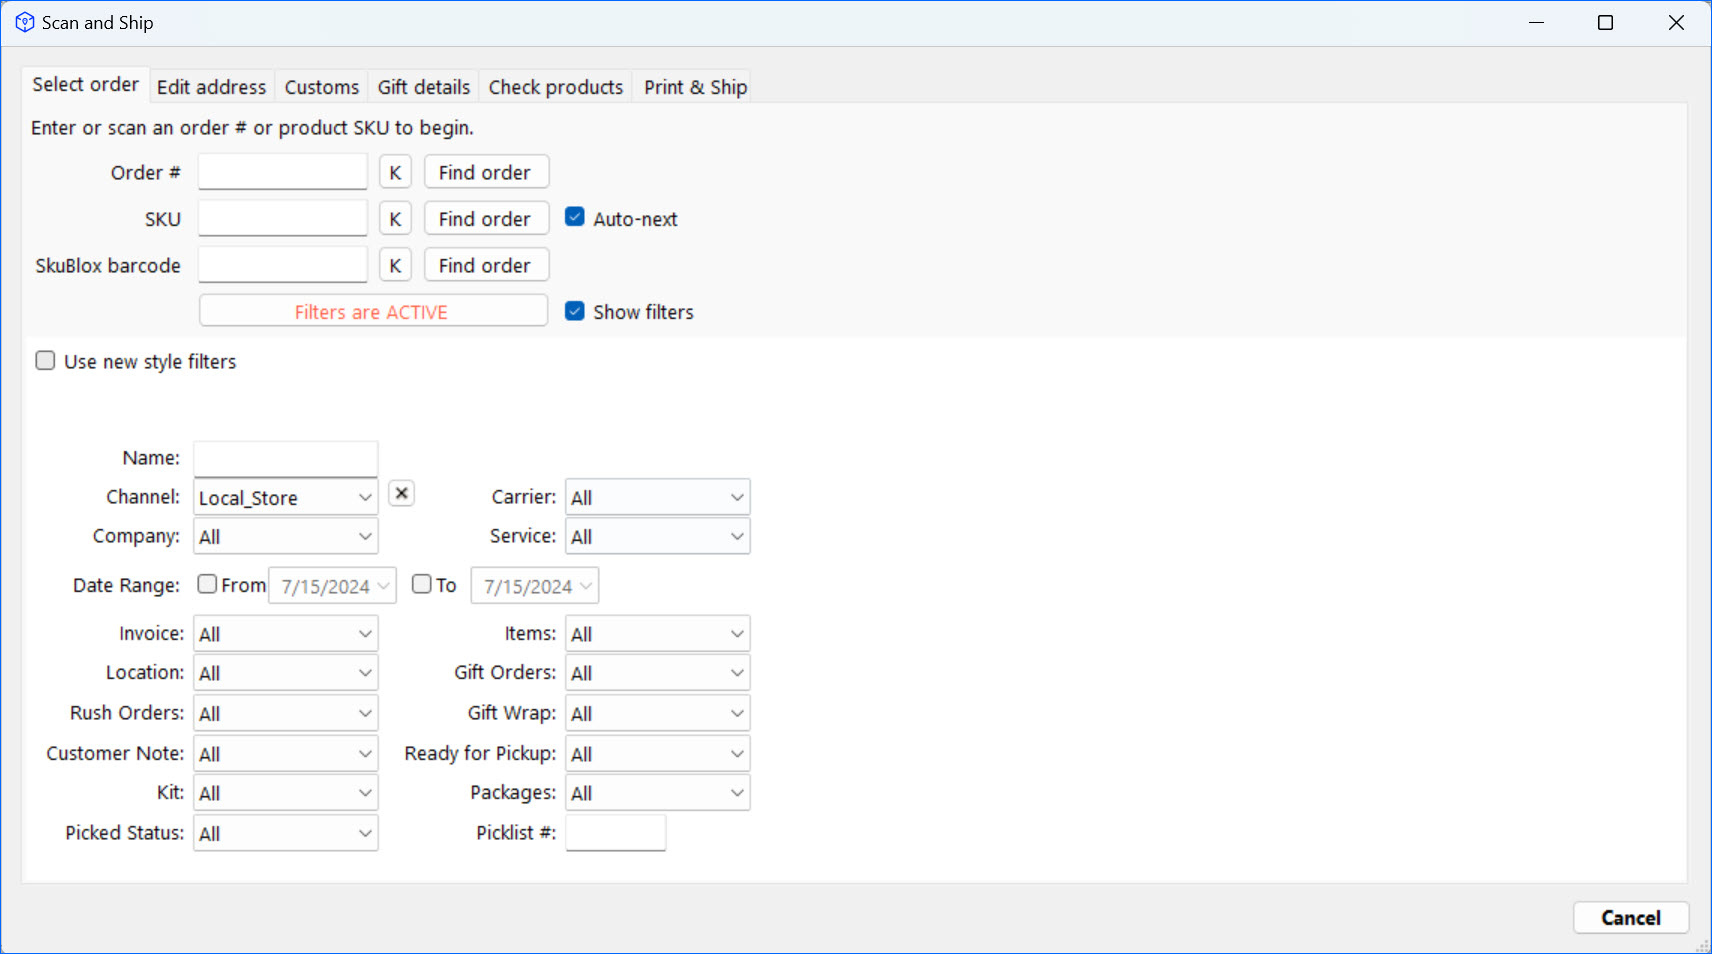
- Click Scan and Ship.
- Scan an order number or SKU to display the items. Scanning a Product ID will load all orders related to that specific item, starting with the oldest.
- If you check Auto-next, the Scan and Ship window will automatically load the next order in the list after you print a label.
- Alternatively, you can use the Confirmation Label Workflow.
- You can also apply filters to narrow down your search. To do so, click the Show filters checkbox.
- Additionally, you can check the Use new style filters box. This gives you access to a more customizable version of the available filters, where you can select which ones will be visible by default and adjust their design.
- Continue as directed in the section above.
Disable the Grid
You can also completely disable the order grid and force using Scan and Ship for all orders:
- Click Menu > Options.
- Select the Scan and Ship tab.
- Enable the option to Disable the grid (only allow Scan & Ship).
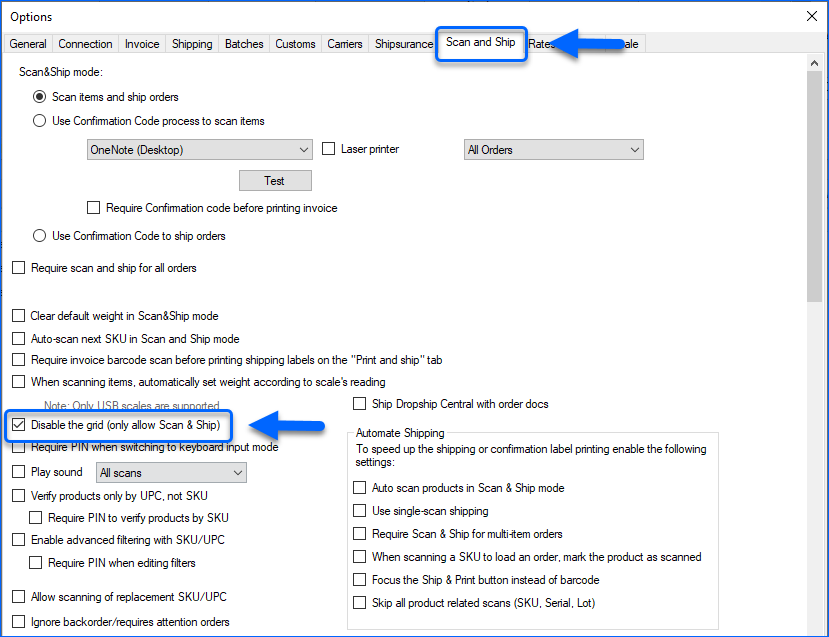
- Click Save to open the Scan and Ship window. This mode only lets you ship one order at a time.
If Use single-scan shipping is enabled in Scan and Ship, a shipping label will auto-generated after a product is scanned. The product shipping weight and dimensions must be configured for the product in Sellercloud.
Note that the sorting order by which orders will be prioritized changes depending on your Shipbridge settings:
- If you do not enable the setting Use new SKU/UPC search method, the default is for orders to be sorted by single item first and then by number.
- If When searching by SKU, sort by multi-item orders first is enabled, orders will be sorted by multi-item first and then by number.
- If Use new SKU/UPC search method is enabled:
- If When scanning a SKU, load order based on Order date is enabled, orders will be sorted by Order date.
- If When scanning a SKU, load order based on Promise date is enabled, orders will be sorted by Promise date.
- If When searching by SKU, sort by multi-item orders first is checked is enabled, orders will be sorted by multi-item first.
- If none of the above are enabled, orders will be sorted by single item first and then by number.
Scan Multiple Units of an Item
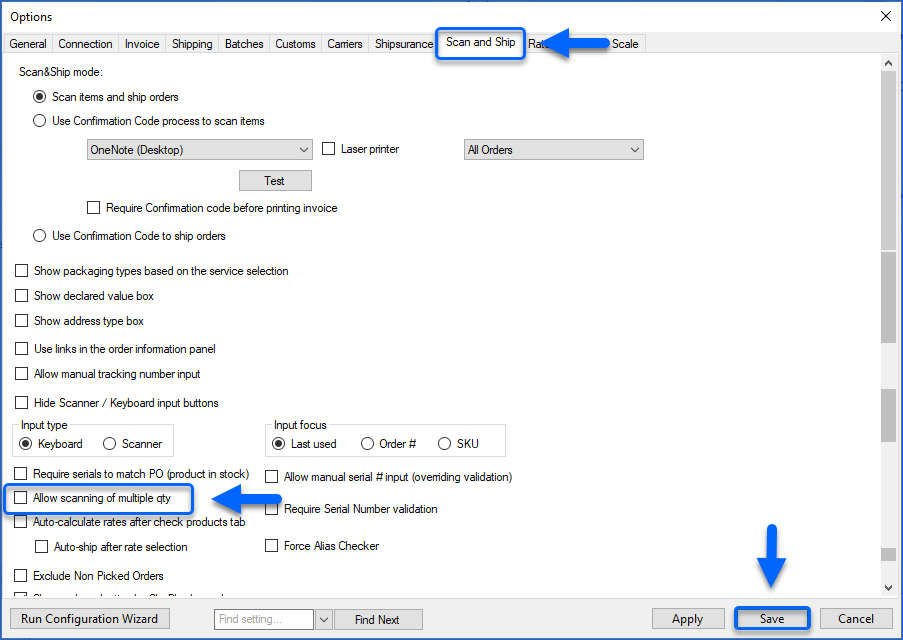
If you have orders with multiple quantities of the same item, you can enable the Allow scanning of multiple qty setting. This lets you scan the item only once and then enter the quantity. To enable the setting:
- Navigate to Menu > Options and select the Scan and Ship tab.
- Check Allow scanning of multiple qty.
- Click Save.
Lock Orders
Shipbridge also offers the ability to lock orders and prevent other users from editing or shipping them once they have begun processing at a shipping station. To achieve this:
- The Admin setting Require exclusive shipping lock must be enabled.
- The Admin setting Shipping lock duration allows you to configure the duration of the order lock. The maximum amount of time you can set is 2880 minutes (24 hours).
Open a ticket with Sellercloud Support to request assistance configuring these settings.
When the necessary settings are configured, an order will be locked as soon as it is opened in the Scan and Ship dialog. During the lock, no other user can Edit the order or print labels.
You can also enable the following settings to further customize this functionality:
- Allow keeping the order locked after closing the Scan&Ship form – By default, the lock ends automatically if the Scan and Ship dialog is closed without finalizing the shipping, regardless of the Shipping lock duration. When this setting is enabled, a Keep Lock button becomes available in the Scan and Ship dialog, which when pressed, will force the lock to remain for the full duration.
- Auto-close the Scan&Ship form when the shipping lock expires – Enable this setting to ensure the Scan and Ship dialog is automatically closed when the lock expires. This prevents users from double-shipping an order if the original shipper doesn’t finalize the process within the allocated time and somebody else starts shipping at another station.