Overview
The Product Status Enabled for Amazon is responsible for the automatic inventory and price updates Sellercloud sends to Amazon. All your merchant-fulfilled products created under an Amazon-Enabled Company have an Amazon Properties Page where you can see and edit this status. If the Allow Inventory Update and Allow Price Update (Regular) boxes are checked on that page, Sellercloud will regularly send information for all enabled SKUs to Amazon.
When you enable a product for Amazon, you allow Sellercloud to pick it up for automatic updates. If you disable a product that has been enabled for a while, Sellercloud will send one last update with 0 available quantity and then stop. This is useful if you prefer to manage your inventory directly on Amazon or use other connected software. Re-enabling a product restarts inventory updates from Sellercloud.
Auto-Enable Products
Sellercloud regularly downloads an Active Listing Report from Amazon and automatically enables all of the SKUs in it for Amazon.
To turn off auto-enabling:
- Go to your Amazon-Enabled Company.
- Click Toolbox and select Amazon > General Settings.
- Click Edit.
- In the Controls panel, check Do not Enable for Amazon.
- Click Save.
Enable or Disable Manually
There are three ways to Enable and Disable your products for Amazon – individually, in bulk, and with file import.
Individually
- Go to Catalog > Manage Catalog.
- Search for a product and then click to view it.
- Click Toolbox and select Amazon Properties.
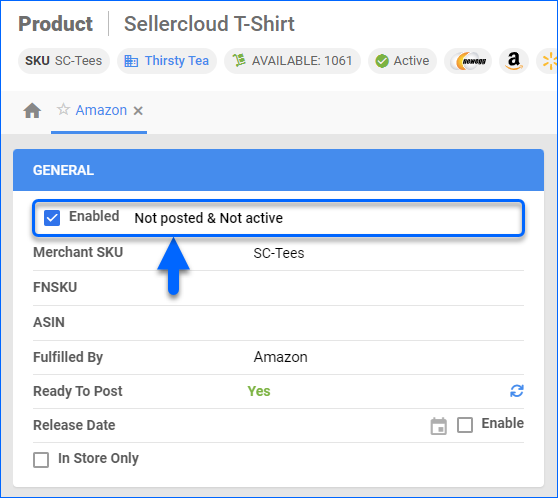
- Click Edit, then check the Enabled box in the General panel, and click Save.
In Bulk
- Go to Catalog > Manage Catalog.
- Search for products and check the boxes to select them.
- Click the blue Action icon on the bottom and select Enable/Disable for Channel.
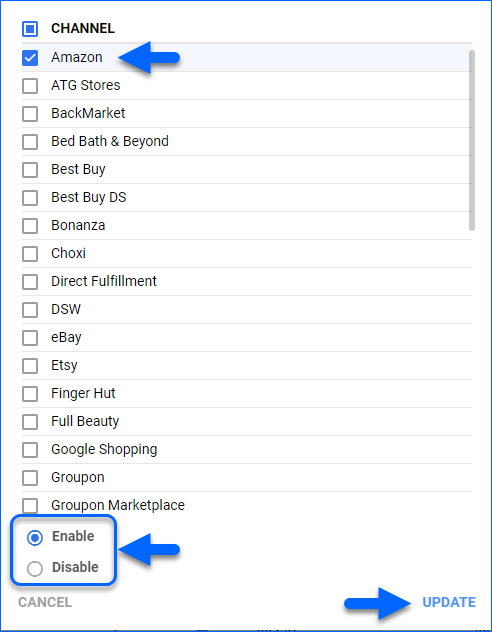
- On the new page, select Amazon from the list.
- You will also see a field called Enable/Disable. Select the action you want to perform for the selected products.
- Click Update. This action generates a Queued Job. When complete, your products’ status will change.
File Import
You can also enable and disable products for Amazon with the Bulk Update Products tool.
- Go to Catalog > Tools > Import Product Info > Bulk Product Update.
- Click Generate Template.

- Select Create New Template and click Next:
- Format – Tab Delimited, CSV or Excel
- Add Columns To Template – search for the field AmazonEnabled and click Next.
- Click Download.
- The template has two columns. AmazonEnabled accepts two values:
- True – Enable for Amazon
- False – Disable for Amazon
- Fill in and save your template.
- Back in Sellercloud, click Select File and select the updated template.
- Click Upload. This action generates a Queued Job. When complete, your products’ status will change.
Overview
The Product Status Enabled for Amazon is responsible for the automatic inventory and price updates Sellercloud sends to Amazon. All your merchant-fulfilled products created under an Amazon-Enabled Company have an Amazon Properties Page where you can see and edit this status. If the Allow Inventory Update and Allow Price Update (Regular) boxes are checked on that page, Sellercloud will regularly send information for all enabled SKUs to Amazon.
When you enable a product for Amazon, you allow Sellercloud to pick it up for automatic updates. If you disable a product that has been enabled for a while, Sellercloud will send one last update with 0 available quantity and then stop. This is useful if you prefer to manage your inventory directly on Amazon or use other connected software. Re-enabling a product restarts inventory updates from Sellercloud.
Auto-Enable Products
Sellercloud regularly downloads an Active Listing Report from Amazon and automatically enables all of the SKUs in it for Amazon.
To turn off auto-enabling:
- Go to your Amazon-Enabled Company.
- Click Toolbox and select Amazon > General Settings.
- Check Do not Enable for Amazon.
- Click Save Settings.
Enable or Disable Manually
There are three ways to Enable and Disable your products for Amazon – individually, in bulk, and with file import.
Individually
- Go to Inventory, search for your product, and click to open it.
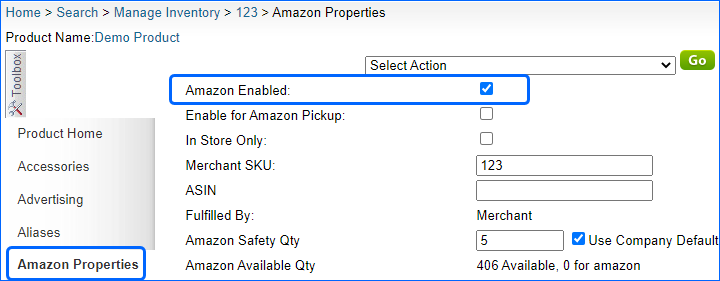
- Click Toolbox and select Amazon Properties.
- Click the Amazon Enabled checkbox.
- Scroll down to the bottom and click Save.
In Bulk
- Go to Inventory, search for your products, and check the boxes to select them.
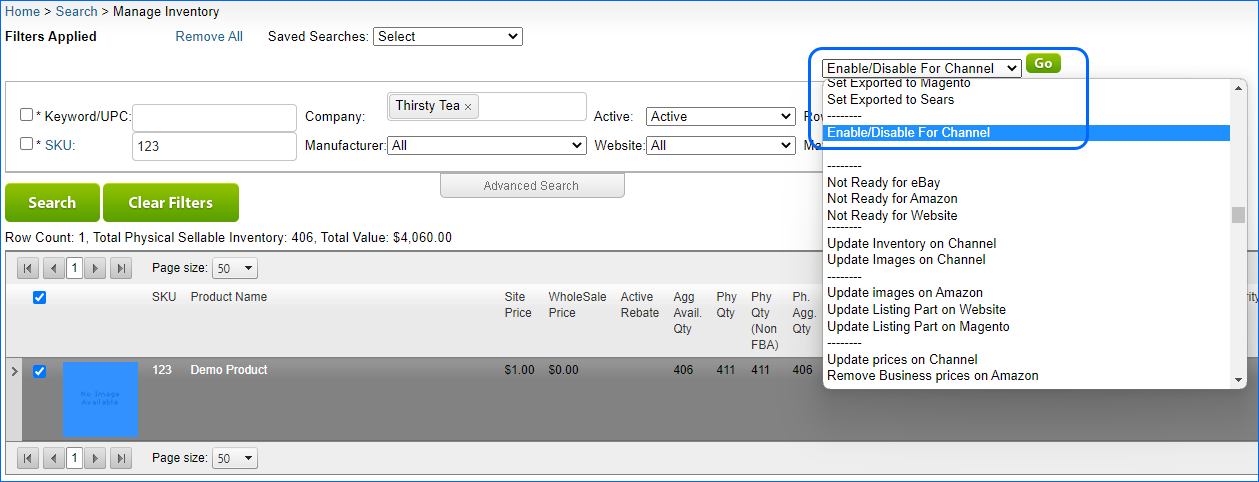
- Click Select Action, select Enable/Disable for Channel, and click Go.

- Check Amazon.
- Choose whether to Enable/Disable the products.
- Click Continue. This action generates a Queued Job. When complete, your products’ status will change.
File Import
You can enable and disable products for Amazon with the Bulk Update Products tool.
- Go to Inventory > Bulk Update Products.
- Click Get Template file.
- In the pop-up window:
- Select either First Column is UPC or First Column is Product ID.
- Choose a Format – Tab Delimited, CSV or Excel.
- Under Available Fields, search for the field AmazonEnabled and add it to the box on the right.
- Click Download Template.
- The template has two columns. AmazonEnabled accepts two values:
- True – Enable for Amazon
- False – Disable for Amazon
- Fill in and save your template.
- Back in Sellercloud, click ChooseFile and select the updated template.
- Click Submit. This action generates a Queued Job. When complete, your products’ status will change.


