Overview
Manufacturers are the companies that produce the products in your Catalog. In Sellercloud, you add your manufacturers per company, and each product can be associated with only one manufacturer.
Some channels require manufacturer details for listings, and Sellercloud can communicate this information. Manufacturers may also be used in place of the Product Brand if no brand is selected for your products and if the manufacturer matches the brand name.
In this article, you will learn how to add and manage manufacturers in Sellercloud.
Add Manufacturers
You can add manufacturers manually one by one or in bulk.
Manually
To add a new manufacturer:
- Go to Company Settings.
- Click Toolbox and select Manufacturers.
- Click the Add New Manufacturer plus icon at the top right.
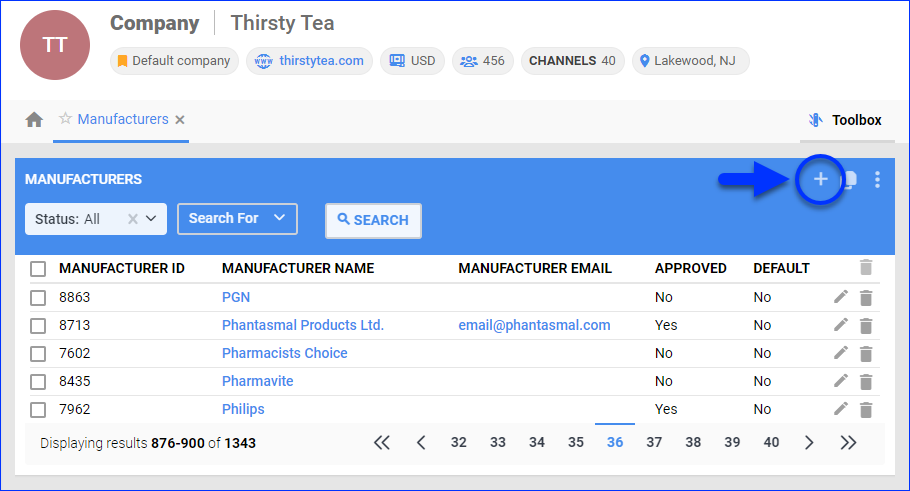
- Enter a Name for the manufacturer.
- Click Add. You will be taken to the Manufacturer Details page, where you can enter additional information. See Configure Manufacturer Details for more information.
In Bulk
To add manufacturers in bulk by importing a spreadsheet:
- Go to Company Settings.
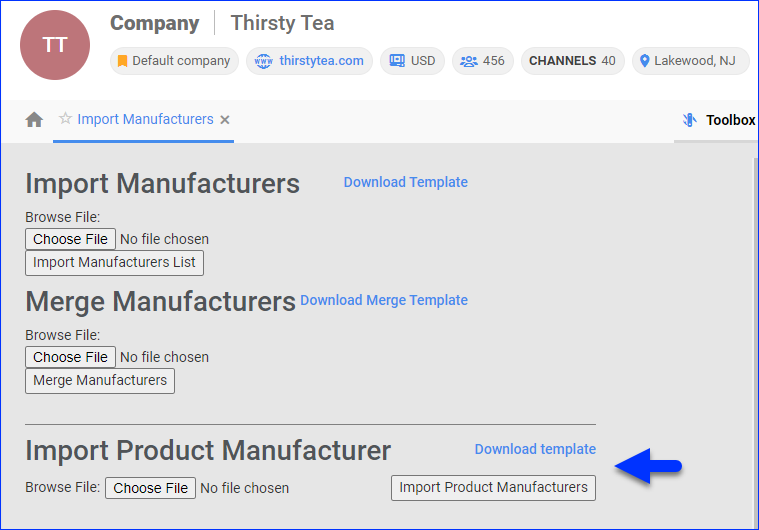
- Click Toolbox and select Manufacturers > Import.
- Next to Import Manufacturers, click Download Template.

- А TXT file template will be downloaded to your device. Enter these details, tab-delimited, one row per manufacturer:
- ManufacturerName – Enter the manufacturer’s name.
- Email – Enter the manufacturer’s contact email address.
- ManufacturerCode – The name of the manufacturer when importing from integrated services. If the same manufacturer does not exist in Sellercloud, it will be created.
- Approved – Enter True to mark the manufacturer as Approved.
- Click Choose File and select the updated template file.
- Click Import Manufacturers List. You should instantly see the message “X manufacturers created successfully.”
Manage Manufacturers
To view and manage your manufacturers:
- Go to Company Settings.
- Click Toolbox and select Manufacturers.
- The page displays all manufacturers added to the company.
- Optionally, you can display only manufacturers with a specific Status, either Approved or Not Approved.
- If you have a large list of manufacturers, you can use the Search For filter.
- The following options are available on the Manufacturers page:
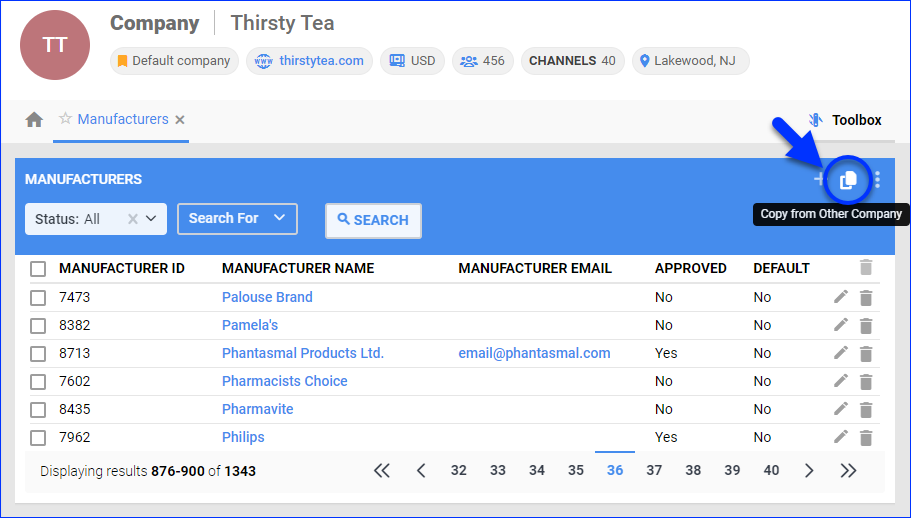
- Copy From Other Company – While manufacturers are company-specific, you can easily copy a manufacturer from one company to another with this option.
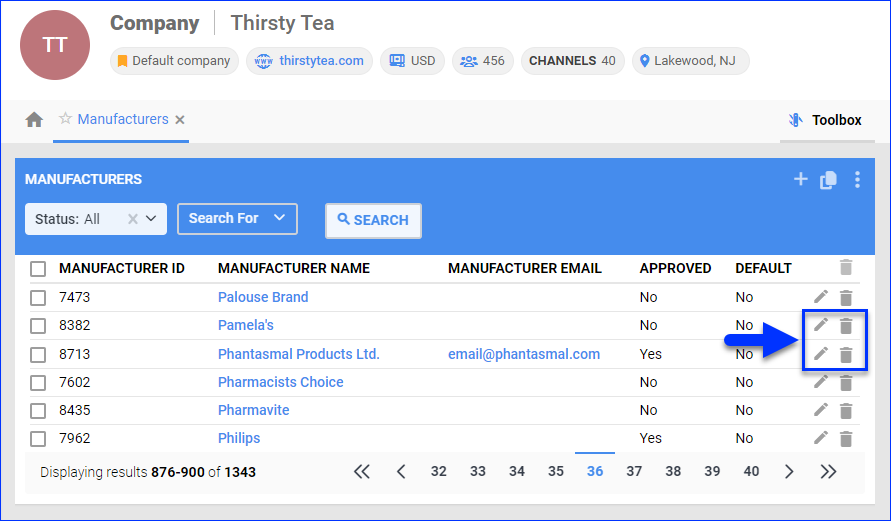
- Edit Details – The pencil icon opens the Manufacturer Details page, where you can update the manufacturer’s details.
- Delete – The trash icon deletes the manufacturer permanently. Be careful; there is no restore option.
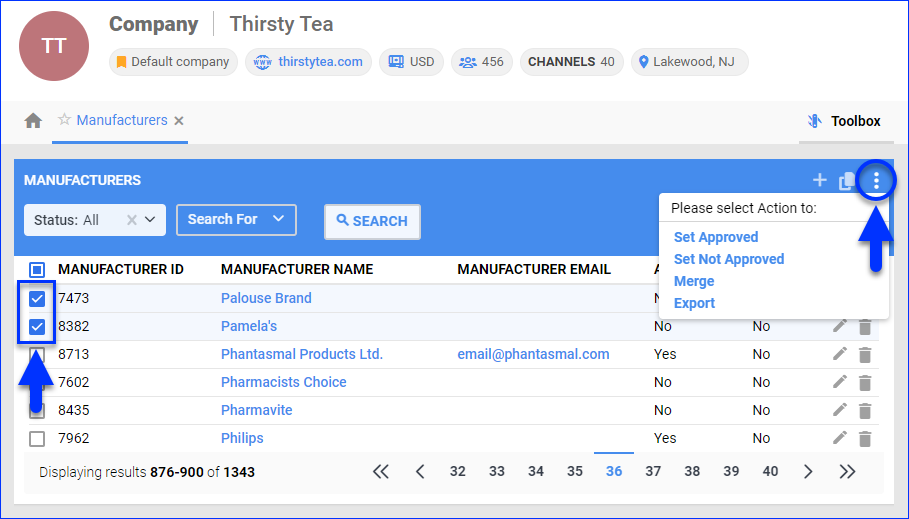
- Set Approved – Mark the selected manufacturers as Approved.
- Set Not Approved – Remove the selected manufacturers’ Approved status.
- Merge – Merge the selected manufacturers. Only the one with the lowest Manufacturer ID number will remain. This action can not be undone.
- Export – Download the selected manufacturers’ general details to an Excel spreadsheet. The columns you see in the grid are the details that will be exported.
- Copy From Other Company – While manufacturers are company-specific, you can easily copy a manufacturer from one company to another with this option.
Configure Manufacturer Details
To configure manufacturer details:
- Go to Company Settings.
- Click Toolbox and select Manufacturers.
- Click the Manufacturer Name.
- The Manufacturer Details page opens with the following panels and settings:
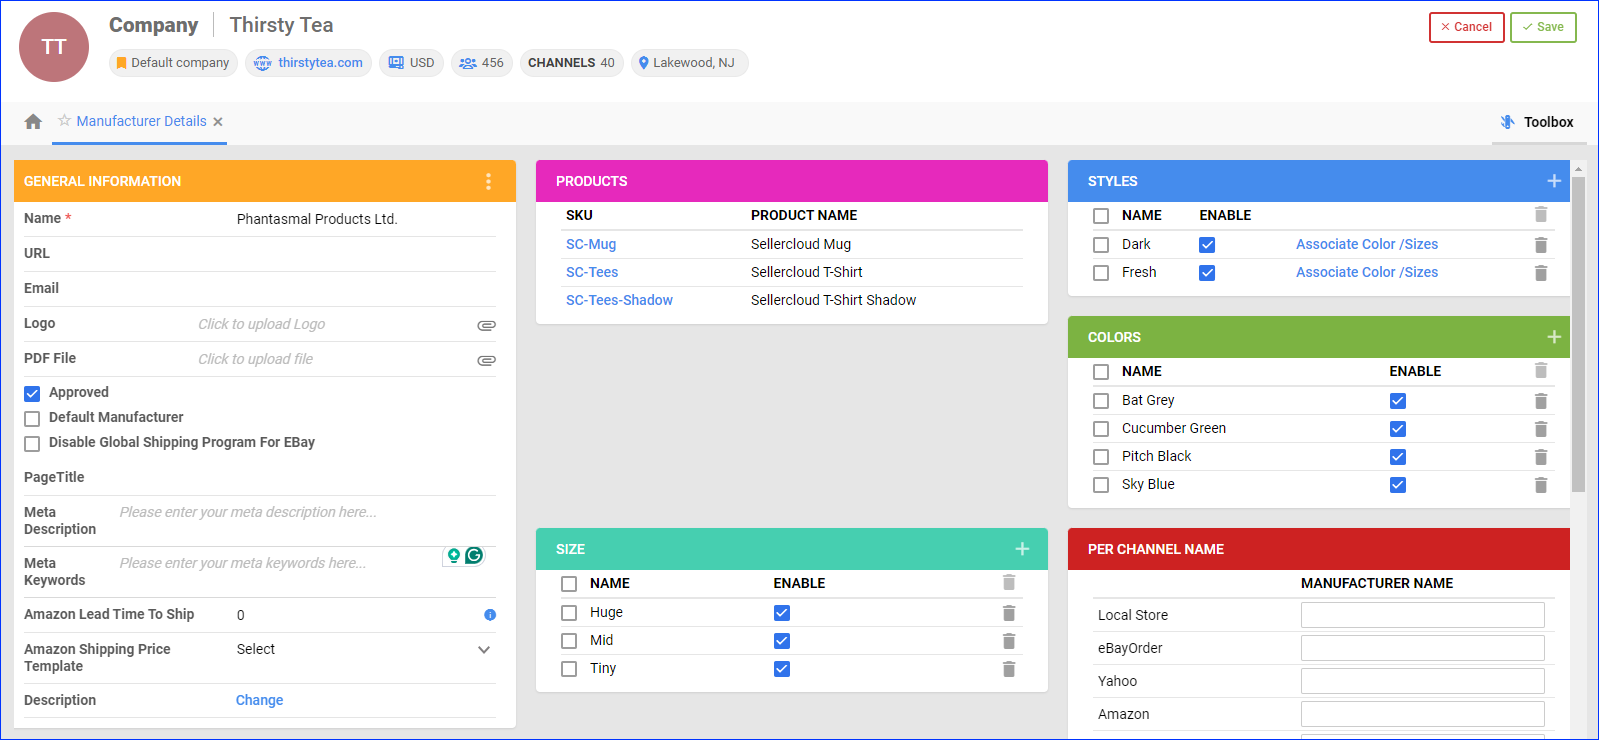
General Information
This panel contains the following options:
- Name – The manufacturer’s name.
- URL – The manufacturer’s website address.
- Email – The manufacturer’s contact email address, used when dropshipping orders.
- Logo – The manufacturer’s logo.
- PDF File – A .pdf file containing information about the manufacturer.
- Approved – Indicates whether the manufacturer has been approved or not.
- Default Manufacturer – Indicates that this is a default manufacturer. This field is only for internal reference.
- Disable Global Shipping Program For EBay – Disable the eBay International Shipping Program for products produced by this manufacturer.
- PageTitle – The manufacturer’s website page title. This field is only for internal reference.
- Meta Description – The manufacturer’s website meta description. This field is only for internal reference.
- Meta Keywords – The manufacturer’s website meta keywords. This field is only for internal reference.
- Amazon Lead Time To Ship (in days) – The Fulfillment Latency of products purchased from this manufacturer. This is the number of business days it takes to ship an order after it is placed. This field is only for internal reference, and won’t actually apply to products from this manufacturer.
- Amazon Shipping Price Template – In Sellercloud, there are two types of shipping templates for Amazon: Ship By Region Templates and the standard Amazon Shipping Templates, which allow you to configure rates for different shipping services. However, you can only enable and apply one type of template to your products at a time. By enabling Ship By Region templates with the Enable Ship By Region Templates Client Setting, you disable the other type. Clicking the three dots icon at the top right of the panel lets you execute the Update Products with Shipping Template action, which lets you apply the selected Amazon shipping template to products from that manufacturer.
- Description – A description of the manufacturer. Corresponds to the placeholder #?BrandDescription?# for Description Templates.
Products
- This panel will display SKUs that have been Assigned a Manufacturer. While you can view SKUs here, you can’t add or remove them.
Per Channel Name
- Enter a channel-specific Manufacturer Name for each integrated channel.
Assign Manufacturers to SKUs
You can assign manufacturers to SKUs manually or in bulk.
Manually
To manually:
- Go to a Product Details Page.
- Click Edit.
- Select a Manufacturer in the Details panel.
Alternatively, you can create a new manufacturer from the Plus icon.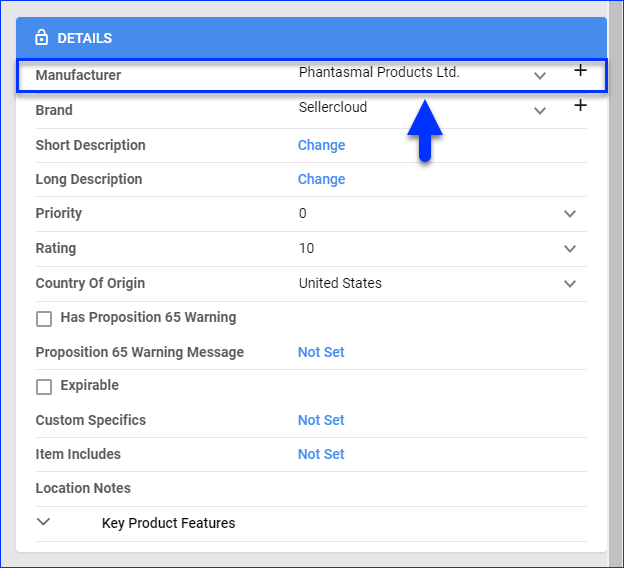
- Click Save.
In Bulk
There are two ways to assign manufacturers to SKUs in bulk:
- One only assigns existing manufacturers and never creates new ones.
- One also creates new manufacturers if they don’t exist yet.
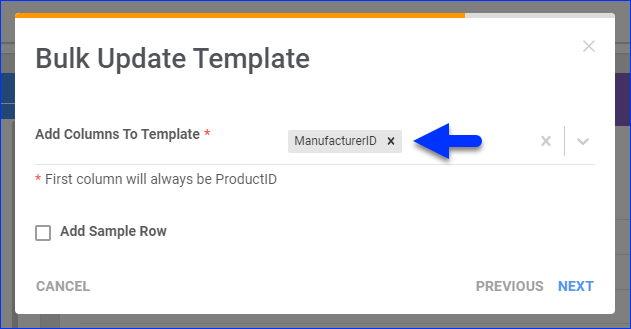
To assign only existing manufacturers to SKUs in bulk:
- Follow the steps to Bulk Update Products.
- Add the ManufacturerID column header to your template. You can enter either the manufacturer’s ID or Name in the template – both are accepted.
To assign manufacturers to SKUs and create unknown manufacturers:
- Go to Company Settings.
- Click Toolbox and select Manufacturers > Import.
- Next to Import Product Manufacturer, click Download Template.
- А TXT file template will be downloaded to your device. Enter these details, tab-delimited, one row per manufacturer:
- SKU – The product’s SKU.
- Manufacturer – The manufacturer’s name.
- Click Choose File and select the updated template file.
- Click Import Product Manufacturers. You should instantly see the message “X manufacturers created successfully.”
Related Client Settings
The following Client Settings related to manufacturers are available:
- Require Manufacturer When Creating Product – Make the Manufacturer a mandatory field to populate when creating a new product in Sellercloud.
- Stop Using Brands (Use Manufacturer As Brand) – With this setting enabled, Product Brands are not accessible, and Sellercloud will not process or consider them even if you populate the fields. The product’s assigned Manufacturer will be used instead of the Brand.
- Enable Manufacturer SKU For Channel – Include and process all Manufacturer SKUs on your products’ Channel Properties. This setting is mandatory if you need to identify a product by its Manufacturer SKU. If this setting is disabled, the Manufacturer SKU field won’t be processed even if you have populated it.
- Create Manufacturer When Get Info From Amazon Or Create Product From Amazon – By default, when you use the Get Info From Amazon action, Sellercloud will not import manufacturer details. If this setting is enabled, the Manufacturer and ManufacturerSKU will be pulled from Amazon if they don’t exist in Sellercloud. To override product properties for Amazon that are already populated in Sellercloud, you must also enable the Enable Override product info when getting info from Amazon or Walmart setting.
- Send Manufacturer Name As Item Specific When Listing On EBay – When listing products on eBay, send the Manufacturer’s name as an eBay Item Specific. The Manufacturer SKU (Model Number) is always sent as an item-specific manufacturer part number (MPN).