Overview
Sellercloud’s Description Templates allow you to create customizable, reusable templates for product listings across platforms. These templates ensure consistency in the description content and can include details such as titles, images, shipping details, and more. You can tailor them to product type or seasonal themes using dynamic placeholders and static data.
Templates are sent as HTML-formatted documents with product information and company branding. Description templates are available for eBay, Walmart Marketplace, Shopify, Bonanza, and Reverb.
Manage Description Templates
You can easily create, edit, clone, and delete templates. Additionally, the Description Template tab provides information related to the latest modifications.
Create Description Templates
To create a new Description Template:
- Go to Company Settings.
- From the Toolbox > Click Description Template.
- Click on the + icon in the panel header.

- In the pop-up modal:
- Fill in the Template name.
- (Optional) Select Master Template from the drop-down menu to assign a master template.
- Select Single Product Template or Kit Product Item Template. If you choose the Kit Product Item Template, you will have two editors to work with.
- Add Static data to your template. This refers to elements that would be identical for all products, such as company information, logos, messages, formatting, etc.
- Add Dynamic data to your template. This refers to information that would change based on the product it is set on. See the Placeholders section below for more information.
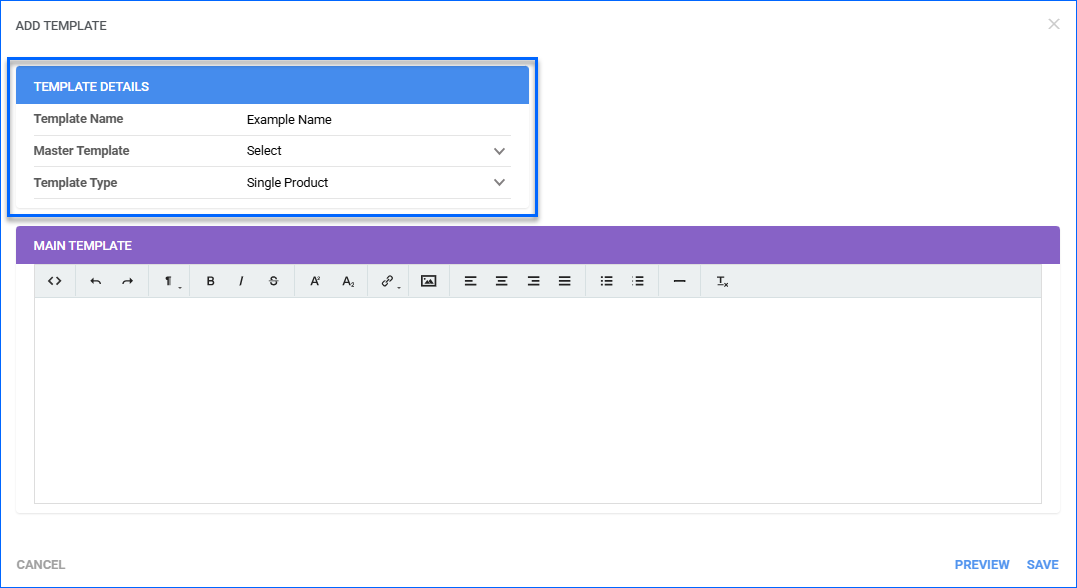
- Click Preview to preview your template.
The Preview allows you to see the format of your template. However, placeholders will not be mapped to a specific product’s details. - Click Save.
Clone Description Template
The Clone Template functionality allows you to copy existing templates into a different company and keep all the placeholders and static data.
To clone a Description Template:
- Go to Company Settings.
- From the Toolbox > Click Description Template.
- Select templates from the grid and click the three dots menu in the panel header > Clone template.

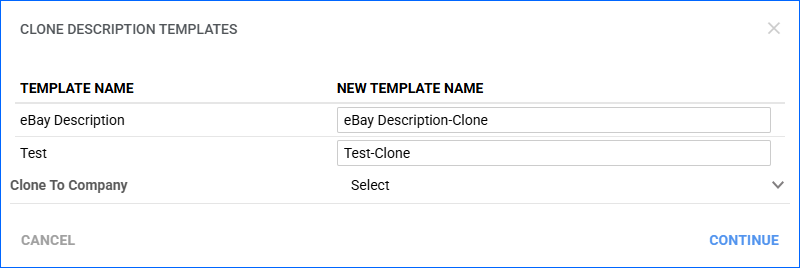
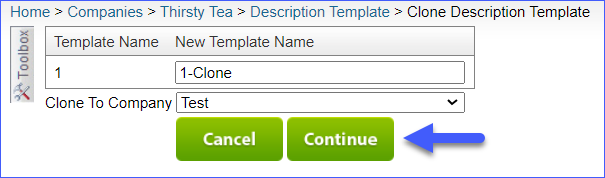
- In the pop-up modal:
- Template Name – Displays the name of the existing template you are cloning.
- New Template Name – By default, this will be [TemplateName]-Clone. You can edit this field if necessary.
- Clone to Company – Select which company the clone would be created in.
- Click Continue.
Set Description Templates
You can select a description template for your products individually or in bulk.
Individually
To set a Description Template for an eBay, Walmart Marketplace, Website, or a Bonanza product:
- Go to Catalog > Manage Catalog > Open a Product.
- From the Toolbox, depending on the channel, select one of the following:
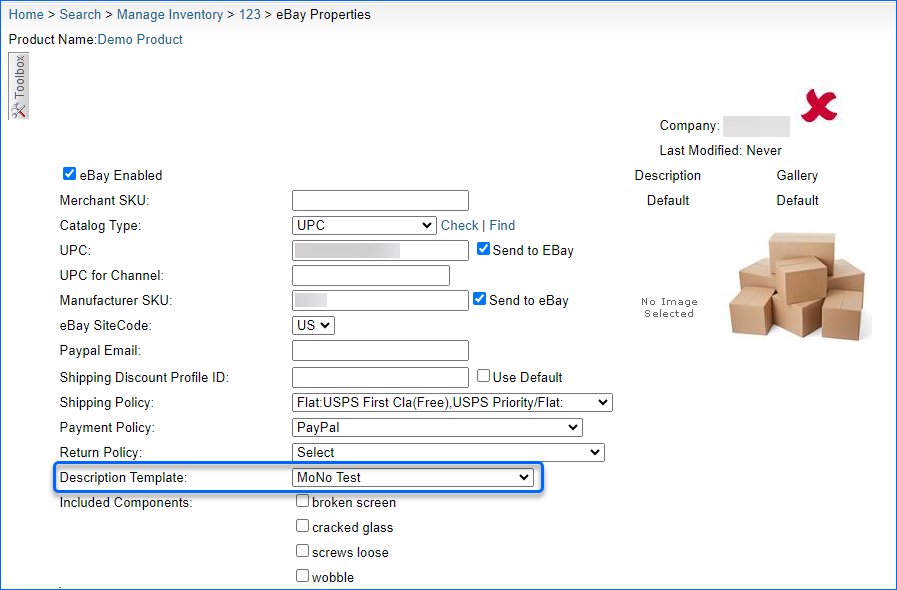
- eBay Properties.
- Walmart Marketplace.
- Website Properties.
- Bonanza.
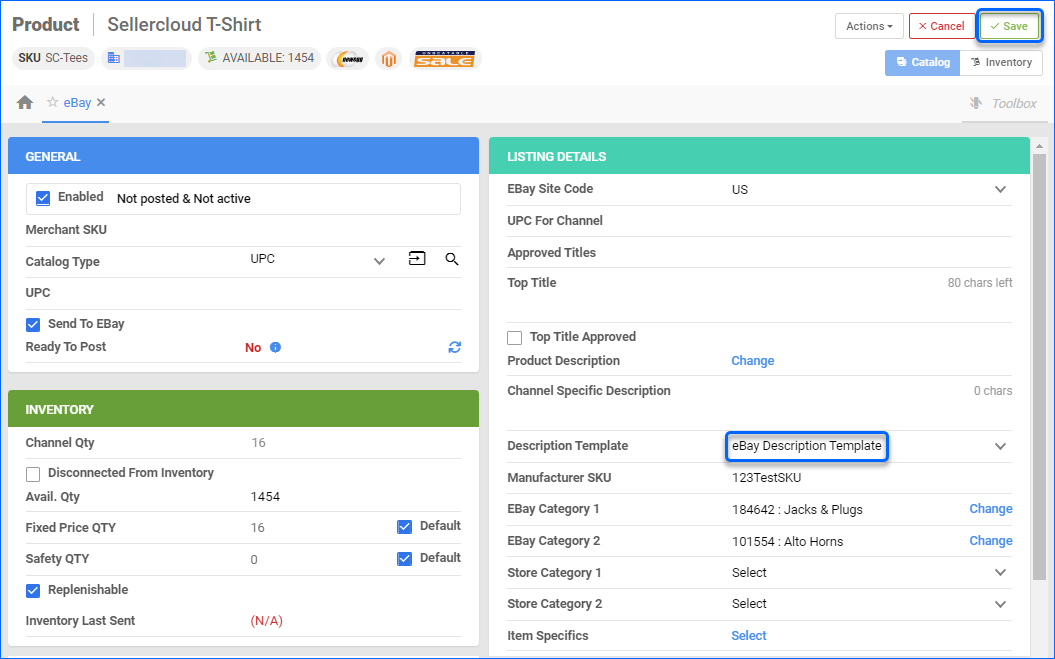
- Click Edit.
- In the Listing Details panel > Description Template > Select your template from the dropdown menu.
- Click Save.
In Bulk
To set a Description Template for multiple products, you can use our Bulk Update tool:
- Navigate to Catalog > Import Product Info.
- Select a Bulk Product Update.
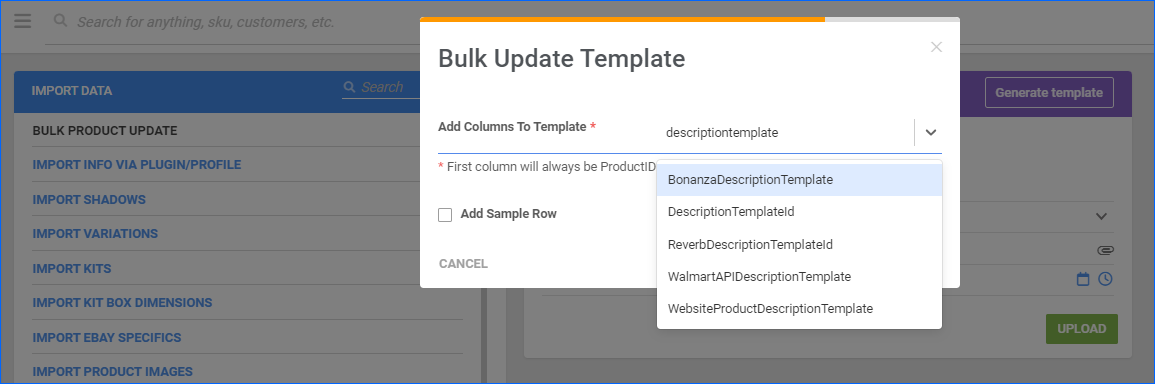
- Click on Generate Template.
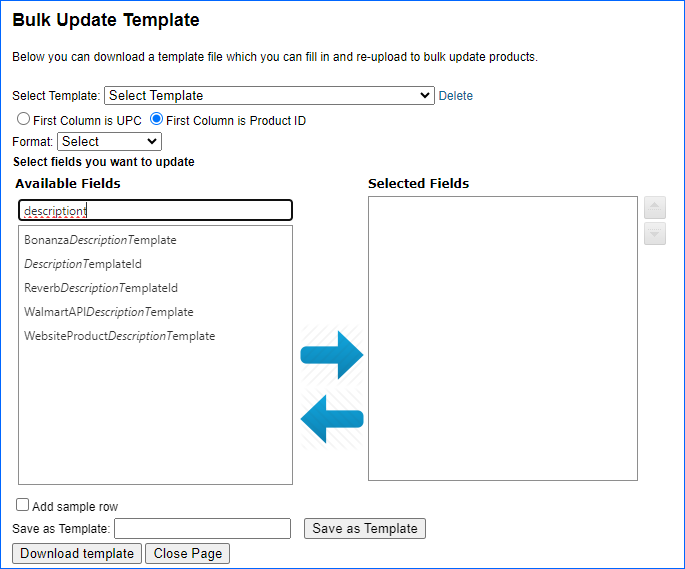
- Select Create New Template and choose your desired format.
- Select the applicable column from the dropdown menu:
- BonanzaDescriptionTemplate
- DescriptionTemplatedID (for eBay)
- ReverbDescriptionTemplateID
- WalmartAPIDescriptionTemplate (for Walmart Marketplace)
- WebsiteProductDescriptionTemplate
- Populate the newly created template and go back to Sellercoud to upload it.
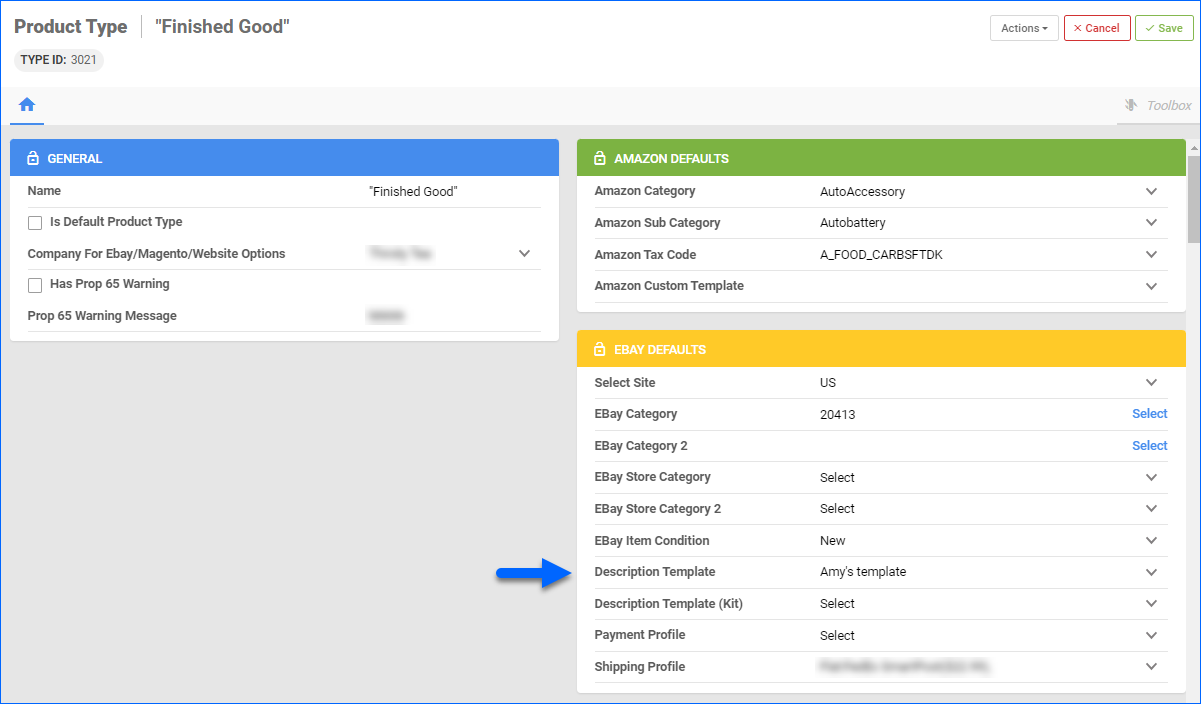
You can also set a default description template for all your eBay products under a specific Product Type:
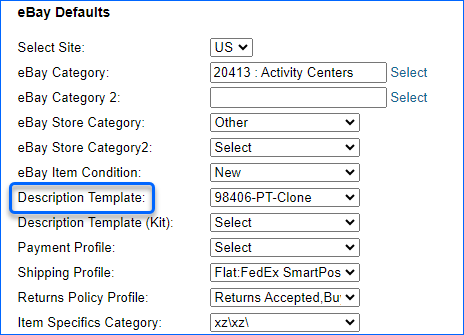
- Navigate to Catalog > Product Types > Choose a Product Type.
- Click Edit and navigate to the eBay Defaults Panel.
- Select a default Description Template and click Save.
Types of Templates
There are different types of templates available in Sellercloud. You can configure Description Templates, Master Templates, and Kit Templates.
Description Template
Description Templates enable you to make reusable templates for your products, ensuring that you maintain consistent information across your listings and platforms.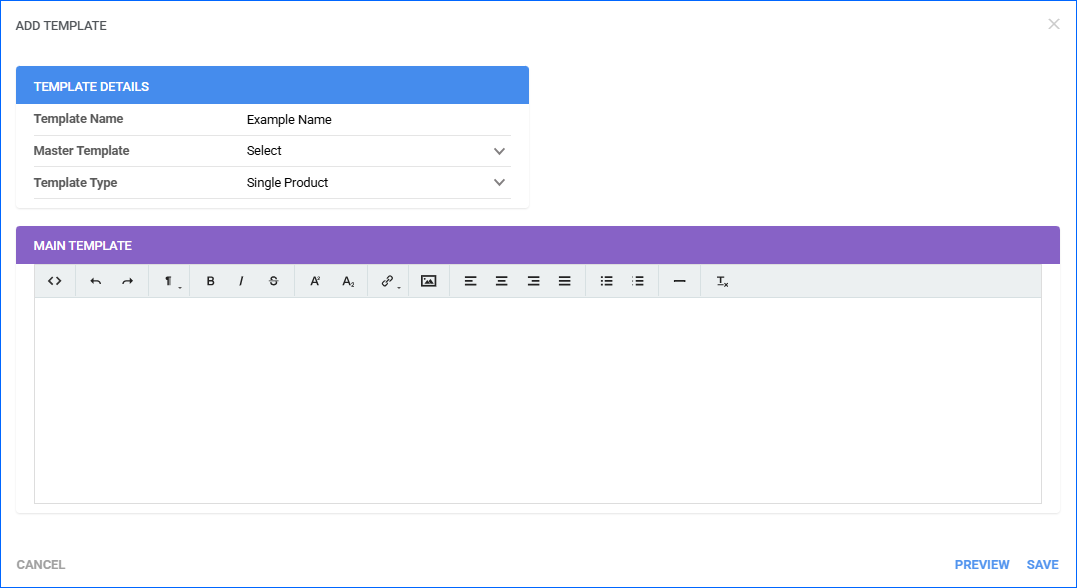
You can add placeholders when creating templates to insert dynamic data, which will change for each SKU.
Custom Columns can be used as placeholders. For example, user-defined Age Rating, can be placed in the description template as #?AGERATING?#. After you complete the fields on the individual product properties pages, you can add them to the description template by referencing the Custom Column as a placeholder.
You can also create Custom Tags for templates to use as shortcodes for static data. You can include text and images and then use the tag the same way as a placeholder.
Master Template
Master Templates act as a “parent” to regular Description Templates. For example, if the header information and company logo will be the same across your whole catalog, you can add them to one master template, while the linked regular templates can still have different sets of placeholders or custom messages.
To create a Master Template:
- Go to Settings > Companies > Manage Companies > Select a Company.
- Toolbox > Description Master Template.
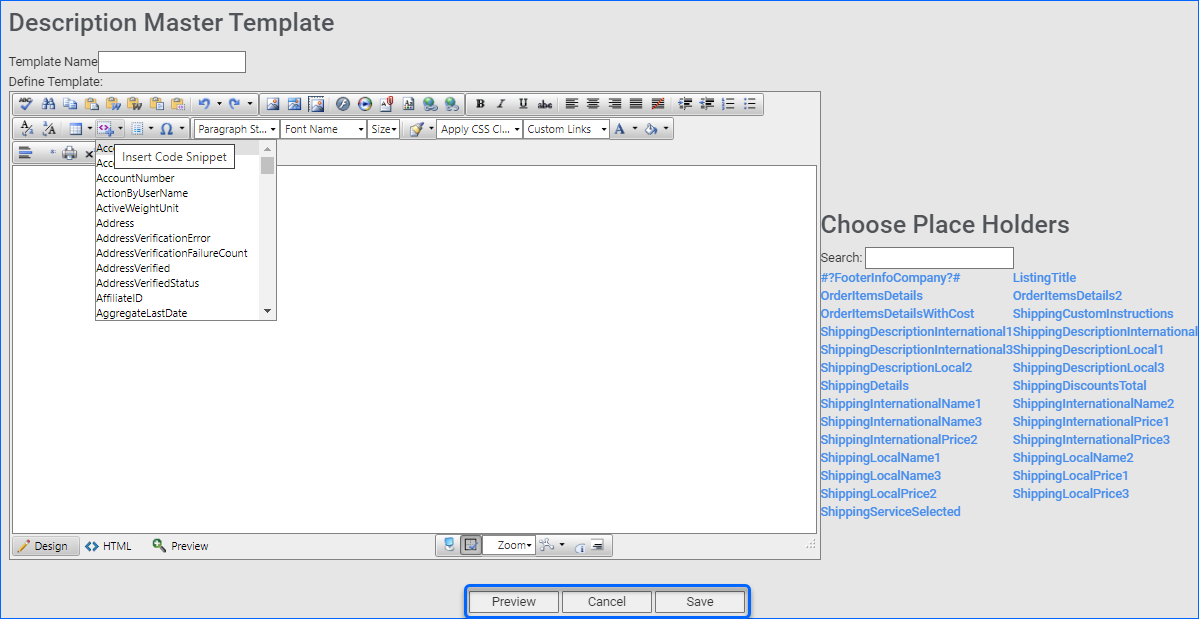
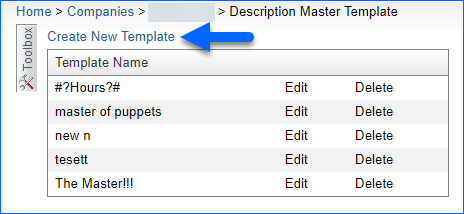
- Click the + icon to Create New Template.

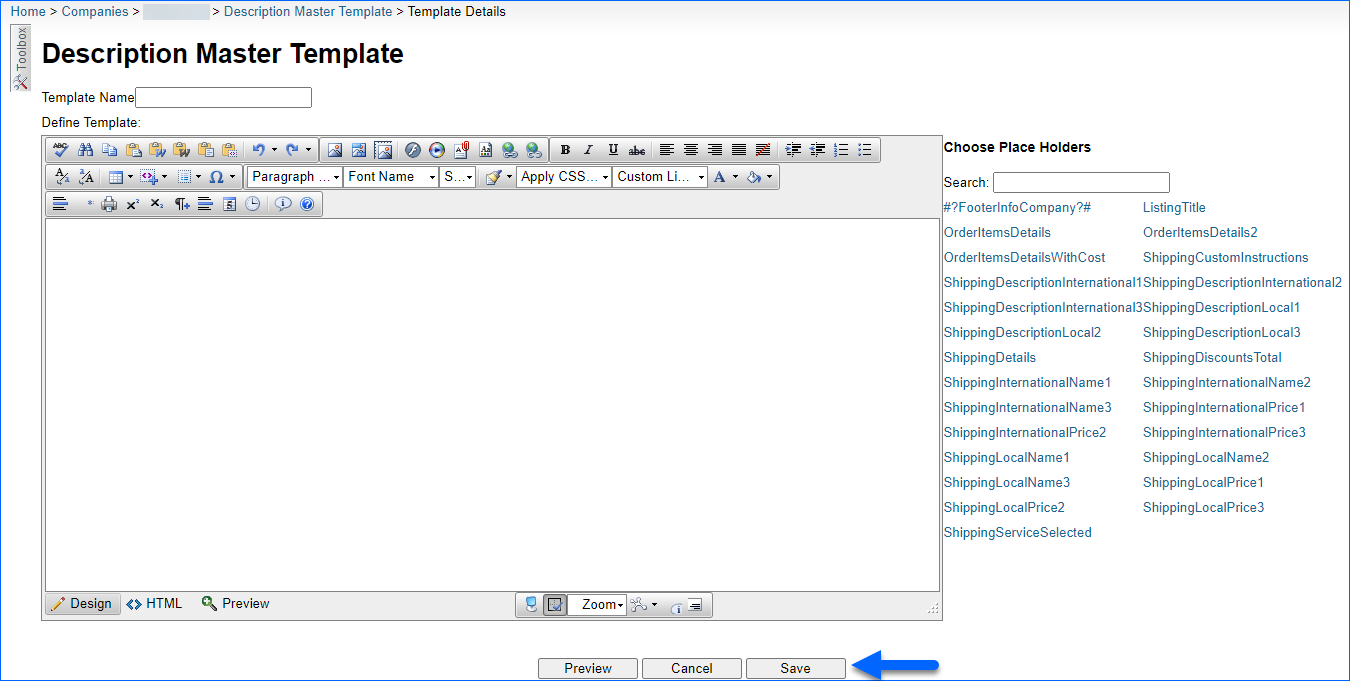
- Enter your Template Name and add your template information. You can input placeholders by searching and choosing from the list on the right or by clicking Insert Code Snippet and scrolling for the correct placeholder.
- Click Preview to preview your template.
- Click Save.
Kit Template
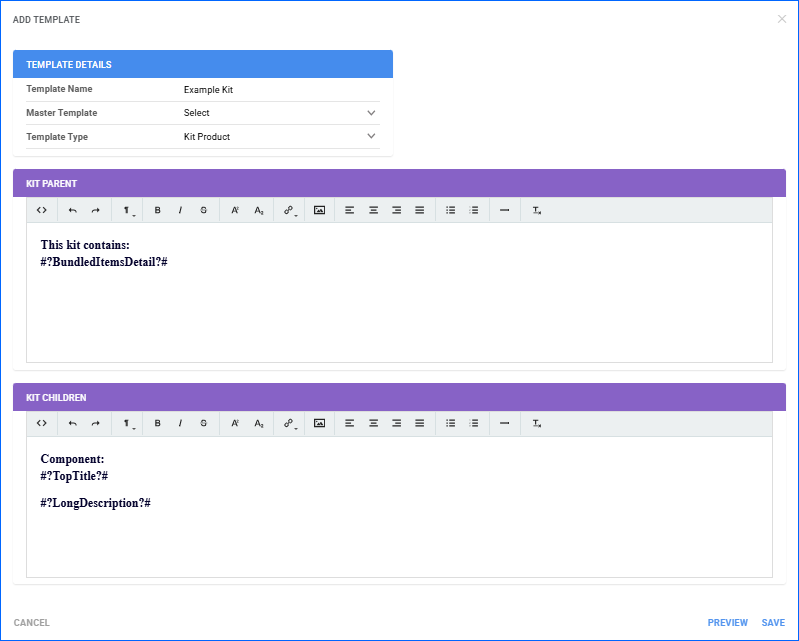
Kit Products use a different type of Description Template, in order to accommodate the fact that the parent consists of other unique SKUs. Kit templates have two separate editors:
- Kit Parent – Any placeholders in this editor will pull product details only from the Kit Parent. Adding #?BundledItemsDetail?# and#?BundledItemsDetailNotMainItem?# to this editor allows you to pull the component information you will enter in the Kit Children editor below.
- Kit Children – Placeholders in this editor will pull product details from the kit components. This allows your kit description to contain titles, images, and item specifics of the children. To ensure this information is in your product description, you must include #?BundledItemsDetail?# or #?BundledItemsDetailNotMainItem?# in the parent editor.
Placeholders and Definitions
Placeholders are variables used in description templates to automatically insert dynamic data, such as product details or pricing. Here, you can read more about the different placeholders and their definitions.
General Placeholders
We have the following placeholders available for your templates:
- #?TopTitle?# – This will be your Listing title.
- #?LongDescription?# – This will be the HTML description of the product.
- #?ItemIncludesDescription?# – This will be your item description.
- #?ProductSpecificName1?# / #?ProductSpecificValue1?# – These placeholders populate Item Specifics in your eBay template, Name and Value. Up to 35.
- #?ProductSpecifications?# – This creates a table with all Item Specifics.
- #?CSSGallery?# – Shows the main image with a gallery of thumbnails of the other images, revealing other images when hovering over thumbnails. There are some Client Settings to control thumbnail size and position.
- #?ListingSubTitle?# – Listing Subtitle.
- #?ListingShortTitle?# – Listing Short Title.
- #?BrandLogo?# – Logo image of the product’s manufacturer as defined in the manufacturer profile.
- #?BrandDescription?# – Description of the product’s manufacturer as defined in the manufacturer profile.
- #?ManufacturerURL?# – URL of the product’s manufacturer as defined in the manufacturer profile.
- #?ListPrice?# – MSRP or Regular Price.
- #?BuyItNowPrice?# – eBay Buy it now price.
- #?StartPrice?# – Product Start Price.
- #?ProductBullet?# / #?ProductBullet2?# / #?ProductBullet3?# / #?ProductBullet4?# / #?ProductBullet5?# – These are applicable for the Amazon Bullet Points 1-5.
- #?OtherAttributes1?# / #?OtherAttributes2?# / #?OtherAttributes3?# / #?OtherAttributes4?# / #?OtherAttributes5?# – Applicable for the Amazon Bullet Points 1-5.
- #?AmountDifferenceBetweenListPriceAndFixedPrice?# – Calculates the amount difference between the List Price and BuyItNowPrice.
- #?PercentageDifferenceBetweenListPriceAndFixedPrice?# – Calculates the percent difference between the List Price and BuyItNowPrice.
- #?MagentoAttribute_Name_attributeName?# / #?MagentoAttribute_attributeName?# – Replaces attributeName with attribute code name in Magento Admin to place the front name in templates. For example, #? MagentoAttribute_Name_color?# will place Color in the template. Replace attributeName with attribute code name in Magento admin to pull value. For instance, #?MagentoAttribute_color?# will place Blue in the template.
- #?PartsCompatibilityGrid?# – Display the part compatibility chart for eBay Motors items. Additionally, the following tags can be defined in CSS classes to beautify the HTML.
- #?EBayItemConditionName?# – eBay condition name selected on the eBay Properties Properties page.
- #?ProductConditionInHouseName?# – Product Condition name used internally in Sellercloud.
- #?Variation1Price?# – Pulls price for variation of Matrix parent. Up to 19.
- #?Variation1FixedPriceQty?# – Pulls quantity for variation of Matrix parent. Up to 19.
- #?Variation1Dimension?# / #?Variation1DimensionValue?# – Pulls Dimension Value for variation of Matrix parent. Up to 19.
- #?RelatedProducItemID1?# – Pulls the SKU of the first related item. Similarly, you can change to RelatedProducItemID2 to pull information from the second related product.
Image-Related Placeholders
- #?DescriptionDefaultImage?# – The main description image grabs the entire image HTML tag.
- #?DescriptionDefaultImageURL?# or #?ImageFileMedium?# – Shows the URL of the main image of the product.
- #?OtherImage01?# – Shows additional images of the product. For example, you could show the condition of the product. Up to 20.
- #?SupplementalImage01?# / #?SupplementalImage02?# – Creates a full image tag of the first/second product image marked supplemental.
- #?SupplementalImageURL01?# – URL of the image. Corresponds to the count of images, not their numbers. If your images are numbered as 1,5,9, the placeholders should be #?SupplementalImageURL01?#, #?SupplementalImageURL02?#, #?SupplementalImageURL03?#.
- #?SupplementalImageResized01?# / #?ImageFileMediumResized?# – Resized main product image, with maximum dimensions defined in the eBay Client Settings. If the image is rectangular with a width greater than the height, it will set the width to the maximum dimension defined in the Client Settings and then calculate the height so the image stays to scale.
- #?HostedImageURLOnlyDescription?# – URL of the main image if you use third-party hosting, like Flickr.
- #?HostedImageURL01?# – URL of the supplemental image if using third-party hosting.
Kit-Related Placeholders
- #?KitIncludesGallery?# – List of images of all child items.
- #?KitIncludesGalleryNotMainItem?# – List of images of all child items (excluding the main item).
- #?KitIncludesNotMainItem?# – Product names of all child products (excluding the main item).
- #?BundledItemsDetail?# – Bunde Items description.
- #?BundledItemsDetailNotMainItem?# – References tags in the bottom editor, excluding the main item.
- #?KitMainItemIncludes?# – Main Kit Item details.
- #?KitMainItemDescription?# – Description of the main item in the kit.
- #?KitMainItemCustomProductSpecific?# – Pulls the custom product specifics of the main item in the kit.
- #?KitIncludesDescriptionImage01?# – Pulls the description image. Up to 40.
- #?KitIncludesShortTitle01?# – Pulls the product’s Short Title. Up to 40.
- #?KitIncludesItemQtyCurrent?# – Displays the kit components with their quantity in the kit.
Custom Tags
The Custom Tags functionality allows you to create your own placeholders for eBay Description Templates.
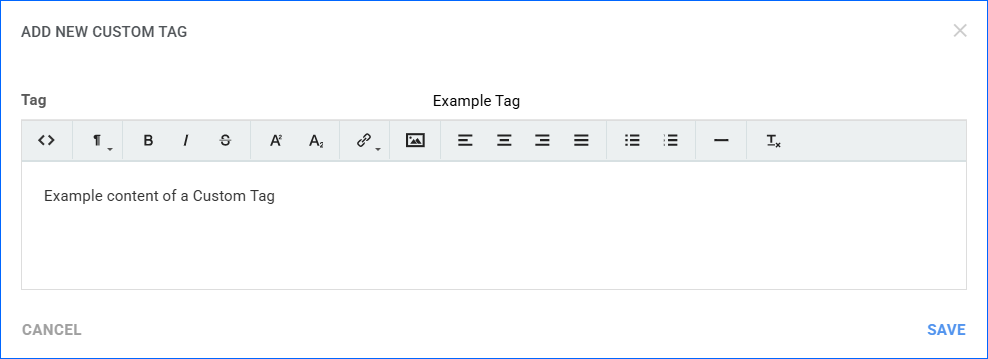
To create a new Custom Tag:
- Go to Company Settings.
- From the Toolbox > Open eBay Custom Tags.
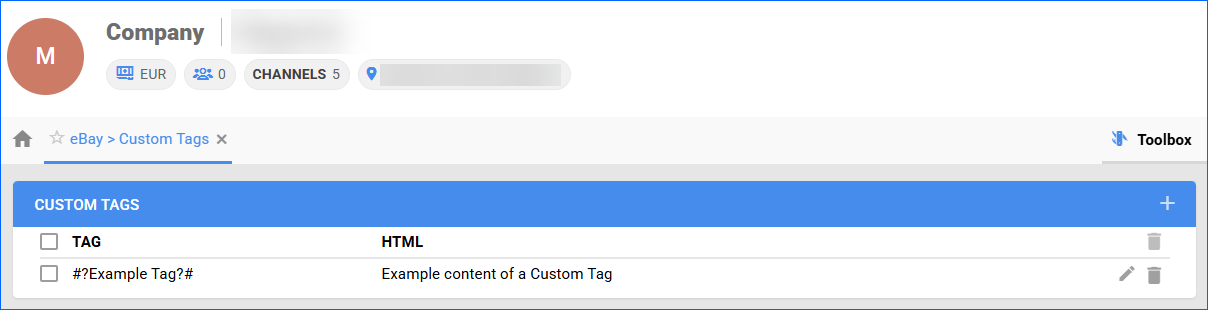
- Click the + icon and fill in the fields. Click Save.
The custom tags let you prepare static data, including company information and images, that is easily accessible as a short placeholder.
Overview
Description Templates allow you to create multiple reusable templates for all your selling needs and ensure that you provide consistent information across your listings. Description Templates can consist of product descriptions, listing titles, images, shipping details, and more. You can create ready-to-use templates for different types of products or for different seasons to showcase seasonal information.
Templates work by sending HTML-formatted documents with product information and company branding. Description templates are available for eBay, Walmart Marketplace, Shopify, Bonanza, and Reverb.
Configure Description Templates
You can easily create, edit, and delete templates, as well as view important details such as the template name, type, creation date, last modified date, and the user who modified it.
Create Description Templates
To Create a description template, navigate to:
- Settings > Select a Company.
- Toolbox > Description Template.
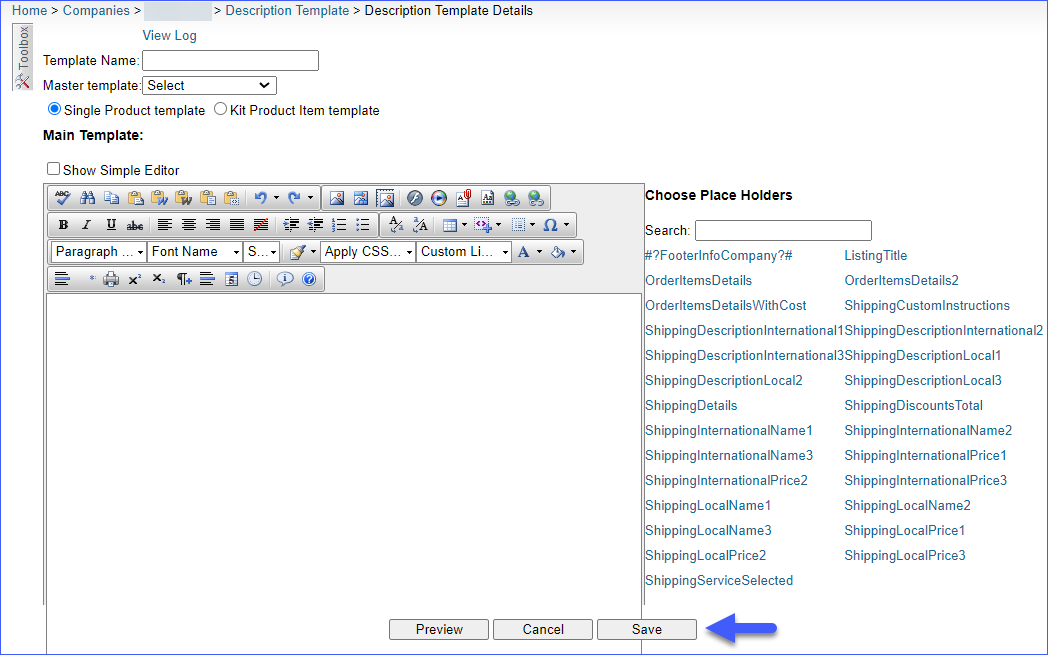
- Click on Create New Template.

- Enter the following details:
- Template name
- Optional: Select Master Template from the drop-down menu to assign a master template. Read more about these templates below.
- Select Single Product Template or Kit Product Item Template. If you choose the Kit Product Item Template, you will have three editors to work with.
- Optional: Check/uncheck Show Simple Editor to view placeholders.
- You can input placeholders by searching and choosing from the list on the right or by clicking Insert Code Snippet and scrolling to the correct placeholder. You can also choose to write your text without placeholders.
- Enter your Static Data or Dynamic Data. Static Data is content that does not change between products. For example, a company logo or contact information. Dynamic Data is content that is unique to each product.
- Click Preview to preview your template.
- Click Save.
Clone Description Templates
You can clone similar description templates to your company. To copy an existing template to your company, navigate to:
- Settings > Select a Company > Toolbox > Description Template.
- Select a Description Template > Action Menu > Clone Template > Go.
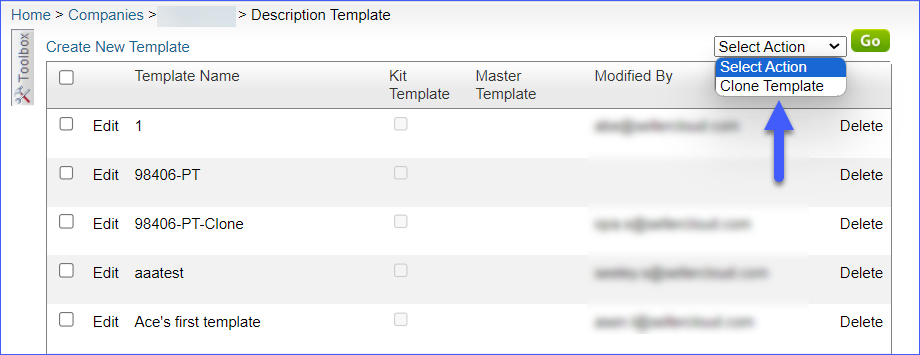
- Enter the New Template Name and select a Company from the dropdown menu.
- Click Continue.
Manage Description Templates
You can select a description template for your product/s individually or in bulk.
Individually
Let’s say you want to set a default template for an eBay, Walmart Marketplace, Website, or a Bonanza product.
- Go to Inventory > Open a product.
- From the Toolbox, depending on the channel, select one of the following:
- eBay Properties for eBay
- Walmart Marketplace for Walmart
- Website Properties for Shopify
- Bonanza for Bonanza
Bonanza reuses eBay’s templates. Client Setting Reuse eBay Description template for Bonanza must be enabled for this workflow.
- Click Edit > Listing Details > Description Template > Select your template from the dropdown menu.
- Click Save.
In Bulk
To set a default description template for multiple products, you can use our Bulk Update Products Tool.
- Navigate to Inventory > Bulk Product Update.
- Click on Get Template File.
- Select your desired format and select the applicable column from the dropdown menu:
- BonanzaDescriptionTemplate
- DescriptionTemplatedID (for eBay)
- ReverbDescriptionTemplateID
- WalmartAPIDescriptionTemplate
- WebsiteProductDescriptionTemplate
- Click Download Template.
- Populate the newly created template and go back to Sellercoud to upload it.
You can also set a default description template for all your eBay products under a specific Product Type.
- Navigate to Settings > Product Types > Choose a Product Type.
- Navigate to the eBay Default Panel, and select a default description template.
- Scroll down and click Save.
Types of Templates
There are different types of templates available in Sellercloud. You can choose between Description Templates, Master Templates, and Kit Templates.
Description Template
Description Templates enable you to make reusable templates for your products, ensuring that you maintain consistent information across all your listings.
You can add placeholders when creating templates. Common placeholders are available on the right side of the description template editor, but you can access a full list of placeholders from the Insert Code Snippet dropdown on the template editor’s menu bar.
Custom Columns can be used as placeholders. For example, user-defined Age Rating, can be placed in the description template as #?AGERATING?#. The actual columns can be added by the System Administrator or Sellercloud Support and set up in the Custom Columns page under the Setting tab. After you complete the fields on the individual product properties pages, you can add them to the description template by referencing the Custom Column as a placeholder.
You can create custom tags in templates for referencing placeholders. They’re useful for adding static information, like a logo, to multiple templates. Simply insert the custom tag as a placeholder in the template, and it will display the logo across all templates.
Master Template
When creating Description Templates, some information may overlap between products. For example, your header and footer information may all be identical. This is when a Master Template comes in handy. It acts as a “parent” to the description template.
To create a Master Template, navigate to:
- Settings > Select a Company.
- Toolbox > Description Master Template.
- Click on Create New Template.
- Enter your Template Name and add your template information. You can input placeholders by searching and choosing from the list on the right or by clicking Insert Code Snippet and scrolling for the correct placeholder.
- Click Preview to preview your template.
- Click Save.
Kit Template
Kits use a different type of Description Template. Kit templates have three HTML editors:
- The top HTML editor is used to hold the main HTML information and has placeholders that refer to the bottom editors (#?BundledItemsDetail?# or #?BundledItemsDetailNotMainItem?#). You can set these placeholders where you want to have that component information appear. All formatting and branding are configured in the top template.
- The middle HTML editor is used to style the kit component squares/image gallery. It is referenced in the top editor by the tag #?KitIncludesGallery?#.
- The bottom HTML editor is called the Kit Item Template. In this template, you enter placeholders that refer to individual products, like #?TopTitle?# and #?LongDescription?#. The placeholders entered here must be referenced in the top HTML editor by the placeholder #?BundledItemsDetail?# or #?BundledItemsDetailNotMainItem?#.
Placeholders and Definitions
Here, you can read more about the different placeholders and their definitions.
Placeholders
We have the following placeholders available for your templates:
- #?TopTitle?# – This will be your Listing title.
- #?LongDescription?# – This will be the HTML description of the product.
- #?ItemIncludesDescription?# – This will be your item description.
- #?ProductSpecificName1?# / #?ProductSpecificValue1?# – These placeholders populate Item Specifics in your eBay template, Name and Value. Up to 35.
- #?ProductSpecifications?# – This one creates a table with all Item Specifics.
- #?CSSGallery?# – Shows the main image with a gallery of thumbnails of the other images, revealing other images when hovering over thumbnails. There are some Client Settings to control thumbnail size and position. Do not add to description templates intended for eBay Listings.
- #?ListingSubTitle?# – Listing Subtitle.
- #?ListingShortTitle?# – Listing Short Title.
- #?BrandLogo?# – Logo image of the product’s manufacturer as defined in the manufacturer profile.
- #?BrandDescription?# – Description of the product’s manufacturer as defined in the manufacturer profile.
- #?ManufacturerURL?# – URL of the product’s manufacturer as defined in the manufacturer profile.
- #?ListPrice?# – MSRP or Regular Price.
- #?BuyItNowPrice?# – eBay Byu it now price.
- #?StartPrice?# – Product Start Price.
- #?ProductBullet?# / #?ProductBullet2?# / #?ProductBullet3?# / #?ProductBullet4?# / #?ProductBullet5?# – These are applicable for the Amazon Bullet Points 1-5.
- #?OtherAttributes1?# / #?OtherAttributes2?# / #?OtherAttributes3?# / #?OtherAttributes4?# / #?OtherAttributes5?# – Applicable for the Amazon Bullet Points 1-5.
- #?AmountDifferenceBetweenListPriceAndFixedPrice?# – Calculates the amount difference between the List Price and BuyItNowPrice.
- #?PercentageDifferenceBetweenListPriceAndFixedPrice?# – Calculates the percent difference between the List Price and BuyItNowPrice.
- #?MagentoAttribute_Name_attributeName?# / #?MagentoAttribute_attributeName?# – Replaces attributeName with attribute code name in Magento Admin to place the front name in templates. For example, #? MagentoAttribute_Name_color?# will place Color in the template. Replace attributeName with attribute code name in Magento admin to pull value. For instance, #?MagentoAttribute_color?# will place Blue in the template.
- #?PartsCompatibilityGrid?# – Display the part compatibility chart for eBay Motors items. Additionally, the following tags can be defined in CSS classes to beautify the HTML.
- #?EBayItemConditionName?# – eBay condition name selected on the eBay Properties Properties page.
- #?ProductConditionInHouseName?# – Product Condition name used internally in Sellercloud.
- #?Variation1Price?# – Pulls price for variation of Matrix parent. Up to 19.
- #?Variation1FixedPriceQty?# – Pulls quantity for variation of Matrix parent. Up to 19.
- #?Variation1Dimension?# / #?Variation1DimensionValue?# – Pulls Dimension Value for variation of Matrix parent. Up to 19.
- #?RelatedProducItemID1?# – Pulls the SKU of the first related item. Similarly, you can change to RelatedProducItemID2 to pull information from the second related product.
Image-Related Placeholders
- #?DescriptionDefaultImage?# – The main description image grabs the entire image HTML tag.
- #?DescriptionDefaultImageURL?# or #?ImageFileMedium?# – Shows the URL of the main image of the product.
- #?OtherImage01?# – Shows additional images of the product. For example, you could show the condition of the product. Up to 20.
- #?SupplementalImage01?# / #?SupplementalImage02?# – Creates a full image tag of the first/second product image marked supplemental.
- #?SupplementalImageURL01?# – URL of the image. Corresponds to the count of images, not their numbers. If your images are numbered as 1,5,9, the placeholders should be #?SupplementalImageURL01?#, #?SupplementalImageURL02?#, #?SupplementalImageURL03?#.
- #?SupplementalImageResized01?# / #?ImageFileMediumResized?# – Resized main product image, with maximum dimensions defined in the eBay Client Settings. If the image is rectangular with a width greater than the height, it will set the width to the maximum dimension defined in the Client Settings and then calculate the height so the image stays to scale.
- #?HostedImageURLOnlyDescription?# – URL of the main image if you’re using third-party hosting, like Flickr.
- #?HostedImageURL01?# – URL of the supplemental image if using third-party hosting.
Kit-Related Placeholders
- #?KitIncludesGallery?# – List of images of all child items.
- #?KitIncludesGalleryNotMainItem?# – List of images of all child items (excluding the main item).
- #?KitIncludesNotMainItem?# – Product names of all child products (excluding the main item).
- #?BundledItemsDetail?# – Bunde Items description.
- #?BundledItemsDetailNotMainItem?# – References tags in the bottom editor, excluding the main item.
- #?KitMainItemIncludes?# – Main Kit Item details.
- #?KitMainItemDescription?# – Description of the main item in the kit.
- #?KitMainItemCustomProductSpecific?# – Pulls the custom product specifics of the main item in the kit.
- #?KitIncludesDescriptionImage01?# – Pulls the description image. Up to 40.
- #?KitIncludesShortTitle01?# – Pulls the product’s Short Title. Up to 40.
- #?KitIncludesItemQtyCurrent?# – Displays the kit components with their quantity in the kit.