Overview
Reverb is an online marketplace specializing in musical instruments and gear. It provides a platform for new and used equipment, fostering a community of musicians globally.
Integrating Reverb into your Sellercloud account allows you to seamlessly import orders, upload tracking information, post products, and ensure your Reverb store is always up-to-date with the latest inventory data.
Integrate with Reverb
Before you can integrate Reverb with Sellercloud, you must:
- Create a Reverb Seller account.
- Obtain an API Token by going to Menu > Settings > My Profile > API & Integrations > Generate New Token. Then, check all the boxes and copy the token. You will need it when setting up the integration in Sellercloud.
Learn more about how to obtain your Personal Access Token.
Integrate with Reverb
To integrate Reverb with Sellercloud, navigate to:
- Settings > Manage Companies > Select a company.
- Go to the Toolbox > Reverb > General Settings.
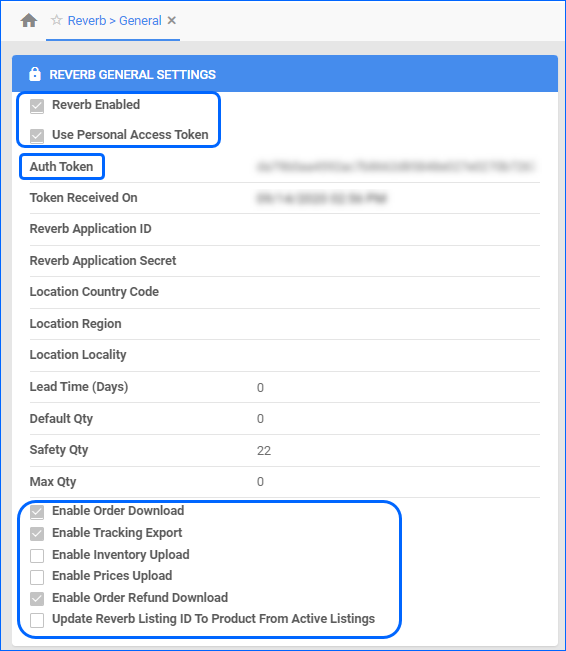
- Click Edit and enable the Reverb Enabled and Use Personal Access Token boxes.
- Enter your token in the Auth Token field and click Save.
- Access the Actions menu > Verify API Key to test the connection.
- (Optional) From the Actions menu, select Download Shipping Profiles. This will bring up any templates configured on Reverb, which you can then add to your products in Sellercloud.
- When you are ready to go live with the channel, check the Enable Order Download, Enable Tracking Export, and Enable Inventory Upload boxes.
Reverb Settings Explained
Sellercloud’s integration with Reverb enables the following settings:
| SETTING | DESCRIPTION |
| REVERB GENERAL SETTINGS | |
| Reverb Enabled | Enable Reverb for the selected company and allow Sellercloud to automatically send and receive updates to and from the channel. |
| Use Personal Access Token | Check this box to input token information manually. |
| Auth Token | Reverb Authentication Token. |
| Token Received On | The date and time when the token was received. (Only applicable with automatic authentication.) |
| Reverb Application ID | The client ID. (Only applicable with automatic authentication.) |
| Reverb Application Secret | The client secret key. (Only applicable with automatic authentication.) |
| Safety Qty | A buffer between the amount of inventory you have and the amount Sellercloud is sending to the channel to prevent overselling of items in high demand. This will be the Safety Quantity used for your products where Use Default is checked on their Reverb properties. |
| Max Qty | Limits the inventory available for Reverb. |
| Enable Order Download | Enable automatic order download from Reverb to your Sellercloud account. |
| Enable Tracking Export | Enable Sellercloud to upload fulfillment information for orders placed on Reverb automatically. |
| Enable Inventory Upload | Enable Sellercloud to send automatic inventory updates to Reverb regularly. Only enable this setting once you are ready to have Sellercloud control your inventory on Reverb.
Products that are not Reverb Enabled will be updated with a quantity of zero. To Bulk Update them, use the column header ReberbEnabled and set it to True.
|
| Enable Prices Upload | Enable Sellercloud to send automatic price updates for Reverb Enabled products to Reverb regularly. |
| Enable Order Refund Download | Enable Sellercloud to download RMAs from Reverb. |
| Update Reverb Listing ID To Product From Active Listings | Enable this setting to update the listing ID of a product when we receive the Active Listings Report. |