Overview
BigCommerce is a popular shopping cart website platform where you can build a store and sell items online. Sellercloud’s API integration with BigCommerce makes it easy to list items on your BigCommerce website, whether for a simple inventory listing or a complex listing with multiple variations, as well as to manage sales orders.
Integrate BigCommerce
To integrate BigCommerce with Sellercloud, you must obtain BigCommerce API Credentials and enter them into your Sellercloud account.
Create API Credentials
First, follow these steps to create BigCommerce API credentials:
- Sign in to your BigCommerce account.
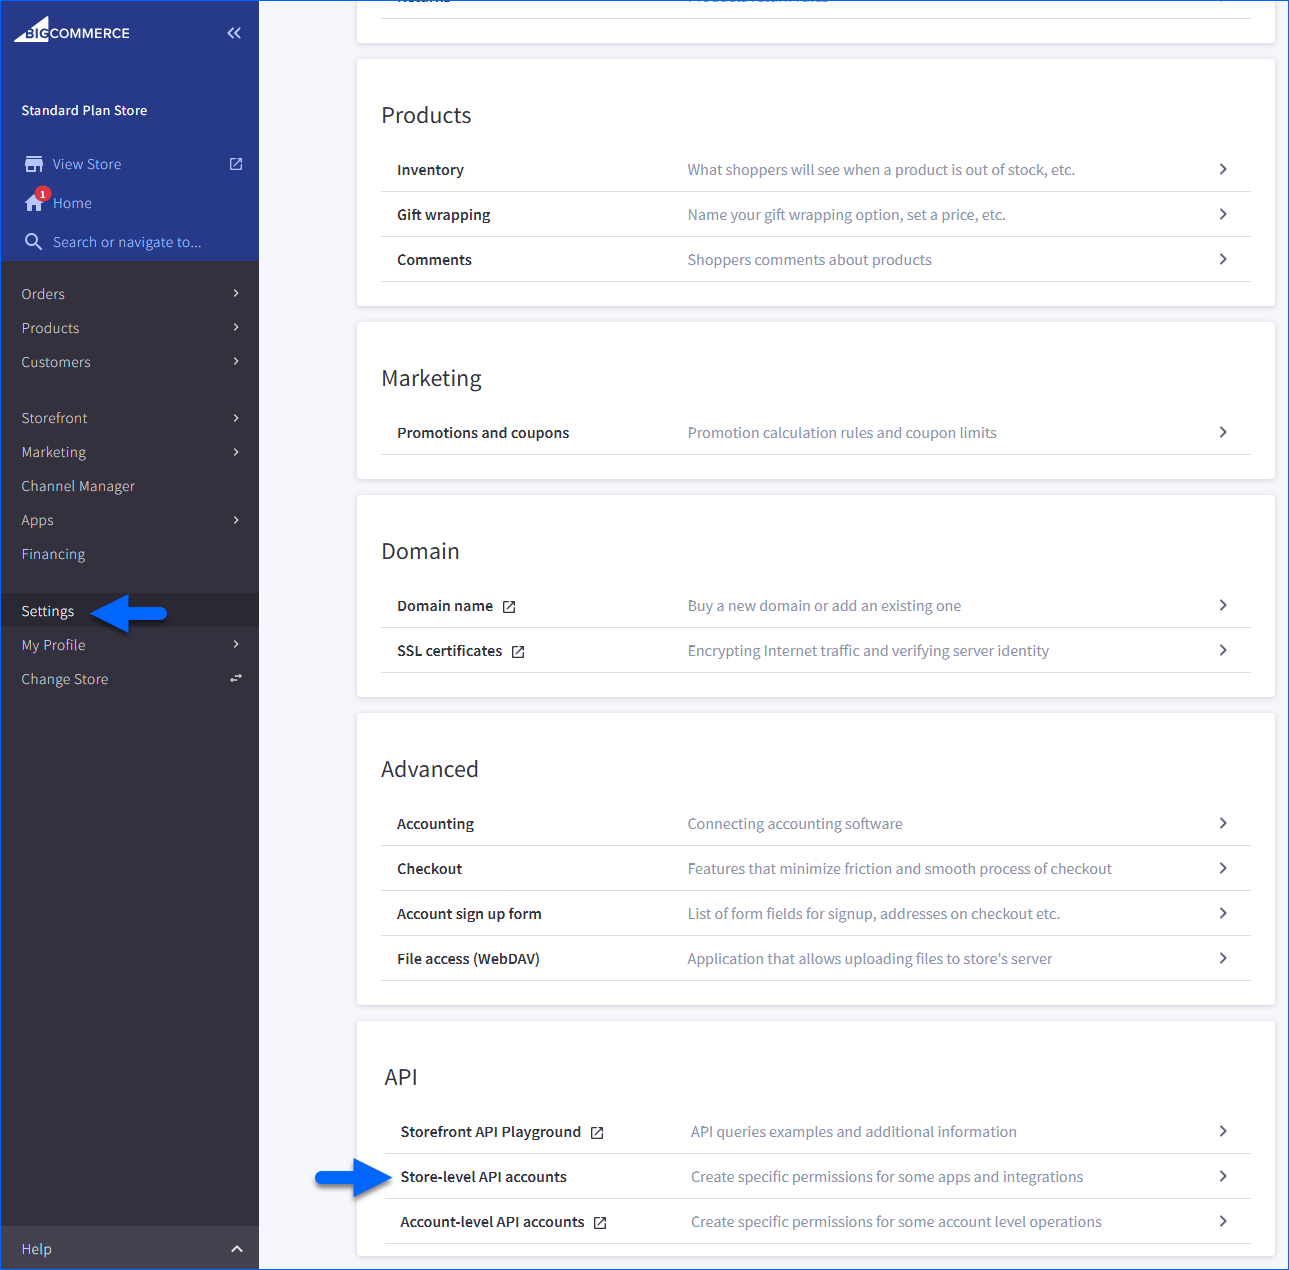
- Click Settings on the left.
- Scroll down to the API section and click Store-level API accounts.
- Click Create account.
- Leave the Token type on V2/V3 API token.
- Type your Name. You will generate the API path as you type the name.
- Under OAuth scopes, configure the following permissions:
- Orders – modify
- Order Transactions – modify
- Products – modify
- Information & Settings – read-only or modify

- Click Save.
- The API account is created, and the credentials appear onscreen. You also get the credentials saved to a text file that automatically downloads to your computer. This file includes all the information you need for the setup. Click Done.

- Note the location where you save the text file, as you will need to input the values it contains into Sellercloud next.

Enter API Credentials
After generating your BigCommerce API credentials, follow the steps below:
- In Sellercloud, navigate to your Company Settings.
- Click Toolbox and select Website > General.
- Click Edit.
- Set the Store Type to Custom.
- Set the Store Plugin to BigCommerce V3.
 If you do not see this option, open a ticket with Sellercloud Support to request that the BigCommerce V3 plugin be installed on your server.
 - Click Save.
- Go to the Toolbox and select Website > Sellercloud Plug-In Website > Cart General.

- Populate these settings with their corresponding BigCommerce information from the text file:
- Website URL: Enter [your store name].mybigcommerce.com
- OAuth Store Hash: Enter the hash from the API path’s URL, from the txt file. The segment in bold from this example: https://api.bigcommerce.com/stores/cty2urxp9w/v3/
- OAuth Client ID: Enter the Client ID from the text file.
- OAuth Access Token: Enter the Access Token from the text file.
- OAuth Secret Token: Enter the Client Secret from the text file.

- Click the three dots icon in the Options section and select Install Webhook.
- Click the three dots icon again and select Test Settings.
The Test Settings action must be executed to initialize the connection. If you don’t complete this step, your BigCommerce orders may not import as intended. - Configure the remaining settings based on your preference.
| SETTING | DESCRIPTION |
| Enable List Price | Enable sending the List Price (MSRP) with a strike-through. |
| Enable Brand Creation | When listing a product on BigCommerce, you must set a brand. If a brand is not in BigCommerce, this setting will create it there when you post. |
| Enable Product Sort Order Update | Sends matrix variations as they are ordered on the matrix page. |
| Enable Custom Column Update For Products | Custom columns will be sent to the “Other Details” section when posting a product. |
| Enable Condition Update For Products | Sends the condition to the website when posting a product. |
| Enable Matrix Option Image | Checks if an N-Matrix image is available. If not, or the option is not enabled, a child product’s main description image will be used. |
| Query Order Payment Status | Checks orders in Sellercloud marked as No Payment or Authorized and queries the order’s status from the website. |
Orders and Refunds
When an order from BigCommerce comes in, the Customer Email field on the order details page in Sellercloud will be populated from their Sellercloud customer profile. If that email is blank, the system will enter BIGCOMMERCE-[ORDERID]@sellercloud.com.
Currently, you can’t send refunds from Sellercloud to BigCommerce. You must issue a refund directly from the payment processor. Then you can issue the refund in Sellercloud locally in order to keep the order’s profit and loss information correct.
Learn more about how to manage your BigCommerce orders here.