Overview
Vendor Central is Amazon’s program for qualified vendors who sell products directly to Amazon. Instead of selling to customers yourself, you sell inventory to Amazon as a wholesale supplier. Amazon then manages pricing, fulfillment, shipping to customers, and customer service.
This article explains the shipping process in Sellercloud for Vendor Central orders, including routing, carton labels, shipping labels, tracking, and invoicing.
Prerequisites
Before you can utilize this workflow, complete the following prerequisites.
Vendor Central
First, obtain an Address Number from Vendor Central for each Sellercloud warehouse you will be shipping from:
- Log in to Vendor Central and navigate to Settings > Warehouse Settings.
- For each warehouse address, click Edit.
- Either enter an Address Number or leave the field blank and save the page. If you save the page without entering a value for the Address Number, Amazon will generate one for you. (The first time you click “Edit” on the warehouse, Amazon will generate the Address Number, but you must save the page to be able to use it.)
- Copy the Address Number/s.
Next, enter an EDI contact in Vendor Central:
- Click Settings > Contacts.
- Add an EDI Contact for each vendor code that you will be integrating with Sellercloud.
Sellercloud Support
Open a ticket with Sellercloud Support to enable the following App Settings:
- VendorCentralCheckQtyDoNotSplitOrder
- EnableVendorCentralShippingAgenda
General Settings
Make sure the Vendor Central General Setting page is configured in alignment with your workflow:
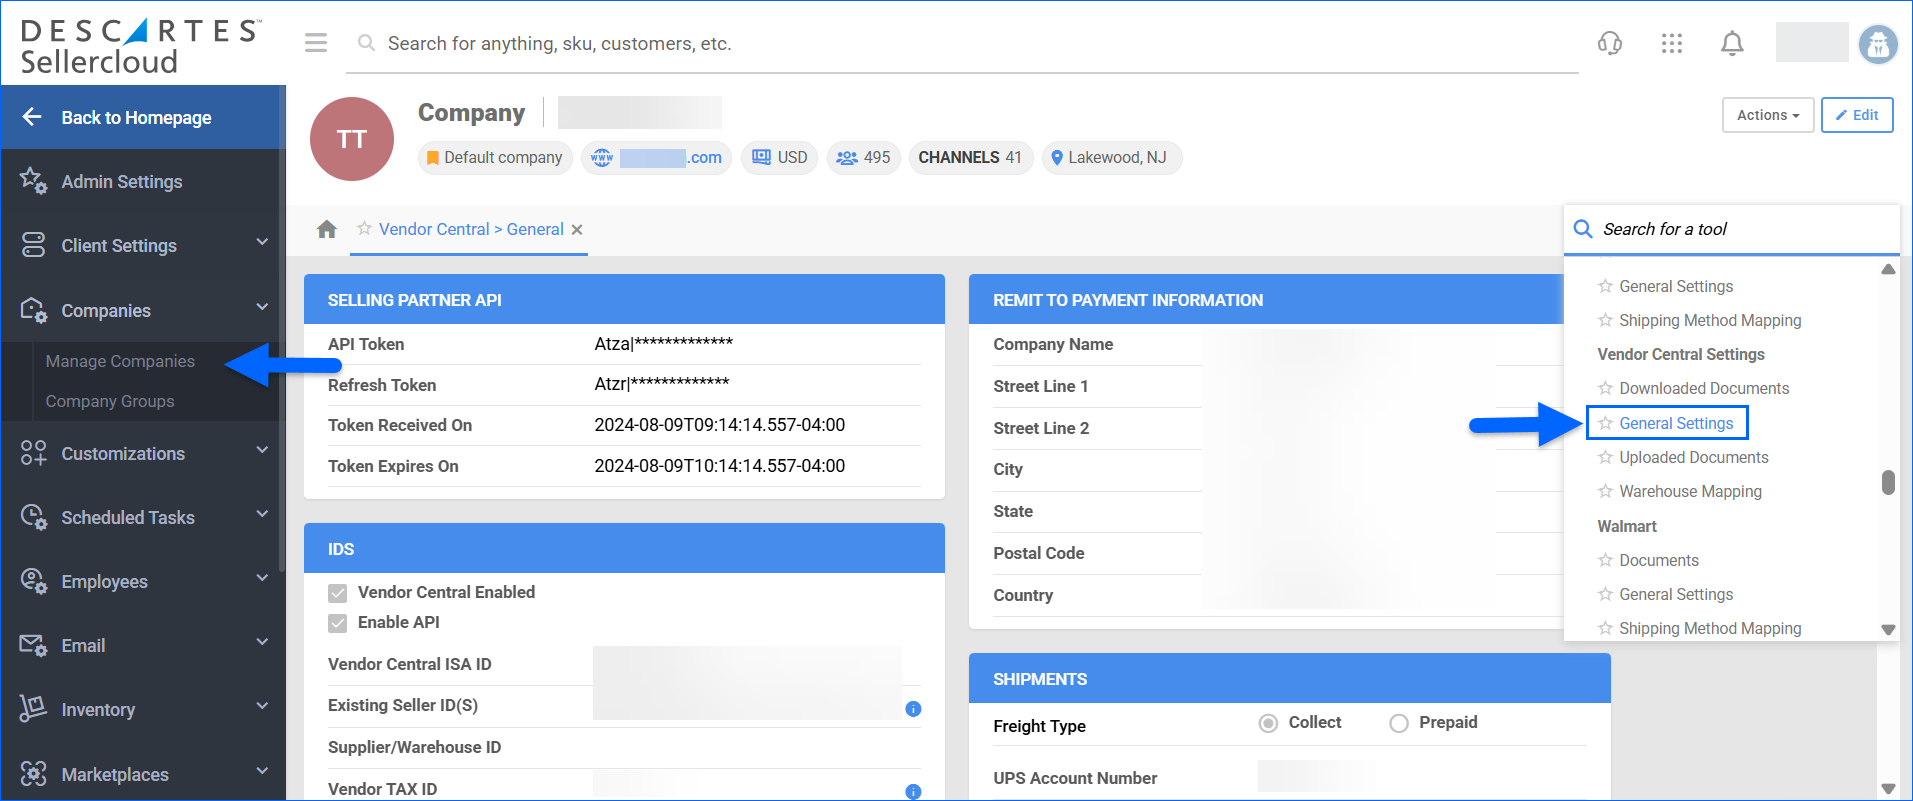
- Navigate to Settings > Companies > Manage Companies and select a company.
- From the Toolbox, select Vendor Central Settings > General Settings.
- In the Shipments panel:
-
- Choose a Freight Type – either Prepaid or Collect. For Collect shipping, you will also need to enter Amazon’s UPS and FedEx account numbers, as well as the UPS Postal Code of the third-party bill-to. Regardless of how you are shipping, you will need to have your carrier API credentials (for UPS and FedEx) set up in Sellercloud. For more details, click here.
- Optionally, select the Default Warehouse For Shipments.

-
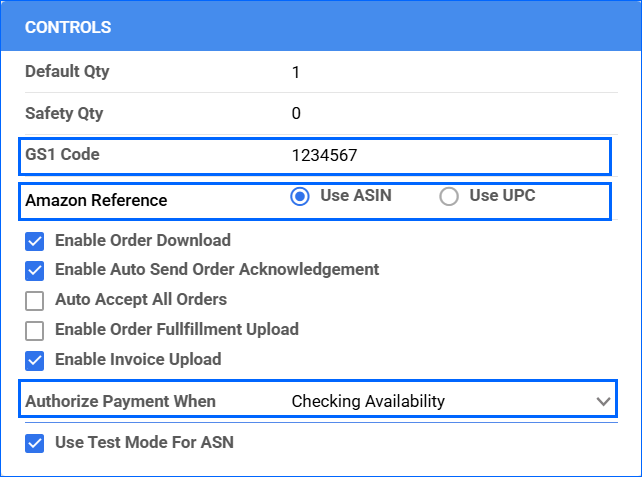
- In the Controls panel:
-
- Select the Authorize Payment method, which determines when inventory is reserved:
- Authorize Payment When Creating Orders to reserve inventory immediately after order creation.
- Authorize Payment When Checking Availability to reserve inventory after availability is confirmed.
- Do not Authorize
- Add your GS1 Code – The prefix assigned to your company by GS1, required for printing SSCC carton labels.
- Select the Amazon Reference field to use for products when communicating with Vendor Central, either ASIN or UPC. Based on your choice here, a product-level field for ASIN or UPC will be displayed on the product’s Vendor Central Properties page, and the general ASIN or UPC saved on the product will not be affected. However, if no Vendor Central-specific reference value is set, the general ASIN or UPC will be used.
- Select the Authorize Payment method, which determines when inventory is reserved:
-
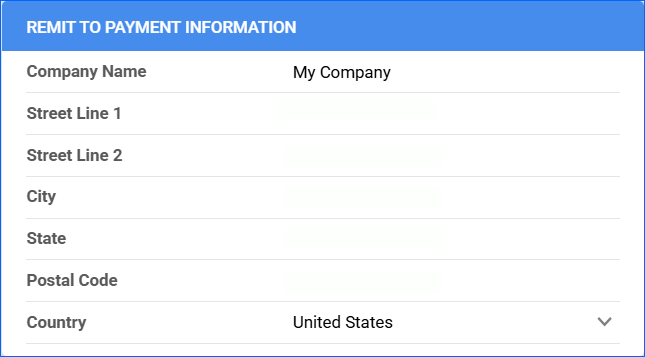
- Configure the Remit To Payment Information, required for the EDI 810 invoices.
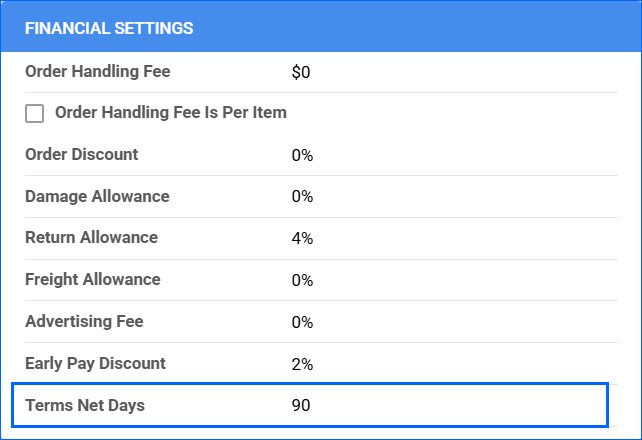
- In the Financial Settings panel, set the Terms Net Days (required for the 810 invoices).
Warehouse Settings
All Sellercloud warehouses, from which orders will be dispatched, must have a valid address and be mapped with the Address Numbers obtained from Vendor Central:
- Navigate to Settings > Companies > Manage Companies and select a company.
- From the Toolbox, select Vendor Central Settings > Warehouse Mapping.
- For each warehouse you will be shipping from, enter the Address Number obtained from Vendor Central into the corresponding field. This is NOT the warehouse code, but an address ID.

- Set up a valid address for every warehouse. This is the warehouse address that will be used on the carton labels and on all documents sent to Amazon for this shipment. Alternatively, check Use Default Address to utilize the warehouse’s default address.

- Save your changes.
If the warehouse address is not set up correctly, the default address from the Return Settings (Company Settings > Toolbox) will be used.
Import Vendor Central Orders
Follow the steps here to set up the connection to Vendor Central, download orders, and acknowledge them.
When shipping Vendor Central orders from Sellercloud, consider that:
- You can specify the point at which payment is authorized, which determines when inventory is reserved (as instructed in the General Settings section).
- When confirming the orders, the backordered items will no longer be split to a new order. All items that are confirmed will be added to a shipping agenda. You can then separate the items into different shipments, depending on when they need to ship, which items need to ship together, etc.
Manage Shipping Agendas
After inventory availability is confirmed, the order should be added to a shipping agenda for the corresponding fulfillment center.
To view and manage the Vendor Central Shipping Agenda list, click Orders > Vendor Central > Manage Shipping Agenda, and click Search.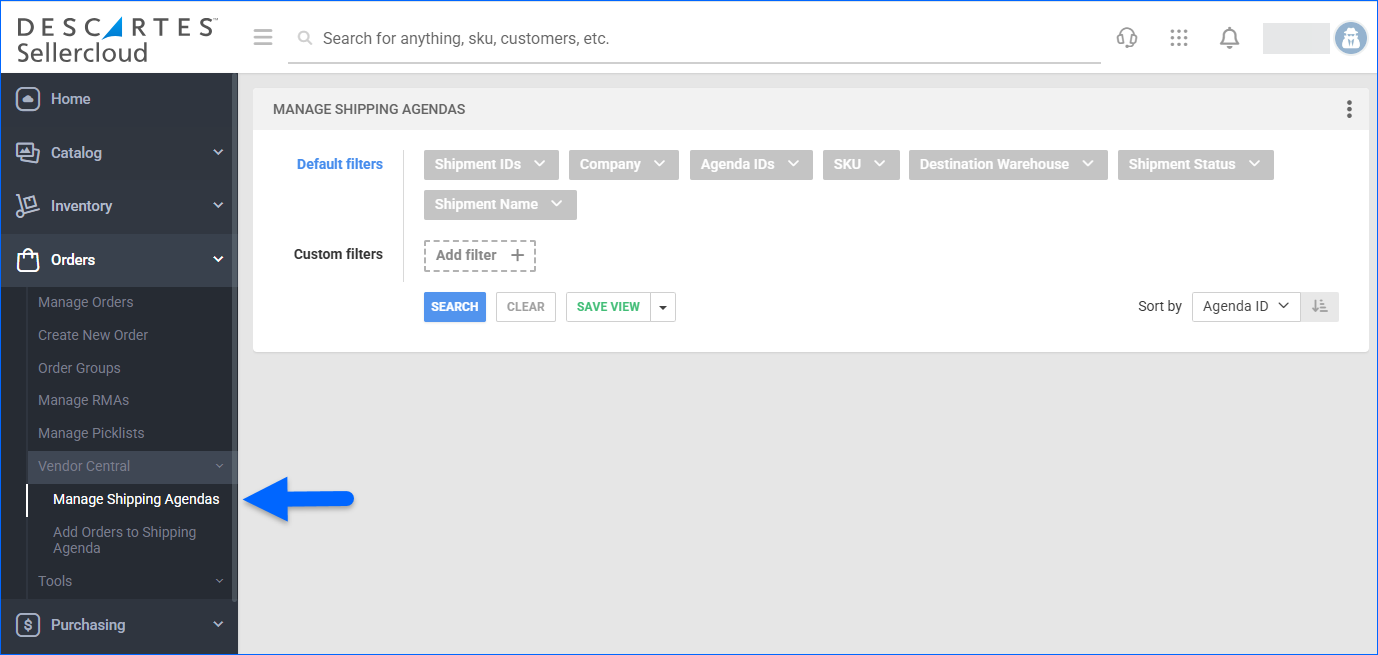
Add Orders to Shipping Agendas
Orders going to the same fulfillment center can be added to the same agenda from the Open Orders grid. The destination warehouse is displayed on both the shipping agenda list and the open order list for easy reference.
To view a list of open Vendor Central orders and add them to shipping agendas:
- Navigate to Orders > Vendor Central > Add Orders to Shipping Agenda.
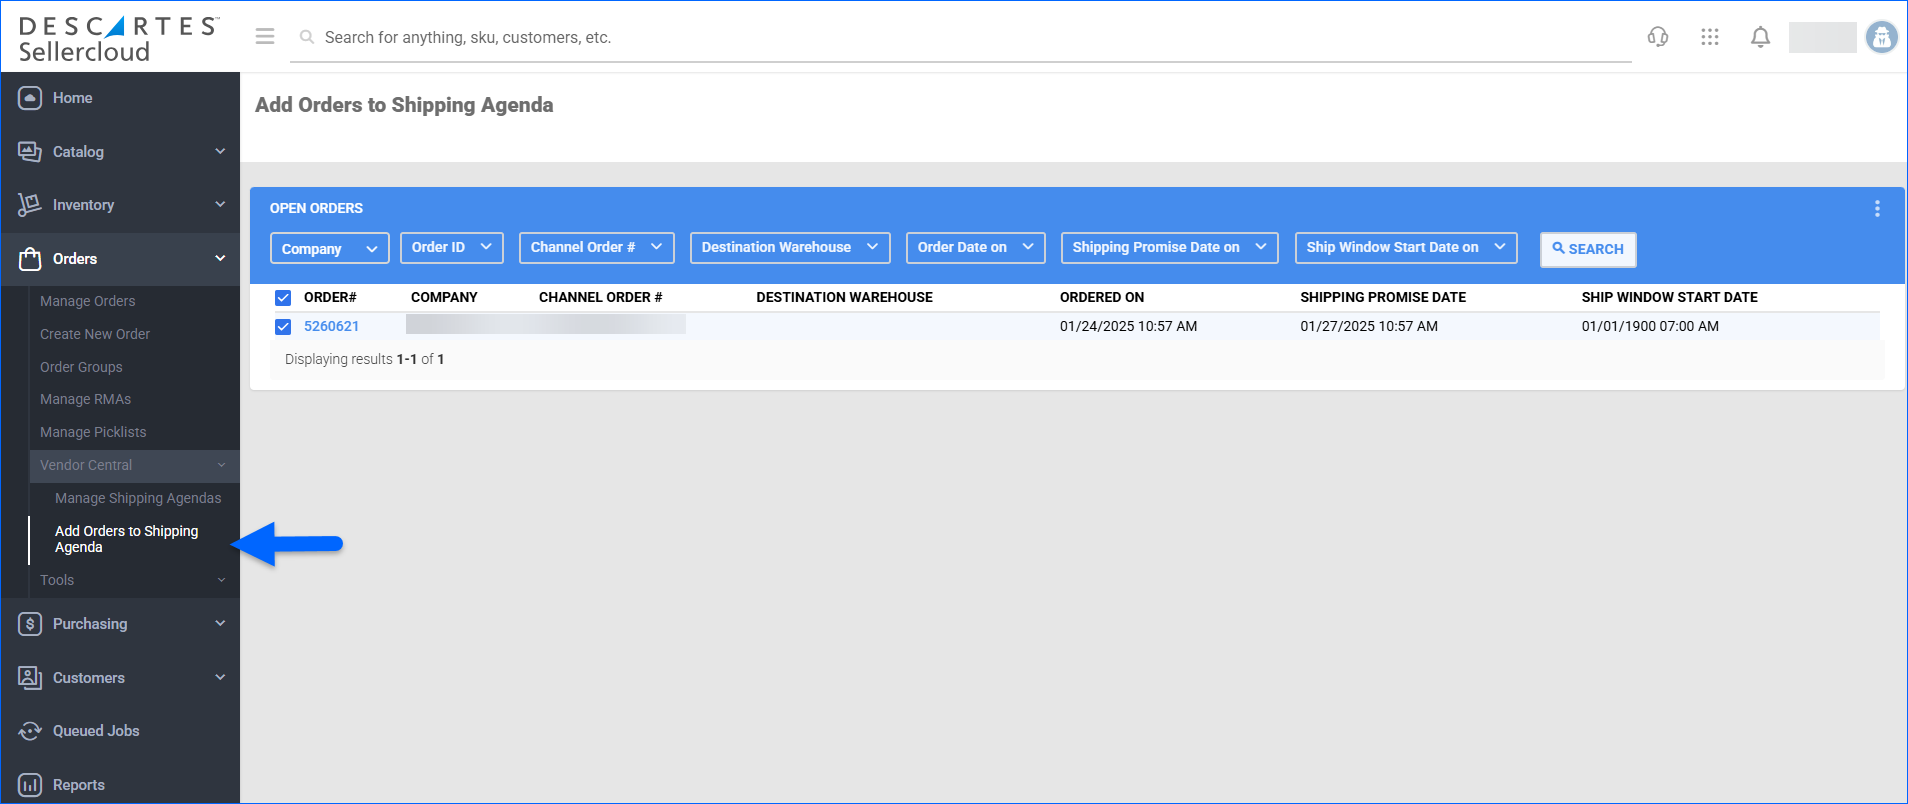
- Select the desired order(s) from the Open Orders grid.
- In the Open Orders panel, click the three dots and select Add Order(s) to Shipping Agenda.

- The Vendor Central Shipping Agenda Add Orders page will be displayed, with the option to add the open order either:
- To an existing shipping agenda: by selecting the checkbox for the existing agenda, then clicking Add to Agenda.
- To a new shipping agenda: by clicking Add to New Agenda.
- Before the order will actually be added to the agenda, you will be redirected to the Check Availability page to confirm the order. Clicking Save will add the order to the agenda you specified (or to a new agenda).
Add Items to Shipments
Every Shipping Agenda starts with a list of orders and items that should be added to a shipment. Each order will show the total confirmed quantity as well as the remaining quantity that has not yet been added to a shipment. A line item with multiple units can be divided into different shipments, and different orders can also be split among different shipments. The Shipments panel and the order’s Remaining Qty will be updated as the units are added to shipments.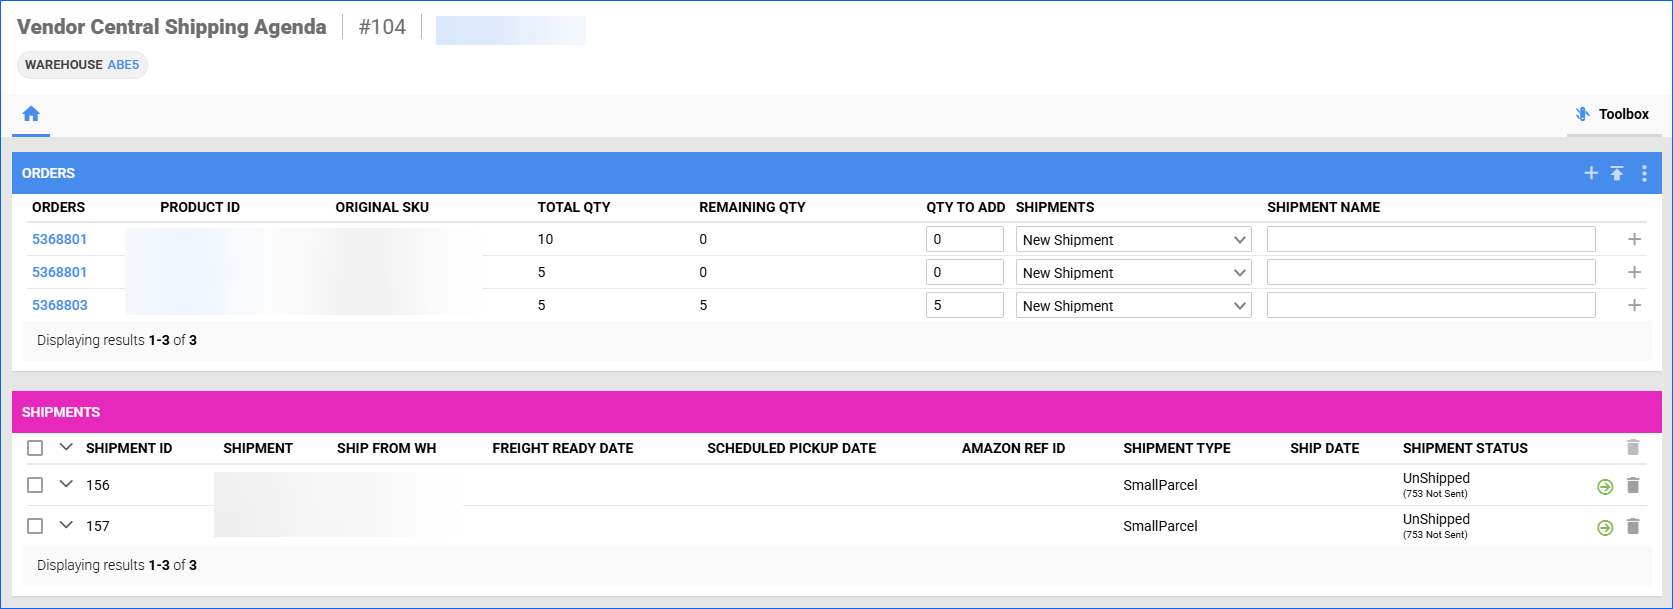
To add items to a new or existing shipment:
- Open the required shipping agenda. The fulfillment center will be displayed at the top of the Shipping Agenda’s page.

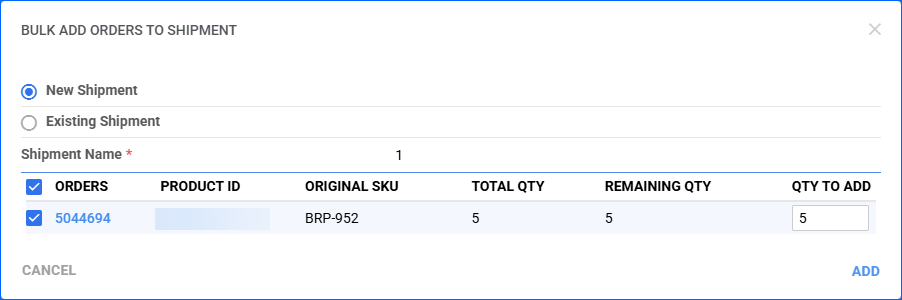
- Click the three dots in the Orders panel and select Bulk add items to shipment. To add orders from the Open Orders grid, click the + icon and follow the instructions from the previous section.

- Depending on your needs, check New Shipment and enter a Shipment Name, or Existing Shipment and select a shipment ID from the respective dropdown.
- Enter what Qty to Add to the shipment and click Add.
Routing & Shipping steps
Routing Request (EDI 753)
Before sending out any shipment, you will need to request routing details from Vendor Central. The routing request includes the PO information, weights, dimensions, and ship from location, and based on that, Amazon will tell you how it should be shipped.
Routing needs to be requested per shipment. Before sending a 753 routing request, you must edit the shipment details and set up pallets/cartons.
- In the Shipments panel, click the green arrow icon of the shipment you want to manage.

- Select a Shipment ID and click Edit.
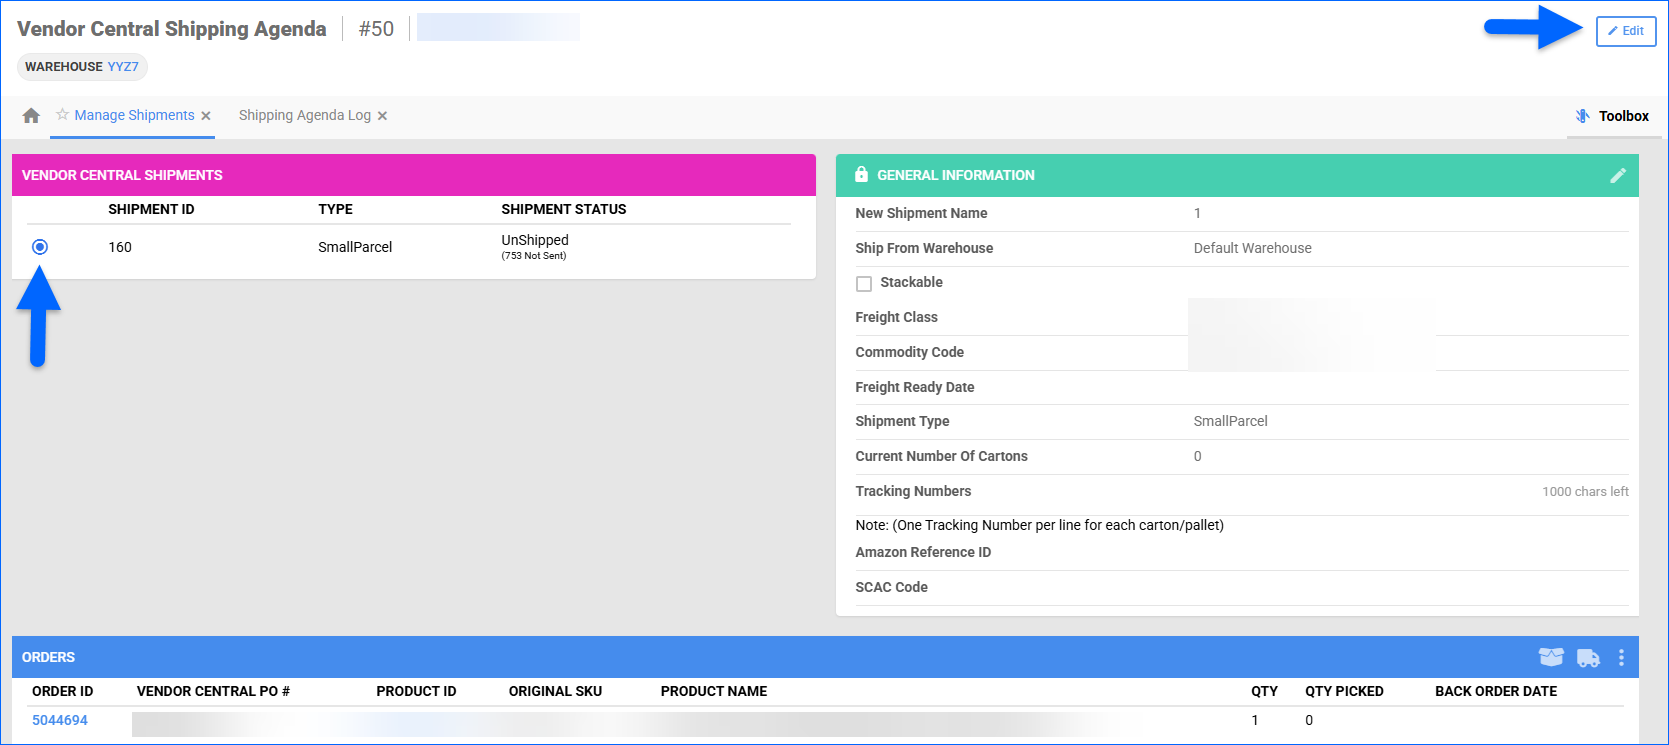
- Complete the following General Information fields:
- Ship From Warehouse
- Stackable
- Freight Class
- Commodity Code
- Freight Ready Date
- Shipment Type
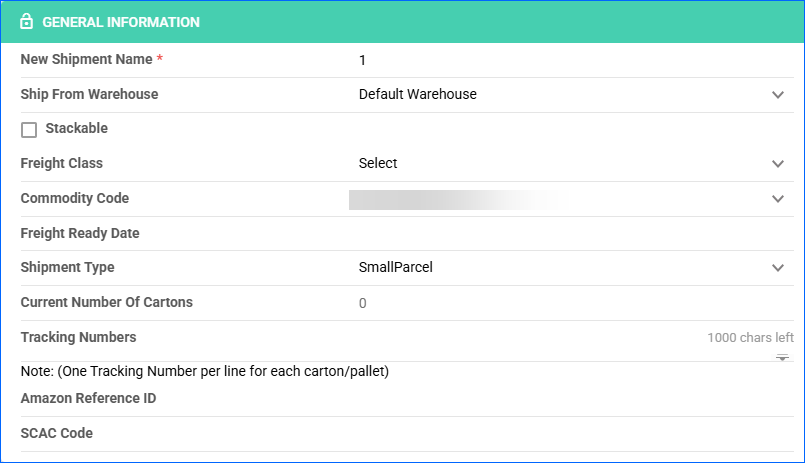
- Click Save.
- In the Orders panel, click the box icon to set up package configuration with pallets (if applicable), cartons, box content, weights, and dimensions. Detailed instructions can be found here.

- Click the Auto Generate icon to automatically create the box record’s details. You can also add a new box record by clicking the + icon and completing the required details.
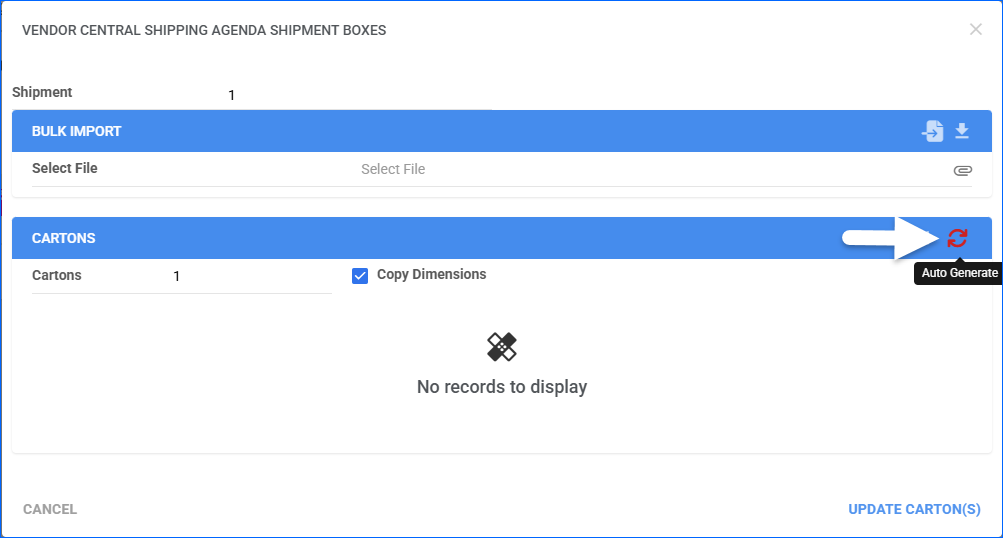
- Once done, click Update.
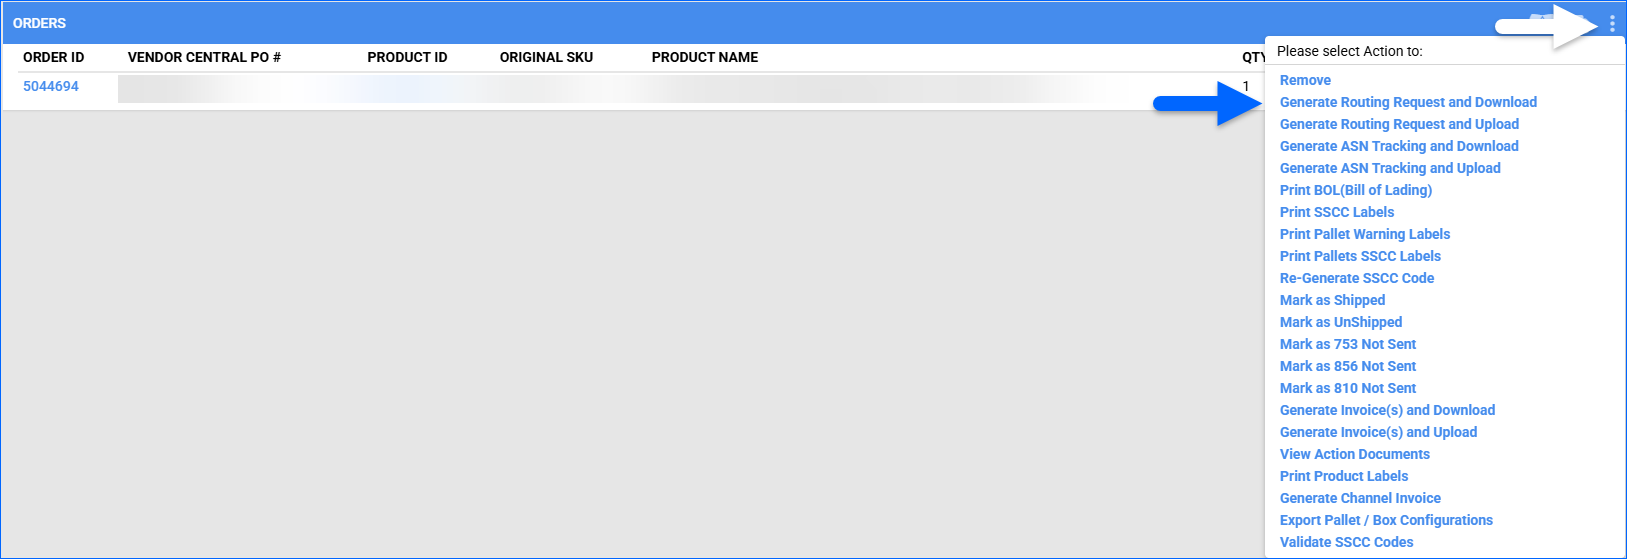
- When the routing information and the cartons/pallets are set up, click the three dots in the Orders panel and choose Generate Routing Request and Upload. (For testing, choose Generate Routing Request and Download).
 Once an EDI 753 is sent for a shipment, Amazon will ignore additional routing requests for that shipment. If you need to make changes to a routing request that was already submitted, you will need to contact Vendor Central to have them change it manually.
Receive Routing Instructions (EDI 754)
The Receive Routing Instructions (EDI 754) is Amazon’s response to the EDI 753 message. Amazon does not send Routing Instructions until the Freight Ready Date is sent on the 753. The 754 response will be automatically imported by the Vendor Central service, and the SCAC Code (carrier code) and Amazon Reference Number will be saved to the shipment.
You can also import a 754 file manually from the shipping agenda page:
- In the Orders panel, click the Import Routing Instructions (754) button.

- Click to upload the file from your computer.
- Click Add to Upload.

SSCC Labels
You can print carton labels anytime after setting up the pallets and cartons. Each label will have a unique Serial Shipping Container Code (SSCC).
By default, carton labels cannot be printed before Amazon provides routing instructions. To enable carton label printing before receiving the routing instructions, open a ticket with Sellercloud Support to enable the AllowVendorCentralPrintSSCCLables_Without754Info App Setting.
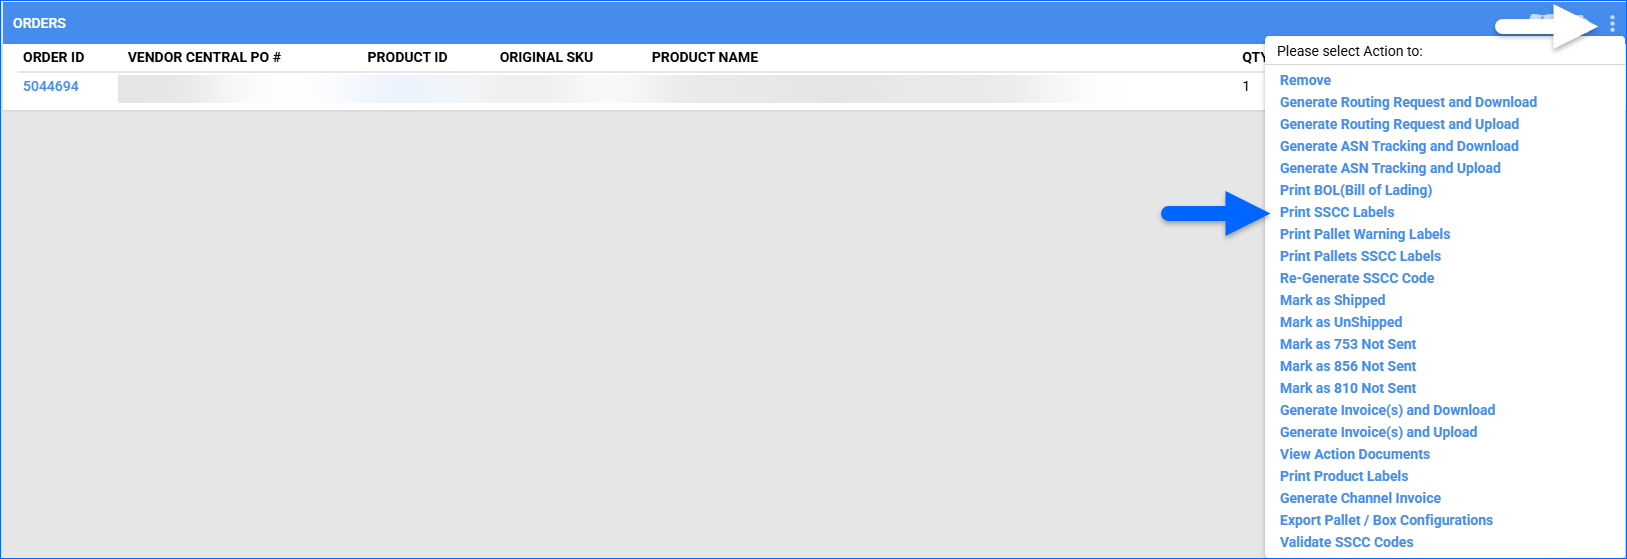
To print carton labels:
- Go to the Shipment Details page.
- In the Orders panel, click the three dots menu and choose Print SSCC Labels. A PDF document will be downloaded with one label for every carton.
Vendor Central Shipping Agenda Labels
To view, create and download shipping agenda labels:
- Navigate to the Shipment Details page.
- In the Orders panel, click the Shipping service icon.

- The Vendor Central Shipping Agenda Labels pop-up will appear, where you can see all labels generated for this shipment. To create a new label, click the + icon.

- A page will open with the details of the label that will be generated. The Ship From Address is populated from the warehouse set on the shipment, and the Ship To Address is the Amazon Fulfillment Center. Clicking on the number of cartons link will allow you to view and edit the cartons and contents that have been set up.
- Click Generate Label.

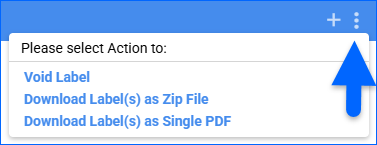
- You will be directed back to the Vendor Central Shipping Agenda Labels page, where you can download the label as a PDF, or as a zip file. Here you can also Void the label, if necessary.
Less-than-truckload (LTL) Shipments
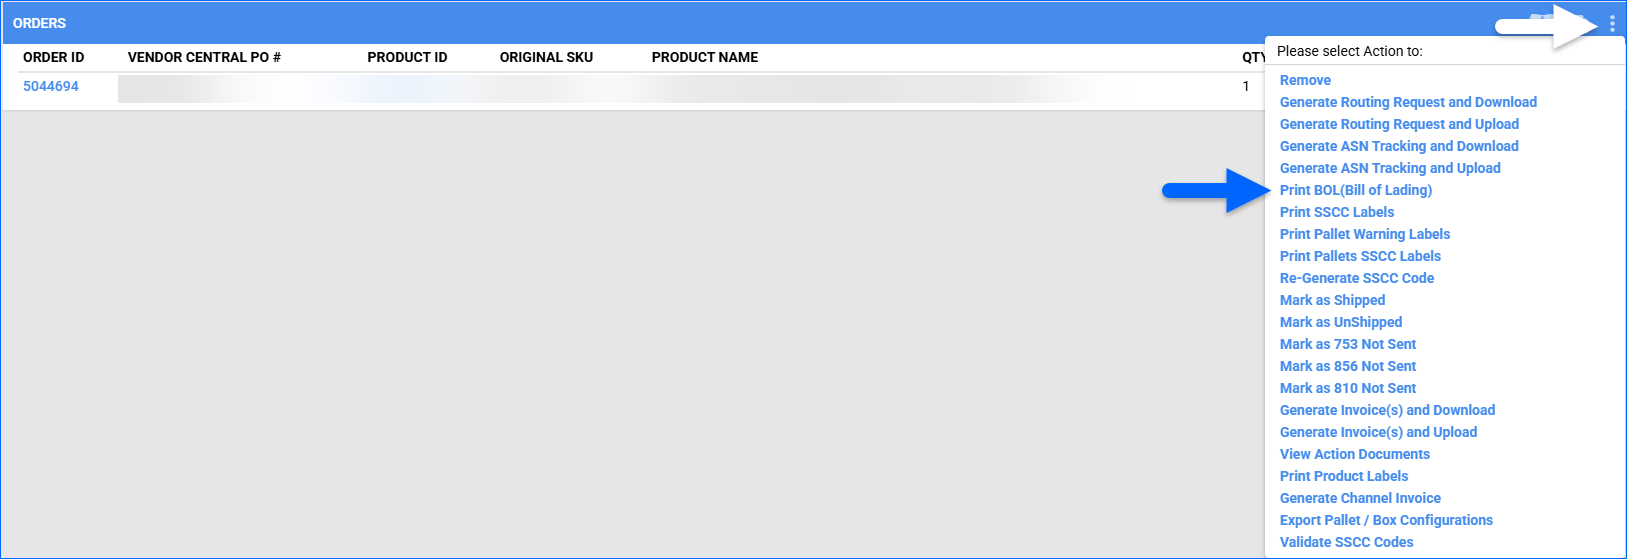
For Less-than-truckload Shipments:
- Select the shipment and choose Print BOL (Bill of Landing) from the action menu. A BOL PDF will be generated and downloaded with a space for the PRO Number/Barcode sticker (which you will receive from the driver).
- Once you have the PRO Number, click Ship on the shipment and enter the PRO Number (and trailer and seal numbers if available).
- Click Update to save the PRO Number and mark the shipment as shipped. The ASN will be sent automatically, usually within about an hour. If you would like to send it immediately, choose Update and Send 856 ASN instead.
Advance Shipping Notification (EDI 856)
The ASN is used to send the shipping and tracking information to Vendor Central. Sellercloud will automatically send an ASN for every shipment shortly after it is marked as shipped, even if it only includes part of an order. When the rest of the order is shipped, a separate ASN will be sent for those items.
To manually push an ASN for a specific shipment, navigate to the required shipment and choose Generate ASN Tracking and Upload from the action menu.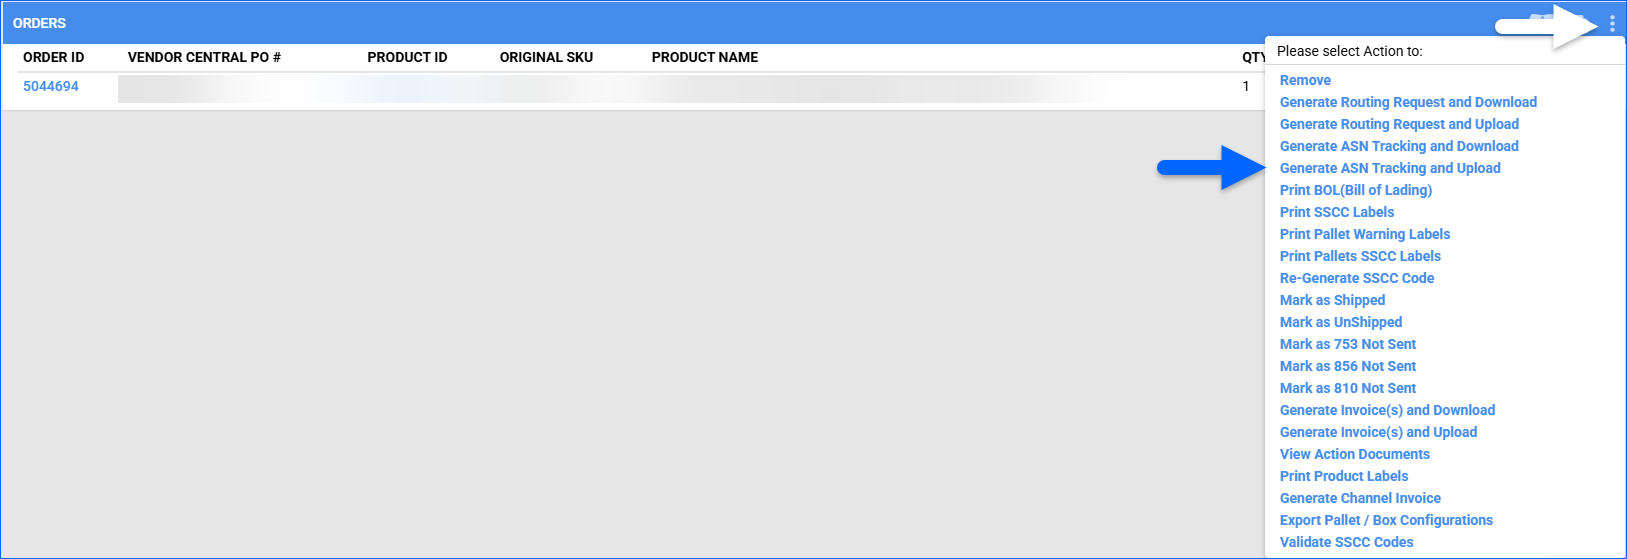
Invoices (EDI 810)
Once a shipment has been shipped, the invoice will be sent automatically for the items in that shipment. If the order has been split among different shipments, the items will be invoiced as they are shipped.
To manually send an invoice for a specific shipment, open the required shipment and choose the Generate Invoice(s) and Upload option from the action menu.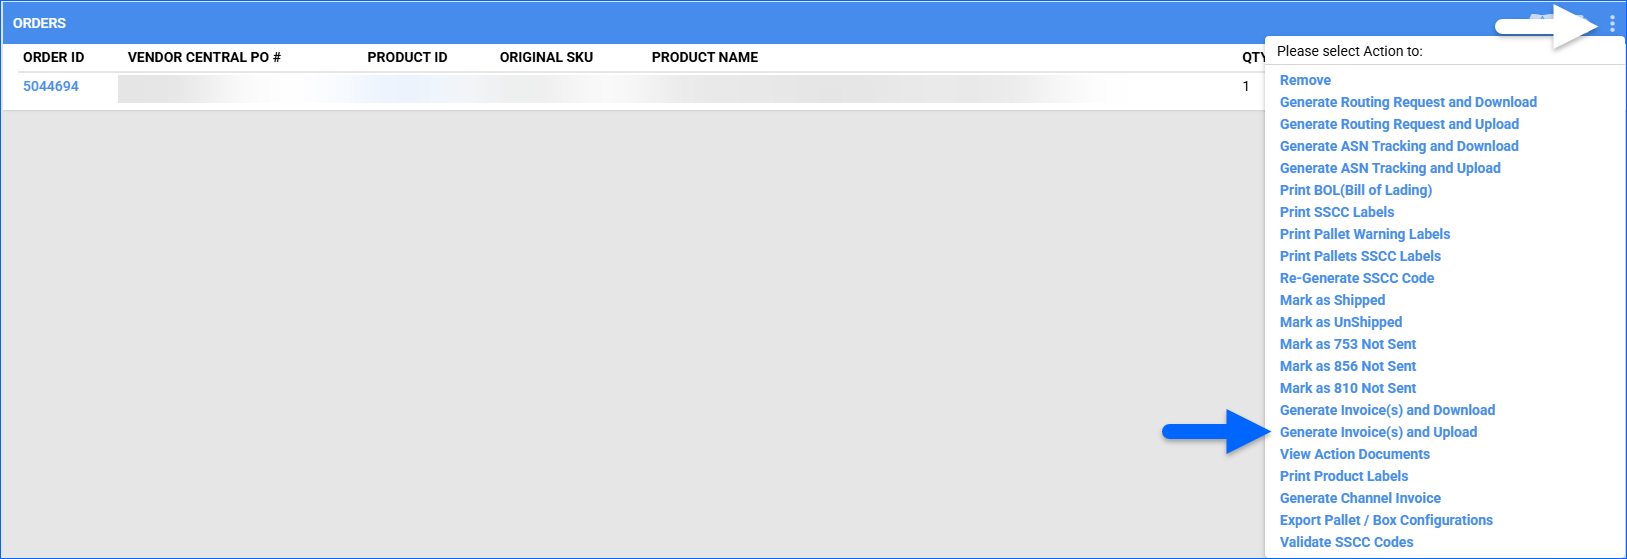
Definitions
| TERMS | DESCRIPTION |
| Shipping Agenda | The group of orders for which you start the shipping process. |
| Shipment | The group of items from various orders will be shipped together in multiple packages, cartons, or pallets. |
| Package | The individual cartons or pallets of the shipment. |
| Freight Type: Collect | Amazon pays for the shipping. |
| Freight Type: Prepaid | Client pays for the shipping. |