Overview
Nocnoc is a cross-border eCommerce platform that enables international merchants to sell across 15+ leading marketplaces in Latin America. With a presence in Brazil, Mexico, Chile, Colombia, and Argentina, Nocnoc allows sellers to reach millions of customers while managing local logistics, customer service, currency conversion, and compliance on their behalf.
Integrating Nocnoc into your Sellercloud account allows you to seamlessly import orders, upload tracking information, and ensure your listings are always up-to-date with the latest inventory data. This integration works through an FTP connection, transmitting information between the two services via Mapping Profiles and Scheduled Tasks.
Prerequisites
Before you can integrate Nocnoc with Sellercloud, complete the following requirements.
Nocnoc Support
- Create a seller account with Nocnoc and obtain your FTP credentials and server details.
- Upload your SKUs in Nocnoc’s Seller Center.
Order Import
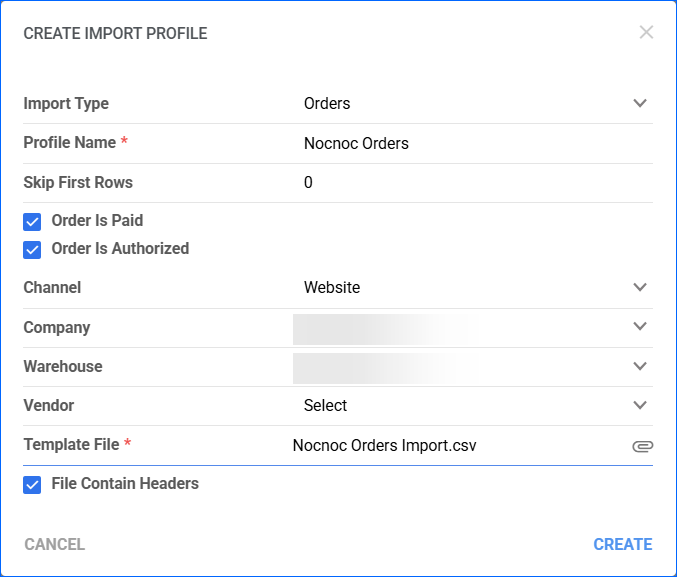
You can import your Nocnoc orders into Sellercloud through an Import Mapping profile of type Orders. To create such a profile:
- Navigate to Settings > Mapping Tools > Manage Import Profiles.
- Access the Actions menu and select Create.
- From the Import Type dropdown, select Orders.
- Enter a Profile Name.
- Set Skip First Rows to 0.
- Check:
- Order Is Paid
- Order Is Authorized
- From the Channel dropdown, select Website.
- Select the Company created for the integration.
- Choose the Warehouse, in which the orders will be imported.
- You can also specify a Vendor to limit the profile’s functionality. Otherwise, leave the Vendor field blank.
- Upload your Order Template file.
- Check File Contains Headers.
- Click Create.
- A message with the new profile ID will pop up automatically – click OK to view and configure it.
- Click Edit.
- Map the following columns in the Column Mapping panel:
- OrderID – Order_OrderSourceOrderID
- SKU – Order_Item_ProductID
- Quantity – Order_Item_Qty
- Price – Order_Item_SalePrice
- CreatedAt – Order_TimeOfOrder
- ShippingFirstName – Order_ShippingFirstName
- ShippingLastName – Order_ShippingLastName
- ShippingAddress1 – Order_ShippingStreetLine1
- ShippingAddress2 – Order_ShippingStreetLine2
- ShippingCity – Order_ShippingCity
- ShippingPhone – Order_ShippingPhoneNumber
- ShippingStateCode – Order_ShippingStateCode
- ShippingPostalCode – Order_ShippingPostalCode
- ShippingCountryCode – Order_ShippingCountryCode
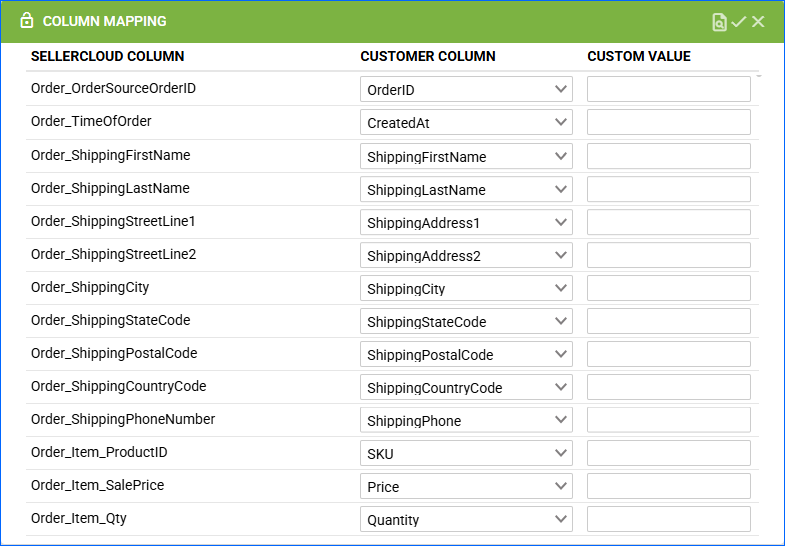
- Save your changes.
Automate Order Import
To regularly import orders from Nocnoc, you must create a Scheduled Task:
- Navigate to Settings > Scheduled Tasks > Manage Scheduled Tasks.
- Click the green + icon and select Create New Scheduled Task.
- Configure the following:
- Click Task Type and select Import Orders.
- Set the Task Name.
- Select the Company.
- Select the Start Time.
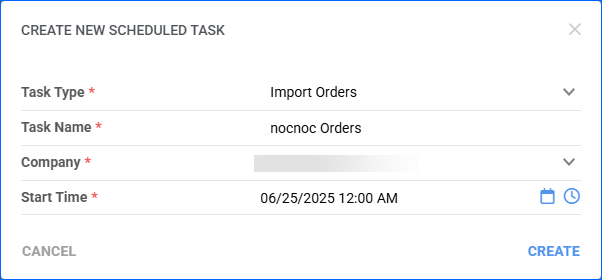
- Click CREATE and the new Scheduled Task page will load on your screen.
- Click the Edit button in the top right corner.
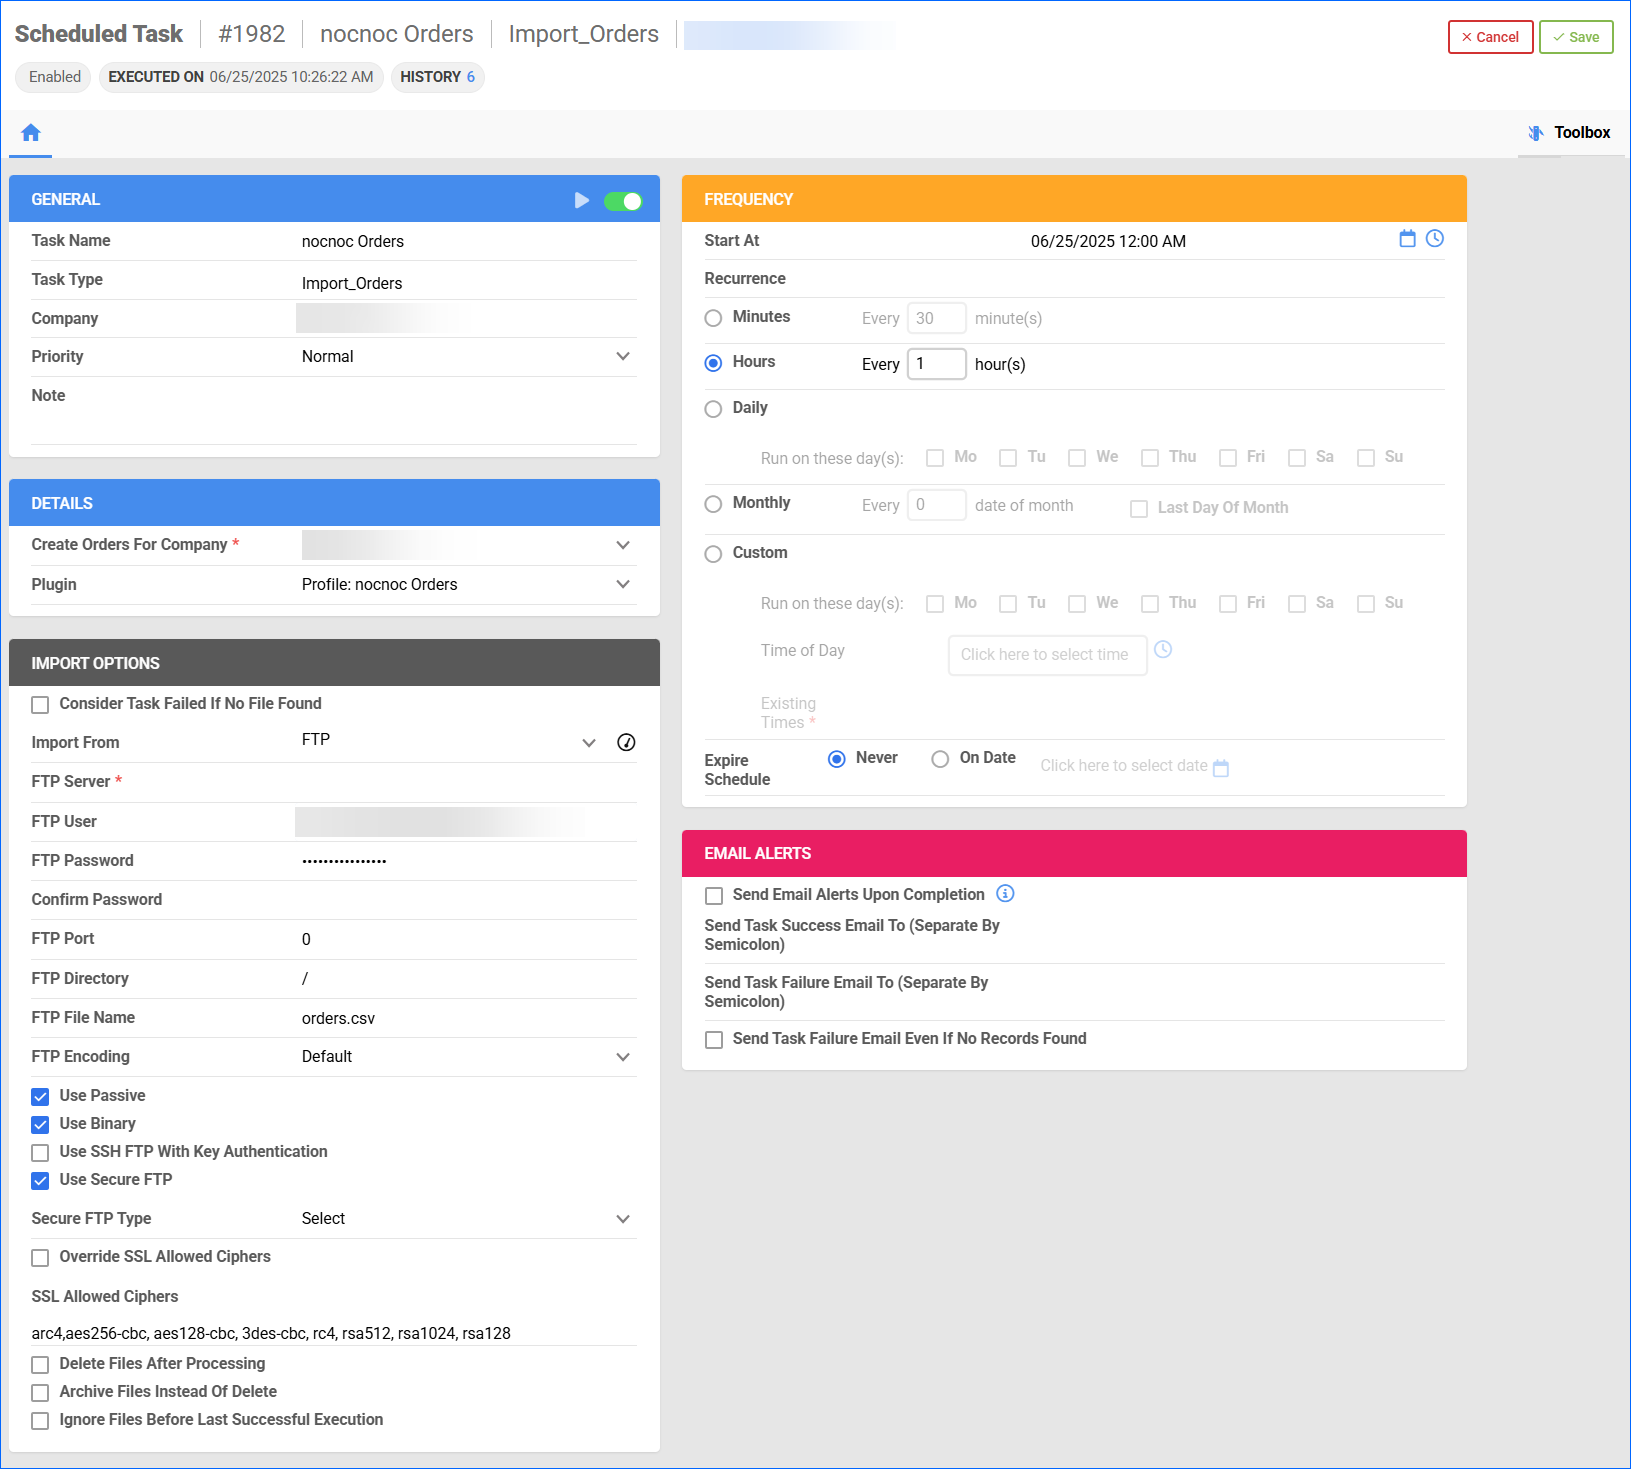
- In the Details panel:
- From the Create Orders For Company dropdown, select the one created for Nocnoc.
- Find the Mapping profile you created earlier in the Plugin dropdown.
- In the Import Options panel, select FTP as a method to Import From and fill out the FTP Server details provided by Nocnoc.
- Enter orders.csv as FTP File Name.
- Check:
- Use Passive
- Use Secure FTP
- In the Frequency panel, select a task frequency between thirty minutes and one hour for optimal performance.
- If required, set up related Email Alerts.
- In the General panel, click the Enable toggle.
- Click Save.
Tracking Export
Tracking information for orders fulfilled through Sellercloud will be sent to Nocnoc regularly through an Export Mapping profile of type Orders.
Before you move on, create a Saved Search for orders filtered by:
- Company – The company you created for the integration.
- Order Status – InProcess Or Completed
- Shipping Status – FullyShipped
Orders without tracking information should not be included.
- Payment Status – Charged
- Tracking Uploaded – No
![]()
To create a Tracking Export Mapping profile:
- Navigate to Settings > Mapping Tools > Manage Export Profiles.
- Access the Actions menu and select Create.
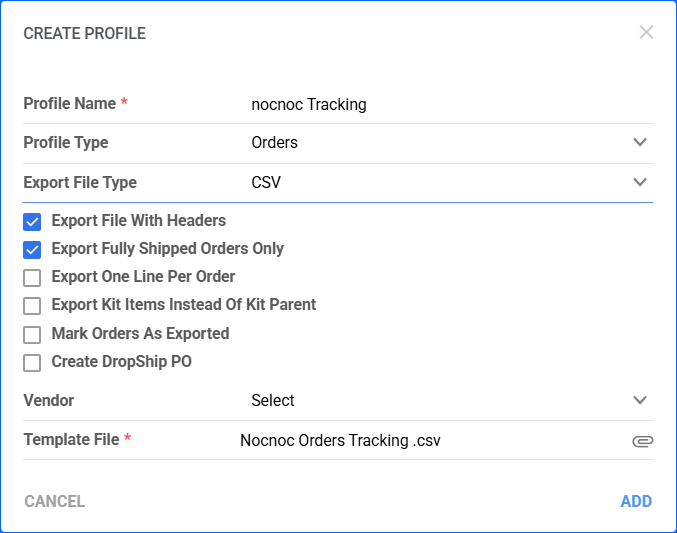
- Enter a Profile Name.
- Select Orders as the Profile Type.
- Choose CSV as Export File Type.
- Check Export File With Headers and Export Fully Shipped Orders Only.
- You can also specify a Vendor to limit the profile’s functionality. Otherwise, leave the Vendor field blank.
- Upload your Order Tracking Template file.
- Click Create.
- A message with the new profile ID will pop up automatically – click OK to view and configure it.
- Click Edit.
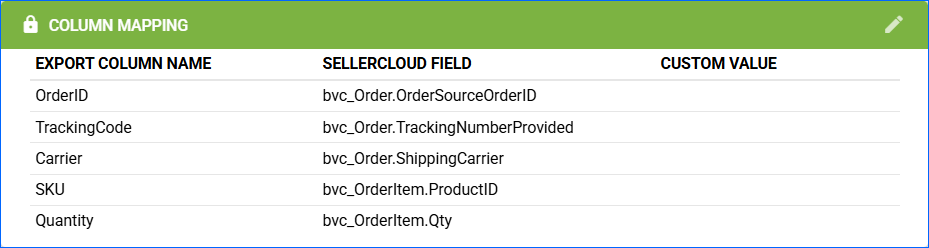
- Map the following columns in the Column Mapping panel:
- OrderID – bvc_Order.OrderSourceOrderID
- TrackingCode – bvc_Order.TrackingNumberProvided
- Carrier – bvc_Order.ShippingCarrier
- SKU – bvc_OrderItem.ProductID. If your whole catalog has Parent SKUs and Child SKUs relation, and you want to send the tracking for a child SKU, select bvc_orderitem.productIDOriginal.
- Quantity – bvc_OrderItem.Qty
- Save your changes.
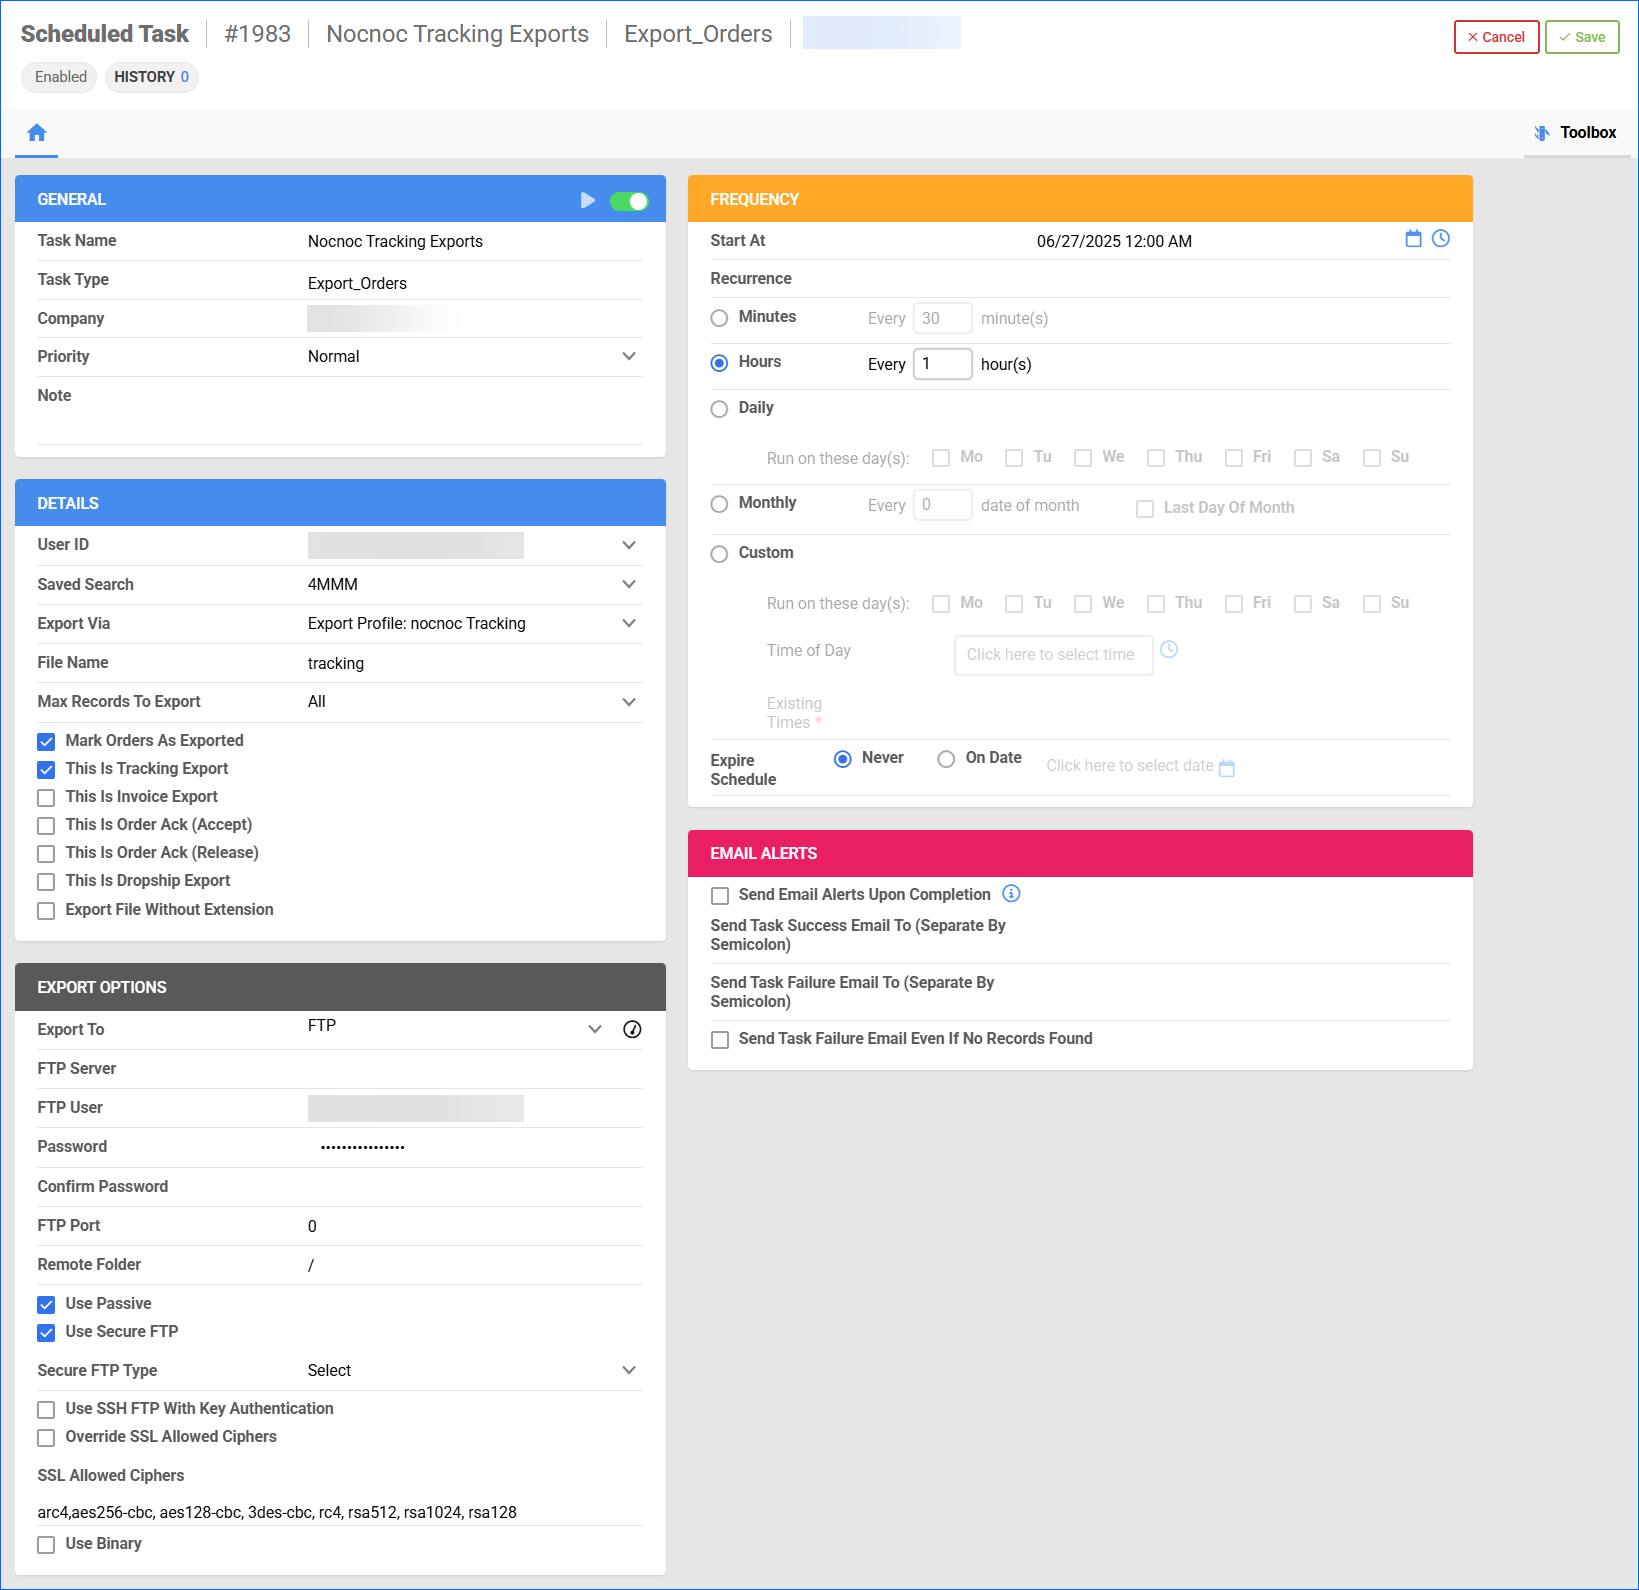
Automate Tracking Export
To regularly export tracking information to Nocnoc, you must create a Scheduled Task:
- Navigate to Settings > Scheduled Tasks > Manage Scheduled Tasks.
- Click the green + icon: Create New Scheduled Task.
- Configure the following:
- Click Task Type and select Export Orders.
- Set the Task Name.
- Select the Company.
- Select the Start Time.
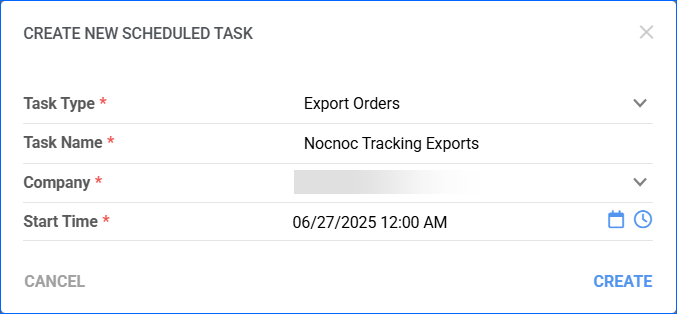
- Click CREATE and the new task will automatically load on your screen.
- Click the Edit button in the top right corner.
- In the Details panel:
- Click the User ID menu and select your email.
- Click the Saved Search menu and select the search you created earlier.
- Click the Export Via menu and select the prepared Export Mapping profile.
- Enter tracking as File Name.
- Check Mark Orders As Exported and This Is Tracking Export.
- In the Export Options panel, set Export To to FTP and fill out the FTP Server details provided by Nocnoc.
- Check:
- Use Passive
- Use Secure FTP
- In the Frequency panel, specify the task frequency. For optimal performance, select a range between thirty minutes and one hour.
- In the General panel, click the Enable toggle.
- Click Save.
Inventory Export
When your products are uploaded to Nocnoc, you can easily export inventory levels and price updates through an Export Mapping profile of type Products.
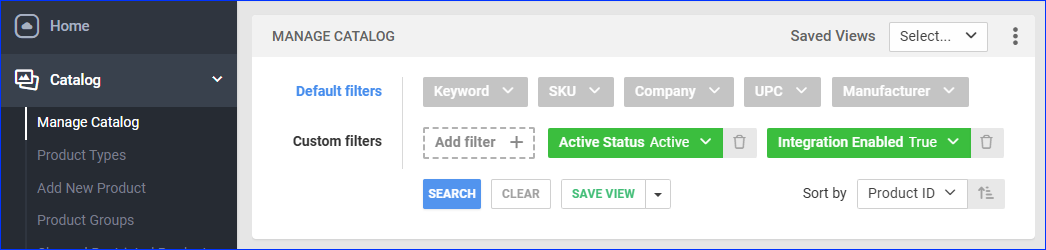
If you don’t intend to sell your entire catalog on Nocnoc, you can filter your products by creating a Custom Product Column called NocnocEnabled.
Before you move on, you can create a Saved Search for products filtered by:
- Company – Select the company where the products you intend to sell on Nocnoc are located. Without this filter, you will send products from all companies.
- (Optional) Nocnoc_Enabled – True. Add this filter if you choose to only update specific products for Nocnoc.
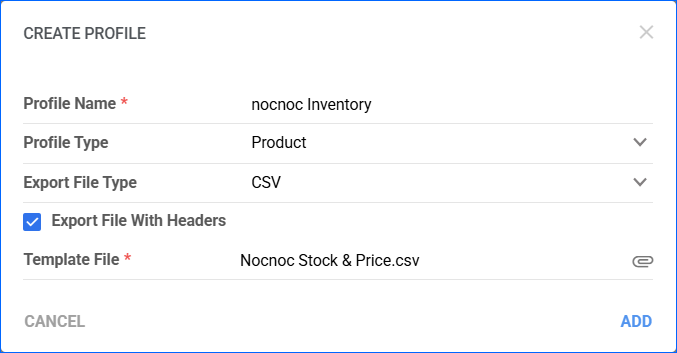
To create an Inventory Export Mapping Profile:
- Navigate to Settings > Mapping Tools > Manage Export Profiles.
- Access the Actions menu and select Create.
- Enter a Profile Name.
- Select Product as the Profile Type.
- Choose CSV as Export File Type.
- Check Export File With Headers.
- Upload your Inventory Template file.
- Click Create.
- A message with the new profile ID will pop up automatically – click OK to view and configure it.
- Click Edit.
- Map the following columns in the Column Mapping panel:
- SKU – bvc_Product.ID
- Price – bvc_Product.SitePrice
- Stock – bvc_Product.AggregateQty

- Save your changes.
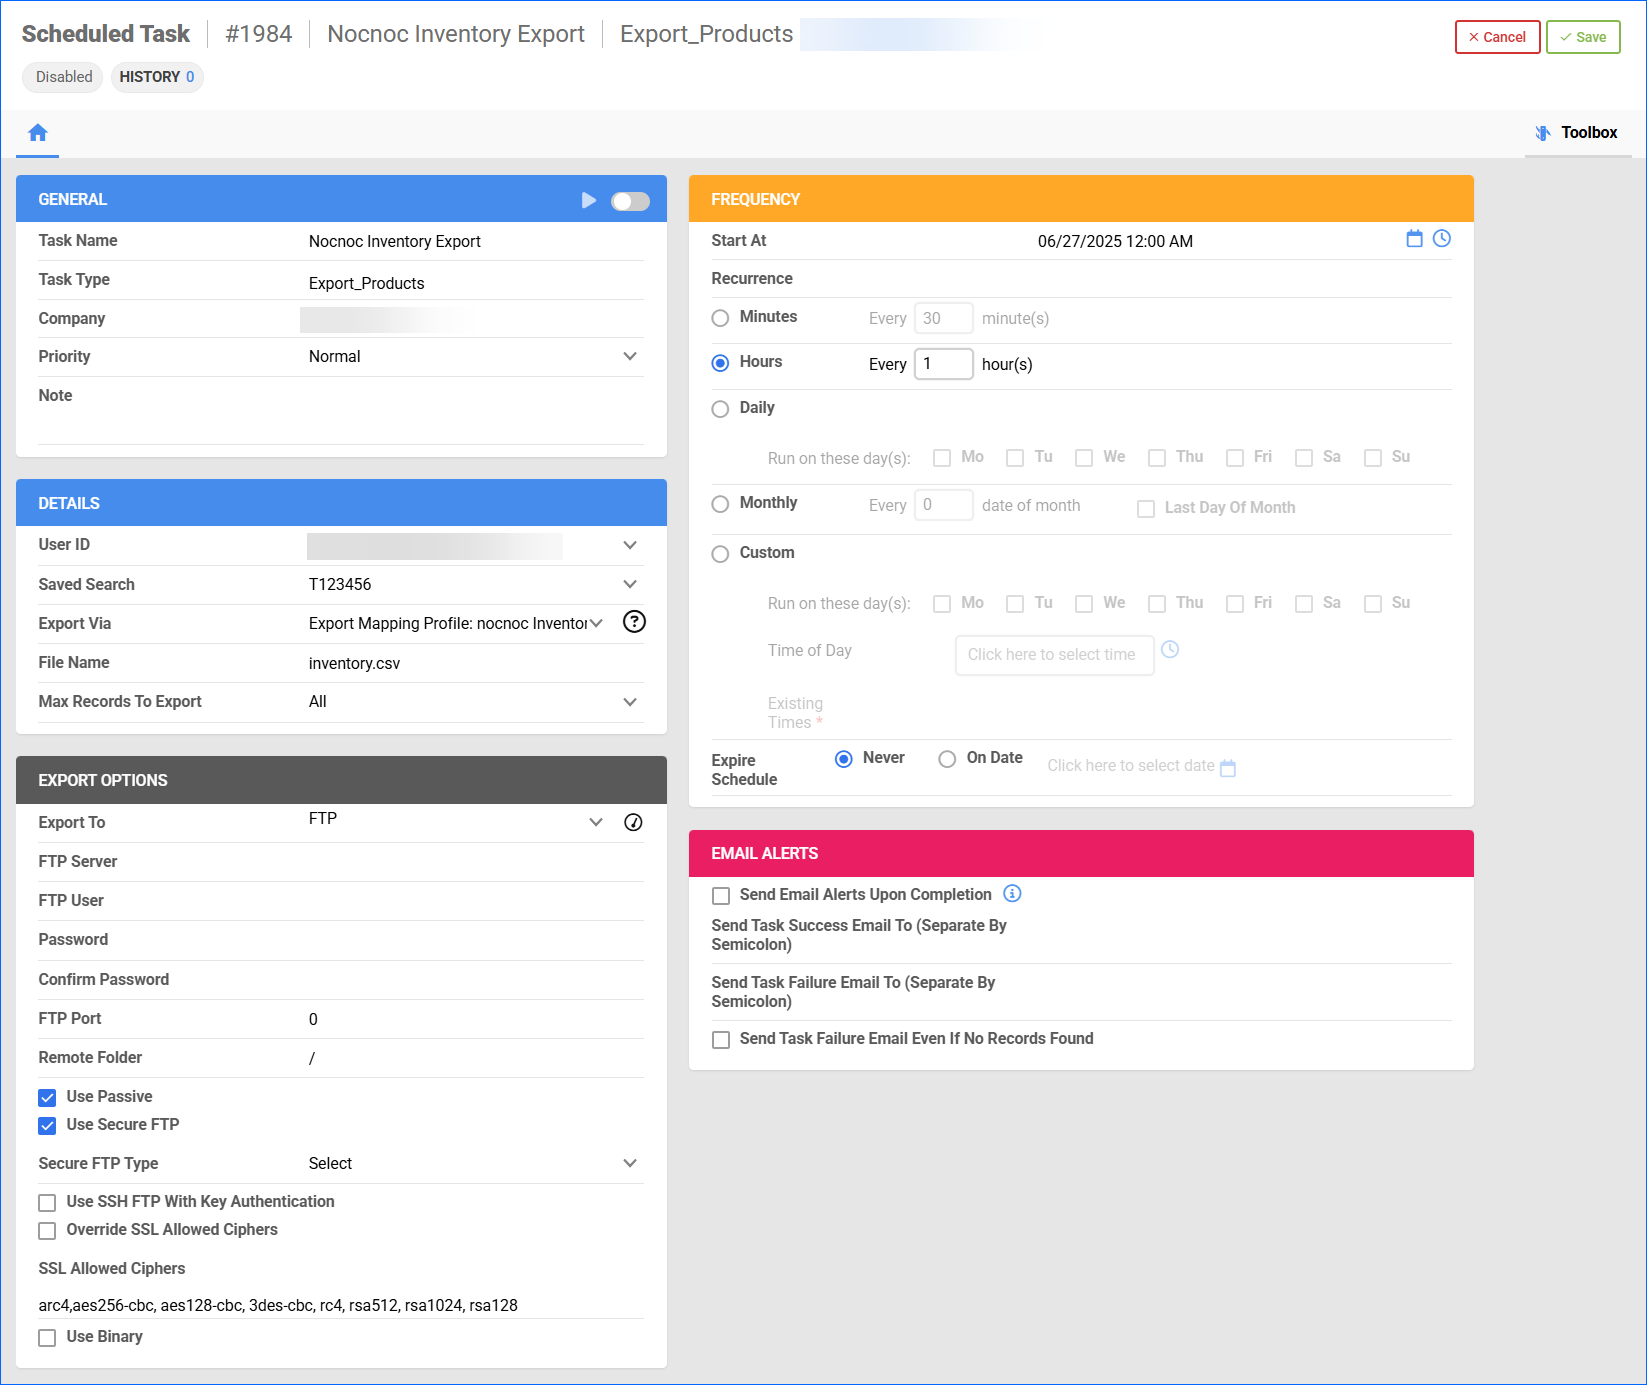
Automate Inventory Export
To regularly export inventory and price information to Nocnoc, you must create a Scheduled Task:
- Navigate to Settings > Scheduled Tasks > Manage Scheduled Tasks.
- Click the green + icon: Create New Scheduled Task.
- Complete as follows:
- Click Task Type and select Export Products.
- Set the Task Name.
- Select the Company.
- Select the Start Time.
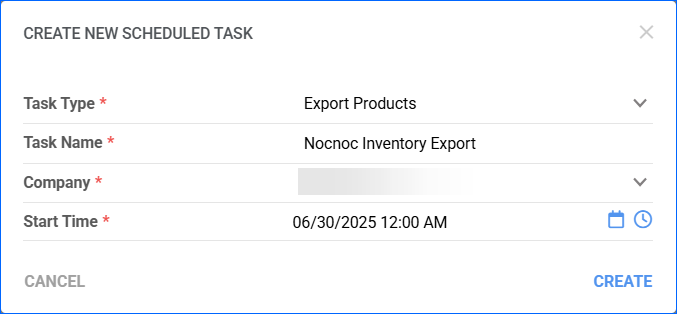
- Click CREATE and the new task will automatically load on your screen.
- Click the Edit button in the top right corner.
- In the Details panel:
- Click the User ID menu and select your ID.
- Click the Saved Search menu and select the saved search you created earlier.
- Click the Export Via menu and select the prepared Export Mapping profile.
- Enter inventory.csv and File Name.
- In the Export Options panel, set Export To to FTP and fill out the FTP fields.
- Check:
- Use Passive
- Use Secure FTP
- In the Frequency panel, specify the task frequency. For optimal performance, select a range between thirty minutes and one hour.
- In the General panel, click the Enable toggle.
- Click Save.