Overview
If you run multiple companies or online brands, you can manage all of your business operations from a single Sellercloud account. This lets you avoid logging into different companies across the channels you sell on. Using Sellercloud, you can create multiple companies and manage the settings for each one individually.
Create a Company
To create a company, follow the steps below.
- Go to the Company Settings page: Settings > Companies > Manage Companies
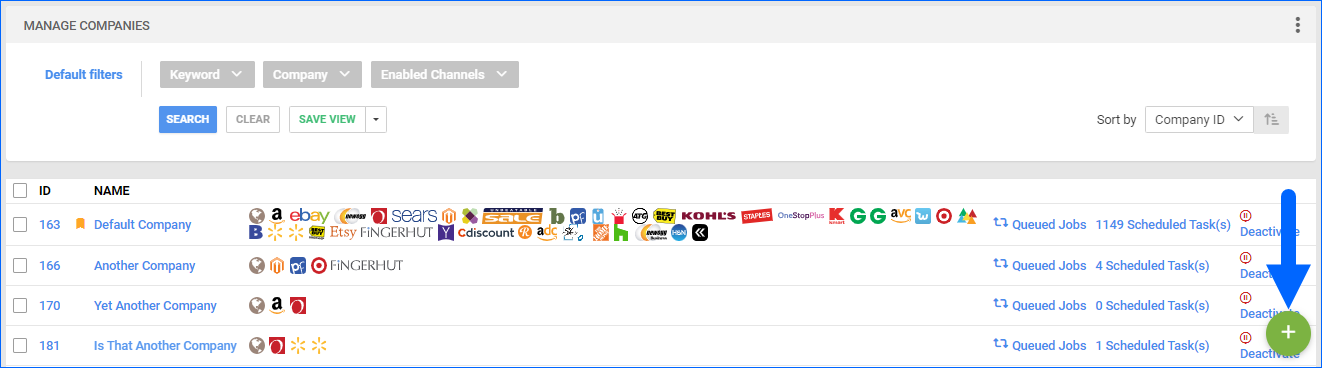
- Click the green action icon to open the company creation wizard.
- Enter Company Name – up to 250 characters.
- Click Next.
- Now, you can enter Business Address information for your company.
- Click Add.
Sellercloud lets you have several accounts integrated for the same channel. However, a channel can only be integrated once per company. For example, if you are selling with two different Amazon accounts, each should be set in a separate company.
Manage a Company
All your companies and the most basic information about them are shown on the Manage Companies page. You can access this page from the main dashboard in two different ways:
- Go to Settings > Companies > Manage Companies
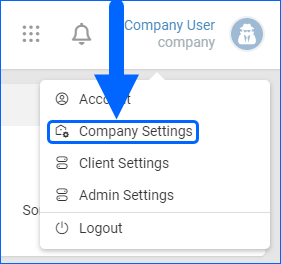
- Click your name in the top right corner and select Company Settings in the dropdown
Once you’ve accessed this page, you can view your companies and a brief snapshot of each one.
The columns show the company ID, name, integrated channels, and any active jobs or scheduled tasks.
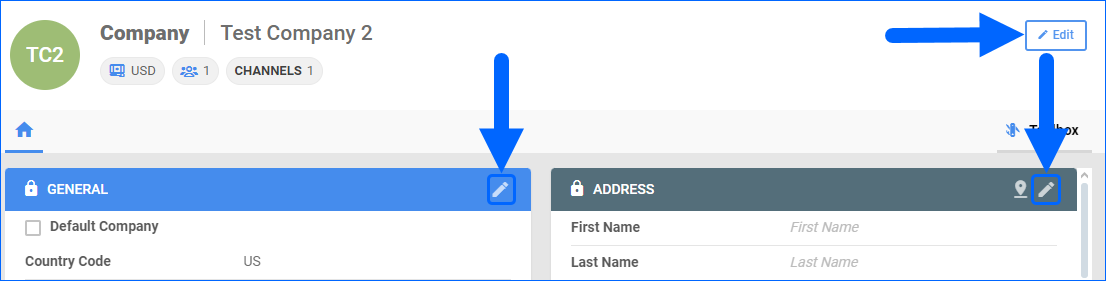
To edit company information:
- Select a company from the list.
- Click the Edit icon in the top right corner of the page or the Edit icon on a panel.
- Click Save.
- On the General panel, you can set a company as a Default Company.
Deactivate a Company
Deactivating a company doesn’t delete anything, but all related information will be hidden, including products, orders, etc. Deactivated companies can be reactivated, which results in all related data becoming visible in your account once again.
Before deactivating a company, make sure there are no active channels connected to it. In addition, the company should not have active, pending, or open:
- Active SKUs
- POs
- Unshipped Orders
- Returns
- RMA
- Scheduled Tasks
- Amazon Removals
- FBA Shipments

Manage Company Settings
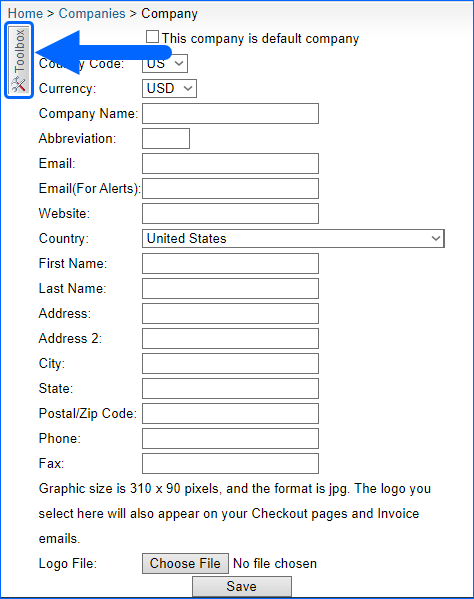
Use the Toolbox to edit specific information about integrated channels and company operations, including custom settings, shipping, and warehouses.
- Go to Settings > Companies > Manage Companies > Select your company.
- Go to Toolbox and scroll to see all your options.
Each company’s Toolbox contains all settings that are related to that company.
| Setting | Description |
| Channels | All credentials and settings for different integrations can be set here. |
| Custom Settings | Some plugins and channels may require additional settings. The Custom Settings menu is available if you select Enable Custom Company Settings in Client Settings. |
| Channel Warehouse | This allows you to set specific warehouses per channel or restrict them. See this article. |
| Invoice Settings | You can set how generic invoices look or use a specified plugin. More information is available here. |
| Email Settings | Set your default email here. Any emails sent from Sellercloud will have this email set as sender. More information is available here. |
| Payment Settings | Set Credit Card processors and PayPal. |
| Product Feeds | Repricers like ChannelMax and AppEagle can be set here. Check the information available here. |
| Return Settings | Default return settings for this company. Some channels have separate settings for returns. |
| Website | Settings for integrated websites. |
| Vendors | You can set your vendors here per company. More information is available here. |
Channel Credentials Alert Setting
This feature allows you to generate and send automatic email notifications to a specified email address when an integration token expires or the channel credentials are no longer valid. You can configure it to alert you only for specific channels or set a global default email address for all active integrations.
Configure a Company for International Marketplaces
Sellercloud gives you the option to sell on international marketplaces in the local currency with product descriptions reconfigured in the local language, even if your company is set as a U.S. company with U.S. currency.
- Create a new company:
- Selling Country Code — the country where you plan to sell
- Currency — that country’s local currency
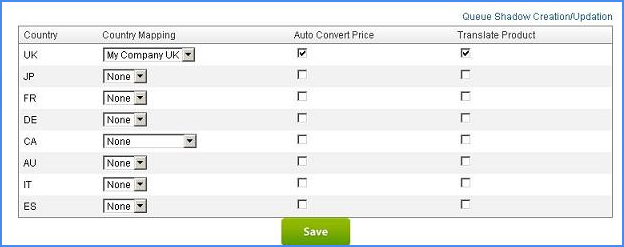
- Go to Company > Toolbox > Int’l Marketplace Preferences.
- Check the Auto Convert Price check-box and Translate Product boxes.

- Click Queue Shadow Creation/Updation and Save.
This action automatically creates shadow SKUs of all products for the international company. The products will be priced in the local currency according to the daily conversion rate (one-time conversion) and described in the local language. Because they are shadow SKUs, they share inventory with the parent U.S. company, so there is no risk of overselling.
Overview
If you run multiple companies or online brands, you can easily manage all your business operations from a single Sellercloud account. Now, there’s no need to log in to different companies across the channels you sell on. Using Sellercloud’s intuitive functions and features, you can effortlessly create and manage your company’s settings.
Create a Company
Sellercloud makes creating and adding a new company to your account easy.
- Go to Settings > Add New Company.
- Type in the Company Name > Create Company.
To view and manage created companies, select Company Settings. On the Company Settings page, you will see a grid with all the companies you have added to your Sellercloud account. The columns show information including the Company Name, whether or not it is a Default company, integrated channels, and more. Clicking Edit or the Company Name will open up a specific company’s details page.
Disable a Company
Deactivating a company doesn’t delete anything, but all related information will be hidden, including products, orders, etc. Deactivated companies can be reactivated, which results in all related data becoming visible in your account once again.
Before deactivating a company, ensure no active channels are connected to it. In addition, the company should not have active, pending, or open:
- Active SKUs
- POs
- Unshipped Orders
- Returns
- RMA
- Scheduled Tasks
- Amazon Removals
- FBA Shipments
Manage Companies
After creating a company, you can access and manage specific information from the company’s details page. To access this page, click on the company’s name in the Company Settings grid.
Here, you can see basic information about your company, including name, email, and address. Sellercloud also features the option to set a company as a default company. This can be done by checking the This company is default company button.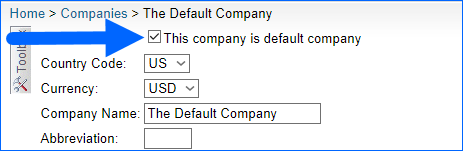
Toolbox
To edit specific information about integrated channels and company operations, including custom settings, shipping, or warehouses, use the Toolbox. Clicking the Toolbox will open a dropdown with access to other pages. This is where you will integrate sales channels and manage their settings for this specific company. These settings will only change for the company you’re managing.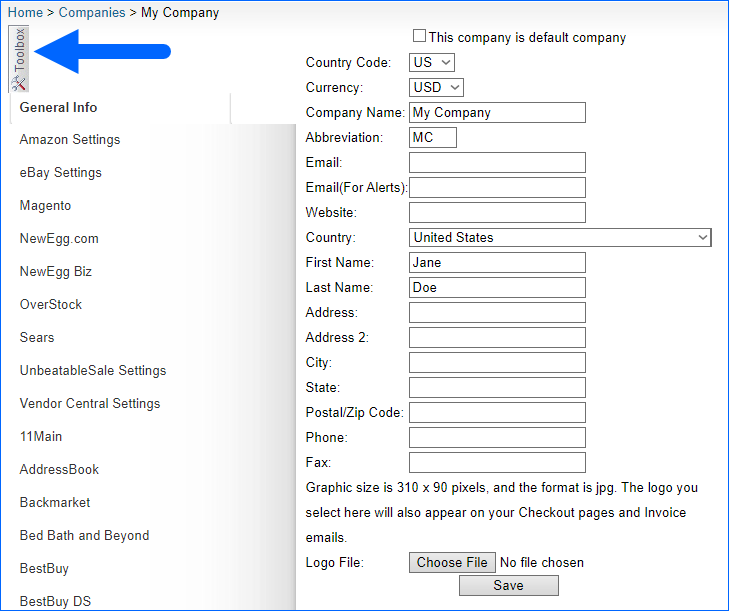
You can also access a company’s specific channel settings from the Company Settings main grid. Once the sales channels are set up, their respective icons will appear alongside the company name. Clicking on the icon will open that channel’s settings for that company.
Company Settings
- Go to Settings > Company Settings > Select your company.
- Go to Toolbox and scroll to see all your options.
Channel Credentials Alert Setting
This feature allows you to generate and send automatic email notifications to a specified email address when an integration token expires or the channel credentials are no longer valid. You can configure it to alert you only for specific channels or set a global default email address for all active integrations.
Multiple Accounts For The Same Channel – Settings
Sellercloud lets you have many accounts integrated for the same channel. However, a channel can only be integrated once per company. For example, if you are selling with two different Amazon accounts, each should be set in a separate company.
- Create a new company from the Settings tab > Add New Company, or clone an existing one by Settings > Add New Company > Clone from Company. (To see the cloning feature, enable the Client Setting Allow to clone company.)
- Open your new company’s Toolbox and supply the related credentials for your new channel integration.
- Because products in Sellercloud are linked to the company they are created, you must create new products or make shadows of existing SKUs in other companies. Learn more about shadows.
Configure a Company for International Marketplaces
Sellercloud allows you to sell on international marketplaces in local currency with product descriptions reconfigured in the local language, even if your company is set as a U.S. company with U.S. currency.
- Create a child company with international credentials. For example, if your company name is My Company, create another company called My Company UK.
- On the My Company UK profile, choose the Country Code UK and choose GBP (Sterling) in the Currency field.


- Under Company Settings > Default Company (My Company) > Open Toolbox > Click Int’l Marketplace Preferences.
- Go to UK dropdown field > Choose your UK company > Check the Auto Convert Price and Translate Product boxes.
- Click Queue Shadow Creation/Updation and Save.
- This action automatically creates shadow SKUs of all products for the UK company. The products will be priced in GBP currency according to the daily conversion rate (one-time conversion) and described in British English. Because they are shadow SKUs, they share inventory with the parent U.S. company, so there is no risk of overselling.
Convert Currency
There are four ways that you can update currency for a new child company with international credentials.
- Currency conversions can be done on a product’s home page.
- You can add manual conversion rates that will override the automated values you receive from the API. Go to Settings > Company > Toolbox > Currency Conversion (Manual) > Choose From Currency, To Currency, Rate > Click Go.

- To bulk-convert currency to multiple selected SKUs, choose the Client Setting Enable convert currencies in bulk. The Convert Currency action will be available on the Manage Inventory page.

- To update the currency conversion rate for all products in the international company, queue the Shadow Creation/Updation as above.
Security Settings
You can set Sellercloud to restrict specific employees’ access:
- Under Settings > Companies > Company Name > Toolbox > Security: The grid shows each user’s access to the Sellercloud tabs. Checking a box will give users access to the selected tab. This only allows access for the selected company.
- You can accomplish the same security settings by going to a specific employee (Employees > Employee Name > Toolbox > Security) to apply security settings across multiple companies
- To restrict certain webpages within the tabs, go to Employees > Employee Name > Toolbox > Security > Webpage Access
- To restrict an employee from specific functionality, go to Employees > Employee Name > Toolbox > Security > Roles and assign roles to the employee. While this will not prevent the employee from accessing, it will prevent any action performed outside of the assigned roles.
Hide Costs from Employees
You can hide all costs related to purchasing products from your employees without Admin Access: Go to Settings > Client Settings > Hide Costs From Employees.