Overview
Vendor invoices are documents that outline the amount a buyer needs to pay to a supplier for the goods or services provided. In contrast to manual handling of PO Payments, you also have the option to manage payments through Vendor Invoices. This workflow assists in tracking payments and invoices at the vendor level, facilitating the reconciliation of bills against received inventory for precise financial management.
Configure Vendor Invoices
Once you enable the above-mentioned setting, you will be able to see different tabs in the toolbox on the Vendor details page, allowing you to manage payments and invoices at the Vendor level.
To enable the Vendor Invoices Workflow go to Client Settings > General Client Settings > Enable Vendor Invoices Workflow.
- If enabled, the Invoices, Payments, and Receive Sessions tabs will appear within the Purchasing > Vendors > Manage Vendors > Toolbox section.
- When activated, the workflow is designed to present the first invoice found in the vendor’s Invoices toolbox that is associated with a PO receiving session.
- If deactivated while the Enable Multiple Invoices For Purchase Orders client setting is enabled, the workflow will show the initial invoice in the Purchase Invoice section.
- If deactivated and the Enable Multiple Invoices For Purchase Orders client setting is also disabled, the system should display the PO Vendor Invoice Number.
To configure your vendor invoices navigate to Purchasing > Vendors > Manage Vendor Invoices.
Invoices
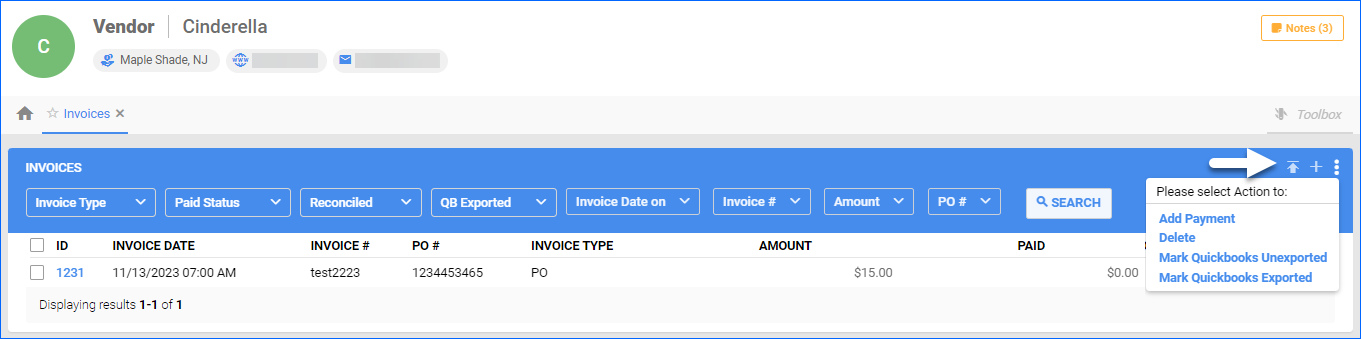
The Invoices tab shows all PO invoices related to that vendor, and you can manage all PO payments from the tab.
Access the Invoice tab from the Toolbox > Invoices. You also have the flexibility to add an invoice individually or in bulk.
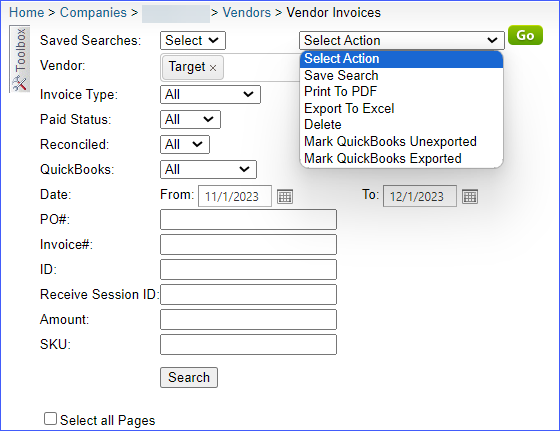
The following actions can be performed
- Add Payment – Log a payment for the corresponding invoice.
- Delete – Delete a payment from the invoice.
- Mark Quickbooks Unexported – Edit an exported PO in Quickbooks to make it unexported.
- Mark Quickbooks Exported – Edit an unexported PO in Quickbooks to make it exported.
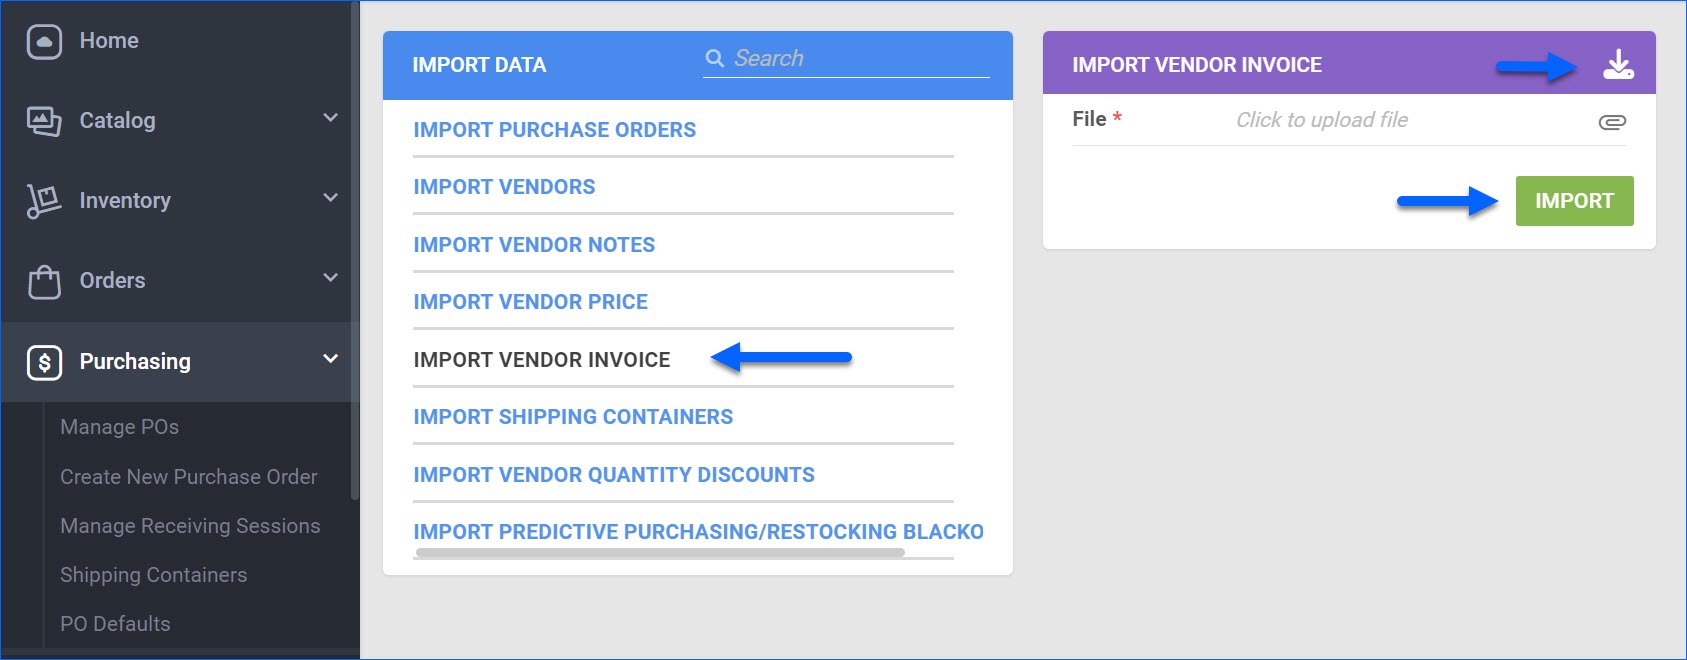
To manually import Vendor Invoices:
- Go to Purchasing > Tools.
- Click Import Purchase Info.
- From the list in the Import Data panel, select Import Vendor Invoice.
- Download the template by clicking the icon. Then, fill in the columns of the file.
- If you choose to include a ReceiveSessionID in the template, you must also provide a PONumber on the same row. Upon import, the Receive Session will be added to the Vendor Invoice automatically.
- Go back to Sellercloud and upload your filled-in template.
- Click Import.
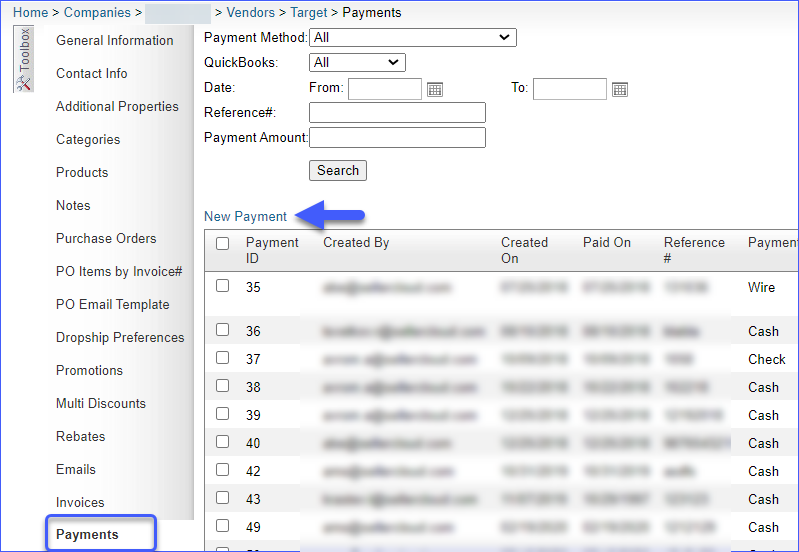
Payments
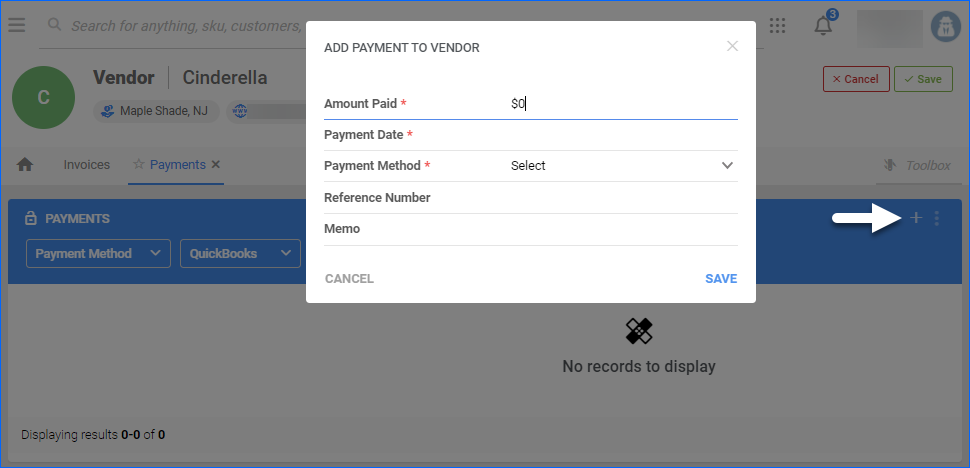
The Payments tab shows any payments made to the selected vendor. You have the option to add a new payment or delete existing ones.
To view payment information on an individual PO, go to Purchasing > Manage POs > Select a PO > Toolbox > Billing & Payments.
Receive Sessions
The Receive Sessions tab shows separate receivings on POs for the selected vendor. You can export them to an Excel sheet. Navigate to the Action Menu and select Export to Excel.
To view receiving information on an individual PO, go to Purchasing > Manage POs > Select a PO > Toolbox > Receiving. On this tab, you have the option to print sessions and delete a receiving.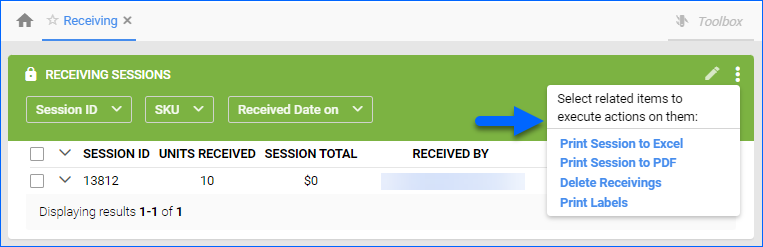
Vendor Invoice Reconciliation
You have the option to verify any discrepancies between vendor invoices and received inventory directly from the PO’s page.
- Navigate to Purchasing > Manage POs.
- Open a PO > Action Menu > Manage Invoices.
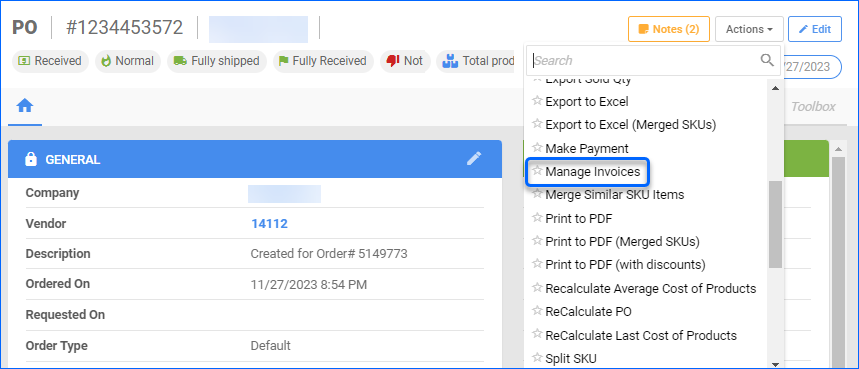
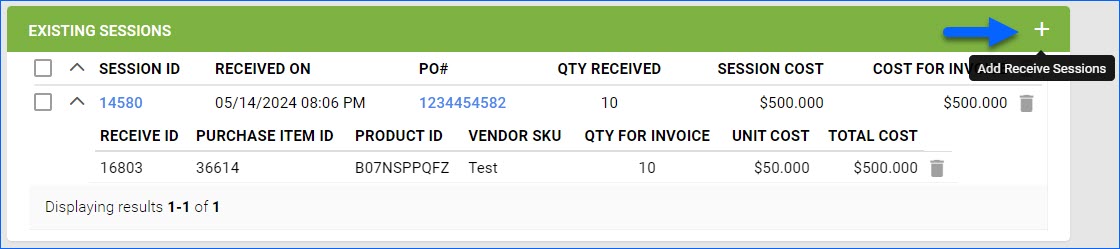
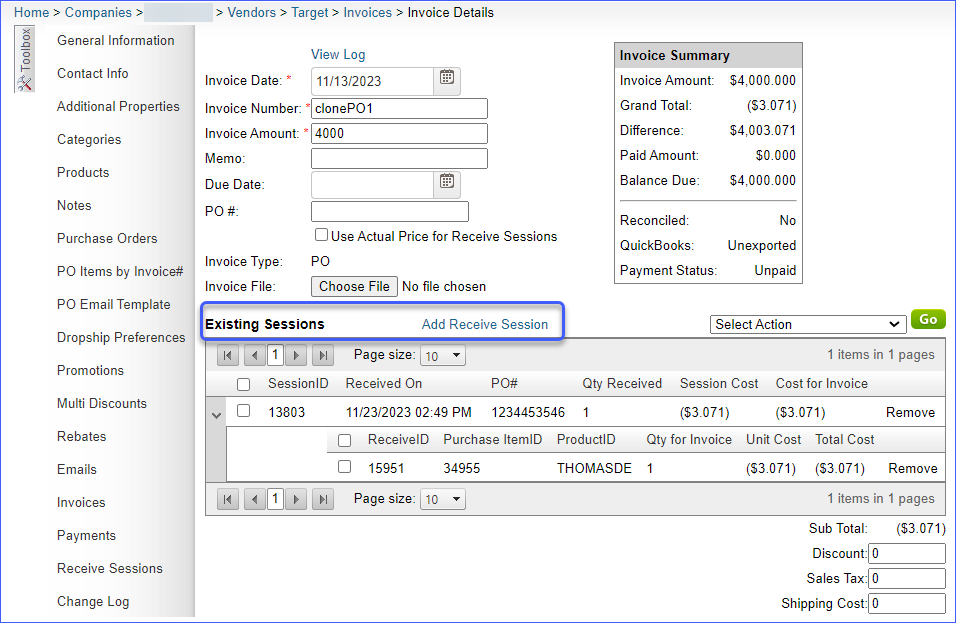
- Open an Invoice, click Edit, and navigate to the Existing Sessions panel.
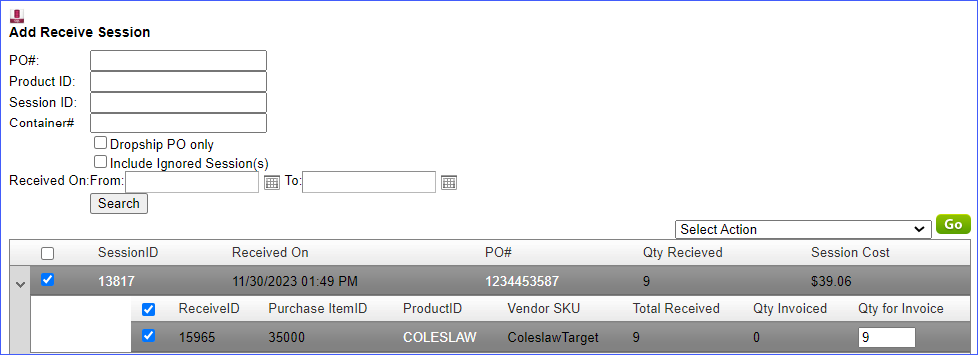
- Click on the Plus button and select the matching sessions.
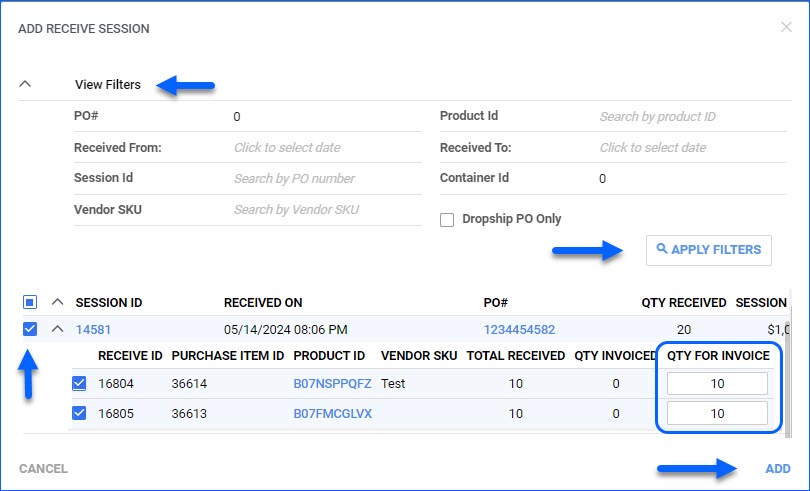
- In the pop-up dialog:
- Click View Filters to expand the dropdown and filter down the sessions.
- Check the boxes to select and edit the Qty For Invoice if necessary.
- Click Add.
- Back on the Invoice Details page, click Save.
Relevant Client Settings
The following related client settings are available:
- Enable Vendor Invoices Workflow
-
- Enable this setting to manage payments and invoices at the Vendor level.
- Enable Multiple Invoices For Purchase Orders
-
- When enabled, this setting lets you create and handle multiple invoices for one purchase order. If disabled, only one invoice can be created per purchase order.
Overview
Vendor invoices are documents that outline the amount a buyer needs to pay to a supplier for the goods or services provided. In contrast to manual handling of PO Payments, you also have the option to manage payments through Vendor Invoices. This workflow assists in tracking payments and invoices at the vendor level, facilitating the reconciliation of bills against received inventory for precise financial management.
Configure Vendor Invoices
Once you enable the above-mentioned setting, you will be able to see different tabs in the toolbox on the Vendor details page, allowing you to manage payments and invoices at the Vendor level.
To enable the Vendor Invoices Workflow go to Client Settings > Enable Vendor Invoices Workflow > Click Save.
- If enabled, the Invoices, Payments, and Receive Sessions tabs will appear within the Company Settings > Open a Company > Toolbox > Vendors > Toolbox section.
- When activated, the workflow is designed to present the first invoice found in the vendor’s Invoices toolbox that is associated with a PO receiving session.
- If deactivated while the Enable Multiple Invoices For Purchase Orders client setting is enabled, the workflow will show the initial invoice in the Purchase Invoice section.
- If deactivated and the Enable Multiple Invoices For Purchase Orders client setting is also disabled, the system should display the PO Vendor Invoice Number.
To configure your vendor invoices navigate to Company > Vendors > Manage Vendor Invoices > Choose a Vendor.
Invoices
The Invoices tab shows all PO invoices related to that vendor, and you can manage all PO payments from the tab.
Access the Invoice tab from the Company > Toolbox > Vendors > Manage Vendor Invoices . You also have the flexibility to add an invoice individually or in bulk.
The following actions can be performed
- Add Payment – Log a payment for the corresponding invoice.
- Delete – Delete a payment from the invoice.
- Mark Quickbooks Unexported – Edit an exported PO in Quickbooks to make it unexported.
- Mark Quickbooks Exported – Edit an unexported PO in Quickbooks to make it exported.
Payments
The Payments tab shows any payments made to the selected vendor. You have the option to add a new payment or delete existing ones.
Receive Sessions
The Receive Sessions tab shows separate receivings on POs for the selected vendor. You can export them to an Excel sheet. Navigate to the Action Menu and select Export to Excel.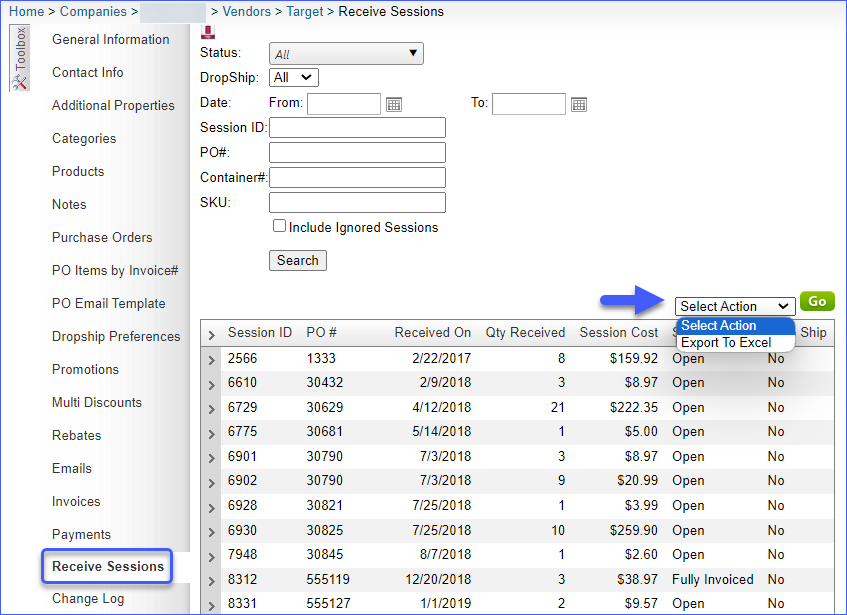
To view receiving information on an individual PO, go to Inventory > Purchasing > Select a PO. On this tab, you have the option to print sessions and delete a receiving.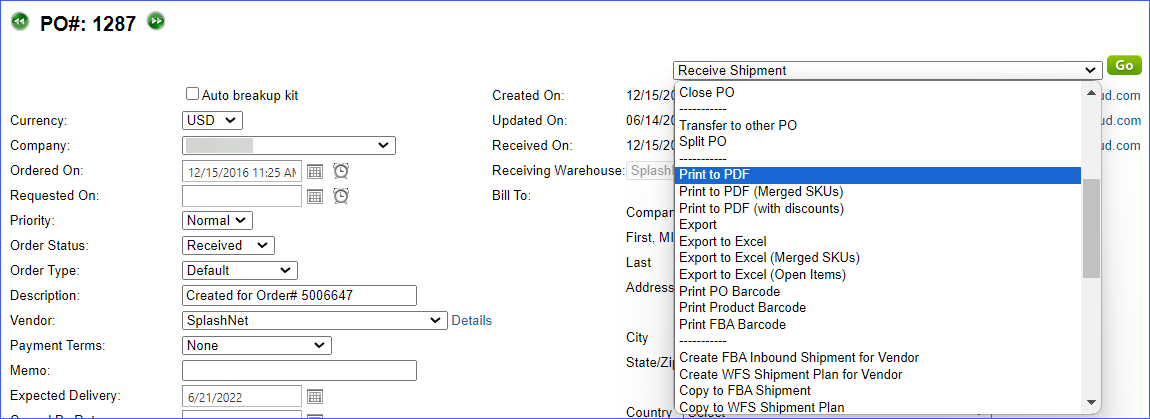
Vendor Invoice Reconciliation
You have the option to verify any discrepancies between vendor invoices and received inventory directly from the PO’s page.
- Navigate to Company > Toolbox > Vendors
- Open a Invoices > Open an Invoice.
- Navigate to the Existing Sessions panel and click Add Receive Session.
- Select the matching sessions, scroll down and click Add Selected Sessions.
- Then Click Save Invoice.
Relevant Client Settings
The following related client settings are available:
- Enable Vendor Invoices Workflow
-
- Enable this setting to manage payments and invoices at the Vendor level.
- Enable Multiple Invoices For Purchase Orders
-
- When enabled, this setting lets you create and handle multiple invoices for one purchase order. If disabled, only one invoice can be created per purchase order.
- Enable vendor invoices to be product/qty level
- This setting is enabled by default and displays session detail on the Add sessions to Vendor Invoice page.
- Display all related vendor invoices on PO
- Turn on this setting to see all associated vendor invoices with the purchase order.
- Require PO Number while creating Vendor Invoice
- When enabled, a PO number will be one of the requirements to create a Vendor Invoice.
- Set Vendor Invoice number as DropShip Vendor OrderID
- When enabled, it will assign the DropShip Vendor OrderID as the Vendor Invoice number.