Overview
The Channel Warehouse Mapping tool enables you to easily map your local warehouses for a specific channel by assigning a unique Channel Warehouse Code. This allows you to send updates about your inventory to each warehouse where your products are stored.
Configure Channel Warehouse Mapping
Follow the steps below to set up and manage Channel Warehouse Mapping.
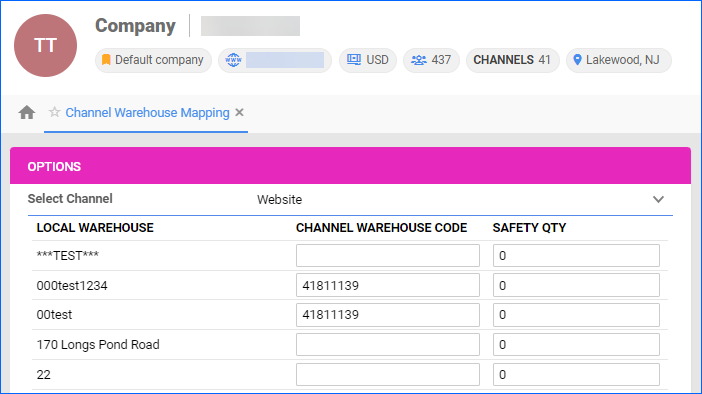
- Go to Settings > Companies > Manage Companies > Open a Company.
- Toolbox > Channel Warehouse Mapping > Edit.
- From the Select Channel drop-down menu, choose the channel.
- Add Warehouse Codes for the warehouses you want to use.
- Add Safety Quantity if needed.
- Click Save.
Once set up, Sellercloud will automatically send inventory updates per warehouse for each product associated with a configured channel through Channel Warehouse Mapping. Inventory information will only be sent for the warehouses that have a Channel Warehouse Code assigned.
Your products will also be affected by this change. To view the changes:
- Catalog > Manage Catalog > Open your product.
- Toolbox > (Channel) Properties.
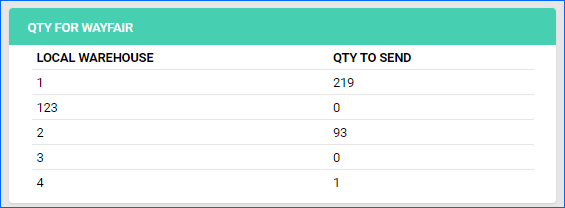
The fields Qty for Channel, Available Qty, and Safety Qty will no longer show up under the Inventory panel. Instead, a new panel called Qty for *Channel* will display (as shown below), showing the Channel Warehouse Codes set for each warehouse and the inventory sent.
Overview
The Channel Warehouse Mapping tool enables you to easily map your local warehouses for a specific channel by assigning a unique Channel Warehouse Code. This allows you to send updates about your inventory to each warehouse where your products are stored.
Configure Channel Warehouse Mapping
Follow the steps below to set up and manage Channel Warehouse Mapping.
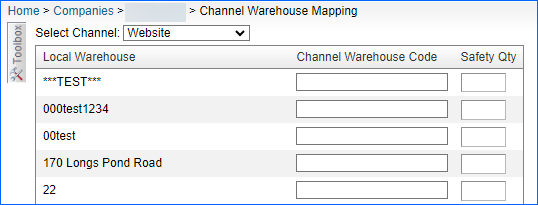
- Go to Settings > Companies > Open a Company.
- Toolbox > Channel Warehouse Mapping.
- From the Select Channel drop-down menu, choose the channel.
- Add Warehouse Codes for the warehouses you want to use.
- Add Safety Quantity if needed.
- Click Save.
Once set up, Sellercloud will automatically send inventory updates per warehouse for each product associated with a configured channel through Channel Warehouse Mapping. Inventory information will only be sent for the warehouses that have a Channel Warehouse Code assigned.
Your products will also be affected by this change. To view the changes:
- Inventory > Open your product.
- Toolbox > (Channel) Properties.
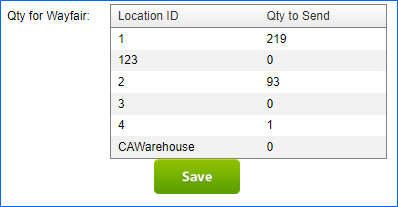
The fields Qty for Channel, Available Qty, and Safety Qty will no longer show up under the Inventory panel. Instead, a new panel called Qty for *Channel* will display (as shown below), showing the Channel Warehouse Codes set for each warehouse and the inventory sent.


