Overview
To import returned merchandise into Sellercloud, whether it’s through an RMA, FBA Removals, or WFS Removals, you must configure a Returns Warehouse and a Return Address. After receiving the returns, you can inspect the products and decide on the appropriate course of action based on their condition.
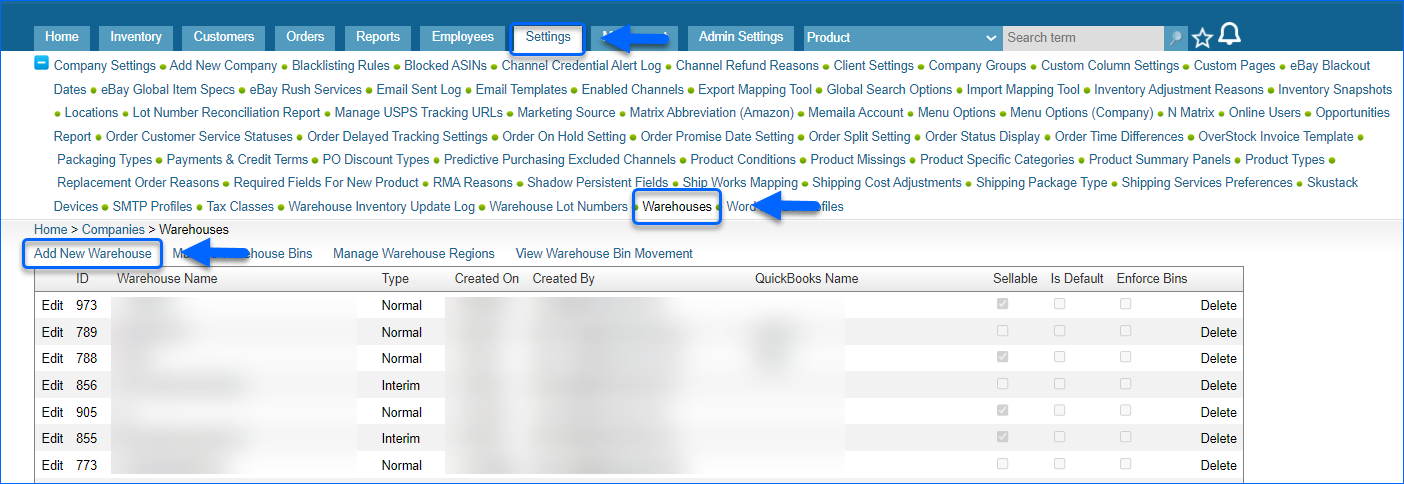
Configure Returns Warehouse
To create a warehouse that will accept your returned products:
- Navigate to Settings > Inventory and select Add New Warehouse.
- Add a Warehouse Name and Warehouse Type.
- Make sure the Is Sellable option is unchecked, so you can avoid mistakenly listing or selling defective items. Unsellable inventory will not be included in the product’s available inventory, but will appear in the total physical inventory count.
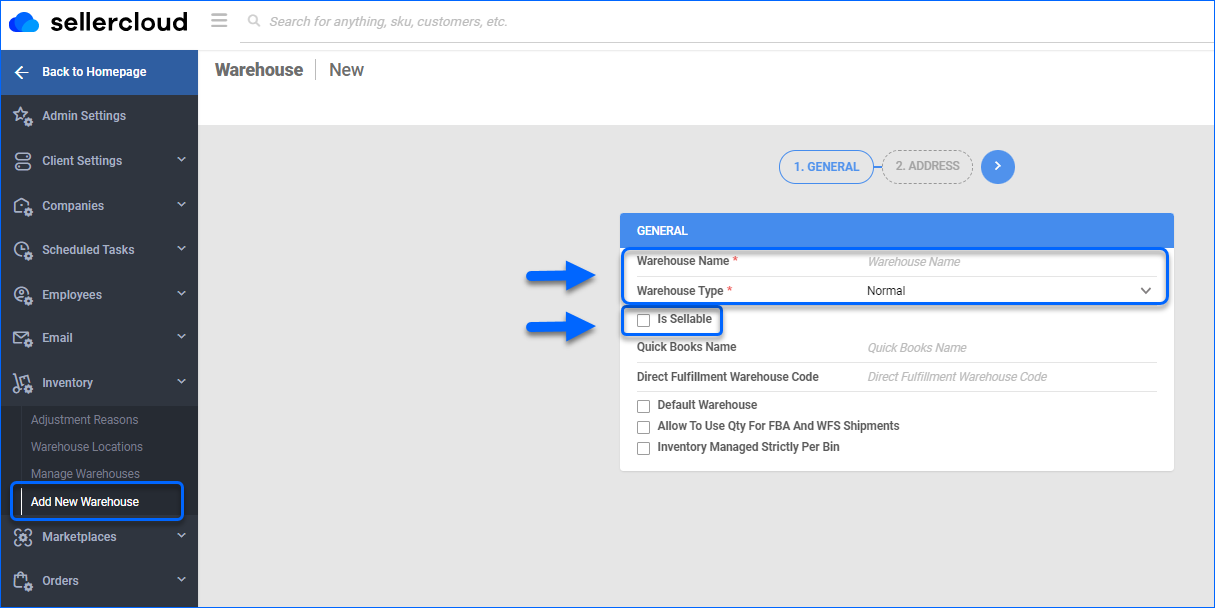
- If you wish, you can select:
- Quick Books Name, in case you use QuickBooks.
- Inventory Managed Strictly Per Bin, if you are using Bins.
- Click Next.
- Add a warehouse Address:
- Via Saved Addresses – If the location is already saved in Sellercloud, select it from the dropdown.
- Input the address manually, by filling the respective fields (Country, Address, ZIP Code, City and State). You can Validate the Address, by clicking on the location pin icon in the top right corner.
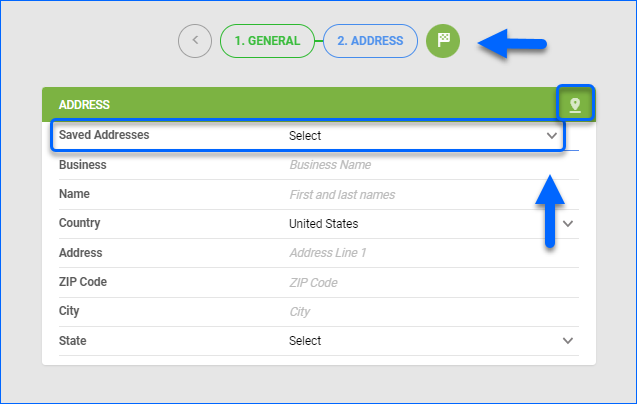
- To Save the warehouse, click the green flag icon.
Return Address Settings
To create an RMA label in Sellercloud, you must first configure your return address settings. Choose either of the 2 options to configure a return address:
- Per Company Address.
- Per channel, by creating a Channel Company Profile.
Company Return Address
To configure a Company Return Address:
- Navigate to Settings > Companies > Manage Companies > Open a company.
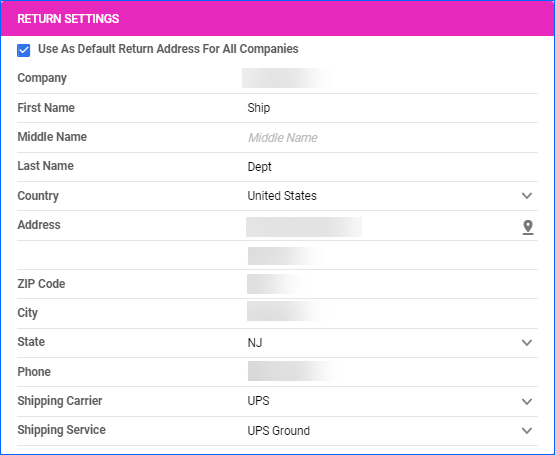
- From the Toolbox, select Return Settings.

- Click Edit.
- Enter the address for the return label and the associated names.
- Select the default Shipping Carrier and Shipping Service. The carrier set here becomes the default for all new RMA return labels.
 Do not put spaces, parentheses, or dashes in the Phone field, as this may cause errors.
 - Check Use As Default Returns Address For All Companies box, if you wish to utilize the same location for all of your companies.
- Click Save.
- Go to Toolbox > Shipping API.
- Click Edit and enter the shipping API credentials for your RMA labels.
- Click Save.
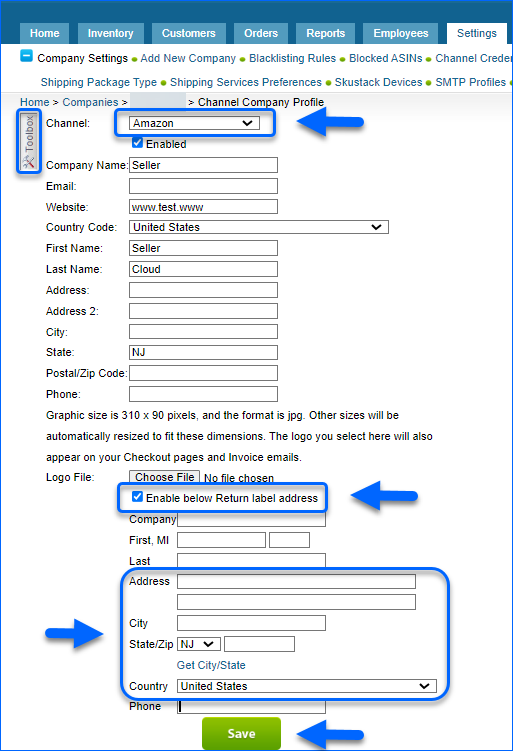
Channel Company Profile
You can set up different return addresses for each channel by creating a Channel Company Profile.
- Navigate to Settings > Companies > Manage Companies and select a company.
- From the Toolbox, select Channel Company Profile.
- Choose a Channel from the dropdown list.
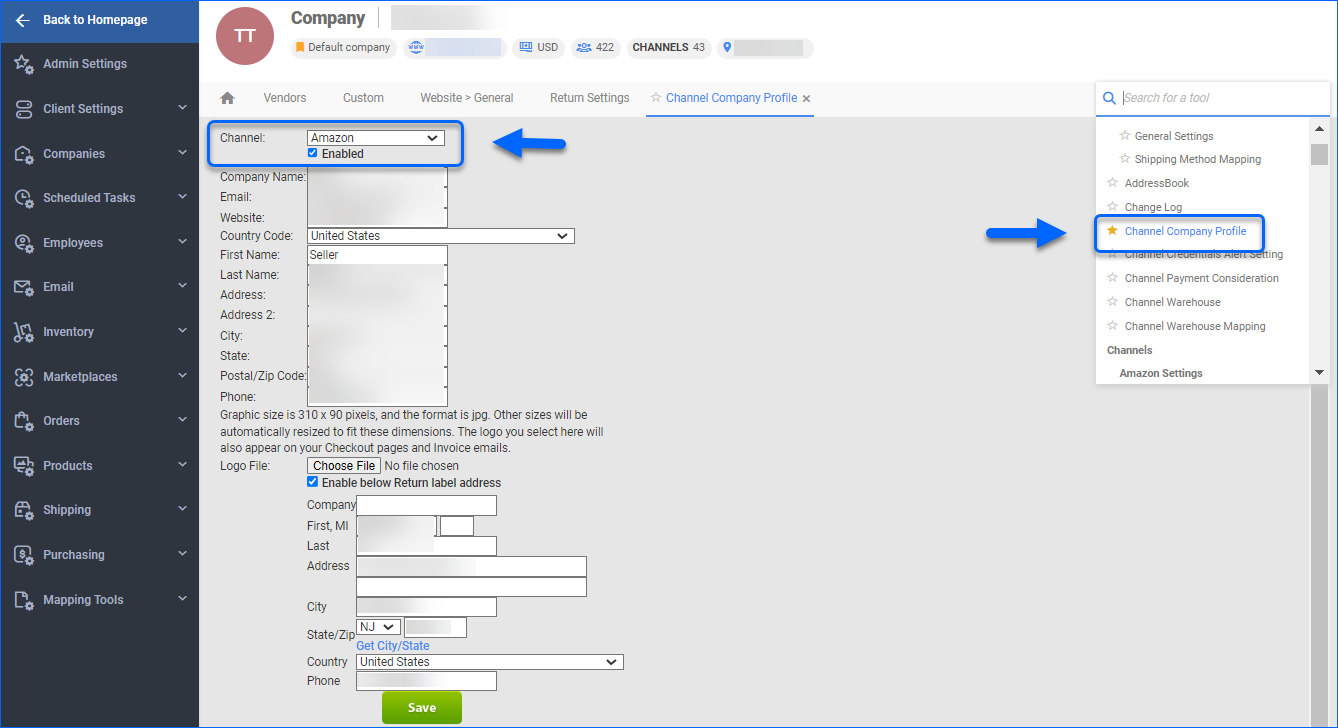
- Enter your Return Address and check Enable below Return label address, to assign it to the channel.
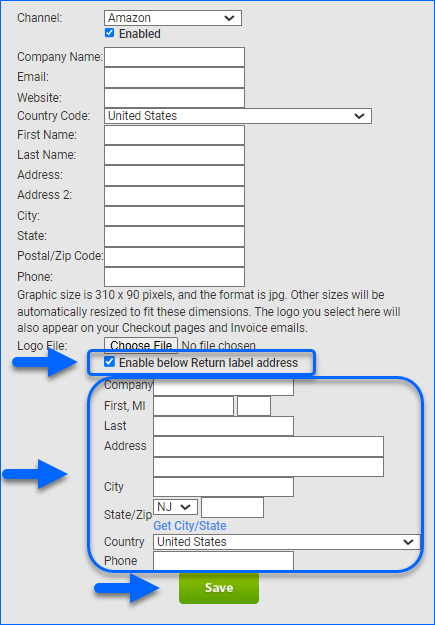
- Click Save.
Manage Returned Products
After an RMA is received, you can inspect the items and depending on their condition, decide how to further manage them.
Defective Items
If an item is defective, you can choose to:
- Make an Inventory Adjustment to remove it from your total inventory quantity.
- Return it to the vendor with a Credit Memo.
Sellable Items
Different approaches can be taken for returned items that are deemed sellable:
- Items that are in their original condition can be transferred to a sellable warehouse, so that they can be sold right away.
- Merchandise with altered condition, which is still considered sellable, can be transferred to another SKU of a suitable condition (e.g. Used, Open box, etc.).
Overview
To import returned merchandise into Sellercloud, whether it’s through an RMA, FBA Removals, or WFS Removals, you must configure a Returns Warehouse and a Return Address. After receiving the returns, you can inspect the products and decide on the appropriate course of action based on their condition.
Configure Returns Warehouse
To create a warehouse that will accept your returned products:
- Navigate to Settings > Warehouses and select Add New Warehouse.
- Add a Warehouse Name and Type.
- Make sure the Sellable option is unchecked, so you can avoid mistakenly listing or selling defective items. Unsellable inventory will not be included in the product’s available inventory, but will appear in the total physical inventory count.
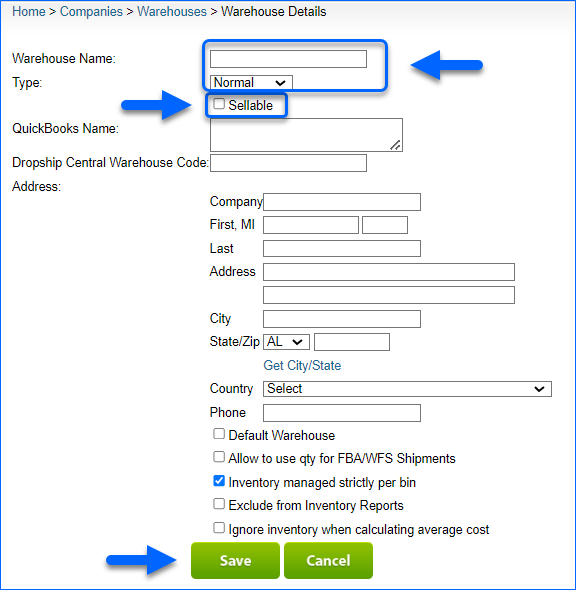
- Add a warehouse Address, by filling the respective fields (Company, Names, Address, City and State/Zip, Country and Phone).
- If you wish, you can select:
- QuickBooks Name, in case you use QuickBooks.
- Inventory managed strictly per bin, if you are using Bins.
- Exclude from Inventory Reports option, to remove data from this warehouse from your inventory reports.
- Click Save.
Return Address Settings
To create an RMA label in Sellercloud, you must first configure your return address settings. Choose either of the 2 options to configure a return address:
- Per Company Address.
- Per channel, by creating a Channel Company Profile.
Company Return Address
To configure a Company Return Address:
- Navigate to Settings > Company Settings and open a company.
- From the Toolbox, select Return Settings.
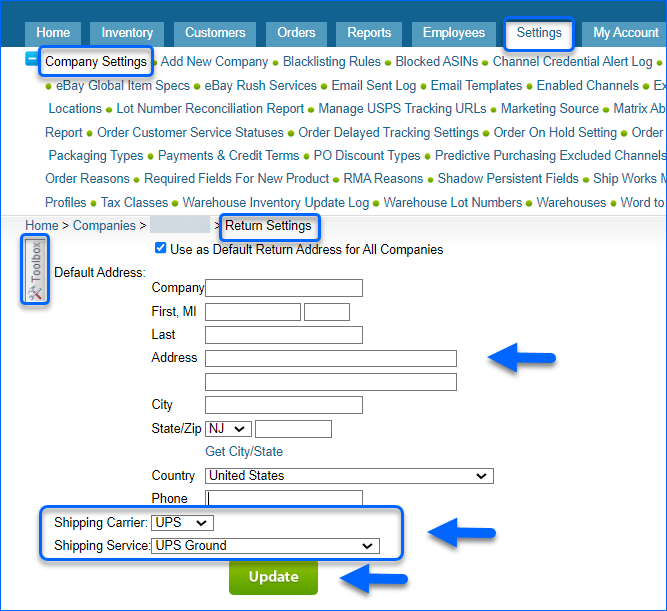
- Enter the Address for the return label, the associated Names and Phone. Do not put spaces, parentheses, or dashes in the Phone field, as this may cause errors.
- Select the default Shipping Carrier and Shipping Service. The carrier set here becomes the default for all new RMA return labels.
- Check Use As Default Returns Address For All Companies box, if you wish to utilize the same location for all of your companies.
- Click Save.
- Go to Toolbox > Shipping API > Shipping API Settings.
- Enter the shipping API credentials for your RMA labels.
- Click Save.
Channel Company Profile
You can set up different return addresses for each channel by creating a Channel Company Profile.
- Navigate to Settings > Company Settings and select a company.
- From the Toolbox, select Channel Company Profile.
- Choose a Channel from the dropdown list.
- Enter your return address and check Enable below Return label address, to assign it to the channel.
- Click Save.
Manage Returned Products
After an RMA is received, you can inspect the items and depending on their condition, decide how to further manage them.
Defective Items
If an item is defective, you can choose to:
- Make an Inventory Adjustment to remove it from your total inventory quantity.
- Return it to the vendor with a Credit Memo.
Sellable Items
Different approaches can be taken for returned items that are deemed sellable:
- Items that are in their original condition can be transferred to a sellable warehouse, so that they can be sold right away.
- Merchandise with altered condition, which is still considered sellable, can be transferred to another SKU of a suitable condition (e.g. Used, Open box, etc.).