Overview
ConnectBooks is a service that allows you to automate your accounting processes and sync your data from Amazon, eBay, Walmart, Shopify, and TikTok Shop to QuickBooks Online or Xero. It provides accurate transaction syncing, inventory tracking, and real-time profit and sales reports. It also offers features like tax and balance sheets, P&L and 1099k reports, and easy book closing.
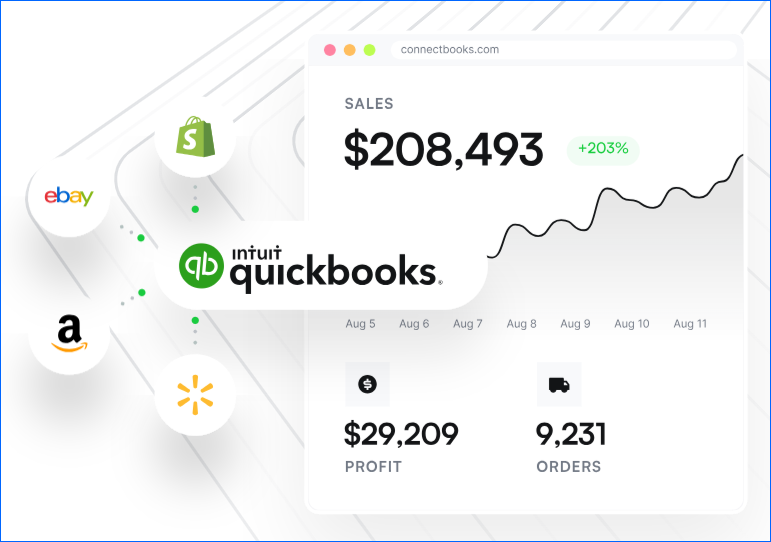
ConnectBooks provides free onboarding, expert support, a user-friendly app experience, and a 100% accuracy guarantee. Overall, it helps you streamline your accounting, gain clarity on your profits, identify trends, and make informed strategic business decisions.
You can integrate Sellercloud and ConnectBooks to synchronize the two platforms and optimize your workflows. The integration is created and maintained by ConnectBooks, which connects to the Sellercloud APIs to transfer data.
Integrate with ConnectBooks
Refer to the steps outlined below for an in-depth understanding of how the integration works:
- ConnectBooks connects to Amazon, Walmart, eBay, and Shopify and automatically imports orders directly from the channel.
- Next, it verifies their shipping status on Sellercloud and, if shipped, retrieves the Cost of Goods Sold (COGS) and shipping costs from Sellercloud to update the data in ConnectBooks.
- If any costs are missing in Sellercloud, ConnectBooks will display a list detailing the affected products and their respective order IDs along with the missing costs. Then, you have two options:
- Fix the missing costs in Sellercloud and manually initiate a re-sync to send the costs to ConnectBooks.
- Manually enter the missing costs in ConnectBooks.
ConnectBooks also imports costs and fees for FBA and WFS orders.
Create an Employee Account
Configure a new Employee account in Sellercloud that you will use to set up the integration:
- Follow the steps to Create an Employee.
- Follow the steps to Add New Permissions to an Employee. Its Role doesn’t necessarily need to be a Client Admin – you can set it up as a regular Employee, but be sure to grant the required permissions for the operations you plan to execute.
- Log in to your ConnectBooks account and enter your Sellercloud employee’s credentials. Contact ConnectBooks Support for assistance with this part of the setup process.
Export Non-Order Transactions
To export non-order transactions to ConnectBooks, you must configure your P&L Settings and use your dedicated employee account to set up a Scheduled Task that automates the process.
Configure P&L Settings
To configure your P&L settings:
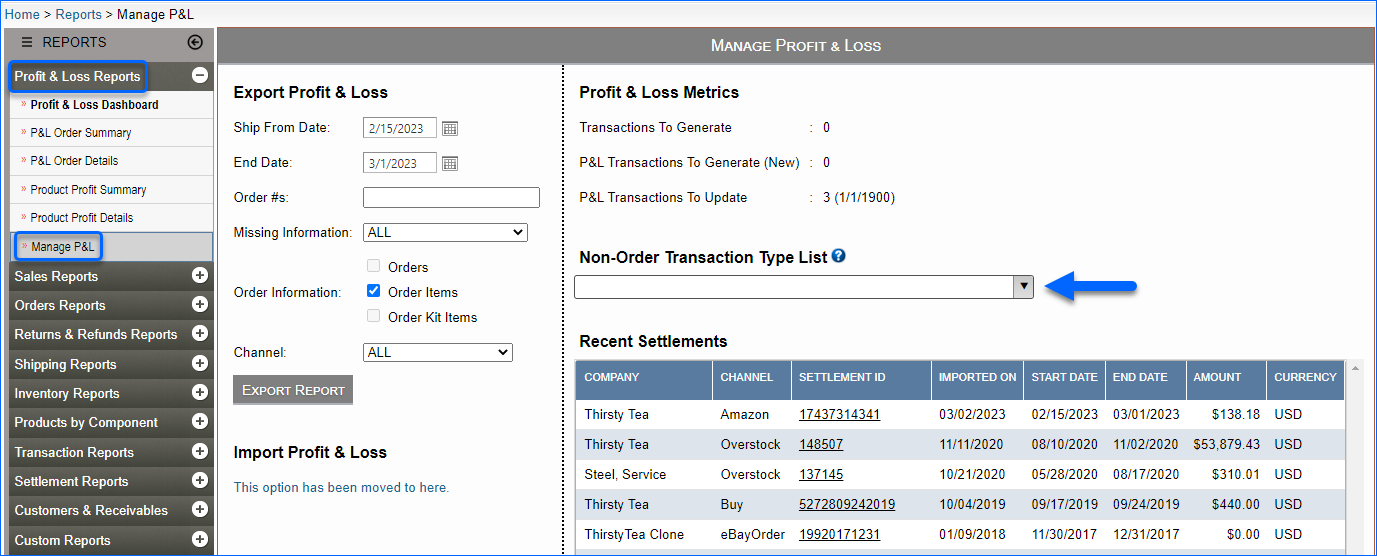
- Go to Reports and select Profit & Loss > Manage P&L.
- Click Non-Order Transaction Type List and enable all transactions.
- Click Save.
Automate the Export
To automate the connection to ConnectBooks:
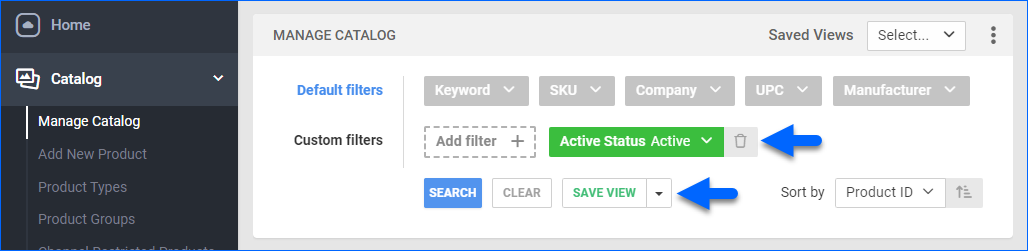
- Log in as the new Employee, then go to Catalog > Manage Catalog and create a new Saved Search with the Active Status filter set to Active.
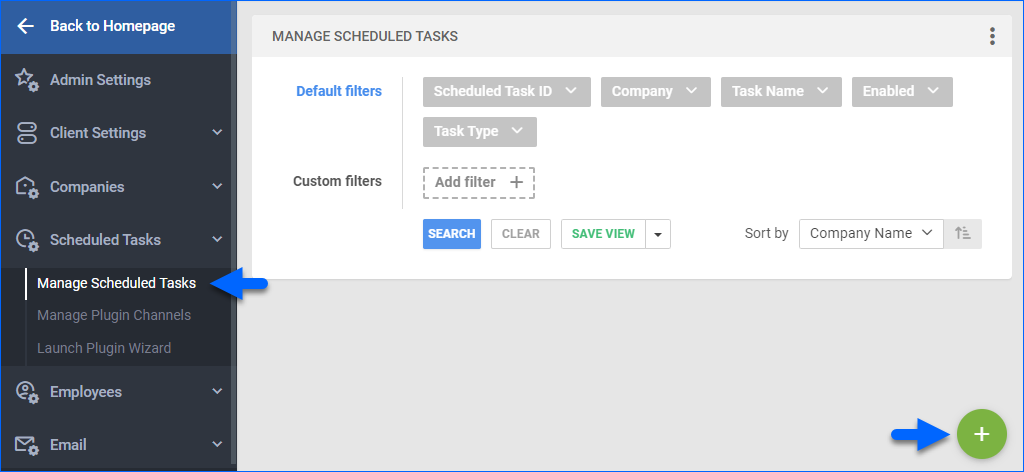
- Go to Settings.
- Select Scheduled Tasks > Manage Scheduled Tasks.
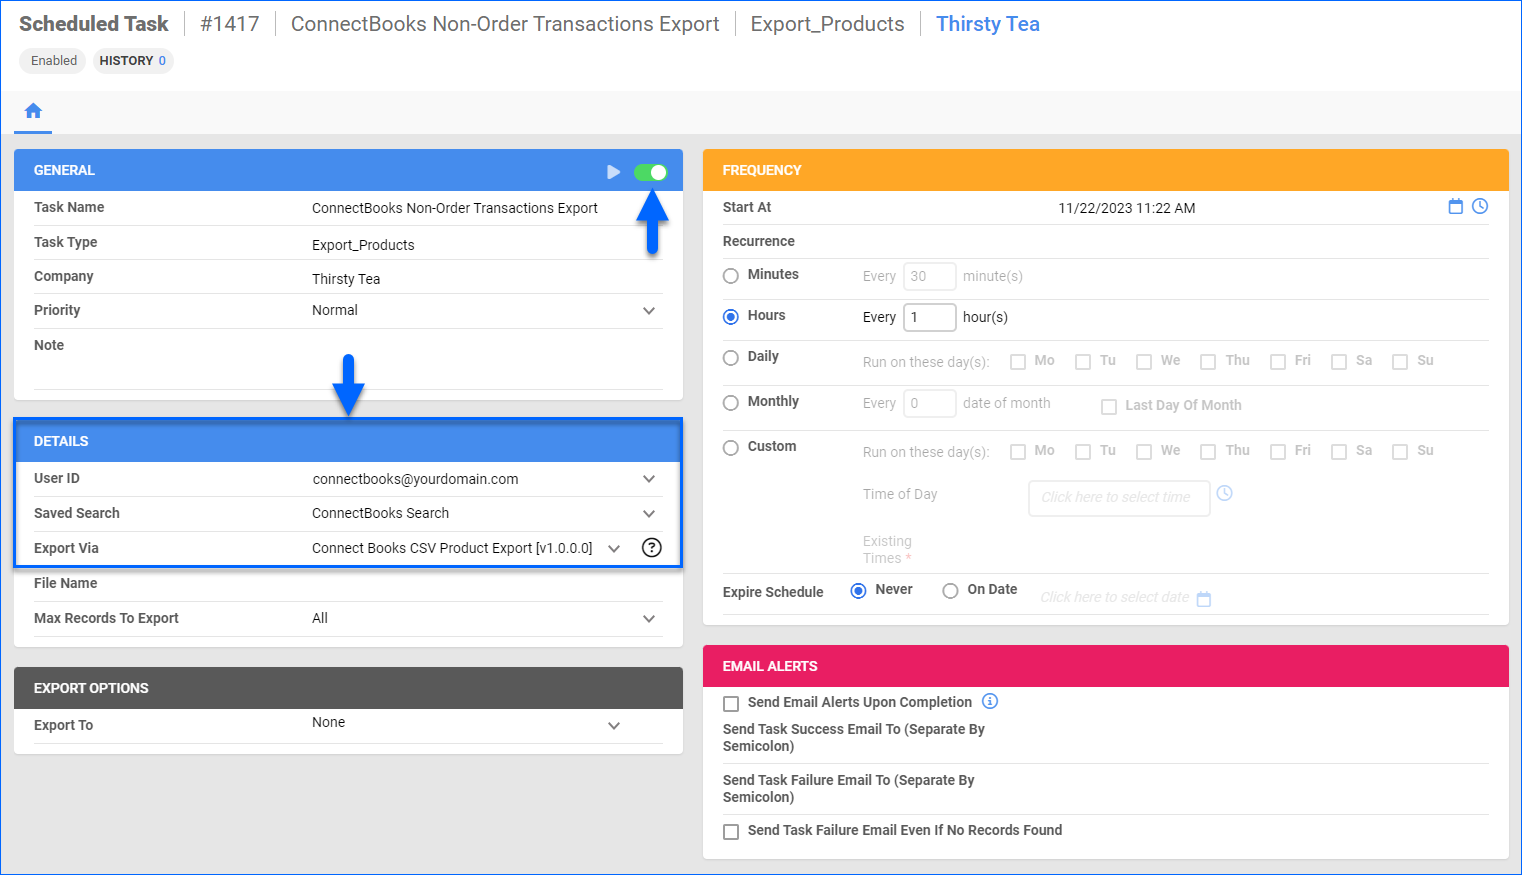
- Click the green + icon: Create New Scheduled Task.
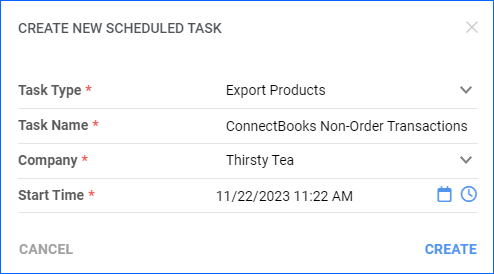
- Complete as follows:
- Click Task Type and select Export Products.
- Set the Task Name.
- Select the Company.
- Select the Start Time.
- Click CREATE.
- Click the Edit button on the top right.
- In the Details section:
- Click Create Orders For Company and select the company designated for this integration.
- Select the new employee from the User ID menu.
- Select the Saved Search you created earlier.
- Click the Export Via menu and select Plugin: Connect Books CSV Product Export.
- In the General panel, check the Enable button on top.
- Click Save on the top right.
Overview
ConnectBooks is a service that allows you to automate your accounting processes and sync your data from Amazon, eBay, Walmart, and Shopify to Quickbooks Online or Xero. It provides accurate transaction syncing, inventory tracking, and real-time profit and sales reports. It also offers features like tax and balance sheets, P&L and 1099k reports, and easy book closing.
ConnectBooks provides free onboarding, expert support, a user-friendly app experience, and a 100% accuracy guarantee. Overall, it helps you streamline your accounting, gain clarity on your profits, identify trends, and make informed strategic business decisions.
You can integrate Sellercloud and ConnectBooks to synchronize the two platforms and optimize your workflows. The integration is created and maintained by ConnectBooks, which connects to the Sellercloud APIs to transfer data.
Integrate with ConnectBooks
Refer to the steps outlined below for an in-depth understanding of how the integration works:
- ConnectBooks connects to Amazon, Walmart, eBay, and Shopify and automatically imports orders directly from the channel.
- Next, it verifies their shipping status on Sellercloud and, if shipped, retrieves the Cost of Goods Sold (COGS) and shipping costs from Sellercloud to update the data in ConnectBooks.
- If any costs are missing in Sellercloud, ConnectBooks will display a list detailing the affected products and their respective order IDs along with the missing costs. Then, you have two options:
- Fix the missing costs in Sellercloud and manually initiate a re-sync to send the costs to ConnectBooks.
- Manually enter the missing costs in ConnectBooks.
ConnectBooks also imports costs and fees for FBA and WFS orders.
Create an Employee Account
Configure a new Employee account in Sellercloud that you will use to set up the integration:
- Follow the steps to Create an Employee.
- Follow the steps to Add New Permissions to an Employee. Its Role doesn’t necessarily need to be a Client Admin – you can set it up as a regular Employee, but be sure to grant the required permissions for the operations you plan to execute.
- Log in to your ConnectBooks account and enter your Sellercloud employee’s credentials. Contact ConnectBooks Support for assistance with this part of the setup process.
Export Non-Order Transactions
To export non-order transactions to ConnectBooks, you must configure your P&L Settings and use your dedicated employee account to set up a Scheduled Task that automates the process.
Configure P&L Settings
To configure your P&L settings:
- Go to Reports > Profit & Loss > Manage P&L.
- Click Non-Order Transaction Type List and enable all transactions.
- Click Save.
Automate the Export
To automate the connection to ConnectBooks:
- Go to Settings > Company Settings > Choose your Company > Toolbox > Scheduled Tasks.
- Choose the Task Type for Export Products and press Go.

- A pop-up will appear.
- Choose the Task Name and the Start Time. The start time includes a calendar date and time. You can select both values from the Calendar and Time View pop-ups.
- Export via Plugin: Connect Books CSV Product Export.
- User ID: the newly created ConnectBooks user/employee.
- Saved search.
- The saved search needs to be created under the same Employee.
- Click on Save.
