Overview
Sellercloud can integrate with Vendor Central Direct Fulfillment, automatically offering Inventory Upload, Order Download, Acknowledgement Upload, Tracking Upload, and Invoice Upload services.
PDF Packing Slips can also be printed from Sellercloud.
Amazon has deprecated the Dropship Central Legacy portal. Dropship Central has been switched to Vendor Central Direct Fulfillment.
If you are shipping orders from Sellercloud, you will need Amazon’s Third-Party Billing information. To request this information, open a case with Amazon. Note that this process may take 10-15 days, during which time your inventory must be at 0.
Vendor Central Direct Fulfillment (formerly Amazon Dropship Central) is Amazon’s vendor dropship program. Amazon will market your products with its branding and you will fulfill orders directly to customers.
Basic Setup
Log into your Vendor Central account and navigate to Integration > EDI Integration. Click View EDI set up next to the Direct Fulfillment profile and select to edit the Global settings.
- EDI Contacts:
- Review and click I have reviewed this information… > Continue to next step
- Message Format:
- Your ISA ID Qualifier: ZZ
- Your ISA/GS ID: This can be your phone number (without spaces or dashes) or any unique 10-digit combination. Note that your ISA ID and GS ID must be the same.
- The EDIFACT fields should be left blank, only fill in the X12 fields.
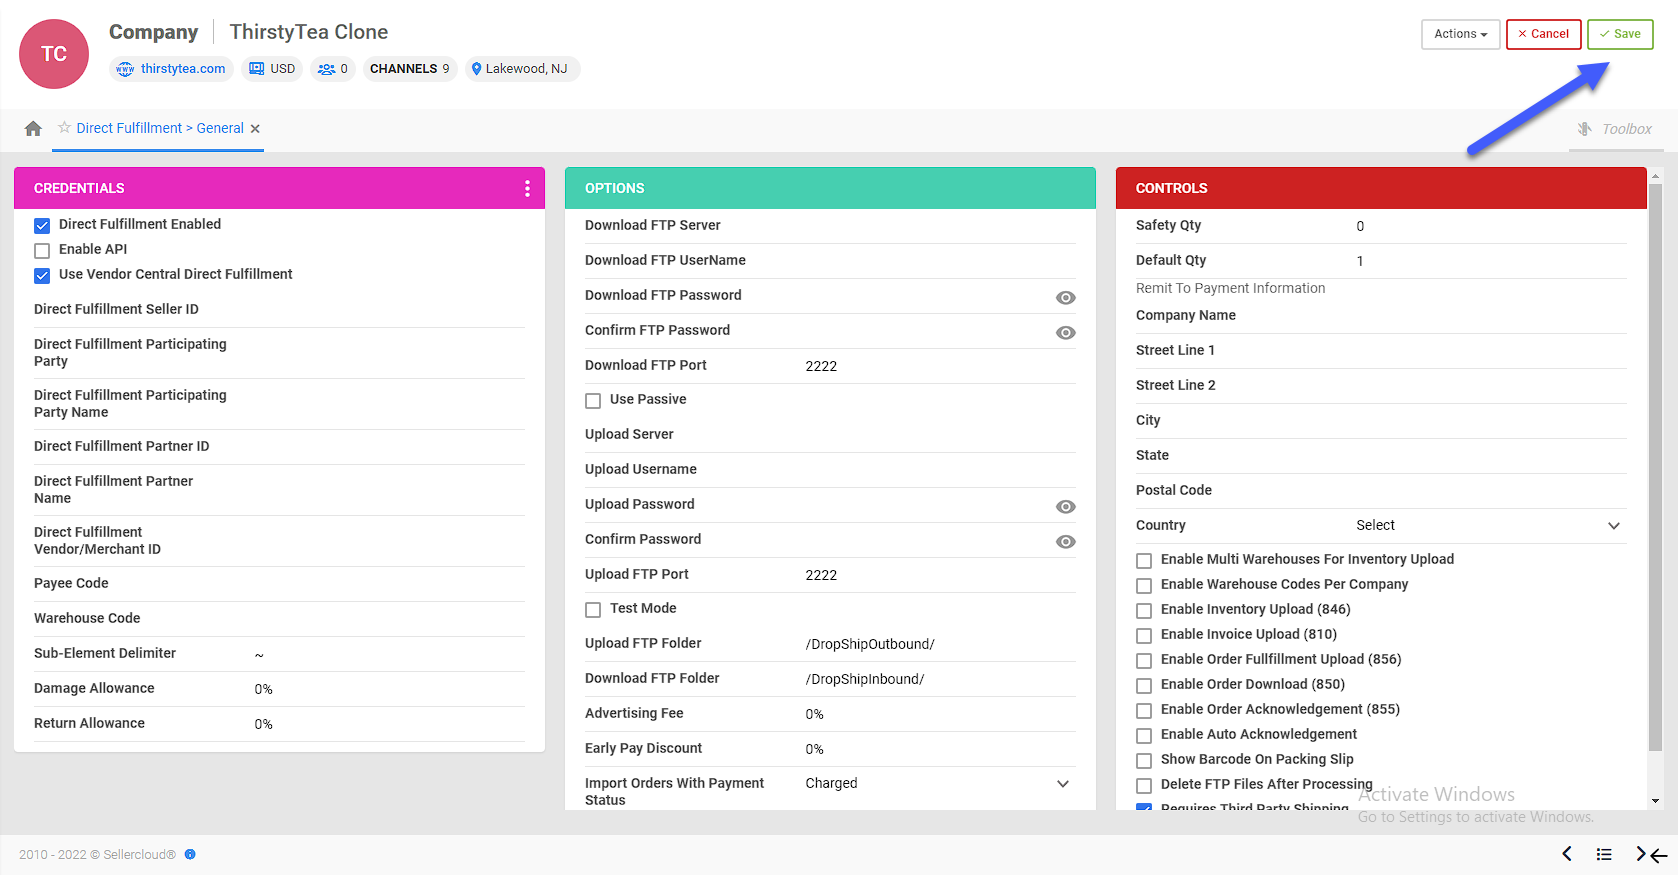
- In Sellercloud, go to Settings > Companies > Manage Companies > Select a company > Toolbox > Direct Fulfillment > General Settings and copy over these credentials from the Amazon portal:
- Direct Fulfillment Seller ID: Your ISA ID Qualifier
- Direct Fulfillment Participating Party: Your ISA ID
- Direct Fulfillment Participating Party Name: Amazon ISA ID Qualifier
- Direct Fulfillment Partner ID: Amazon ISA ID
- (Direct Fulfillment Partner Name can be left blank)
- Check Direct Fullfilment Enabled > Save
- Products:
- Fill out the product identifier, title, cost and price for each of the five test items in the Products section of the Amazon portal. There is no requirement for what is entered as the values for the title, price, and cost fields. The product identifier should be the Sellercloud SKU (create new SKUs in Sellercloud for Direct Fulfillment testing). SKU entered for the Invalid Product Identifier item should NOT exist in Sellercloud.
- Product identifier: Vendor SKU
Warehouse Setup
If you have multiple Direct Fulfillment accounts, each with different warehouse codes, that must be integrated with Sellercloud. Note that you must set up warehouse codes for each company. Otherwise, use the regular warehouse codes.
- In Sellercloud, click Settings > Companies > Manage Companies > Select a company >Toolbox > Direct Fulfillment > General Settings:
- Check Direct Fulfillment Enabled > Save to set up regular warehouse codes.
- Check Direct Fulfillment Enabled and Enable Warehouse Codes Per Company > Save to set up warehouse codes per company.
- Log into the Amazon portal and navigate to Settings > Warehouse Settings. Copy the Warehouse Code from the Direct Fulfillment Warehouse you will be using.
- Back in Sellercloud, go to Inventory > Warehouses > Manage Warehouses > Select a warehouse you will use to ship Direct Fulfillment orders. Click Edit > paste the Warehouse code from the Direct Fulfillment warehouse into the Warehouse Code field and press Save.
- Click Settings > Companies > Manage Companies > Select a company > Toolbox > Direct Fulfillment > General Settings. Paste the same code in the Warehouse Code field.
- Follow the instructions above to set up warehouse codes either by warehouse or by company.
- Set the Direct Fulfillment Warehouse Code on all Sellercloud warehouses that you would like inventory to be pulled from. More than one Sellercloud warehouse can be mapped to the same Direct Fulfillment Warehouse Code.
- The Warehouse Code field on the General Settings page in Sellercloud can be left blank.
- Inventory updates will be sent to each warehouse. Only inventory in warehouses with a Direct Fulfillment Warehouse Code will be included. If more than one Sellercloud warehouse has the same Direct Fulfillment Warehouse Code, a sum of the quantity from those warehouses will be sent.
Use Safety Qty with Multiple Warehouses
You can use safety quantity for multiple Vendor Central Direct Fulfillment warehouses.
On the product level:
- Use Default is unchecked for Safety Qty— The product’s Safety Qty value will be subtracted from each warehouse’s Safety Qty
- Use Default is checked for Safety Qty— The product’s Safety Qty value is ignored and the Per Warehouse Safety Qty is subtracted from each warehouse’s Available Qty
- Enable Warehouse Codes Per Company (on Settings > Companies > Manage Companies > Select a company > Toolbox > Direct Fulfillment > General Settings) must be enabled to work with the Per Warehouse Safety Qty
Vendor ID and Payee Code
- Find your Payee Code on a previous Direct Fulfillment invoice on the Amazon portal (Payments > Direct Fulfillment Invoices) and copy it into the Payee Code field in Sellercloud (Settings > Companies > Manage Companies > Select a company > Toolbox > Direct Fulfillment > General Settings).
- Find your Vendor Code in the Amazon portal by navigating to Items > Catalog. On the left side, above the search button will be a list of Vendor Codes. Copy the dropship code and paste into the Direct Fulfillment Vendor/Merchant ID field in Sellercloud (Settings > Companies > Manage Companies > Select a company > Toolbox > Direct Fulfillment > General Settings).
Set up Test/Production Endpoints
The next step is setting up the connection endpoints. A connection endpoint is the communication path that is used to exchange EDI transactions. You will need to set up both a test and a production connection endpoint. We will be using the SFTP protocol for our connection endpoints.
Log into your Vendor Central account, navigate to Integration > EDI Integration, and click View EDI set up next to the Direct Fulfillment profile. Select the Connection Dashboard tab.
- Click Add test endpoint (or Add production endpoint if you are setting up the production connection).
- How do you want to connect to Amazon? Connect directly to Amazon (AS2, SFTP).
- Connection Protocol: Select Amazon SFTP (secure server maintained by Amazon).
- You can edit the last part of the Connection Name, or leave it as-is. The system uses a date/timestamp as the name by default.
When done testing both endpoints, ensure that the TEST credentials are the ones saved in Sellercloud to use for the rest of the testing process. After all EDI messages are tested and you are ready to launch, you must put the production credentials back into Sellercloud.
- Receiving Account:
- Download the public key attached at the bottom of this Help topic. Browse for the file under Your Public Key and click Upload
- In Sellercloud, click Settings > Companies > Manage Companies > Select a company > Toolbox > Direct Fulfillment Settings > General Settings
- Select Use Vendor Central Direct Fulfillment
- Copy the Directory for receiving file… from the Amazon portal into the Download FTP Folder field on your Sellercloud Direct Fulfillment Settings page
- Click Save & Continue in the Amazon portal
- Receiving Information:
- Copy the host (usually sftp.amazonsedi.com) into the Download FTP Server field in Sellercloud
- Copy the port number (usually 2222) into the Download FTP Port field
- Copy the UserName into the Download FTP User Name field
- In Sellercloud, select Use Passive
- In Sellercloud, select Delete FTP files after processing
- Click Continue in the Amazon portal
- Sending Account:
- Under Your Public Key, browse for the same public key you used for the Receiving Account > Upload
- Copy the Directory… to the Upload FTP Folder in Sellercloud
- Click Continue in the Amazon portal
- Sending Information:
- Copy the host (ordinarily sftp.amazonsedi.com) into the Upload FTP Server field in Sellercloud
- Copy the port number (usually 2222) into the Upload FTP Port field
- Copy the UserName into the Upload FTP UserName field
- Click Save on the Direct Fulfillment General Settings page in Sellercloud
- Click Continue and Continue again in the Amazon Portal. This brings you to the Connectivity Testing section
Test Connectivity for your Test/Production Connection
- Ensure the credentials for the endpoint you are testing are loaded into Sellercloud. If you are testing the production endpoint, the production credentials should be saved on the Direct Fulfillment General Setting page in Sellercloud. To continue testing, you must change back to the test endpoint credentials.
- If you are not already in the Connectivity Testing section in the Amazon portal, navigate to Integration > EDI Integration > View EDI set up for Direct Fulfillment > Connection Dashboard tab. Select to edit the relevant connection and click on the Connectivity Testing tab.
- Press Receive Test File from Amazon. There should be a message A sample PO test file has been generated and will be delivered to your selected endpoint within the next 15 minutes.
- In Sellercloud, click Settings > Companies > Manage Companies > Select a company > Toolbox > Direct Fulfillment Settings > General Settings > Go to Actions > Test FTP Credentials and delete files. A message should display that reads: Download Server Credentials tested successfully. 1 files found, downloaded and deleted. Settings saved successfully. (If not, verify that you entered your Direct Fulfillment settings correctly. If the problem remains, contact Sellercloud Support.)
- In the Amazon portal, click Refresh. The page should refresh, with a new row under Receiving Test Summary. The status of that row should be Passed. Click Continue.
- You do not need to download the test file. In Sellercloud, click Settings > Toolbox > Direct Fulfillment Settings > General Settings > Actions > Test FTP Credentials (Upload). A message should display that reads: Upload Server Credentials tested and file uploaded successfully. Settings Saved successfully. (If not, contact Sellercloud Support.)
- Back in the Amazon portal, click Refresh. The page should refresh with a new row under Sending Test Summary. The status of that row should be Passed. Click Continue.
If the status does not display, wait several minutes before clicking Check for Test File again. There may be a slight delay before Amazon shows the correct result.
- Assign the connection to the first five EDI Messages and click Save. Click Continue in the pop-up window. In the Scheduled to Go Live window and press Close. Then navigate back to Integration > EDI > Direct Fulfillment profile > Messages Dashboard. Do not assign the production connection until you are ready to go live.
Testing EDI Messages
Each EDI message must be tested before being launched.
Navigate to EDI > Direct Fulfillment > Messages.
- 846 Inventory Feed:
- In Sellercloud, mark all Direct Fulfillment items as Direct Fulfillment Enabled. Navigate to Product Home Page > Toolbox > Direct Fulfillment. To update products via Bulk Update, use DropshipCentralEnabled for the column header
- In the Amazon portal, click Test this message for the 846 inventory feed. (If the button says Configure this message, click it first and it will change to Test this message.)
- Click Start Test for the Full Feed
- In Sellercloud, click Settings > Toolbox > Direct Fulfillment > General Settings > Select Enable Inventory Upload (846) > Save
- Select Actions > Generate Inventory and Upload. An inventory file with all Direct Fulfillment Enabled products (your live SKUs) will be uploaded. This will not affect actual inventory levels on Amazon
- After a few moments, the test status will update to Test Complete. If there is an error, ensure your items are set up correctly in the catalog, and that no items are suppressed
- Click Skip Test for the Partial Feed. A Ready to Launch message will appear at the top of the Tests for inventory feed page
- Partial Inventory Update:
- Full inventory feed option (default)— This sends inventory for all items (anything not in the feeds is zeroed out)
- Partial inventory feed option— This sends updates only for items that had an inventory change since the last time inventory was sent (nothing is zeroed out in Vendor Central). To select this option:
- In Sellercloud, click Settings > Companies > Manage Companies > Select a company > Toolbox > Direct Fulfillment > General Settings > Select Enable Inventory Upload
- Select Send Partial Updates > Save
- 850 Order Request:
- Click Test this message and start tests one at a time. (If the button says Configure this message, click it first and it will change to Test this message)
- Click Start Test. After a few moments, the Amazon order number will be populated, and the status will change to Delivering test order
- In Sellercloud, click Settings > Toolbox > Direct Fulfillment > General Settings > Select Enable Order Download (850) > Save
- Click Actions > Import Orders. A queued job will be submitted to import the order. Follow the link and wait until the job processes
- The order will be imported into Sellercloud, and the test status on the Amazon portal should update to Confirm test is valid. (It may take several minutes for the status to update on Amazon.) Click the Confirm message is valid button to change the test status to Test complete
- Repeat for all 3 order tests. When all 850 messages have been tested successfully, a Ready to launch message will appear at the top of the Tests for order request page
- 855 Order Acknowledgement:
- Click Test this message and start tests one at a time. (If the button says Configure this message, click that first and it will change to Test this message)
- Click Start Test. After a few moments, the Amazon order number will be populated, and the status will show Delivering test order
- In Sellercloud, click Settings > Toolbox > Direct Fulfillment > General Settings > Select the Enable Order Acknowledgement (855) box > Save
- Ensure Enable Auto Acknowledgement is DISABLED
- Click Actions > Import Orders. A queued job will be submitted to import the order. Follow the link and wait until the job processes
- Each of the orders in this section must be manually accepted or rejected (see below for specific instructions; if not followed exactly, the test will fail). During production, this process will be automated
- To acknowledge an order, open the order details in Sellercloud and click on the Actions menu > Acknowledge Order to Direct Fulfillment. To accept items, check the Accept Item box. To reject items, select a Reject Reason and ensure the Accept Item box is NOT checked
- Clicking Acknowledge Order will send an acknowledgment to Vendor Central Direct Fulfillment. Once Amazon processes the acknowledgment, the test status will update to Test complete
- Multiple Item Acceptance — Accept all items
- Fill or Kill — Accept the first two items, reject the third item with the reason Canceled out of stock
- Invalid Ship Method — Reject the item with the reason Canceled due to missing/invalid Shipping Carrier/Shipping Method
- Invalid SKU — Reject the item with the reason Canceled due to missing/invalid SKU
- Out of Stock — Reject the item with reason Canceled out of stock
- When all 855 messages are tested successfully, a Ready to Launch message will appear at the top of the Tests for order acknowledgment page
- 856 Advance Shipment Notification:
- Click Test this message and start tests one at a time. (If the button says Configure this message, click it first and it will change to Test this message)
- For each test, click Start Test. After a few moments, the Amazon order number will be populated, and the status will change to Delivering test order
- In Sellercloud, click Settings > Toolbox > Direct Fulfillment > General Settings > Select Enable Order Fulfillment Upload (856) > Save
- Click on the action menu > Import Orders. A queued job will be submitted to import the order. Follow the link and wait until the job processes
- Multiple Item Shipment Test: Find the order in Sellercloud, enter the test tracking information, and click the Action menu order details page > Click Notify Order Source for Shipping.
- Full Floor Denial Test (this rejects the entire order after it was already acknowledged and accepted): Find the order in Sellercloud > Click Acknowledge Order to Direct Fulfillment from the order details’ action menu > Accept the item and click Acknowledge Order > Return to the order details page > Choose Cancel Order from the action menu > Select the item > Set the Qty to Cancel and the reason for canceling the order > Click Continue. The cancellation will be sent to Amazon
- Partial Floor Denial Test (this rejects part of the order after it was already acknowledged and accepted): Find the order in Sellercloud > Click Acknowledge Order to Direct Fulfillment from the order details’ Action Menu > Accept all the items and click Acknowledge Order > Return to the order details page > Choose Cancel Order from the Action Menu > Select the second and third items and cancel qty of 1 from the second line item and qty of 3 from the third line item (do not cancel the first item) > Enter a cancel reason and click Continue > Return to the order details page and ship the first item and one unit from the second item (you will see that the ordered qty has been updated to exclude the cancelled qty) > Choose Notify Order Source For Shipping from the Action Menu to send the 856 with the shipping and cancellation info to Amazon
- When all 856 messages have been tested successfully, a Ready to Launch message will appear at the top of the Tests for Advance shipment notification page
- 810 Invoice:
- Click Test this message (If the button says Configure this message, click it first and it will change to Test this message)
- Click Start Test. After a few moments, the Amazon order number will be populated, and the status will show Pending Delivery
- In Sellercloud, click Settings > Toolbox > Direct Fulfillment > General Settings > Select Enable Invoice Upload (810) > Save
- Click on the action menu > Import Orders. A queued job will be submitted to import the order. Follow the link and wait until the job processes
- Find the order in Sellercloud (you can search the Amazon order number as the OrderSourceOrderID), enter the test tracking information, and select Send/Resend Invoice (810) from the action menu. The test status on the Amazon portal should update to Test complete, and a Ready to Launch message will appear at the top of the Tests for invoice page
* EDI Invoicing— Order will not be invoiced until an EDI 810 invoice is uploadedAfter the EDI 810 invoice transaction is launched, you will not be able to manually invoice any order on Amazon. If you choose not to launch this message, you can use Auto Invoicing instead. However, please confirm that Auto Invoicing is enabled on your account.
Packing Slip
If you will print invoices from Sellercloud/Shipbridge, you must have the PDF approved by Amazon.
- In Sellercloud, click Settings > Companies > Manage Companies > Select a company > Toolbox > Invoice Settings > Per Channel Preferences > Click the Invoice Type dropdown > Channel Specific > Save.
- Open any existing Direct Fulfillment order in Sellercloud > Click on the Actions menu > Print Invoice to PDF.
- Open a case on the Amazon portal and attach the PDF from the previous step.
- Amazon does not require a barcode on the invoice. If you want to show the Sellercloud OrderID barcode (so the packing slip can be scanned in Shipbridge), click Settings > Companies > Manage Companies > Select a company > Toolbox > Direct Fulfillment > General Settings > Select Show Barcode On Packing Slip > Save. Be advised that Amazon may reject the test packing slip if it has a barcode.
Generate Labels
In order to generate labels for your Direct Fulfillment orders, you will need to use our Amazon API Direct Fulfillment Labels plugin. Contact Sellercloud Support to make sure it is installed on your server.
The plugin will periodically export your unshipped orders via API and request the labels from Amazon. Once the label is generated, it will be saved to the Order Documents in the format provided through the API. You can find it by going to your Order Details Page > Toolbox > Documents. Optionally, you can also print those labels in Shipbridge.
Custom Company Settings and Custom Columns
In order to use the plugin, you will need to create them and configure the following Custom Company Settings under the company where the Scheduled task will be running:
- AmazonAPI_WarehouseCode – Amazon Warehouse Code which will be sent with the API call.
- AmazonAPI_VendorCode – Your Vendor Code in Amazon
- AmazonAPI_UseSandbox – True or False. Set to True while in the testing process. Change it to False once ready to use the Production Environment.
- AmazonAPI_APIClientID – Your Client ID for Amazon API.
- AmazonAPI_APIClientSecret – your Client Secret.
- AmazonAPI_AccessKey – Your Client Access Key.
- AmazonAPI_AccessSecret – Your Client Access Secret.
- AmazonAPI_APITokenExpDate – Date of access token expiry.
- AmazonAPI_RefreshToken – Refresh token.
- AmazonAPI_AccessToken – Leave empty to force access token generation despite the date.
Contact Sellercloud Support to create the following Order Custom Column:
- LabelReceived – the plugin will change the value to True once a label has been generated and saved for each order.
Saved View
The next step is to create an Order Saved View for the orders you export. This will later be set on the Scheduled task. Create a Saved View with the following filters:
- Channel: Direct Fulfillment.
- Order Status: InProcess or Completed.
- Shipping Status: Unshipped.
- Company: select the company under which the integration is set up and where the Scheduled task will run.
- LabelReceived: False.
- Optionally you can include filters related to Shipping Carrier and Shipping Method.
Scheduled Task
In order to automate the process, you will need to set up a Scheduled Task:
- Navigate to Settings > Scheduled Tasks > Manage Scheduled Tasks.
- Click the green + icon: Create New Scheduled Task.
- Complete as follows:
- Click Task Type and select Export Orders.
- Set the Task Name.
- Select the Company.
- Select the Start Time.
- Click CREATE.
- The following message appears at the bottom of your screen: “Scheduled task created successfully. Click Here to configure the task details.” – click the link.
- Click the Edit button on the top right.
- In the Details section:
- Click the User ID menu and select your ID.
- Click the Saved Search menu and select the saved view you created earlier.
- Click the Export Via menu and select Amazon API Direct Fulfillment Labels.
- In the Export Options section, set Export To to None.
- In the Frequency section, specify the task frequency. We advise setting this to execute hourly or once every 2 hours.
- In the General section, click the Enable toggle button.
- Click Save on the top right.
Important Steps Before Assigning Production Connections
- Check that you have no open Direct Fulfillment orders on Amazon or Sellercloud. Orders that came into Amazon before the 850 is launched will NOT be pulled into Sellercloud, even if they were not initially in Sellercloud. Additionally, tracking and invoices will fail for orders that were created manually in Sellercloud.
- Launching the 810 transaction is optional but cannot be undone. Only launch if you are sure you want to use EDI invoicing instead of Auto Invoicing.
- If you are experiencing a high volume of orders, you may run into throttling issues with Direct Fulfillment. In such cases, you can set a delay time for sending the EDI 810 Invoices. On the General Settings page for Direct Fulfillment, enable Enable Invoice Upload Delay and set the delay time in seconds for invoice upload in the field Invoice Upload Delay.
- Contact Sellercloud Support to ensure the Dropship Central Service is running on your server.
- Ensure credentials saved in Sellercloud are for the Production Endpoint.
- Before enabling order acknowledgment (855), ensure Enable Auto Acknowledgement (on the Direct Fulfillment General Settings page in Sellercloud) is selected.
- Optional: If you want orders to automatically be accepted, instead of being acknowledged based on inventory availability (which will reject orders that do not have inventory available), you can enable Auto Accept All Orders. This option is only available on the Direct Fulfillment General Settings page in Sellercloud after Enable Auto Acknowledgement is selected and saved.
- Set up shipping method mapping in Sellercloud: Click Company Settings > Toolbox > Direct Fulfillment > Shipping Method Mapping.
- Optional: Sellercloud will send tracking information for orders shortly after they are shipped. If you ship orders on Saturday or Sunday and do not have a carrier pick up until Monday, your First Carrier Scan Rate may be negatively affected. To prevent this, enable Do Not Send Tracking On Saturday and/or Do Not Send Tracking on Sunday on the Direct Fulfillment General Settings page in Sellercloud.
- Assign the production connection you have set up for Sellercloud to the proper transactions
(OF, OFR, INV, ASN, and IAA) - Promote each of the transactions to production.
Use the attached documentation to integrate your Vendor Central Direct Fulfillment account with Sellercloud: