Overview
Direct Fulfillment (formerly Amazon Dropship Central) is a vendor dropshipping program where Amazon markets and sells your products under its own branding. While Amazon manages customer service and covers all shipping costs for orders fulfilled through the program, you remain responsible for packaging, order fulfillment, and direct shipping to customers. This allows you to leverage Amazon’s reach while maintaining control over how your products are packed and shipped.
As a Sellercloud user, you can integrate Direct Fulfillment to upload your inventory, download orders, upload tracking and invoices, and print PDF packing slips. Once you complete the steps below to integrate Direct Fulfillment, orders will start coming into Sellercloud with the Customer Email set to [email protected].
As soon as orders are imported, Sellercloud automatically requests shipping labels from Amazon. When the labels are generated, the corresponding tracking information is assigned and updated in Direct Fulfillment, even before the order is physically shipped. However, you must ensure the order is shipped by the required Ship-By Date to remain compliant with Amazon’s fulfillment policies.
Prerequisites
Before you can integrate Direct Fulfillment, open a ticket with Sellercloud Support and verify that the following App Settings are enabled on your server:
- EnableSellingPartnerAPIForDropShipCentral
- EnableDirectFulfillmentAPISyncShippingLabels – False by default; set to True.
- DirectFulfillmentAPITracking_SkipContainers_IfLabelReceivedFromAmazon – False by default; set to True.
To Integrate Direct Fulfillment, you must obtain your Direct Fulfillment Vendor/Merchant ID, which is available in your Direct Fulfillment Account Settings. It is also available in Menu > Integration > EDI Integration.
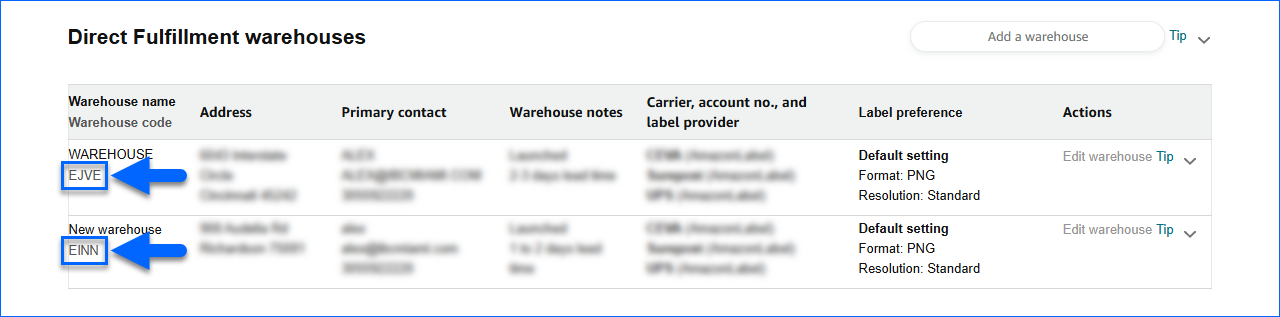
In addition, to complete the Warehouse Setup, you need to enter your Direct Fulfillment Warehouse Codes. To find these codes:
- In the Amazon portal, click the Settings gear icon in the top right and select Warehouse Settings.

- Note down the Warehouse Codes of the warehouse(s) you will integrate.
Integrate Direct Fulfillment
To integrate Direct Fulfillment via API:
- Go to Company Settings.
- Click Toolbox and select Direct Fulfillment > General Settings.
- Click Edit.
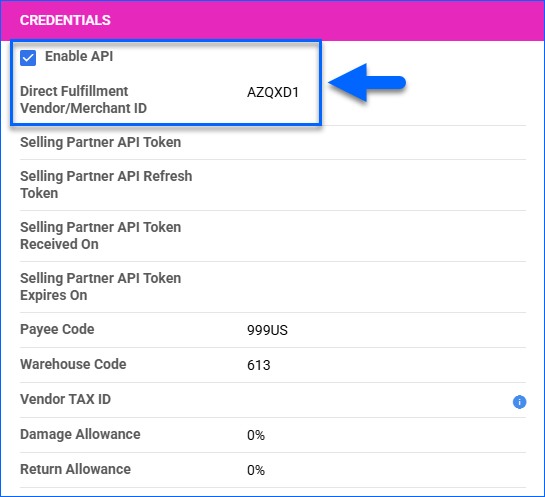
- Check the Enable API box.
If you don’t see the Enable API option, open a ticket with Sellercloud Support and ask to enable the App Setting EnableSellingPartnerAPIForDropShipCentral. - Enter your Direct Fulfillment Vendor/Merchant ID.
- Click Save and then refresh the page.
- Click Actions and select Get Selling Partner API Token.
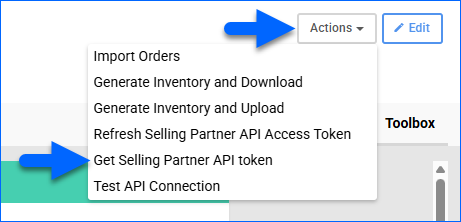
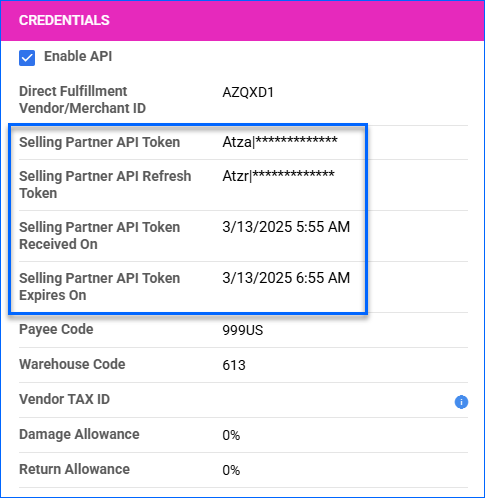
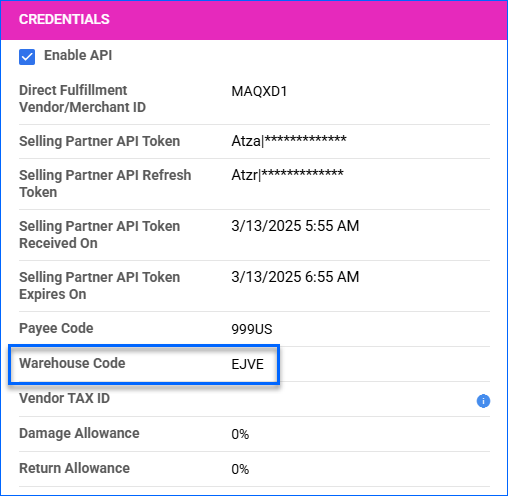
- You will be redirected to Vendor Central, where you must sign in to authenticate. Once you do, all related Selling Partner API Token fields in the Credentials panel will update.
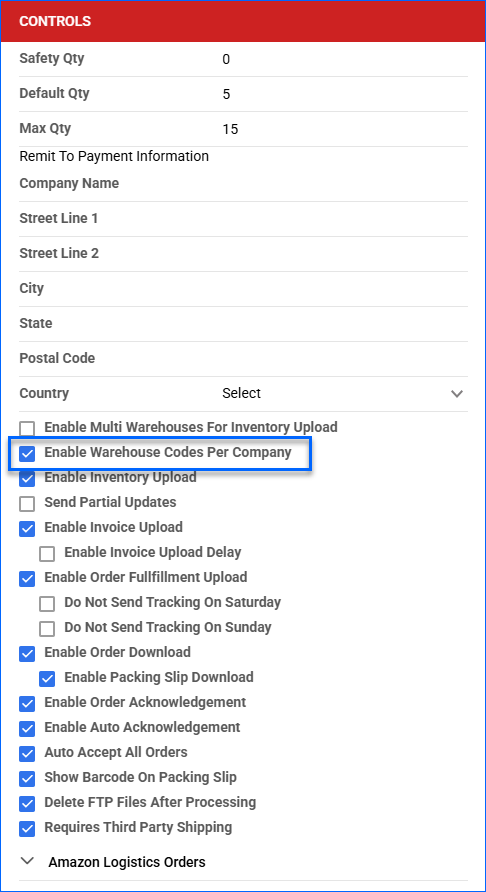
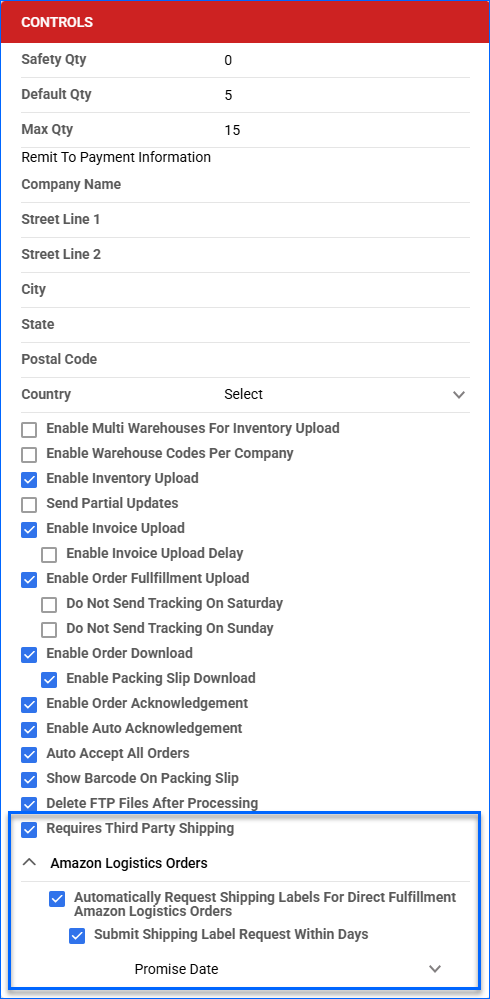
- In the Controls panel:
- Check Requires third party shipping. This setting forces Shipbridge to ship orders to ship using a third-party account instead of your regular account. Shipbridge puts a flag on such orders.
- Click the Amazon Logistics Orders dropdown and check Automatically Request Shipping Labels for Direct Fulfillment Amazon Logistics Orders. This setting will request shipping labels from Amazon once orders are imported to Sellercloud.
- For Sellercloud to request the labels on the Promise Date, enable Submit Shipping Label Request within Days and set Request Within Days to Promise Date.

- Click Save.
- Complete the Warehouse Setup.
- Configure Shipping Method Mapping.
Warehouse Setup
Sellercloud allows you to integrate multiple Direct Fulfillment accounts, each with a different Warehouse Code. To do this, you must set up warehouse codes Per Company. Otherwise, use the regular warehouse-level setup options.
Per Company
To set up warehouse codes per company:
- Go to Company Settings.
- Click Toolbox and select Direct Fulfillment > General Settings.
- Click Edit.
- Check Enable Warehouse Codes Per Company to set up warehouse codes per company. Now, the inventory upload and order import will use the warehouse codes per company instead of the codes set on the warehouse page.
- To enter the codes per company, click Toolbox and select Dropship Central > Warehouse Codes.
This page will only be editable if Enable Warehouse Codes Per Company is enabled on the Direct Fulfillment General Settings page.
- Note that you can also specify the Safety Quantity per warehouse.
Single Warehouse
To configure the warehouse code if you use a single warehouse:
- Go to Company Settings.
- Click Toolbox and select Direct Fulfillment > General Settings.
- Click Edit.
- Paste the code in the Warehouse Code field and click Save.
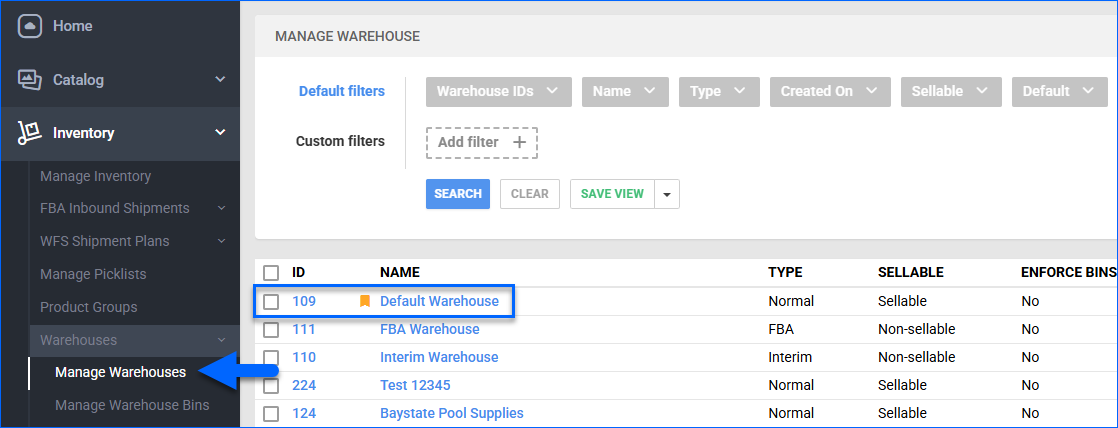
- Go to Inventory > Warehouses > Manage Warehouses.
- Click the Name or ID of the warehouse you will use to ship Direct Fulfillment orders.
- Click Edit.
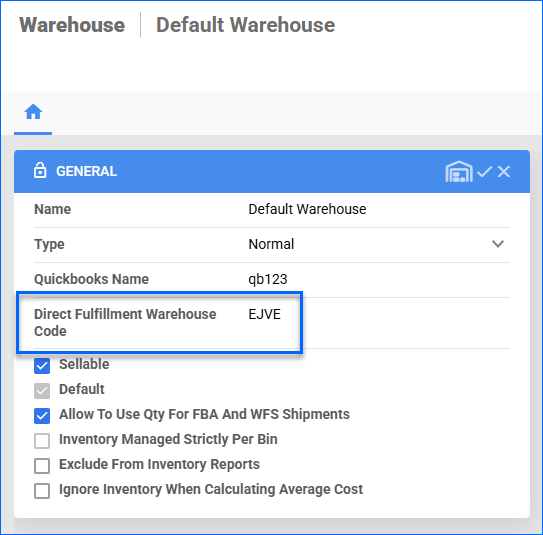
- Enter the warehouse code into the Direct Fulfillment Warehouse Code field and click Save.

Multiple Warehouses
To use multiple warehouses:
- On the Direct Fulfillment > General Settings page, follow the instructions above to set up warehouse codes either by warehouse or by company.
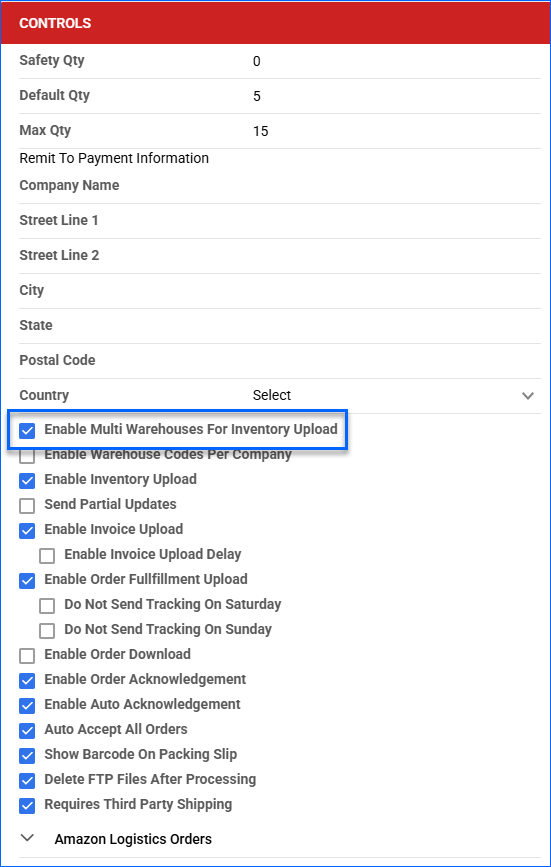
- Check Enable Multi Warehouses For Inventory Upload.
- Leave the Warehouse Code field on the General Settings page in Sellercloud blank.

- For each warehouse in Sellercloud that you would like inventory to be pulled from:
You can map more than one warehouse to the same Direct Fulfillment warehouse code.- Go to Inventory > Warehouses > Manage Warehouses.
- Click the Name or ID of the warehouse you will use to ship Direct Fulfillment orders.

- Click Edit.
- Enter the warehouse code into the Direct Fulfillment Warehouse Code field and click Save.
Sellercloud will send inventory updates for each warehouse with a Direct Fulfillment Warehouse Code. If more than one Sellercloud warehouse has the same Direct Fulfillment Warehouse Code, you will send a sum of the quantity from those warehouses.
Multi-Warehouse Safety Quantity
Below is how the Safety Quantity works with a multiple warehouse setup.
On the Product Details Page > Toolbox > Direct Fulfillment Properties:
- With Use Default unchecked for the Safety Qty, the product’s Safety Qty value will be subtracted from each warehouse’s Available Qty.
- With Use Default checked for the Safety Qty, the product’s Safety Qty value is ignored, and the Per Warehouse Safety Qty is subtracted from each warehouse’s Available Qty.
The Enable Warehouse Codes Per Company setting must be enabled.
Shipping Method Mapping
To configure shipping method mapping for Direct Fulfillment:
- On the Company Settings page, click Toolbox and select Direct Fulfillment > Shipping Method Mapping.
- Click Edit.
- For ATS ship methods, assigned when items weigh over 50lbs, map the following fields to Amazon Ground:
- AMZL_US_BULK
- AMZL_US_LMA
- AMZL_US_PREMIUM
- AMZL_US_LMA_AIR
- AMZL_US_PREMIUM_AIR
- USPS_ATS_BPM
- USPS_ATS_STD
- USPS_ATS_PARCEL
- USPS_ATS_BPM_AIR
- USPS_ATS_STD_AIR
- USPS_ATS_PARCEL_AIR
- For AMXL ship methods, assigned when items weigh over 50lbs, map the following fields to AMXL_US_SH_PARCEL:
- AMZL_US_SH
- AMZL_US_SH_SD
- AMZL_US_SH_PARCEL.
- Click Save.

Configure Label Settings
With the Company Setting Automatically Request Shipping Labels for Direct Fulfillment Amazon Logistics Orders, when orders are imported, Sellercloud automatically requests shipping labels from Amazon. You can also get Sellercloud to request the labels on the Promise Date by enabling Submit Shipping Label Request within Days and setting the Request Within Days to Promise Date.
When you use Shipbridge, you don’t generate a new label. You print out the label sent from Amazon. It’s essential to configure Shipbridge properly and, when shipping, to select the correct option to print these labels.
Before you ship any orders, follow these steps to configure Shipbridge:
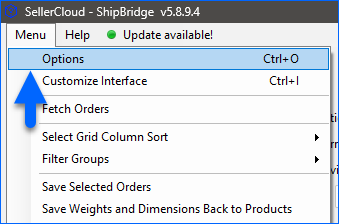
- Go to Menu > Options.
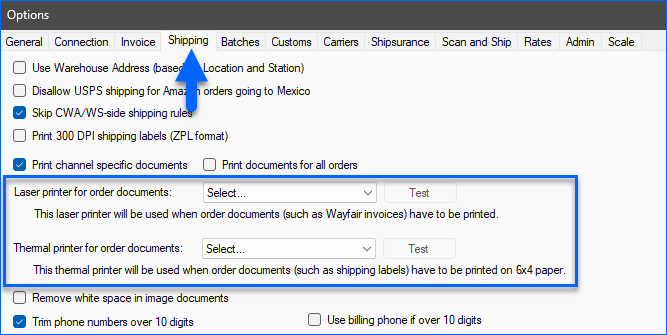
- Select the Shipping tab.
- Set the correct printer for these two options:
- Laser printer for order documents
- Thermal printer for order documents
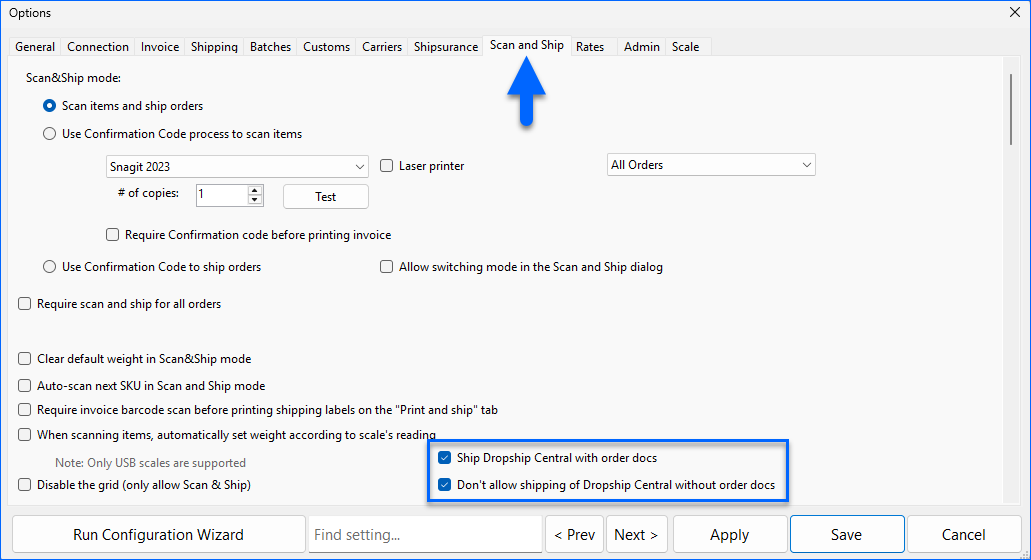
- Select the Scan and Ship tab.
- Check Ship Dropship Central with Order docs.
- Optionally, you can also enable Don’t allow shipping of Dropship Central without order docs to prevent shipping orders for which Amazon has not yet sent the necessary documents.
- Click Save.
Configure PDF Packing Slips
You can download packing slips from Amazon and then print them from Sellercloud and Shipbridge.
To print invoices, you must first have the invoice PDF approved by Amazon:
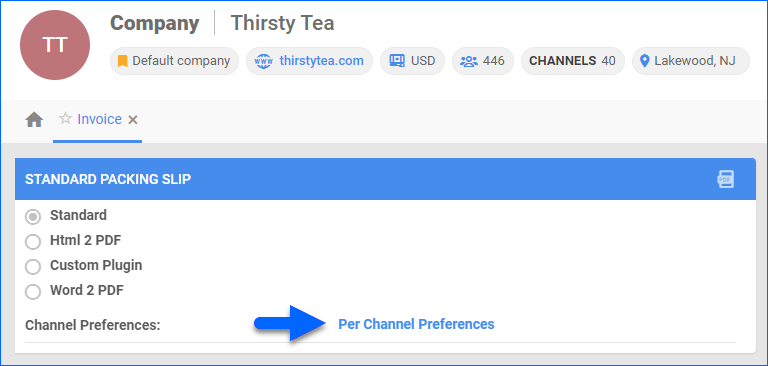
- Go to Company Settings.
- Click Toolbox and select Invoice Settings.
- Click Per Channel Preferences.
- Next to Dropship Central, set the Invoice Type to Channel Specific.
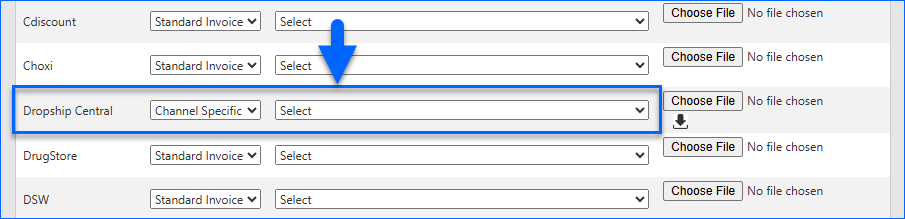
- Click Save.
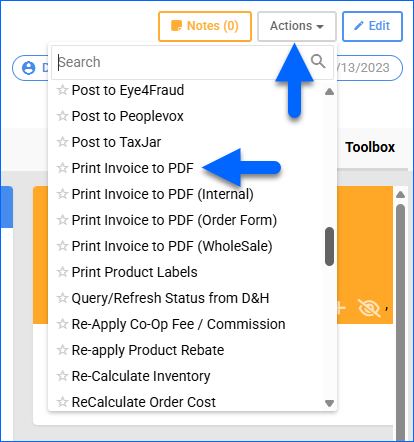
- Go to the Order Details Page of a Direct Fulfillment order in Sellercloud.
- Click Actions and select Print Invoice to PDF.
- Open a support case on the Amazon portal and attach the PDF from the previous step.
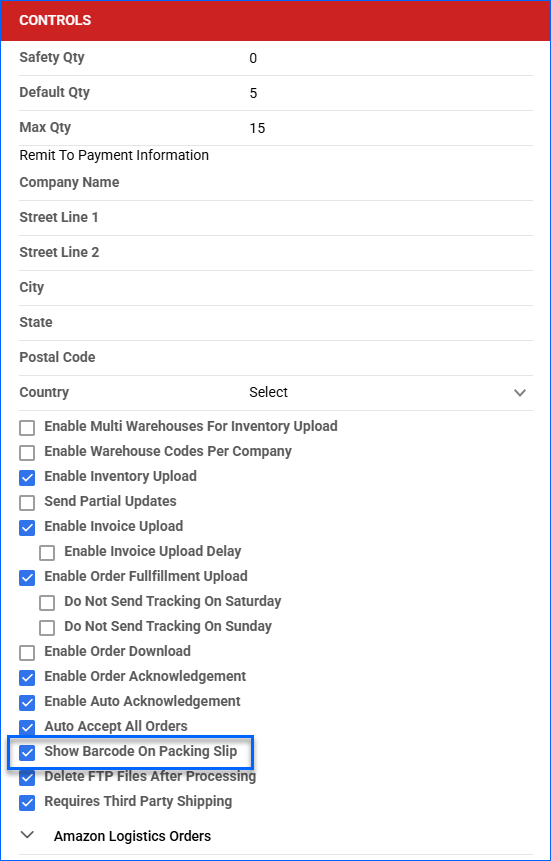
Additionally, you must make sure to show the Sellercloud Order ID barcode so the packing slip can be scanned in Shipbridge:
- Go to Company Settings.
- Click Toolbox and select Direct Fulfillment > General Settings.
- Click Edit.
- Select Show Barcode On Packing Slip.
- Click Save.