Overview
Employee Security Templates in Sellercloud simplify managing permissions across multiple users. These templates allow Client Admins to set and apply consistent access levels, ensuring each employee has the appropriate permissions to carry out their tasks while withholding access to irrelevant or sensitive information.
You can create Templates from scratch or copy them from an existing employee’s permissions, then easily assign them to other users for streamlined access control.
Prerequisites
In order to make changes to a user’s Permissions or assign a Security Template, you must first ensure you have granted them access to at least one existing Company. All of the selected permissions will only apply to the enabled company, and the user will not have access to any of the information linked to the rest of the companies in your Sellercloud account. To do that:
- Navigate to Settings > Employees > Manage Employees.
- Find the Employee you are changing the Permissions for and click on their ID.
When you are creating a new employee, you will be asked to select a Default Company. This does not auto-enable the company on the Permissions tab. You must still follow the steps as described here.
- Open the Toolbox > Permissions.
- Click Edit
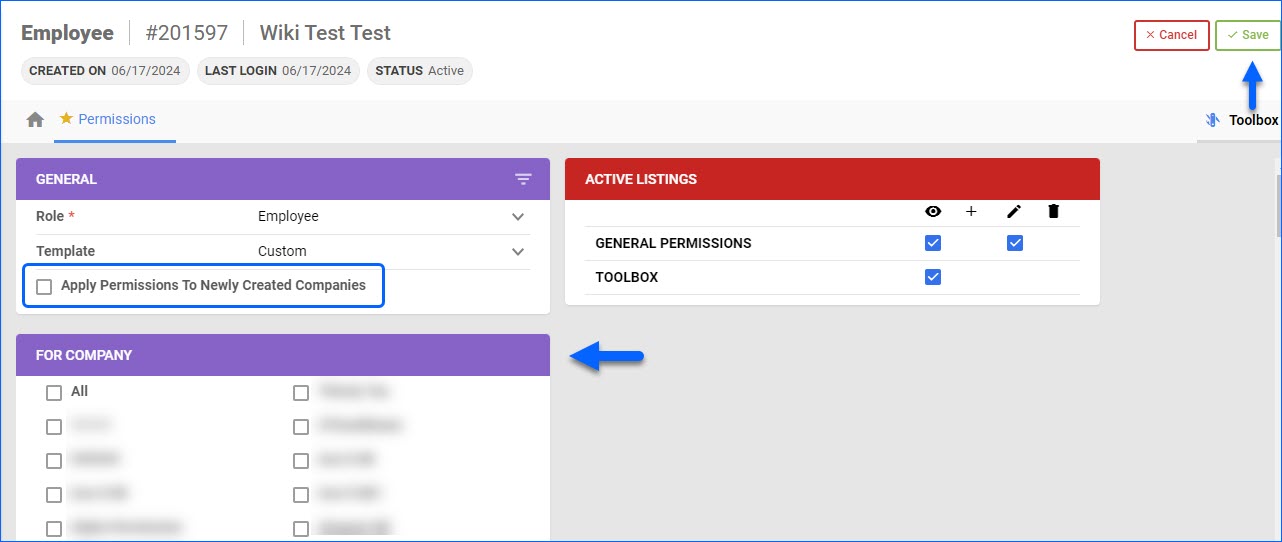
- In the For Company panel, check the boxes for each company you want to grant access to.
- Ensure the Employee’s Default Company is enabled.
- During this step, you can also enable Apply Permissions To Newly Created Companies in the General panel. This will ensure that the user will automatically have the same set of permissions for any new Companies created after configuring the Employee.
- Click Save. In the pop-up modal, select Custom to save the changes only for this Employee or New Template to create a new Security Template.
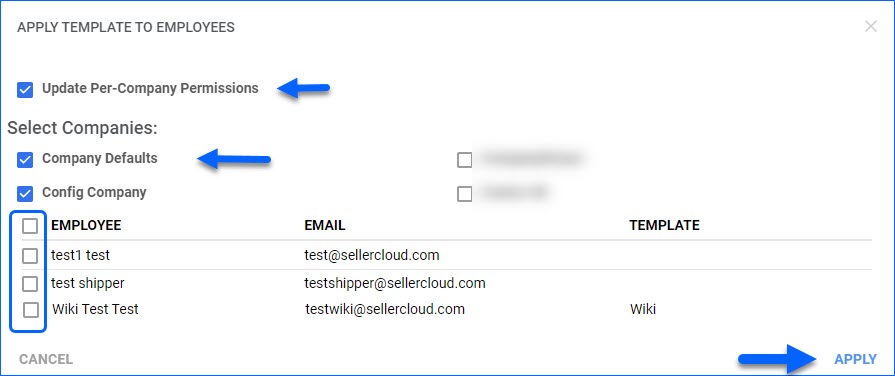
 You can also update the Company Permissions for Employees when Assigning a Template in bulk. The pop-up dialogs have an additional checkbox for Update Per-Company Permissions, which expands the companies list. For example, when Assigning a Template From the Template Details page:
- Go to a Security Template Details page.
- Click Edit.
- Press the three-dot menu and click Apply Template to Employees.
- In the pop-up modal, check the box for Update Per-Company Permissions and select companies from the list.
- Select the Employees.
- Click Apply.
Create Employee Security Templates
There are two ways to add a new Security Template: from the Manage Security Templates page and by saving the Permissions for an Employee.
Create a New Template
To create a new Security Template:
- Go to Settings > Employees > Manage Security Templates.
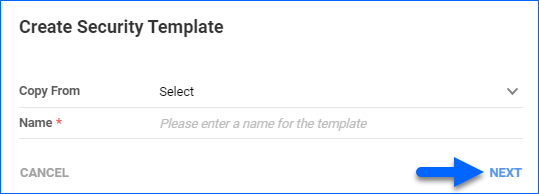
- Click on the Add button at the bottom-right corner of the page.
- Click Next and select entities.
- These entities correspond to different functionalities across Sellercloud, such as Catalog, Purchase Orders, FBA Inbound Shipments, Queued Jobs, etc. Selecting them here will automatically enable all related permissions for that Template. You can later change them from the Template Details page.
- Click Select All to enable all available permissions.
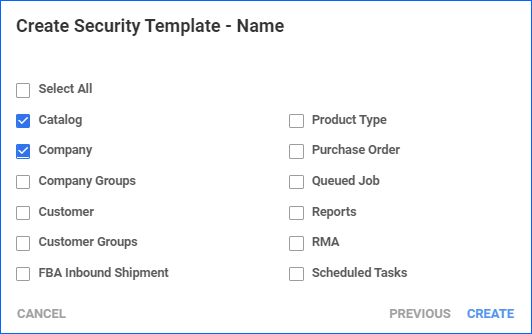
- Click Create.
Save Security Templates
After editing the Permissions of a specific Employee, you have the option to save the configuration as a template and apply it to other users. This only works if there is no Template already selected for that Employee. If there is, even if you make changes and save them, the original permissions will remain. To create a new Template by saving Permissions:
- Go to the Manage Employees page > Choose an Employee and open the Employee Details page.
- From the Toolbox > click Permissions.
- Click Edit to make the necessary adjustments.
- Click Save. In the pop-up modal, select New Template and add a Name.
- If you select Custom, the permissions will be saved for that Employee only, and no Template will be created.
Assign Security Template to Employees
You can assign a Security Template from the Details page of each individual Employee or use one of the two available bulk actions.
Individually
To assign an existing Security Template to an individual Employee:
- Navigate to Settings > Employees > Manage Employees.
- Open the Employee > Toolbox > Permissions.
- Click Edit.
- In the General panel, select an existing Template from the dropdown.
- Click Save. The page will refresh, and you will see all the related permissions.
From the Template Details Page
Once you Create the Security Template, you can assign it to employees in bulk:
- Go to Settings > Employees > Manage Security Templates.
- Click the Template ID to open the Security Template details page.
- Press Edit.
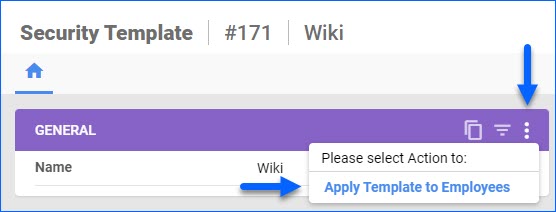
- Click the three-dot menu on the General panel header > Apply Template to Employees.
From the Manage Employees Page
Follow these steps to apply a template to multiple employees:
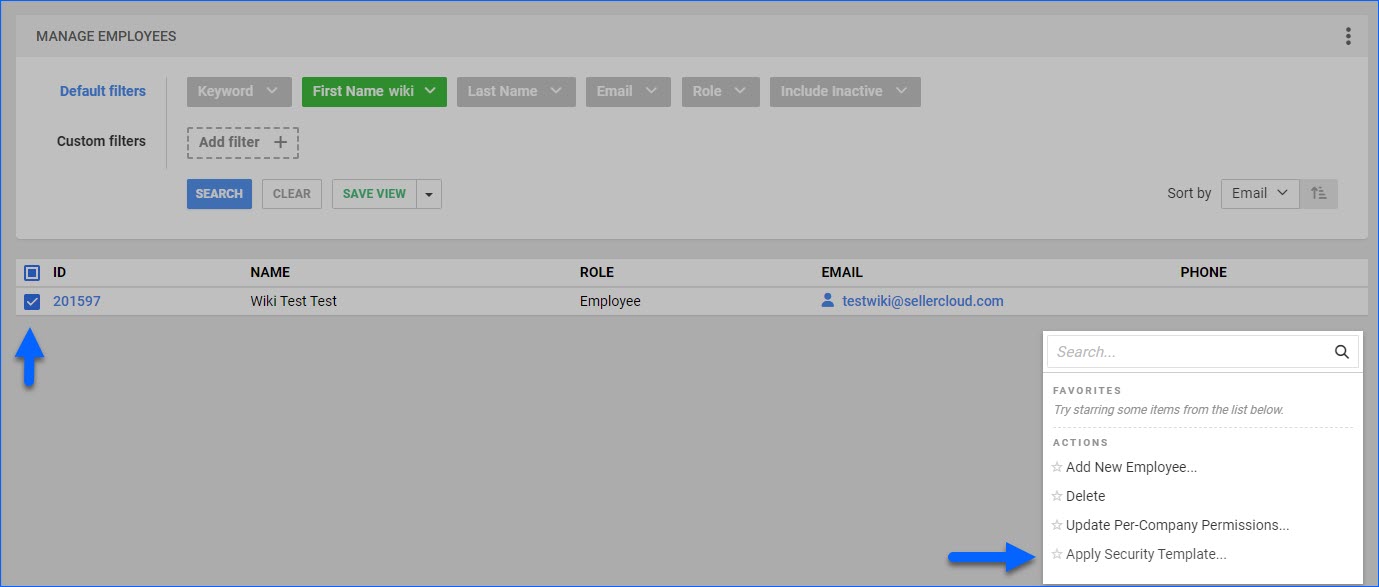
- Go to Settings > Employees > Manage Employees.
- Search and select the users you want to update.
- Click on the Action Menu in the bottom right corner.
- Click Apply Security Template…
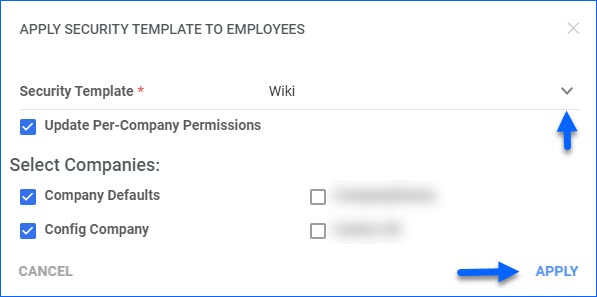
- In the pop-up dialog:
- Select a Template from the dropdown.
- Optionally, check Update Per-Company Permissions to choose which companies the employee would have permission for.
- Click Apply.
Manage Employee Security Templates
Once you have created the necessary Security Templates and assigned them to Employees, you can go back and change the Permissions within different templates or update specific user permissions. Some key things to note:
- If an Employee has been assigned a Security Template, you are not able to edit individual permissions just for that one user. You must either:
- Assign a new Template to the Employee.
- Change the Template to Custom and save the new unique configuration.
- Changing any of the permissions on the Security Template Details page will automatically update the Employee Permissions of all users with that template assigned to them.
- To Delete a Security Template, you must first ensure it is not assigned to any Employees.

To view and update your existing Security Templates:
- Navigate to Settings > Employees > Manage Security Templates.
- You can search for templates using the following filters:
- Template IDs – accepts multiple values.
- Name – accepts multiple values.
- Created On – select a date range.
- The results grid displays the following columns:
- ID – a hyperlink that will redirect you to the Template Details page.
- Template Name – a hyperlink that will redirect you to the Template Details page.
- Created On – the date this template was created.
- Created by – name of the user who created the template. Click to view their Employee Details page.
- Access – list of the entities this template grants access to.
Delete Template
To delete a Security Template:
- Go to Settings > Employees > Manage Security Templates.
- Search for and select Templates.
- From the Action Menu, click Delete.
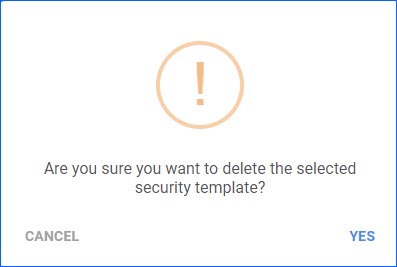
- In the pop-up dialog, confirm the action.
