Overview
Chewy, Inc. is a leading American online retailer focused on pet goods. They offer an extensive catalog of pet-related products ranging from food and treats to accessories and wellness items.
Integrating Chewy, Inc. into your Sellercloud account allows you to seamlessly import orders, upload tracking information, and ensure your listings are always up-to-date with the latest inventory data. This integration works through API, transmitting information between the two services via plugins and Scheduled Tasks. The communication is facilitated through DSCO, a third-party platform.
If necessary, you can contact Sellercloud Support to request additional customizations or other plugins for this integration. Any such modifications will be billable.
Prerequisites
Before you can integrate Chewy, Inc. with Sellercloud, complete the following requirements.
- A dedicated Company.
- Custom Company Settings.
- Saved Views to target specific products and orders.
- Scheduled Tasks to run the plugins automatically.
Once configured, you can manage all integrations created through the wizard on the Manage Plugin Channels page. The workflow outlined below describes the manual configuration process, which does not create a plugin channel on the Manage Plugin Channels page.
DSCO Support
Contact DSCO Support to request your:
- Supplier ID
- API Token
- Client ID
- Client Secret
- Warehouse Supplier Code
Send an email to [email protected] titled ‘Create Client Credentials.’ In the email, include the name and ID of the DSCO account and the user name with which the client credentials will be associated.
When ready, DSCO’s support team will send the client credentials to you. Be sure to store them securely.
To get a Warehouse Supplier code, you must set up a warehouse in DSCO.
- Contact the DSCO Integrations team and log into your DSCO account.
- Click CONNECTING: Step 1 and continue through the onboarding and testing processes. You choose the Warehouse Supplier Code during the onboarding process. You can create it on your Warehouse Manager page in the DSCO portal.
You will use these credentials and Warehouse Codes to populate the Custom Company Settings outlined below.
Sellercloud Support
Open a ticket with Sellercloud Support and request that the following plugins be installed on your server:
- DSCO API v3 Order Import
- DSCO API v3 Tracking Export
- DSCO API v3 Invoice Export
- DSCO API v3 Inventory Export
Company Settings
Create the following Custom Company Settings on the company you created for this integration:
Custom Company Settings for old accounts without Stream API
- DSCO_Token – Enter the Token from DSCO support here.
- DSCO_SupplierId – Your Supplier ID, also provided by DSCO.
Custom Company Settings for new accounts with Stream API
- DSCO_ClientID – Enter your Client ID from DSCO support here.
- DSCO_ClientSecret – Enter your Client Secret from DSCO support here.
- DSCO_StreamID – Leave it empty, it populates automatically for the Stream API.
- DSCO_StreamPosition – Leave it empty. Populates automatically for the Stream API.
Optional Custom Company Settings
- Consider replenishable products – True or False. Defaults to False. When True, works with Replenishable qty.
- Replenishable qty – Quantity that will be exported if Available Quantity is 0 or less. Only works if the Consider replenishable products setting is True.
- DSCOUseExpectedDeliveryDate – True or False, defaults to False. When True, exports custom column DSCOEXPECTEDDELIVERYDATE. If missing or disabled, the exported date will be a week ahead.
- DSCO_WarehouseCode – DSCO warehouse code used by default when the DSCO_WarehouseCodes setting has no value.
- DSCO_WarehouseCodes – List of Sellercloud WarehouseIDs and DSCO warehouse codes (connected by a hyphen), separated by a comma. Example: Sellercloud warehouseID-DSCOWarehouseCode, 123-Lakewood, 245-BostonWH.
- DSCO_DontSendItemID – True or False, defaults to False. When set to true, inventory updates will not include ItemID, and DSCO will match the SKU instead.
- DSCOSendCost – True or False, defaults to False. When True, sends a custom column DSCOCost.
- DSCO_SendDiscontinued – True or False, defaults to False. When True, it sends the custom column DSCOIsDiscontinued. Products must be discontinued in Sellercloud
- DSCO_SendUPC – True or False, defaults to False. When True, sends UPC with the inventory export.
- DSCO_SendQtyOnOrder – True or False, defaults to False. When True, sends quantityOnOrder with the OnOrderQty for that product.
- DSCO_ExportSsccCode – True or False. If True, exports the SSCC code with the tracking.
- DSCO_StandardWarehouseCode – DSCO’s standard Warehouse code exported by the tracking export plugin.
- DSCO_IncludeWarehouseCodeInTracking – True or False, if True, sends the DSCO standard warehouse code from the custom setting DSCO_StandardWarehouseCode.
- DSCO_SendOnePackagePerKitParent – True or False. If True, each kit parent will be in a separate package.
- DSCO_SendKitParentOnly – True or False. If True, only sends the parent SKU with the tracking without the components.
- DSCO_SendShipFromInfo – True or False. If True, sends the orders’ Ship From information with the tracking export.
- DSCO_SendPackageWeight – True or False. If True, sends the package weights with the tracking export.
- DSCO_SendInvoiceDate – True or False, set to True to send Invoice Date.
- DSCO_SendCurrencyCode – True or False, set to True to send the exported order’s Currency Code.
- DSCO_NetTermDays – Numeric only, sends NetTermDays with the invoice export.
- DSCO_NetTermType – Exported when DSCO_NetTermDays exists and isn’t 0.
- DSCO_SendShipToInfo – True or False. If True, sends the orders’ Ship To information with the invoice export.
- DSCO_SendSubtotal – True or False. If True, enables exporting order line subtotal with the invoice export.
- DSCO_Chewy– Can be set as a Sellercloud channel name. The order source will appear as the set channel name.
- DSCO_MarkOrdersUnpaid – True or False. If True, sets the order as Unpaid.
- DSCO_LockShippingMethod – True or False. If True, does not allow shipping methods on orders to be changed.
- DSCO_IncludeWarehouseCodesInOrderImport – True or False, If True, sets the Ship From warehouse with the order import and checks the setting DSCO_WarehouseCodes for the codes.
- DSCO_ShippingRequiresThirdPartyBilling – If True, the orders’ ShippingRequiresThirdParty will be set to True.
- DSCO_AllowShippingUSPS – True or False. If True, and DSCO_ShippingRequiresThirdPartyBilling is True, and the order’s carrier is USPS, we will NOT set ShippingRequiresThirdParty to True.
- DSCO_AllowShippingUPS – True or False. If True, and DSCO_ShippingRequiresThirdPartyBilling is True, and the order’s carrier is UPS, we will NOT set ShippingRequiresThirdParty to True.
- DSCO_CreatePayments – Type Boolean, defaults to True if missing. Determines if an order payment will be imported or not based on the setting value for the order channel. Defaults to Website, but can be changed by using the company setting DSCO_Chewy.
- DSCO_CoopFeePercentage – Defaults to 0. CoOp Fee percentage to be applied when creating order items. 2.5 would denote 2.5% to be added to each order item’s CoOp fee.
Custom Order Columns
Create the following Custom Order Columns:
- DSCOInvoiceId – The invoice number.
- DSCOConsumerOrderNumber – The imported consumer order number from DSCO is saved here.
- DSCO_Coupons – Imports the coupons here.
- DSCO_Email – Imports the shipping address email.
- DSCO_Channel – Saves the name of the order’s channel. Type string.
Custom Product Columns
Create the following Custom Product Columns:
Required Custom Product Columns
- DSCOItemID – Conditionally required String. This should match the SKU of your listing. You can find it on the Products page in DSCO. If left empty for a product, that SKU will be skipped in the inventory update. However, if the custom setting DSCO_DontSendItemID is True, we will send the Sellercloud SKU instead.
- DSCOSafetyQty – Sets a Safety Quantity on the product level.
- DSCOIsDiscontinued – True or False, defaults to False. When set to True, exports the item with a Discontinued status.
- DSCO_MerchantSKU – Product identifiers used when sending a request to DSCO. If not present, the integration will use ProductIDs. Type string.
Optional Custom Product Columns
- Chewy_Enabled – Optional, type Boolean. Used to enable only specific products for Chewy. Set to True for any products you want to send with the Inventory Export plugin.
- DSCOEXPECTEDDELIVERYDATE – Used when the company setting DSCOUseExpectedDeliveryDate is enabled. Exports a date that’s a week ahead when missing or disabled. Sellercloud will follow the entered date. If no date is entered, 7 days from the current date will be sent.
- DSCOCost – Sent when the company setting DSCOSendCost is set to True.
- DSCOPartnerSKU – If this column exists and is populated, it is sent as a partner SKU.
Order Import
The Order Import plugin:
- Gets all new orders from DSCO and imports them to Sellercloud using API.
- Imports orders as paid for the user DSCO_<CompanyID>@sellercloud.com.
- Acknowledges each order after it is created, so it will be moved to Shipment Pending in DSCO and will no longer be included in the new orders download.
- Checks for products by matching:
- DSCO SKU to Sellercloud UPC
- DSCO SKU to Sellercloud Product ID
- DSCO UPC to Sellercloud UPC
- DSCO Item ID to Sellercloud custom column DSCOItemID
- DSCO Partner SKU to Sellercloud Product ID
As of version 1.0.1.5, the plugin supports both the Stream API and the old method to get orders. The only differences are a few custom settings and credentials. The old method will continue to be used by default, where only DSCO_Token is required, as long as the Stream API settings don’t exist or aren’t populated.
If you need to reset the date, use the following DSCO_StreamPosition:
- Format: z/yyyy/mm/dd/HH/mm/000
- Example: z/2022/09/26/20/19/000
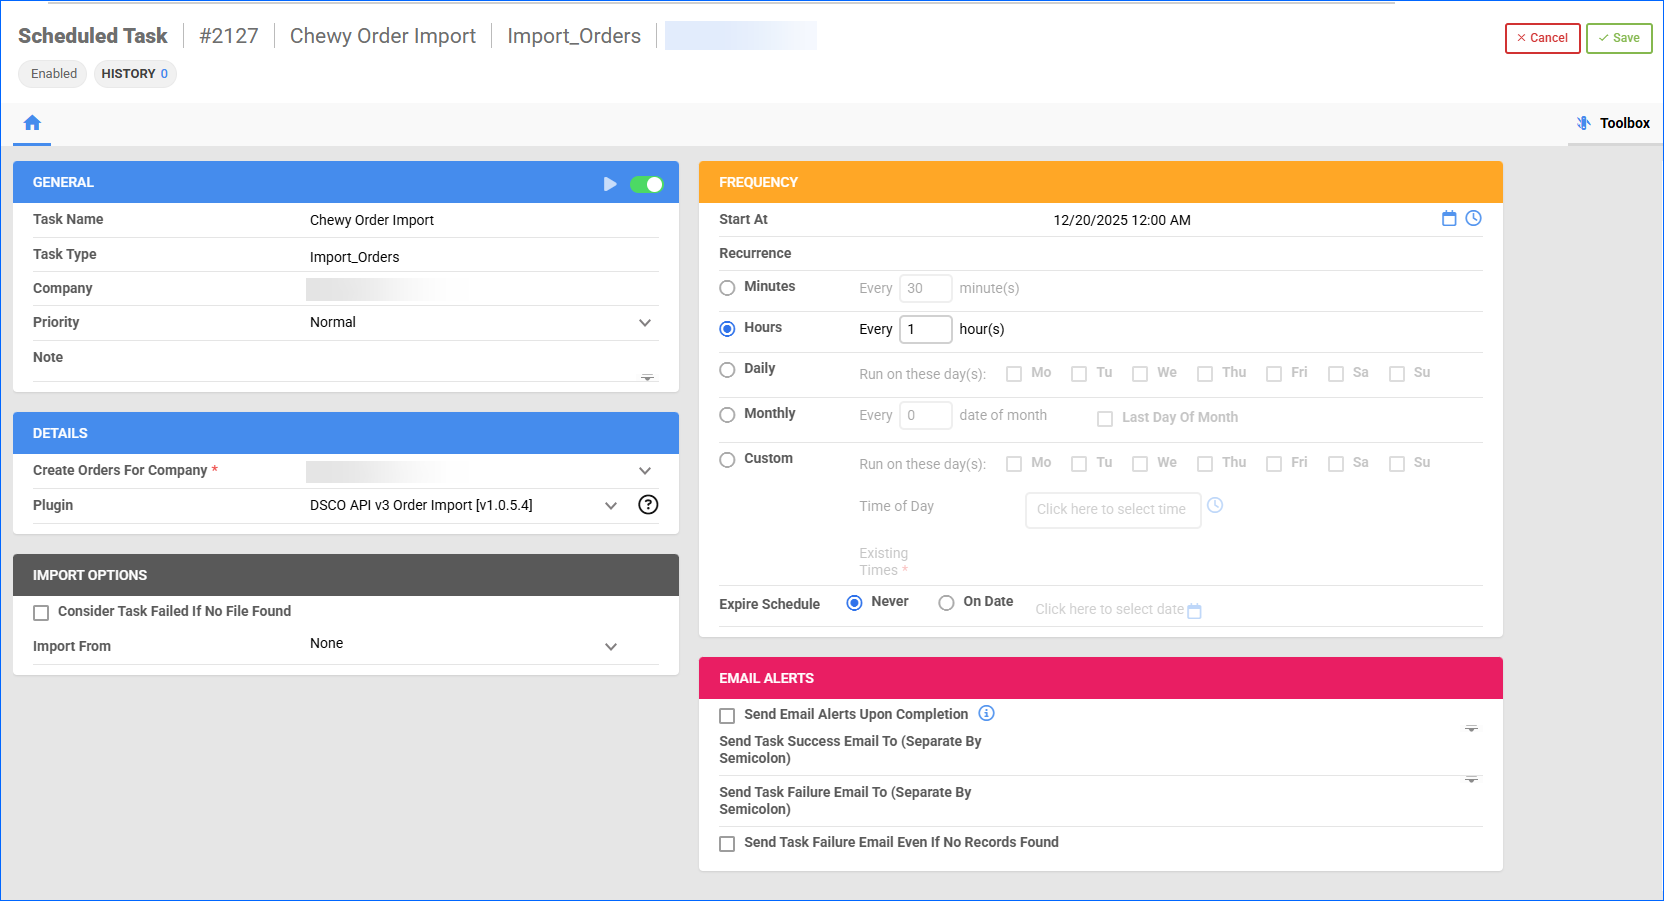
Automate Order Import
To create a Scheduled Task that regularly imports orders from DSCO to Sellercloud:
- Navigate to Settings > Scheduled Tasks > Manage Scheduled Tasks.
- Click the green + icon: Create New Scheduled Task.
- Complete as follows:
- Click Task Type and select Import Orders.
- Set the Task Name.
- Select the Company.
- Select the Start Time.
- Click Create, and the new scheduled task will load on your screen.
- Click the Edit button in the top right corner.
- In the Details panel:
- Under Create Orders for Company, select your DSCO company.
- Click the Plugin menu and select DSCO API v3 Order Import.
- In the Import Options panel, set Import From to None.
- In the Frequency panel, specify the task frequency. For optimal performance, select a range between thirty minutes and one hour.
- In the General panel, click the Enable toggle button.
- Click Save.
Tracking Export
This plugin sends tracking information to DSCO via API.
Before you move on, create a Saved Search for orders filtered by:
- Company – The company you created for the integration
- Order Status – InProcess or Completed
- Payment Status – Charged
- Shipping Status – Fully Shipped
- Tracking Uploaded – No
![]()
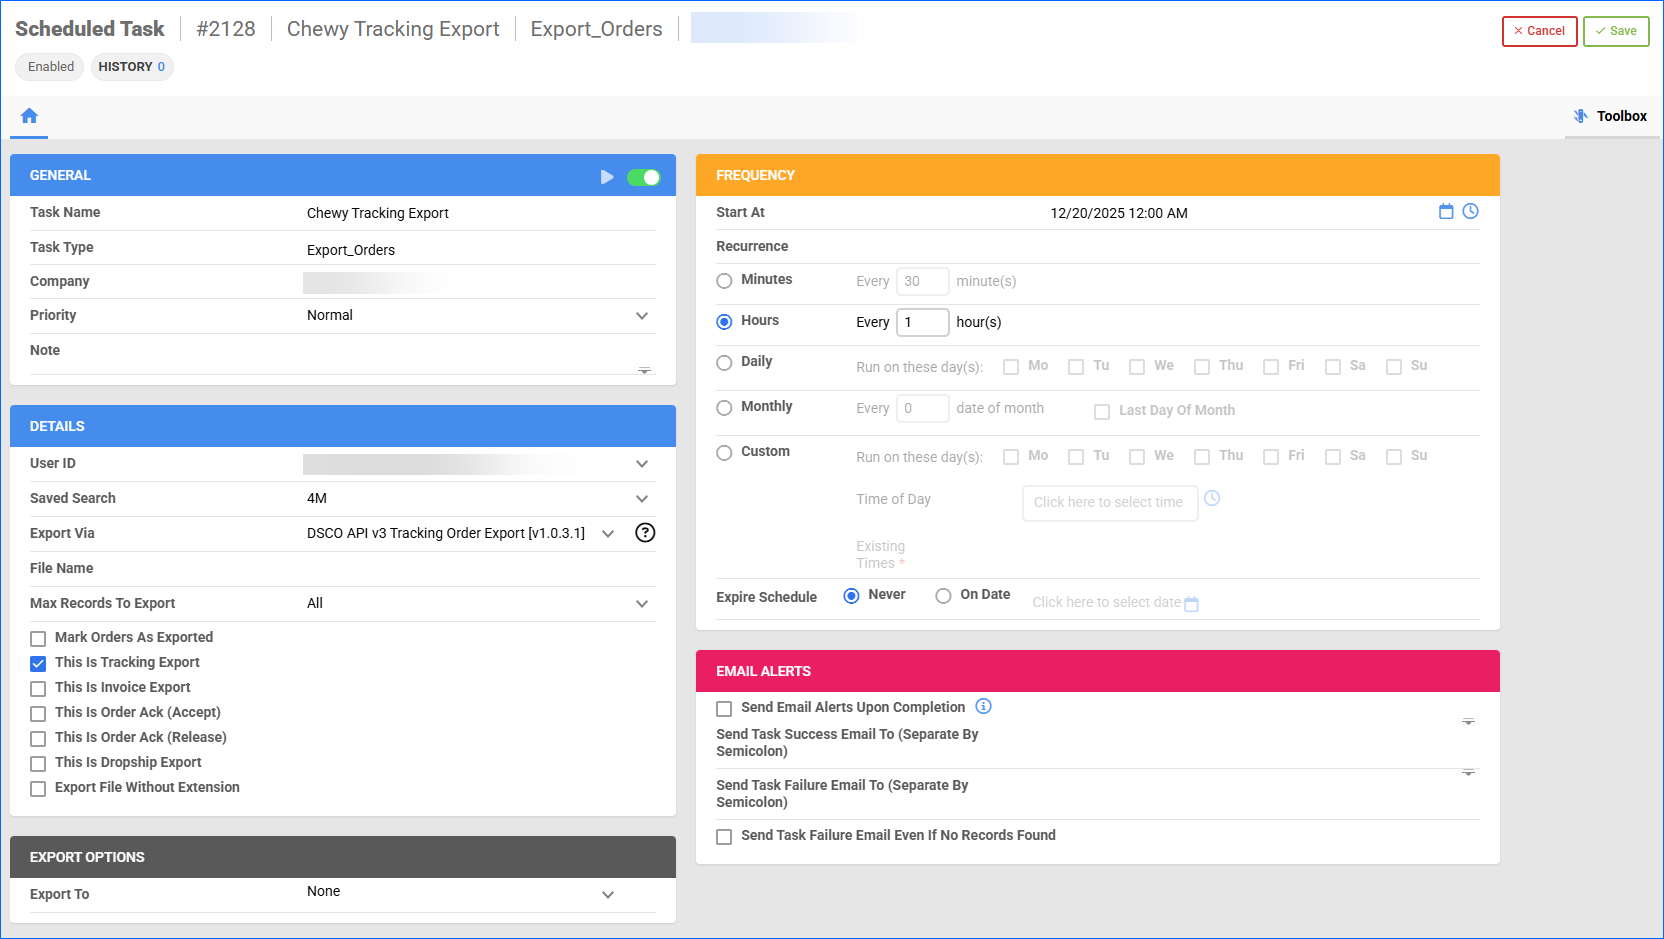
Automate Tracking Export
To create a Scheduled Task that regularly exports order tracking from Sellercloud to DSCO:
- Navigate to Settings > Scheduled Tasks > Manage Scheduled Tasks.
- Click the green + icon: Create New Scheduled Task.
- Complete as follows:
- Click Task Type and select Export Orders.
- Set the Task Name.
- Select the Company.
- Select the Start Time.
- Click Create, and the new scheduled task will load on your screen.
- Click the Edit button in the top right corner.
- In the Details panel:
- Click the User ID menu and select your ID.
- Click the Saved Search menu and select the saved search you created earlier.
- Click the Export Via menu and select DSCO API v3 Tracking Order Export.
- Check This Is Tracking Export.
- In the Export Options panel, set Export To to None.
- In the Frequency panel, specify the task frequency. For optimal performance, select a range between thirty minutes and one hour.
- In the General panel, click the Enable toggle button.
- Click Save.
Invoice Export
This plugin creates an invoice on DSCO via API. It also saves the InvoiceID to a custom column.
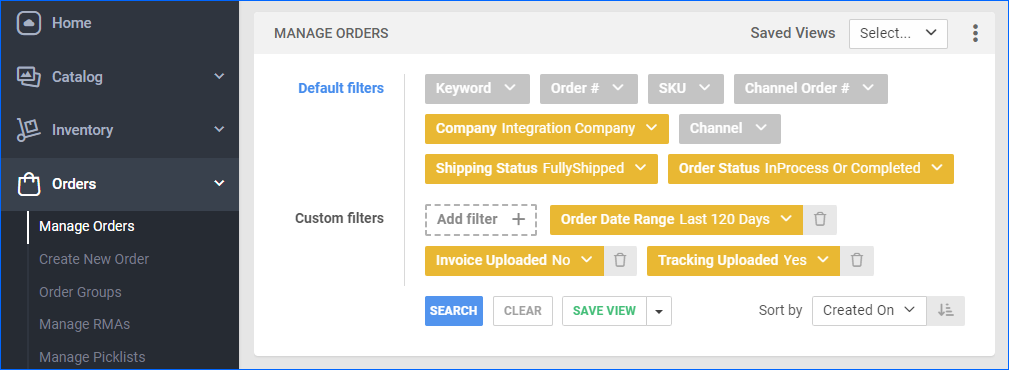
Before you move on, create a Saved Search for orders filtered by:
- Company – The company you created for the integration
- Shipping Status – Fully Shipped
- Order Status – InProcess Or Completed
- Invoice Uploaded – No
- Tracking Uploaded – Yes
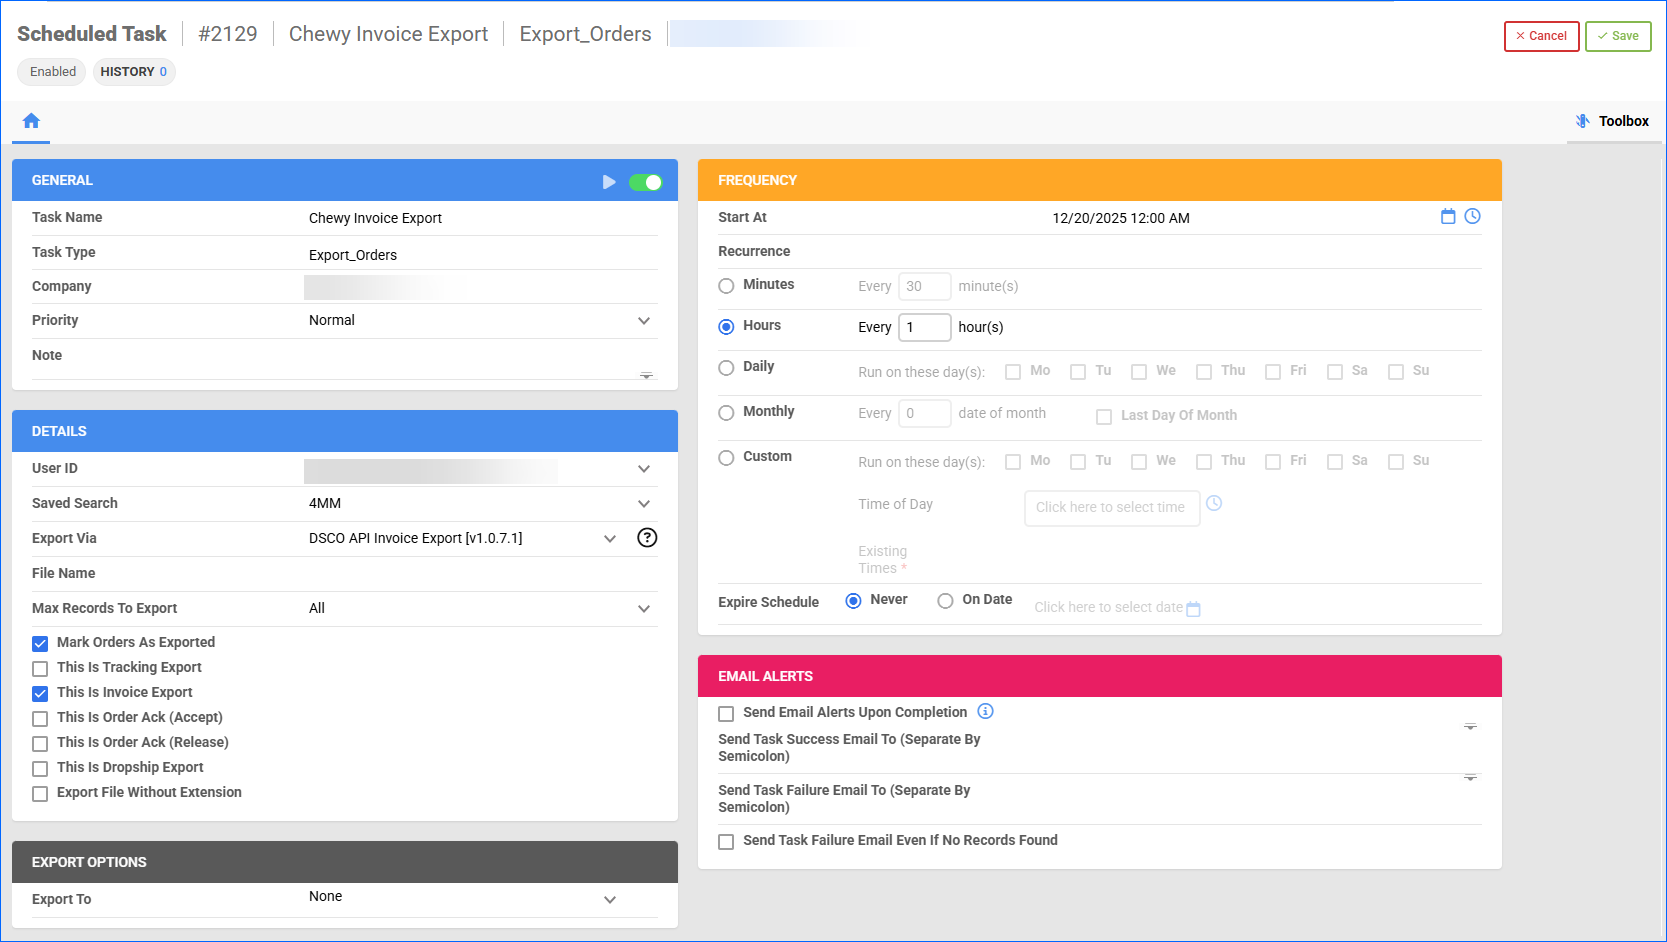
Automate Invoice Export
To create a Scheduled Task that regularly exports invoices from Sellercloud to DSCO:
- Navigate to Settings > Scheduled Tasks > Manage Scheduled Tasks.
- Click the green + icon: Create New Scheduled Task.
- Complete as follows:
- Click Task Type and select Export Orders.
- Set the Task Name.
- Select the Company.
- Select the Start Time.
- Click Create, and the new scheduled task will load on your screen.
- Click the Edit button in the top right corner.
- In the Details panel:
- Click the User ID menu and select your ID.
- Click the Saved Search menu and select the saved search you created earlier.
- Click the Export Via menu and select DSCO API v3 Invoice Export.
- Check Mark Orders As Exported.
- Check This Is Invoice Export.
- In the Export Options panel, set Export To to None.
- In the Frequency panel, specify the task frequency. For optimal performance, select a range between thirty minutes and one hour.
- In the General panel, click the Enable toggle button.
- Click Save.
Inventory Export
This plugin exports inventory to DSCO using API. However, note:
- Products must exist in DSCO in order to be exported.
- You can use the custom product column DSCOSafetyQty to set a Safety Quantity on the product level.
- DSCOItemID is conditionally required – if empty for a SKU, the SKU will be skipped in the update unless the custom setting DSCO_DontSendItemID is True. The DSCOItemID should match the SKU of your listing found on the DSCO Products page.
Before you move on, create a Saved Search for products filtered by:
- Company – Select the company with the products you want to sell on Chewy. Without this filter, you will send products from all companies.
- Chewy_Enabled – True. Only add this filter if you choose to enable only specific products for Chewy.

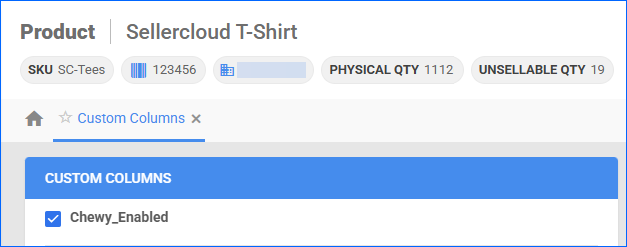
Also, make sure to enable your products for Chewy by setting their Chewy_Enabled Custom Column for Products to True:
- For one product at a time: go to the Product Details Page > click Toolbox and select Custom Columns > click Edit, update the Chewy_Enabled column, and Save.
- For multiple products in bulk: follow the steps to Bulk Update Products and use the Chewy_Enabled column – set it to True for all products you want to enable.
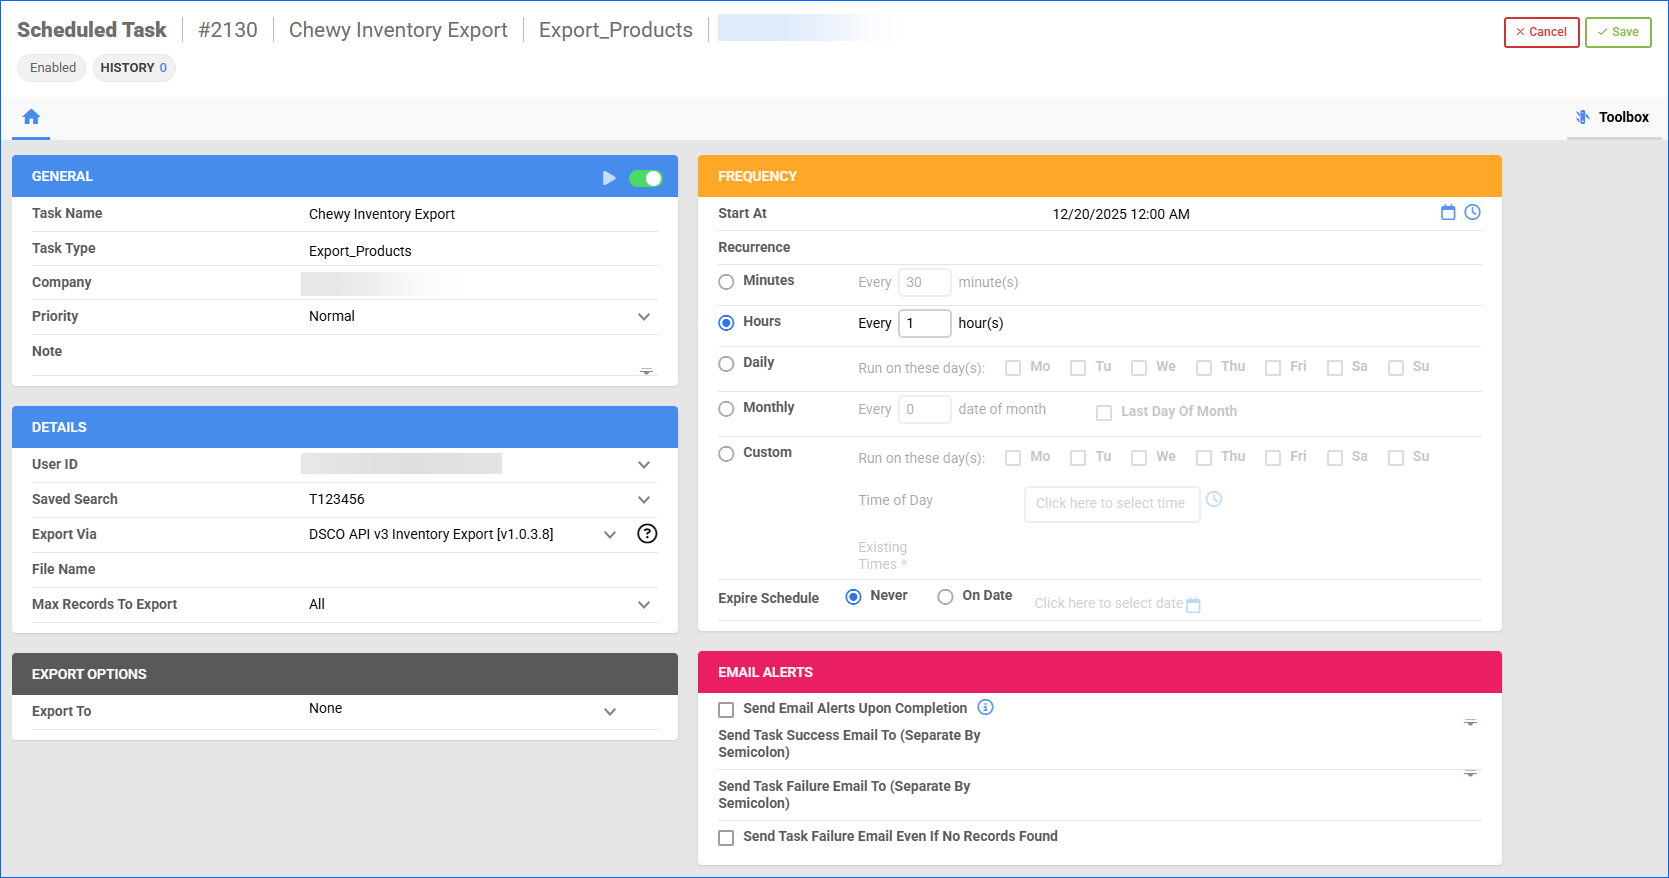
Automate Inventory Export
To create a Scheduled Task that regularly exports inventory from Sellercloud to DSCO:
- Navigate to Settings > Scheduled Tasks > Manage Scheduled Tasks.
- Click the green + icon: Create New Scheduled Task.
- Complete as follows:
- Click Task Type and select Export Products.
- Set the Task Name.
- Select the Company.
- Select the Start Time.
- Click Create, and the new scheduled task will load on your screen.
- Click the Edit button in the top right corner.
- In the Details panel:
- Click the User ID menu and select your ID.
- If you choose to only export specific products, click the Saved Search menu and select the saved search you created earlier.
- Click the Export Via menu and select DSCO API v3 Inventory Export.
- In the Export Options panel, set Export To to None.
- In the Frequency panel, specify the task frequency. For optimal performance, select a range between thirty minutes and one hour.
- In the General panel, click the Enable toggle button.
- Click Save.