Overview
Sellercloud’s Manage Plugin Channels page lets you view and manage any integrations configured through the Plugin Wizard. You can see which company is used for each channel integration, access details about the associated scheduled tasks and plugins, configure any required custom settings, and validate that everything has been set up properly.
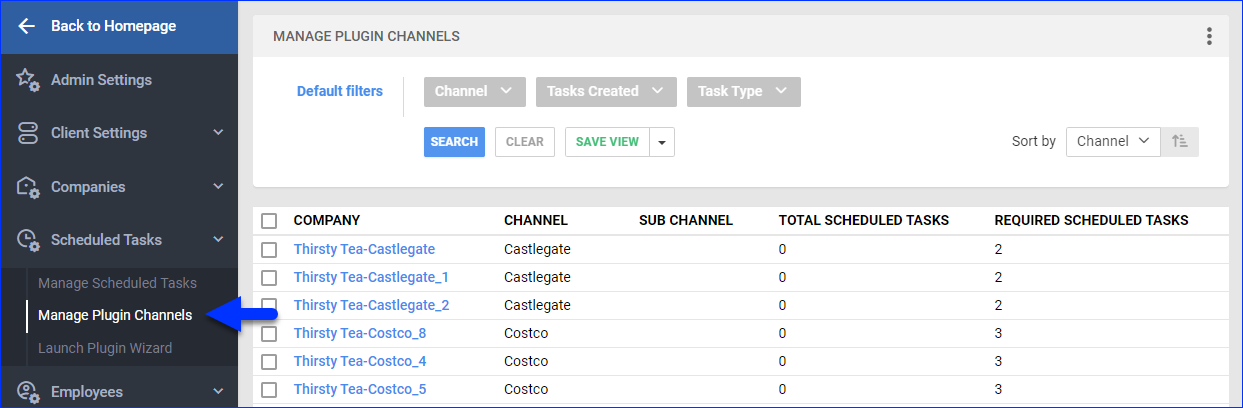
Manage Plugin Channels Page
To use the Manage Plugin Channels page:
- Go to Settings.
- Select Scheduled Tasks > Manage Plugin Channels.
- Optionally, use these filters to get precise results:
- Channel – Show only companies created for one or more channels.
- Tasks Created – Show only companies with or without created Scheduled Tasks.
- Task Type – Show only companies with tasks of one or more types: Import Orders, Export Orders, Export Products, or Import RMA.
- Click Search.
- The search results display the following information:
- Company – Shows the name of the Company. Clicking the link takes you to the Plugin Channel Page.
- Channel – Shows the name of the integrated channel.
- Sub Channel – Shows the sub-channel if your integration is through Mirakl or DSCO or you selected Other during the Plugin Wizard setup.
- Total Scheduled Tasks – Shows the total number of Scheduled Tasks that are currently configured.
- Required Scheduled Tasks – Shows the number of required Scheduled Tasks that must be configured for the channel integration.
- Optionally, you can click the Sort by menu on the right and select from these options to change the sorting order:
- Channel – Sort the results by channel.
- Company – Sort the results by company.
- Total Scheduled Tasks – Sort the results by the number of currently configured tasks.
- Optionally, you can click Save View to save your current view. To load it, select it on the top right.
Plugin Channel Page
Clicking the name of a company on the Manage Plugin Channels page takes you to the Plugin Channel page. Here, you can see the details from the previous page, as well as additional information related to the Scheduled Tasks.
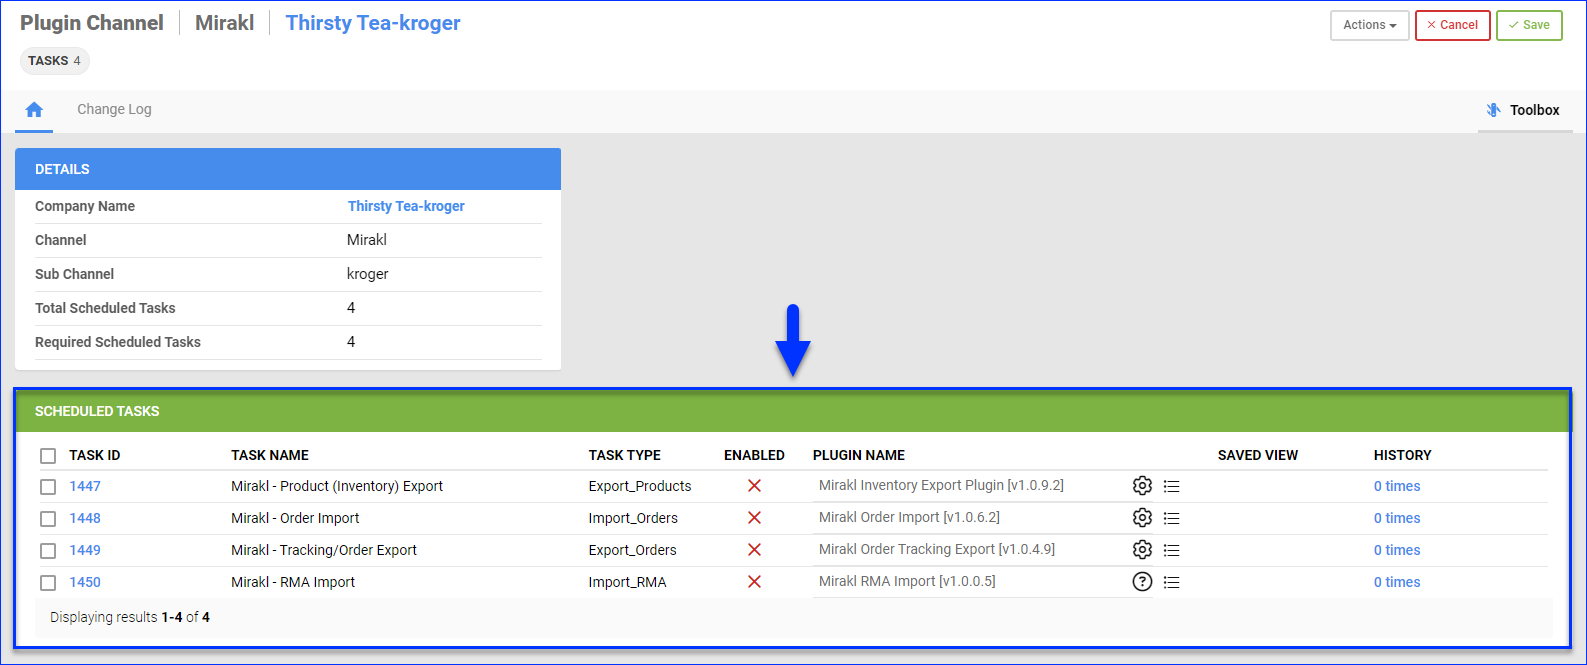
The Scheduled Tasks panel shows the following information:
- Task ID – The unique identifying number of the scheduled task.
- Task Name – The name of the scheduled task.
- Task Type – The type of the scheduled task.
- Enabled – Indicates whether the task is currently enabled or not.
- Plugin Name – The name of the plugin run by the scheduled task.
- Configure Plugin Settings – See, create, and update any required Custom Company Settings.
- View Plugin Information – See details about the plugin.
- Saved View – The Saved Search used when executing the scheduled task.
- History – The number of times the scheduled task has run, linking to its execution history page.
Validate Channel
To help validate your integration setup, Sellercloud can check if all plugins are up to date and if any plugins or settings are missing.
To validate a channel integration:
- On the Plugin Channel page, click Actions and select Validate Channel.

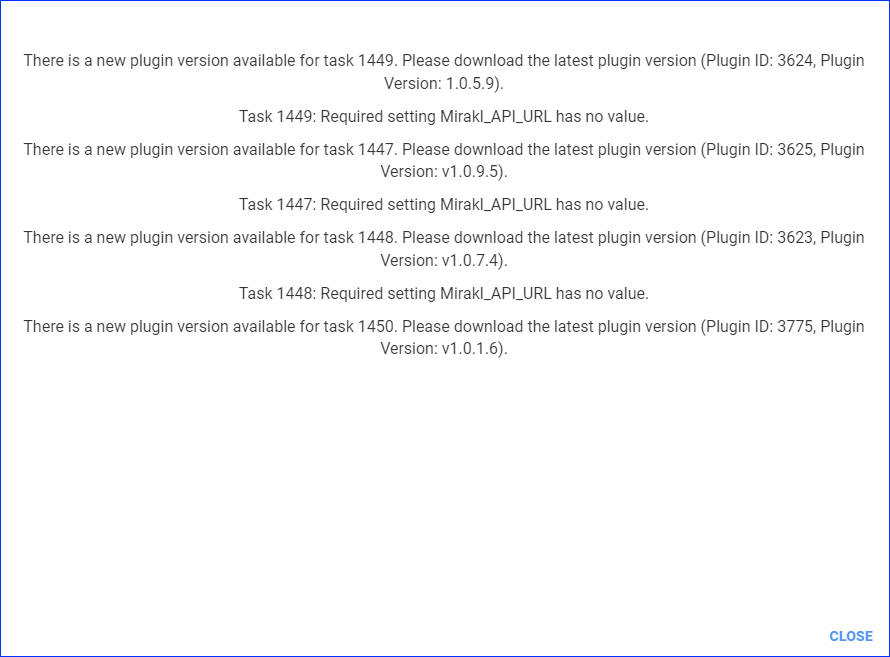
- Click View More under the error message that appears at the bottom.
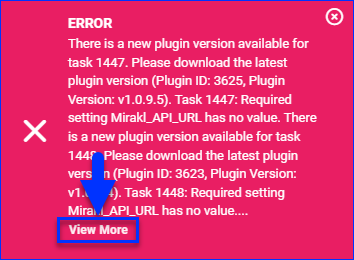
- Review the details to learn what you need to do to complete the integration setup, and click Close.
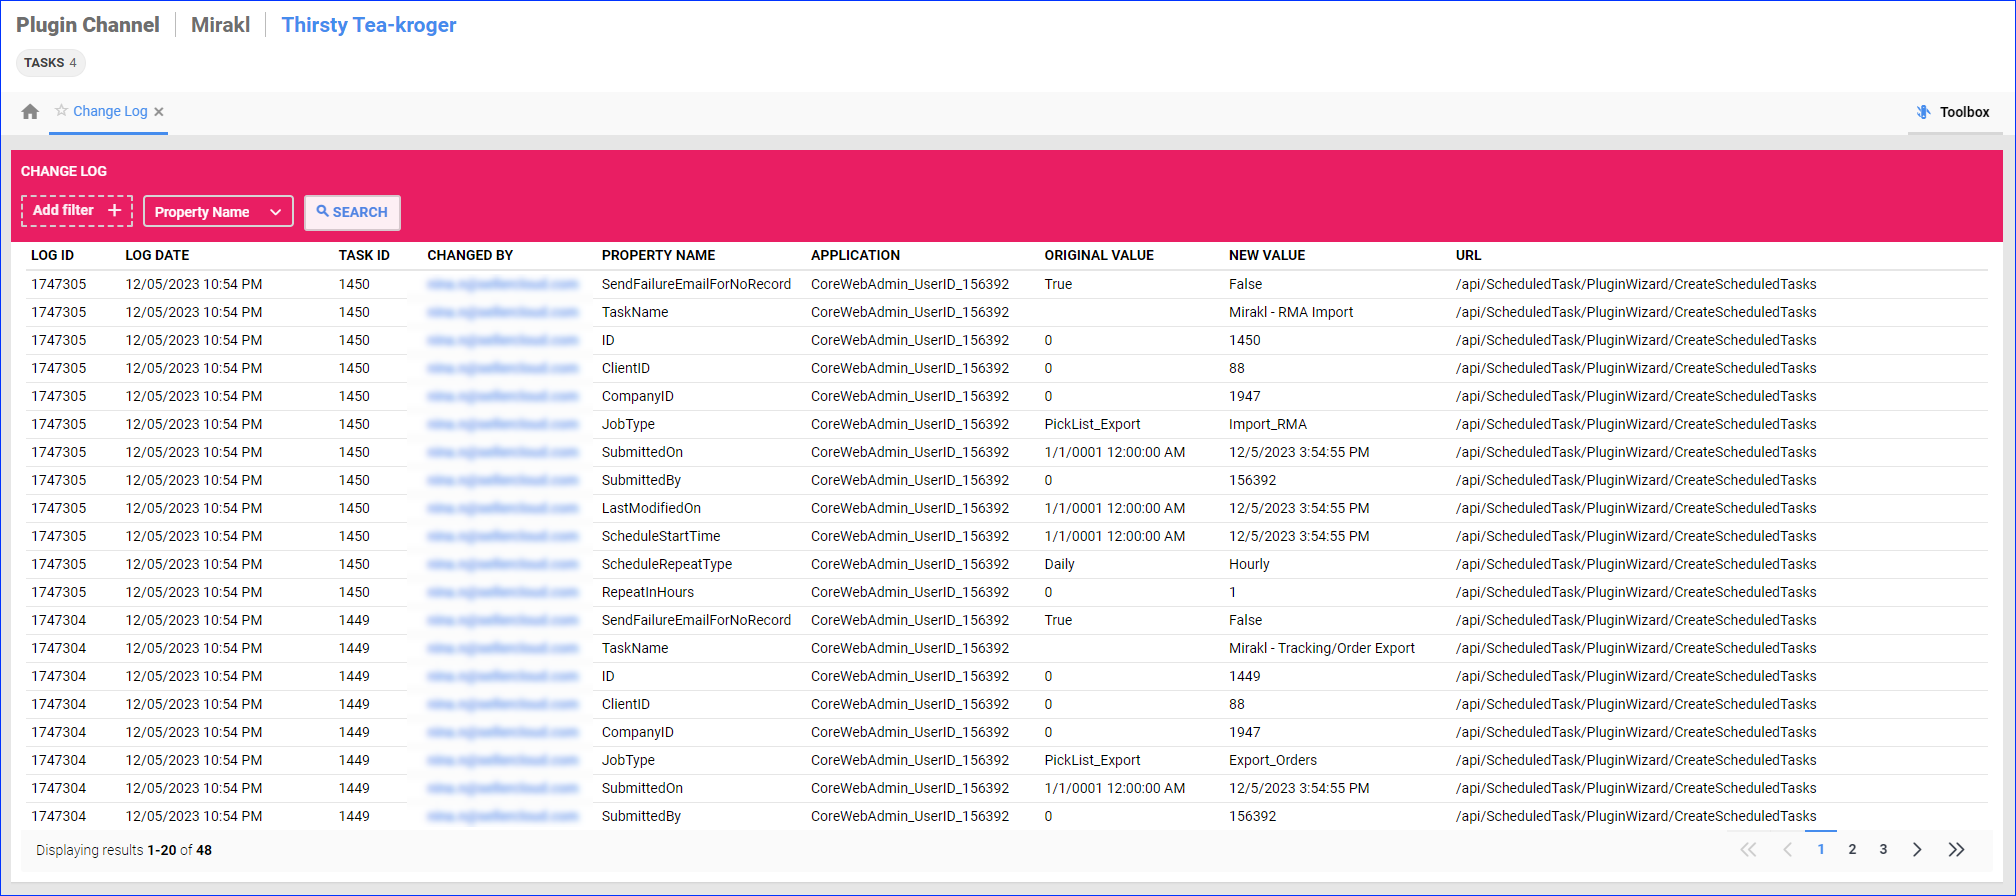
Change Log
The Plugin Channel page offers a combined Change Log for all Scheduled Tasks configured for the integration. This allows you to view the history of logged activity related to all tasks from the same page instead of checking each individual task’s log.
To view an integration’s combined tasks change log:
- On the Plugin Channel page, click Toolbox and select Change Log.
- The log shows all events by default. You can click Add filter to add and use the search filters to get precise results.