Overview
The Home Shopping Network (HSN) is a famous American television network and e-commerce platform specializing in home shopping. The website provides a wide array of product categories, customer reviews, and detailed product information. Sellercloud helps you manage your inventory and orders on HSN, allowing you to reach a wider audience and streamline your sales process.
Prerequisites
If you don’t have an HSN account, create one at https://www.hsn.com/.
Contact HSN’s support team and ask for the following details:
- Sender ID
- Receiver ID
- Vendor ID
- FTP Server
- FTP Username and Password
Sellercloud offers a custom invoice format designed to print HSN packing slips. Open a ticket with Sellercloud Support to install the HSN Invoice – Order PDF Invoice plugin on your server.
Integrate HSN
To integrate your HSN account into Sellercloud:
- Go to your Company Settings.
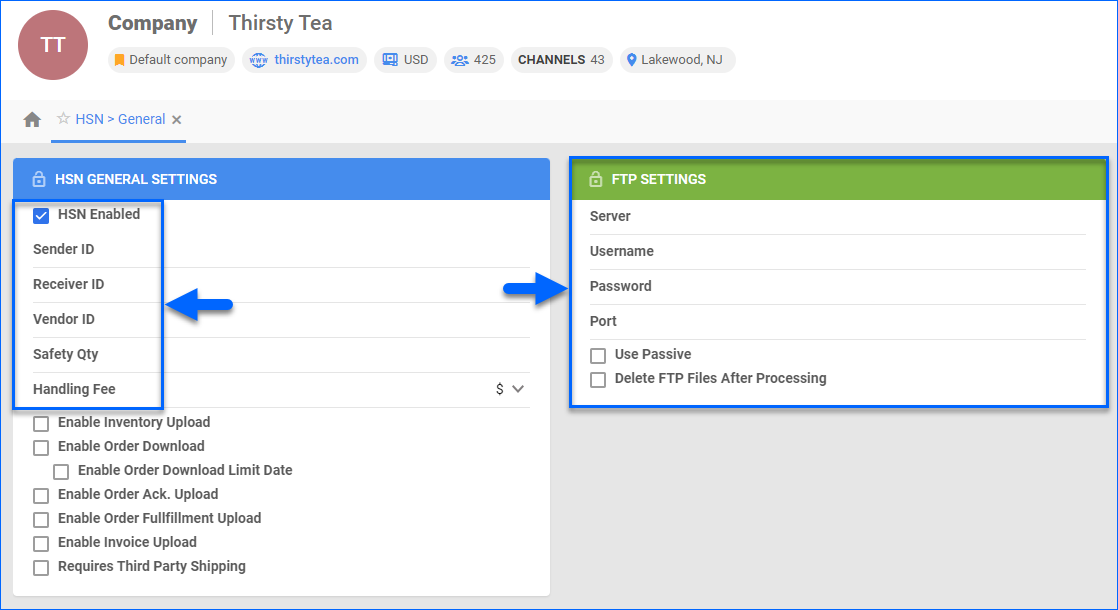
- Click Toolbox and select HSN > General Settings.
- Click Edit.
- Enter the Sender ID, Receiver ID, Vendor ID, and FTP credentials provided by HSN.
- Enter the Handling Fee you charge HSN.
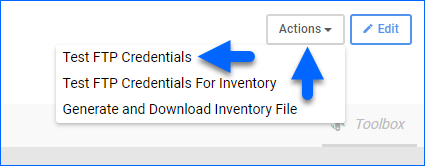
- Click Actions and select Test FTP Credentials to ensure the FTP is configured correctly.
- Configure the rest of your account settings as needed and click Save.
Test Stage
Before going live with HSN, you must go through a test stage that involves exchanging various XML documents and printing test packing slips and UPS shipping labels. To complete the testing stage, HSN requires you to exchange the following documents:
- Order Import
- Order Acknowledgement
- Shipment Confirmation
- Credit Memo
You have two options for exchanging the test files:
- Automatically using the FTP provided by HSN
- Manually on the HSN Vendor Portal
Automatically
To enable automatic file exchange between Sellercloud and HSN via FTP, used both for testing and production:
- Go to your Company Settings.
- Click Toolbox and select HSN > General Settings.
- Click Edit.
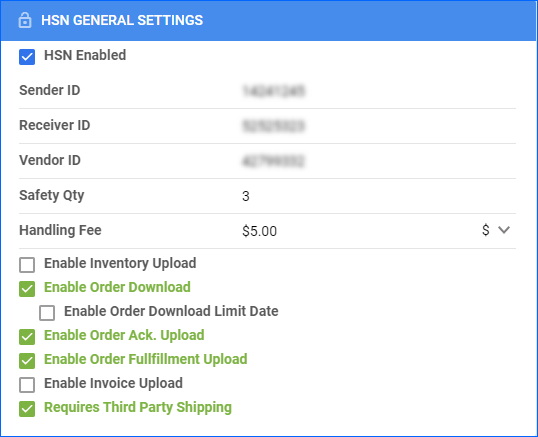
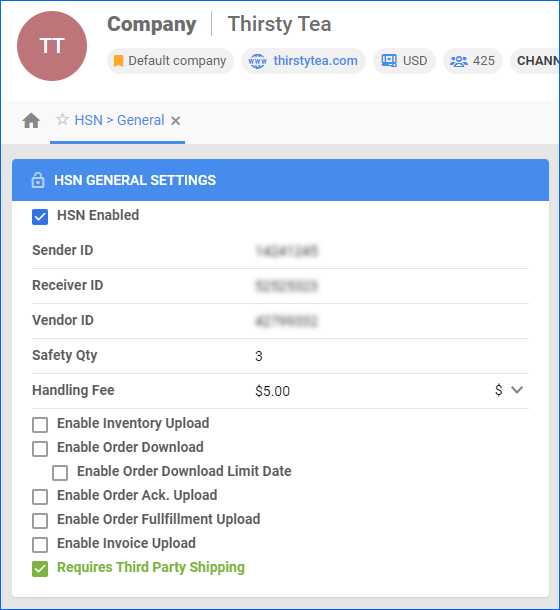
- Check these boxes:
- HSN Enabled – Activates all enabled settings and options on this page.
- Enable Order Download – Enables automatic order download from HSN. Orders will be imported into Sellercloud approximately every 30 minutes.
- Enable Order Ack. Upload – Automatically informs HSN that an order file has been accepted and is being processed.
- Enable Order Fulfillment Upload – Enables automatic tracking upload to HSN.
- Requires Third Party Shipping – Enforce the use of a 3rd party account to ship HSN orders.
- Click Save.
Now that you have enabled the automatic file exchange, you can complete the testing stage:
- Order Import – First, HSN must generate a Sample Order File and upload it to the FTP.
- Order Acknowledgement – Once Sellercloud downloads the orders from the sample file, it automatically sends the order acknowledgment file through the FTP.
- Shipment Confirmation – Sellercloud sends shipping confirmation to HSN after an order is fulfilled. The information will only be sent once your HSN orders are marked as Fully Shipped and have a valid tracking number.
- Credit Memo – When a customer returns an item, Sellercloud must transmit that information to HSN:
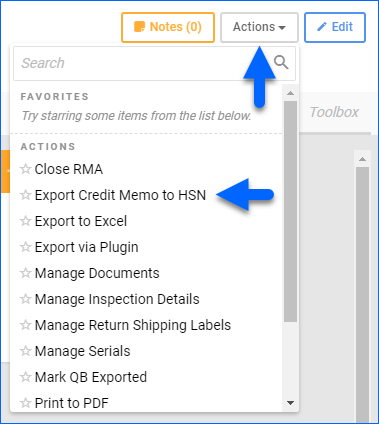
- First, Create an RMA for an HSN order and go to the RMA page.
- Click Actions and select Receive Return to mark the RMA as received.
- Click Actions and select Export Credit Memo to HSN.
- Configure your HSN Invoice Settings to print packing slips with the plugin. Then, print 5 packing slips and send them to HSN for verification.
- HSN will require you to use their UPS account to ship orders. Follow the steps in the Configure UPS Prepaid Labels for HSN Orders in Shipbridge section to set this up. Then, print 5 Shipping Labels and send them to HSN for verification.
Manually
If you’re having problems with the automatic file exchange process, you can complete the testing stage manually. This requires you to generate and upload the required files yourself.
- Sign in to HSN’s Vendor Portal.
- Download their Sample Order File.
- Go to Sellercloud and follow the steps to Import Orders Manually.
- Go to Orders > Manage Orders, find and select the HSN orders, then click the blue Actions icon and select Download Func Ack File(s) (997). Batch all 25 orders into 1 file for upload.

- Upload the Order Acknowledgment file to the HSN Vendor Portal.
- Mark all 25 HSN orders as Fully Shipped in Sellercloud and ensure they have tracking numbers.
- On the Manage Orders page, select the HSN orders, click the blue Actions icon, and select Download Shipping Update File (856). Batch all 25 orders into 1 file for upload.
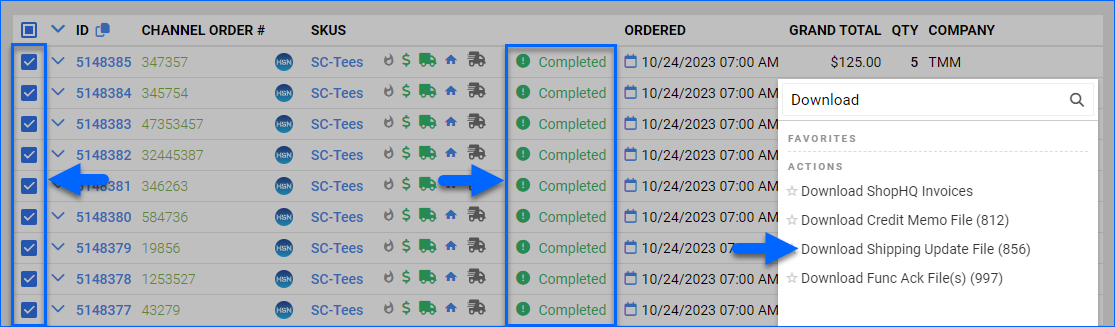
- Upload the Shipment Confirmation file to the HSN Vendor Portal.
- When a customer returns an item, Sellercloud must transmit that information to HSN:
- Create an RMA for a few HSN orders.
- On the RMA pages, click Actions and select Receive Return to mark the RMAs as received.
- Go to Orders > Manage Orders, find and select the HSN orders, then click the blue Actions icon and select Download Credit Memo File (812). Batch all 25 orders into 1 file for upload.
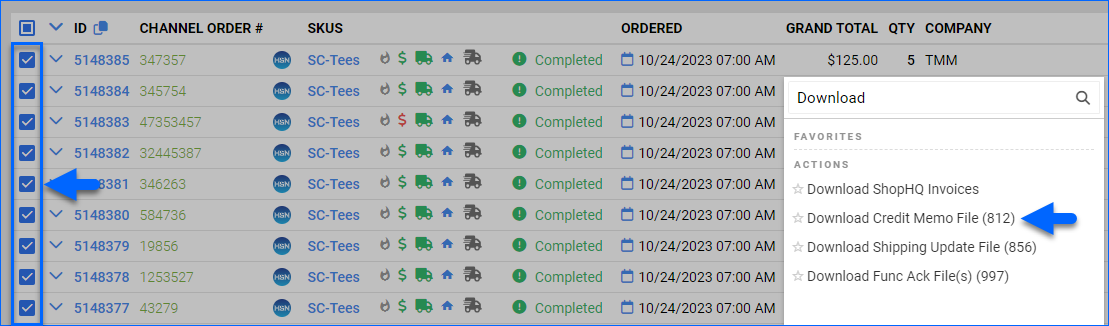
- Upload the Return Transaction/Credit Memo file to the HSN Vendor Portal.
- Configure your HSN Invoice Settings to print packing slips with the plugin. Then, print 5 packing slips and send them to HSN for verification.
- HSN will require you to use their UPS account to ship orders. To do this:
- Go to Company Settings > Toolbox > HSN > General Settings.
- Click Edit, enable the Requires Third Party Shipping setting, and Save.
- Follow the steps in the Configure UPS Prepaid Labels for HSN Orders in Shipbridge section to complete this setup. Then, print 5 Shipping Labels and send them to HSN for verification.
- With the above, your testing stage should be complete. When you’re ready to go live, go to the HSN > General Settings page, check HSN Enabled, and enable any other desired options to automate your processes.
Configure UPS Prepaid Labels for HSN Orders in Shipbridge
To set up HSN’s UPS account in Shipbridge:
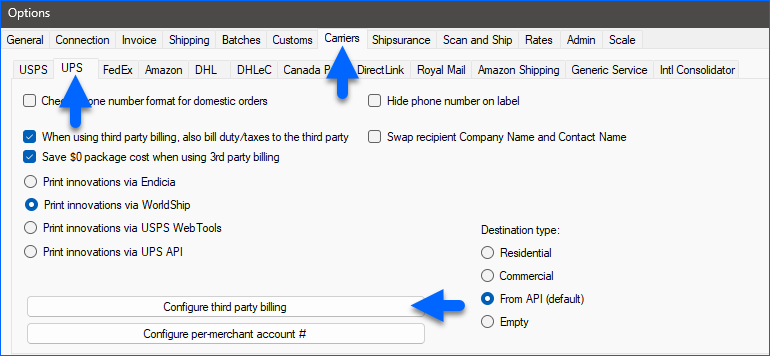
- Open Shipbridge and go to Menu > Options > Carriers > UPS.
- Click Configure Third Party Billing.
- Click Configure next to the correct company.
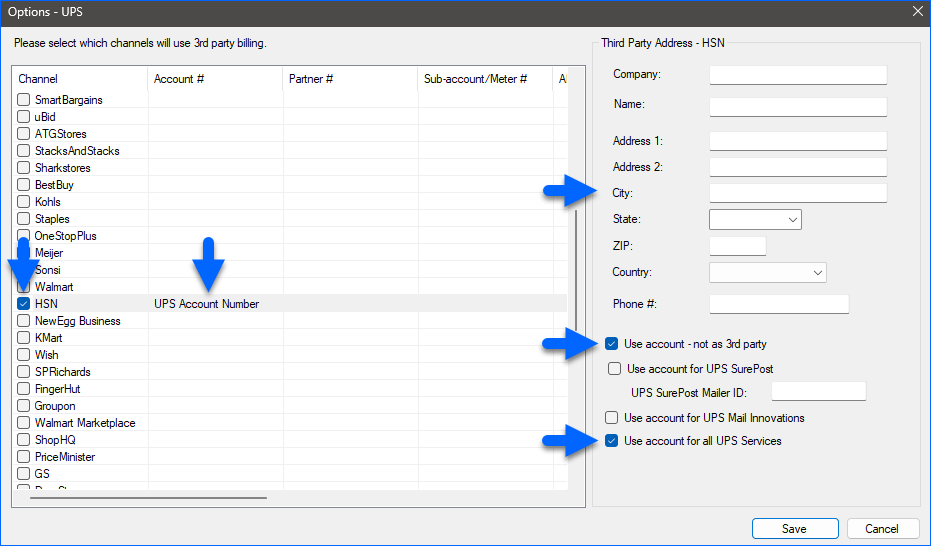
- Check the HSN box.
- Enter the UPS Account number provided by HSN in the Account # field.
- Fill out the required address information.
- Check Use account – not as 3rd party and Use account for all UPS Services.
- Click Save.