Overview
Shipping labels typically include essential information such as postal code, country, tracking number, destination address, return address, and more. Shipbridge simplifies the labeling process by allowing you to generate shipping labels and connect with leading carriers online. Labels will differ depending on the carrier you use, but a shipping label will generally include the following:
- Ship to address
- Ship from address
- Package weight
- Shipping class
- Tracking number
- Shipping barcode
There are two ways you can print shipping labels in Shipbridge:
- Ship and Print Labels – Requests a label from the carrier straight away.
- Scan and Ship – First requires you to scan the products and then requests a label.
Prerequisites
To generate a shipping label, you must first select the carrier and service you want to ship your order(s) with. If your desired carrier/service isn’t already pre-selected, you have two options: right-click on an order and click Calculate rates, or press F6 on your keyboard for a shortcut. This opens the rates window where you can select the carrier, rate, package type, and insurance.
The information on each label helps ensure that orders reach your customers as quickly as possible. Below is an example:
Print Labels
Once you have selected the carrier and service of your choice, you can proceed with generating labels for your orders.
Ship and Print
To ship and print labels for your orders, follow the steps below:
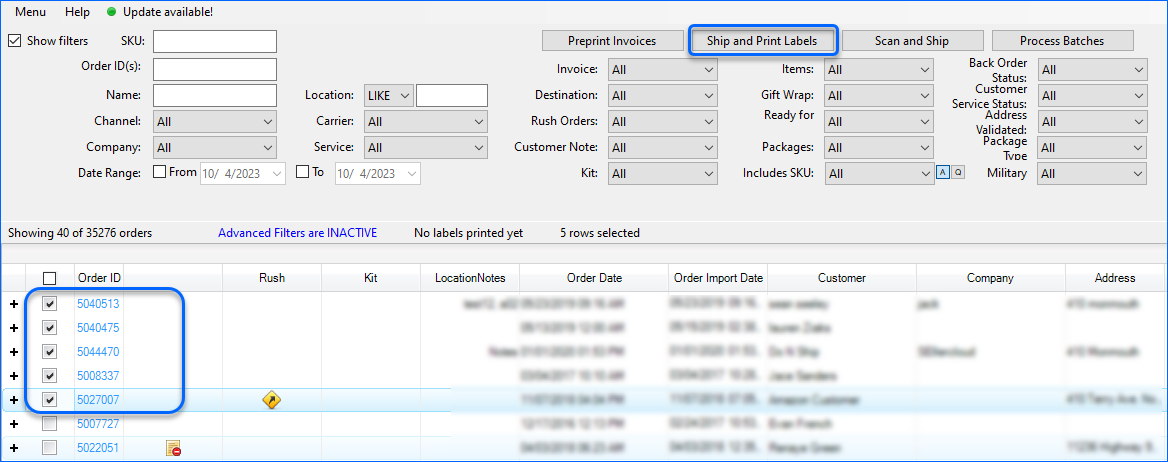
- In the Shipbridge grid, use the checkbox to select the orders you want to generate labels for.
- Click on Ship and Print Labels at the top of the grid, and the shipping labels for all the selected orders will be printed out.
Scan and Ship
You also have the option to print labels from the Scan and Ship Menu. Once you select an order from the grid, click on Scan and Ship at the top, where you will be able to edit your packages, as well as scan items and ship orders.
Scan your items, navigate to the Print & Ship Menu, and click Print Labels + Invoice.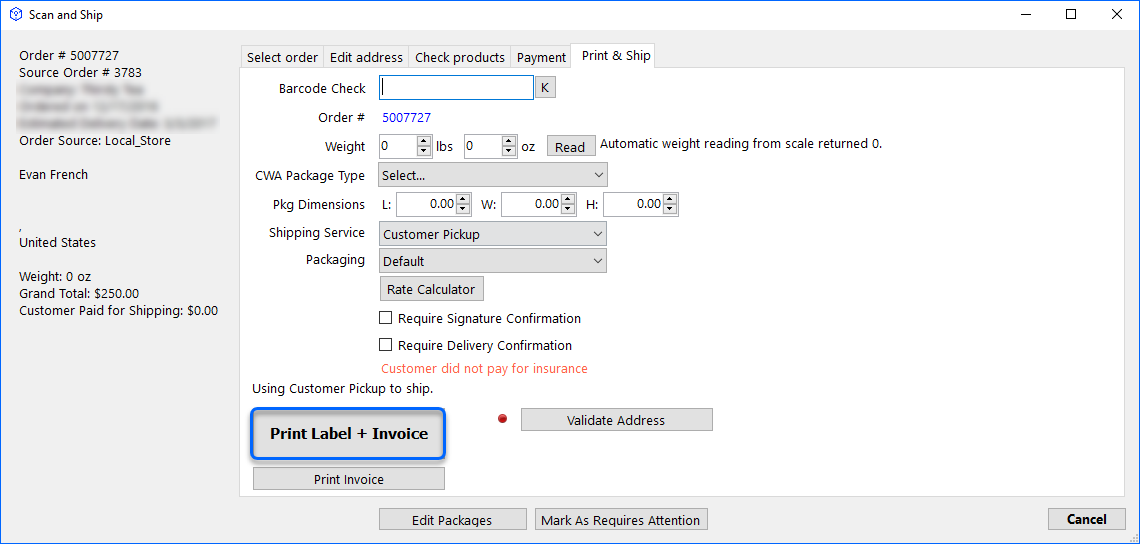
Learn more about the Scan and Ship workflow here.
Reprint Labels
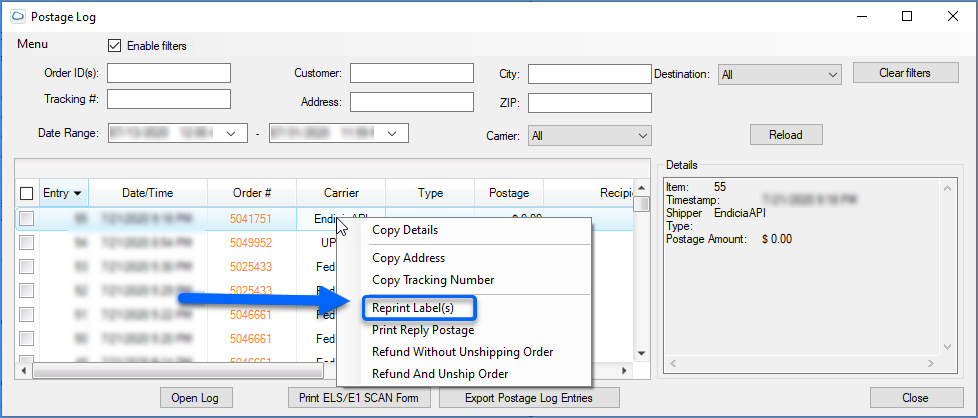
You can reprint labels from the orders’ grid or by navigating to the Postage Log. Labels can be reprinted individually for a single order or in bulk for multiple orders.
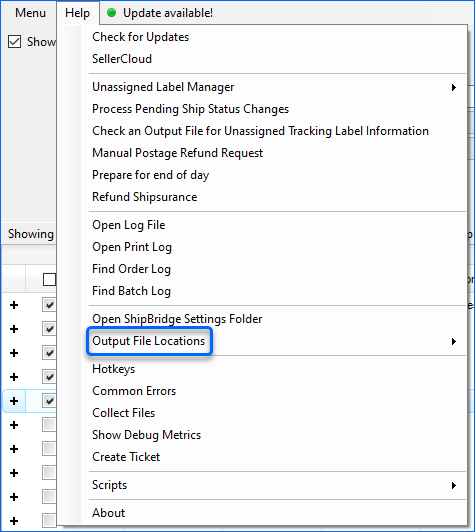
Prior to reprinting labels, you need to check if you have the required label file stored on your device. To do that, navigate to Help > Output File Locations.
Once you have confirmation that the files are stored on your device, you can begin reprinting labels. You can either right-click on an order or access the Postage Log.
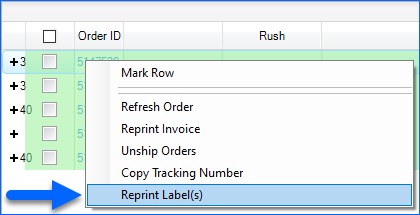
- Right-click on the order you want to reprint labels for.
- Choose Reprint Label(s).
To reprint labels from the Postage Log, navigate to:
- Menu > Postage Log > Search the log.
- Right-click on an order > Select Reprint Label(s).
Batch Labels Reprint
You have the option to reprint labels for multiple orders. You can do so from the orders grid menu or by navigating to the Postage Log. Once you select the orders you want to print labels for, right-click and choose Reprint Label(s).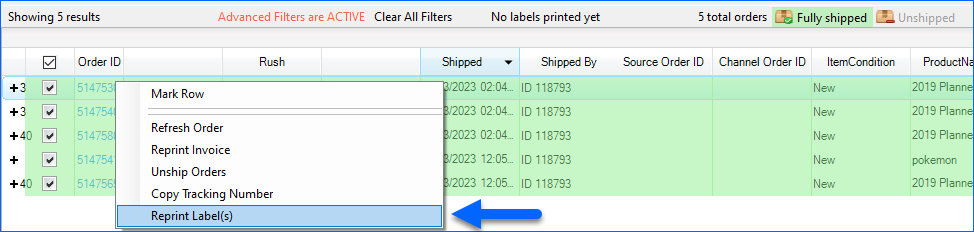
Label API Requests and Responses
After you print a label, you have the option to view the XML document sent through the API and the response from the carrier. Navigate to:
- Help > Output File Locations > Select the Carrier.
- A pop-up window will appear with folders titled (Carrier Name) Save and (Carrier Name) Out.
- The Carrier Save files are the label request files. The files are named according to the order number, and each file contains all information related to the label that was requested for that order.
- The Carrier Output files are the responses from the carrier. These files contain success or error messages.


Ship to APO/FPO
Packages shipped to a military address located outside of the U.S. must also include a special label and customs form. Here are some important terms to be aware of:
- Army Post Office (APO)
- Fleet Post Office (FPO)
The Ship To country will still be the U.S.; however, there will be some changes in state abbreviations. Here are some important abbreviations to know:
- Armed Forces Europe (AE)
- Armed Forces Americas (AA)
- Armed Forces Pacific (AP)
With Shipbridge, you can print out special APO/FPO labels with the accompanying customs form.
To configure APO/FPO labels:
- Go to Menu > Options > Carriers tab.
- Check Use APO/FPO printer configuration for US territory destinations.
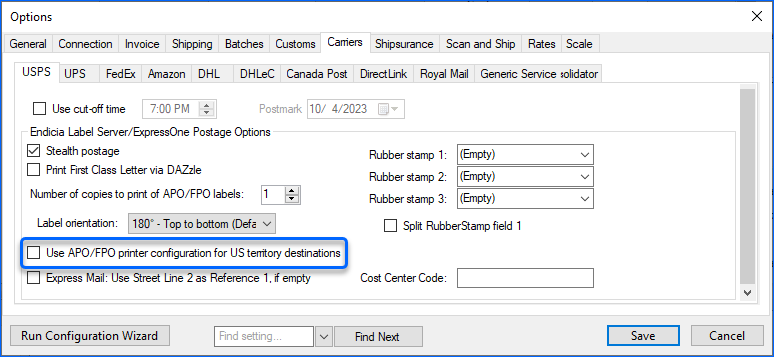
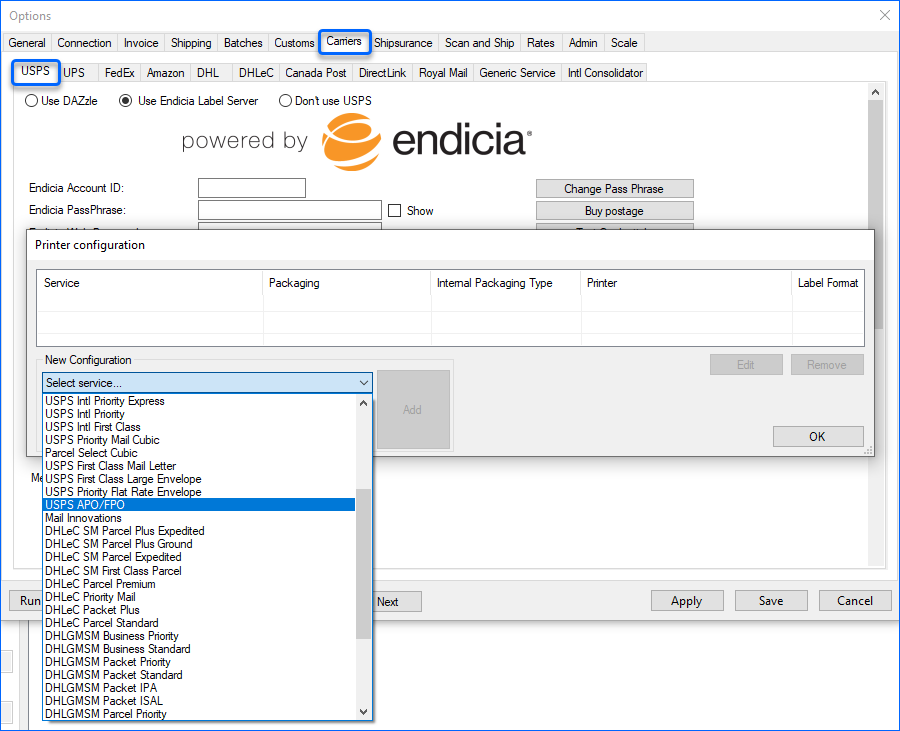
- Next, go to Label Printer Configuration.
- In the New Configuration dropdown, select USPS APO/FPO.
- Click Add and then OK to save your changes.
Next, learn how to unship orders and void labels in our Manage Shipping Charges in Shipbridge article.