Overview
Meyer Distributing specializes in the marketing and distribution of automotive products, including car parts and accessories, tires, off-road products, and towing supplies. They also provide merchants with the option to leverage their dropshipping services.
Integrating Meyer Distributing into your Sellercloud account allows you to seamlessly import orders, upload tracking information, and ensure your listings are always up-to-date with the latest inventory data. This integration works through API for orders and tracking, and an FTP connection for inventory updates.
If necessary, you can contact Sellercloud Support to request additional customizations or other plugins for this integration.
Prerequisites
Before you can integrate Meyer Distributing with Sellercloud, complete the following requirements.
Meyer Distributing Support
Contact Meyer Support to:
- Obtain your API credentials for order export and tracking import purposes.
- Obtain your FTP credentials for inventory updates.
- Obtain your unique Customer Number.
Custom Company Settings
After that, for the company you just added, create the following Custom Company Settings :
- MeyerDistributing_APIKey – The Meyer Distributing API key. (type string, required)
- MeyerDistributing_BaseURL – The root address of the API server. (type string, required)
- MeyerDistributing_CreateOrderURL – The endpoint used to submit new orders. (type string, required)
- MeyerDistributing_VendorID – Your unique vendor identifier on Meyer Distributing. (type int, required)
- MeyerDistributing_ExportMappingProfileID – The Export Mapping profile required for the order creation. (type int, required)
- MeyerDistributing_TrackingURL – The endpoint used to retrieve the status of the order. (type string, required)
- MeyerDistributing_ImportMappingProfileID – The Import Mapping profile needed for the order tracking. (type int, required)
- MeyerDistributing_UpdateShippingCost – Defaults to False. If set to True, the plugin will make an additional call to retrieve the order info and update the order’s shipping cost. The call will be made only if a tracking number for the order is returned. (optional, bool)
- MeyerDistributing_OrderDetailURL – To allow the plugin to update an order’s shipping cost, fill in MeyerDistributing_OrderDetailURL and set MeyerDistributing_UpdateShippingCost to True. (optional, string)
- MeyerDistributing_CustomerNumber – Your unique Customer Number, provided by Meyer Distributing. (type string, required)
Custom Order Columns
Next, create the following Custom Order Columns:
- Meyer_OrderSourceOrderID – When an order is successfully exported to Meyer, its OrderNumber is saved in this column. (required, string)
Sellercloud Support
Finally, open a ticket with Sellercloud Support and request that the latest version of the following plugins be installed on your server:
- Meyer Distributing Create Orders – Order Export
- Meyer Distributing Tracking Import – Order Export
Order Export
The Meyer Distributing Create Orders plugin ensures that your Sellercloud orders are exported to Meyer and created within their system. The order number is saved as OrderSourceOrderID, and the VendorSKU is used as the product identifier for Meyer.
Before you move on, create a Saved Search for orders filtered by:
- Company – The company you created for the integration.
- Order Status – InProcess or Completed
- Payment Status – Charged
- Exported – Not Exported
Automate Order Export
To create a Scheduled Task that automatically triggers the Meyer Distributing Create Orders plugin:
- Navigate to Settings > Scheduled Tasks > Manage Scheduled Tasks.
- Click the green + icon and select Create New Scheduled Task.
- Configure the following:
- Click Task Type and select Export Orders.
- Set the Task Name.
- Select the Company.
- Select the Start Time.
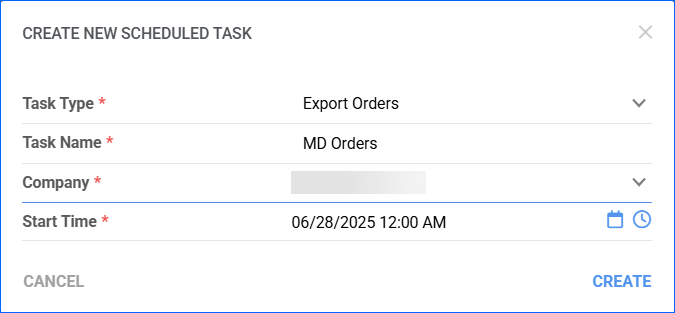
- Click CREATE, and the new Scheduled Task page will load on your screen.
- Click the Edit button in the top right corner.
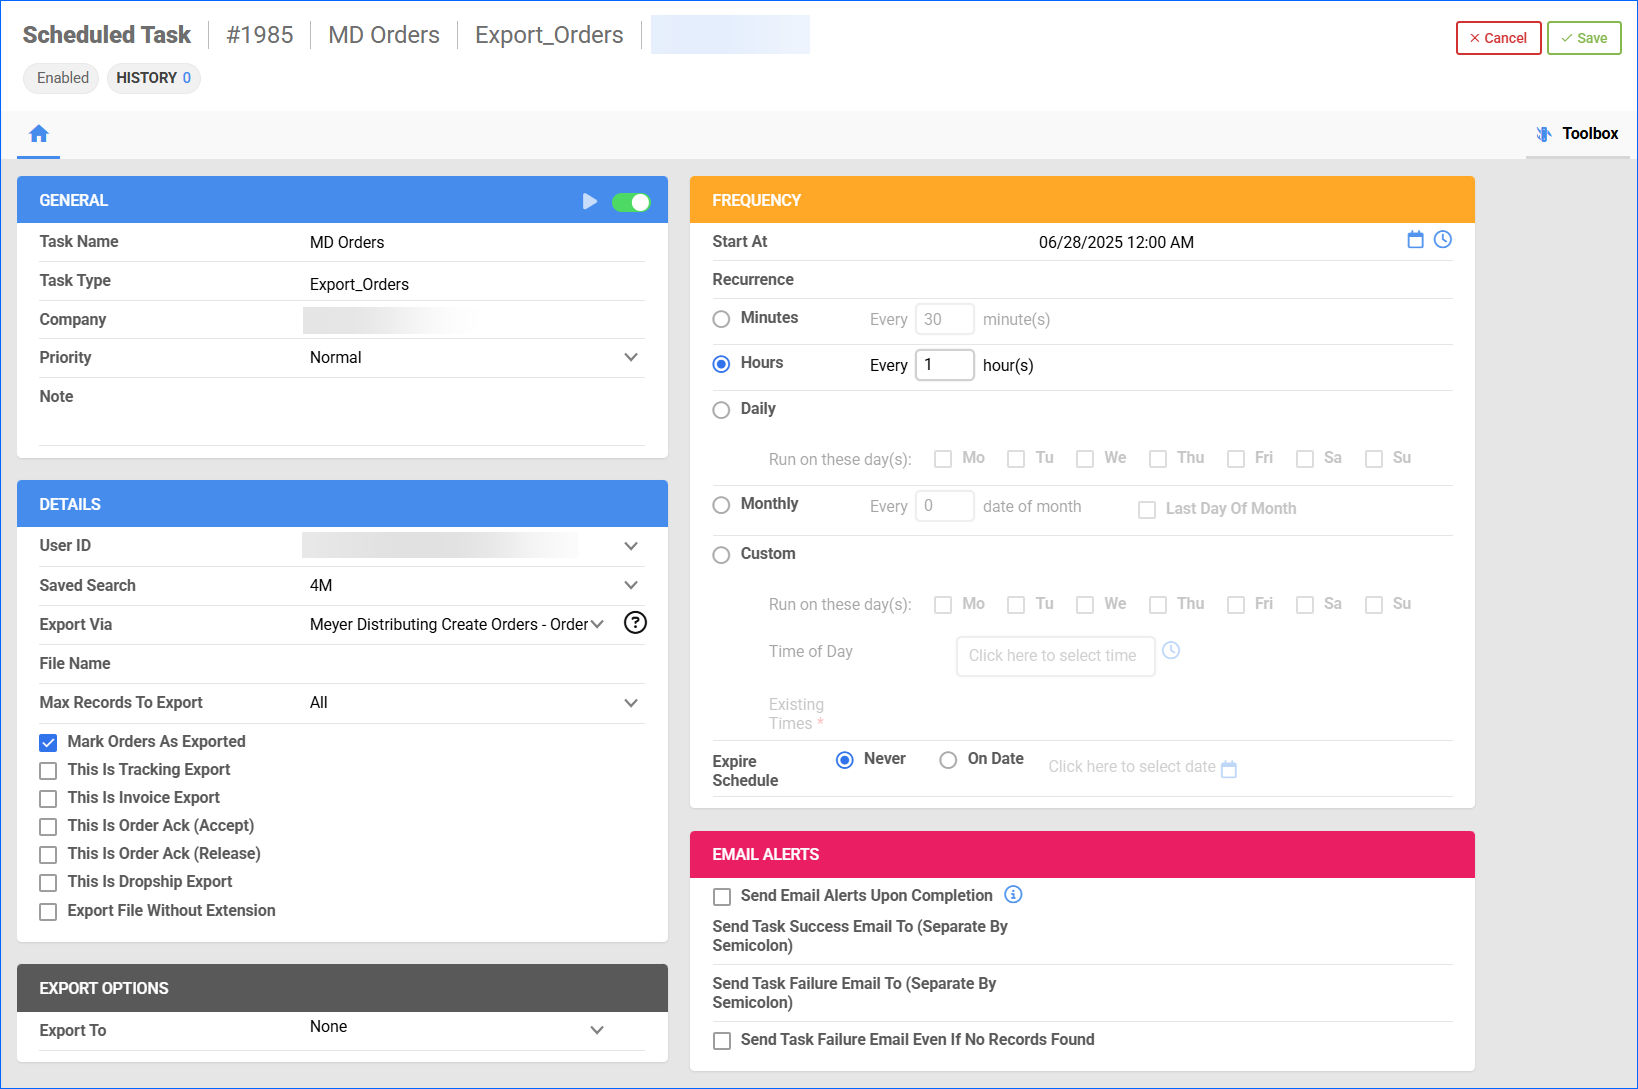
- In the Details panel:
- Click the User ID menu and select your email.
- Click the Saved Search menu and select the saved search you created earlier.
- Click the Export Via menu and select Meyer Distributing Create Order Export.
- Populate the Plugin Settings.
- Check Mark Orders As Exported.
- In the Export Options panel, set Export To to None.
- In the Frequency section, select a task frequency between thirty minutes and one hour for optimal performance.
- If required, set up related Email Alerts.
- In the General panel, click the Enable toggle button.
- Click Save.
Tracking Import
The Meyer Distributing Tracking Import plugin retrieves tracking numbers, estimated delivery dates, and shipping methods from Meyer using the OrderSourceOrderID. It then maps Meyer’s shipping methods to Sellercloud’s via an Import Mapping Profile. Once a tracking number is received, the order is marked as Fully Shipped.
Before you move on, create a Saved Search for orders filtered by:
- Company – The company you created for the integration.
- Order Status – InProcess Or Completed
- Exported – Exported
- Shipping Status – Unshipped
Automate Tracking Import
To create a Scheduled Task that automatically triggers the Meyer Distributing Tracking Import plugin:
- Navigate to Settings > Scheduled Tasks > Manage Scheduled Tasks.
- Click the green + icon and select Create New Scheduled Task.
- Configure the following:
- Click Task Type and select Order Export.
- Set the Task Name.
- Select the Company.
- Select the Start Time.
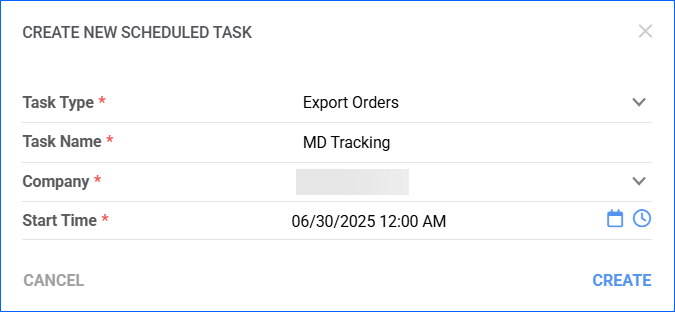
- Click CREATE, and the new Scheduled Task page will load on your screen.
- Click the Edit button in the top right corner.
- In the Details panel:
- Click the User ID menu and select your email.
- Click the Saved Search menu and select the saved search you created earlier.
- Click the Export Via menu and select Meyer Distributing Tracking Import.
- Populate the Plugin Settings.
- In the Export Options panel, set Export To to None.
- In the Frequency section, select a task frequency between thirty minutes and one hour for optimal performance.
- If required, set up related Email Alerts.
- In the General panel, click the Enable toggle button.
- Click Save.

Inventory Import
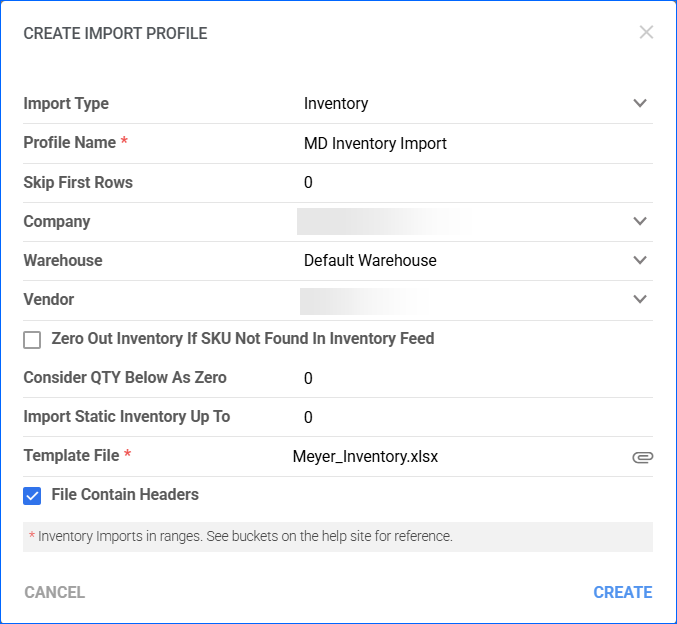
To import inventory levels from Meyer Distributing to Sellercloud, you need to create an Inventory Mapping Profile:
- Navigate to Settings > Mapping Tools > Manage Import Mapping Profiles.
- Open the Action menu, click Create.
- Select Inventory from the Import Type dropdown menu.
- Enter Profile Name.
- If the initial row/s from your file should be skipped, enter the number in the Skip First Rows field.
- Select the Company.
- Select the Warehouse where the inventory should be imported.
- You can also specify a Vendor to limit the profile’s functionality. Otherwise, leave the field blank.
- If applicable, check Zero Out Inventory If SKU Not Found In Inventory Feed – if a SKU is not in the imported file, then that SKU’s inventory will be set to zero for the selected Warehouse. This option only applies to SKUs associated with the selected Vendor.
- If applicable, enter Consider Qty below as Zero – all products with quantity below the specified amount will be considered as zero quantity.
- Enter data into Import Static Inventory Up To, if required – this feature imports static inventory up to a certain value with exact quantities entered in the file and then continues with ranges for inventory over this value.
- Upload your Template File and check File Contain Headers.
- Click Create. The page will automatically refresh to your new Mapping Profile Details Page, where you can map your columns.
- On the profile page, click Edit.
- Map the fields in the Column Mapping panel:
- Inventory_VendorSKU – Item Number (the Vendor SKU on Meyer Distributing).
- Inventory_Inventory – MFG Qty Available (Available quantity to import).
- Click Save.
Automate Inventory Import
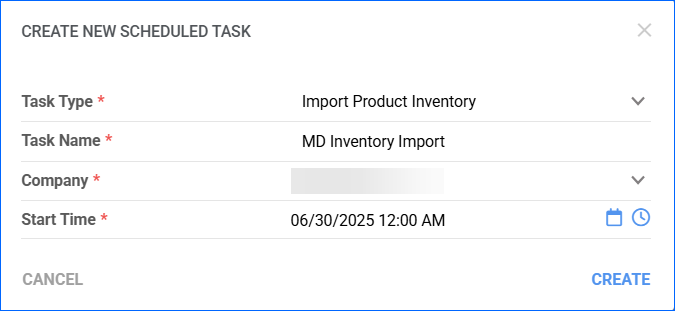
To automate the inventory import with a Scheduled Task based on your custom schedule:
- Navigate to Settings > Scheduled Tasks > Manage Scheduled Tasks.
- Click the green + icon and select Create New Scheduled Task.
- Configure the task details:
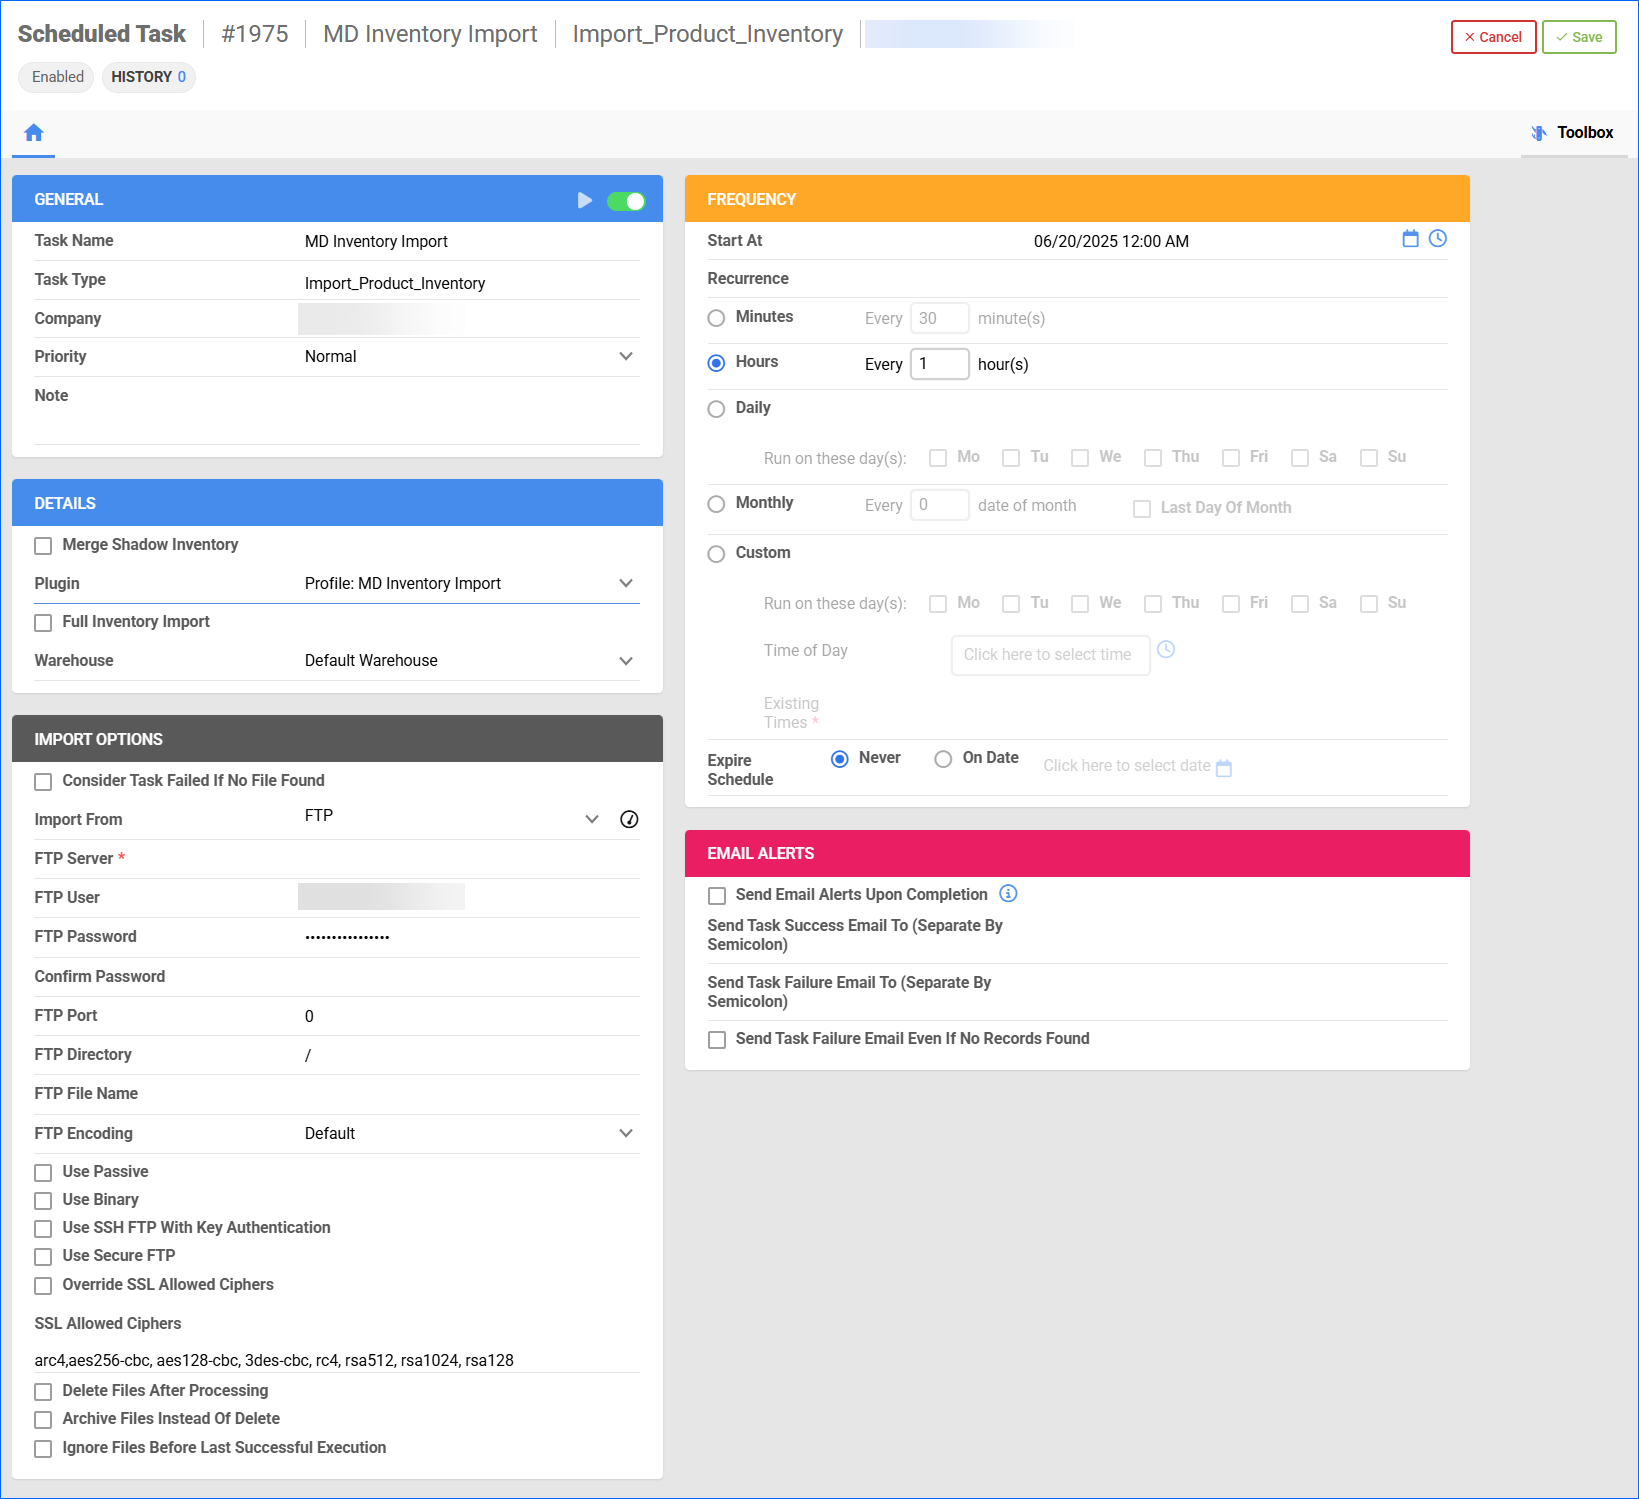
- Click Task Type and select Import Product Inventory.
- Set the Task Name.
- Select the Company.
- Select the Start Time.
- Click CREATE, and the new task will automatically load on your screen.
- Click the Edit button in the top right corner.
- In the Details section:
- From the Plugin dropdown, select the Inventory Import Mapping profile you created earlier.
- Select the Warehouse to which the import applies.
- In the Import Options section, set Import From to FTP and fill out the FTP details provided by Meyer Distributing.
- In the Frequency section, select a task frequency between thirty minutes and one hour for optimal performance.
- If required, set up related Email Alerts.
- In the General section, click the Enable button.
- Click Save.