Overview
Sellercloud allows you to automatically import products and product information from BigCommerce and store them in your catalog.
Once you set up the BigCommerce V3 Account Integration, you can synchronize your catalog between the two platforms by importing information from your existing listings on BigCommerce. This feature both creates and updates products in Sellercloud.
Prerequisites
Before you can import products from BigCommerce:
- Make sure you have successfully connected BigCommerce to Sellercloud. The following fields must be configured on the Website > Sellercloud Plug-in Website > Cart General page:
- Website URL
- OAuth Store Hash
- OAuth Client ID
- OAuth Access Token
- OAuth Secret Token
- Contact Sellercloud Support to request the product import plugin.
Import Products From BigCommerce
You can import and update products from BigCommerce automatically or manually.
Variation Products are supported. Based on the BigCommerce product’s variation list, local products will be created or updated in Sellercloud, and then the N-Matrix relationship will be created. Kit Product relationships, on the other hand, will not be created.
The following product properties will be updated, both upon initial product import and during regular updates:
- On the BigCommerce (Website) Properties page:
- Website Merchant SKU
- Website Product ID
- Manufacturer SKU
- Long Description
- Website Price
- Retail Price
- Website Categories
- Enabled (Website)
- On the Product Details page:
- UPC
- GTIN
- Product Status
- Product Name
- Product Type
- Product Weight
- Product Dimensions (Length, Width, Height)
- Product Images
Automatically
To import and update products from BigCommerce automatically:
To set up the scheduled task:
- Go to Settings > Scheduled Tasks > Manage Scheduled Tasks.
- Click the green + icon: Create New Scheduled Task.
- Complete as follows:
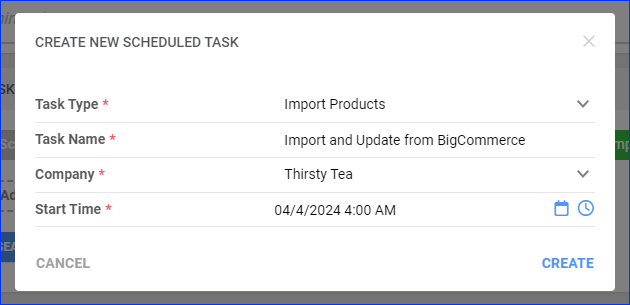
- Click Task Type and select Import Products.
- Set the Task Name.
- Select the Company where this task will be created.
- Select the Start Time. This will be used if you start syncing products automatically.
- Click CREATE.
- The following message appears at the bottom of your screen: “Scheduled task created successfully. Click Here to configure the task details.” – click the link.

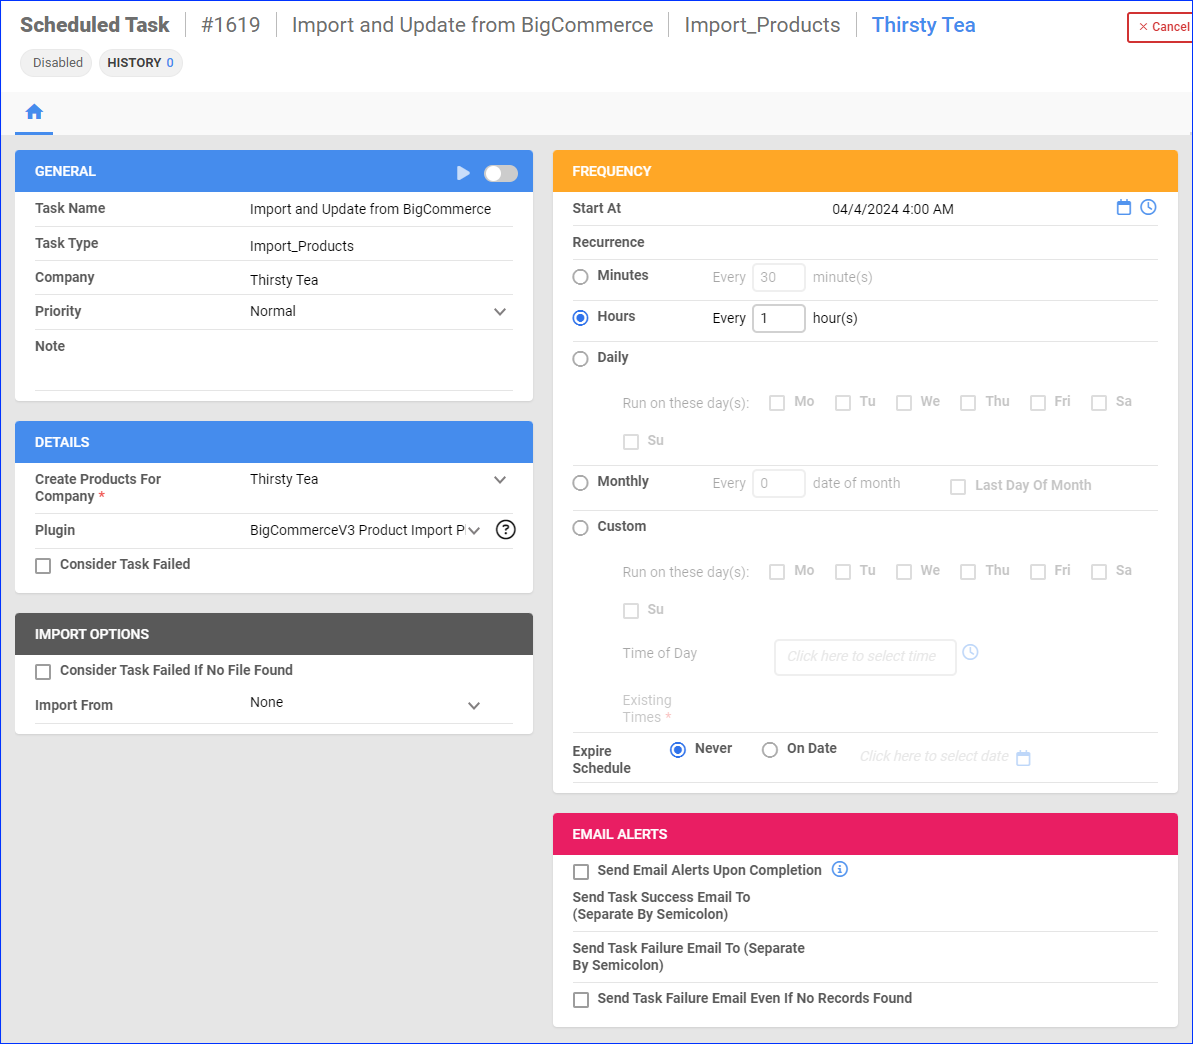
- Click the Edit button on the top right.
- In the Details section:
- Click the Create Products For Company menu and select the company where products will be imported and updated.
- Click the Plugin menu and select BigCommerceV3 Product Import Plugin.
- In the Frequency section, specify the task frequency. For optimal performance, select a range between thirty minutes and one hour.
- Click the Enable toggle button in the General panel.
- Click Save on the top right.
Manually
To import and update products from BigCommerce manually:
- Go to Catalog > Tools > Import Product Info.
- Select Import Info Via Plugin/Profile.
- Select the targeted company next to Update Products For Company.
- Choose Select Plugin and select BigCommerceV3 Product Import Plugin.
- You will be required to upload a File. This particular plugin does not require a list of SKUs, so you can upload a blank CSV or Excel file.
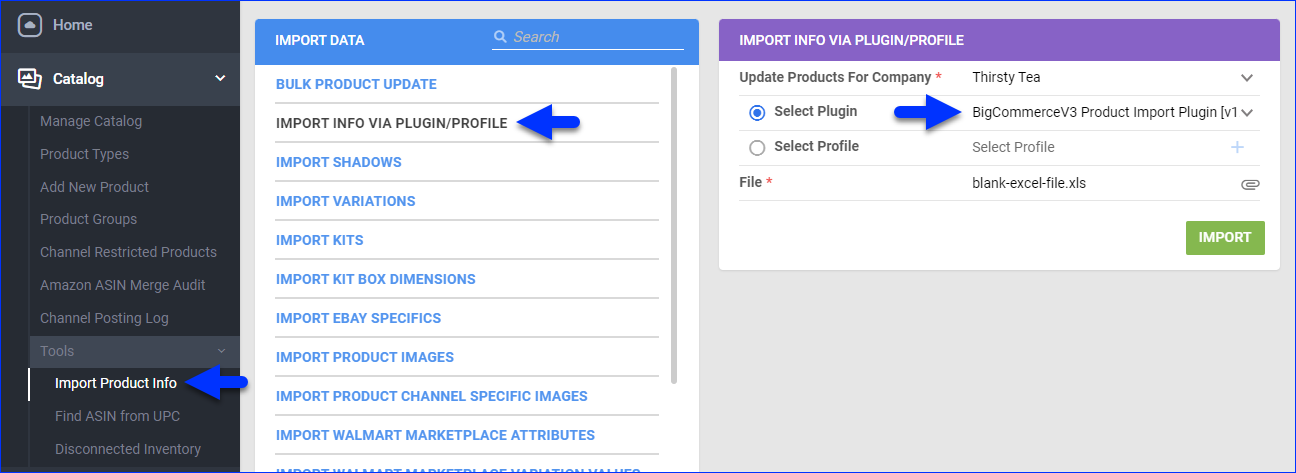
- Click Import.
Alternatively, if you have already followed the steps above to set up a scheduled task:
- Go to Settings > Scheduled Tasks > Manage Scheduled Tasks.
- Find the product import task and select it.
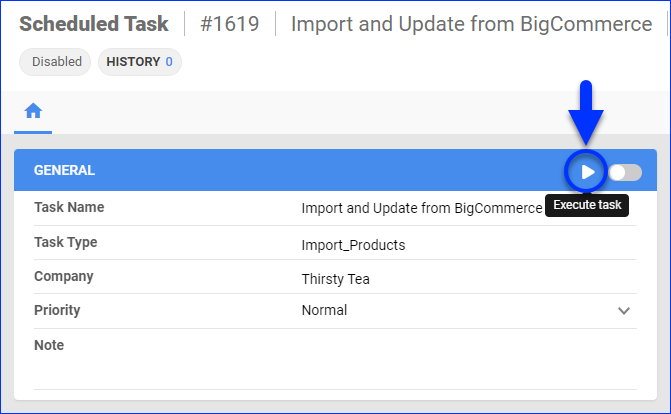
- Click the blue Actions icon at the bottom right and select Execute.
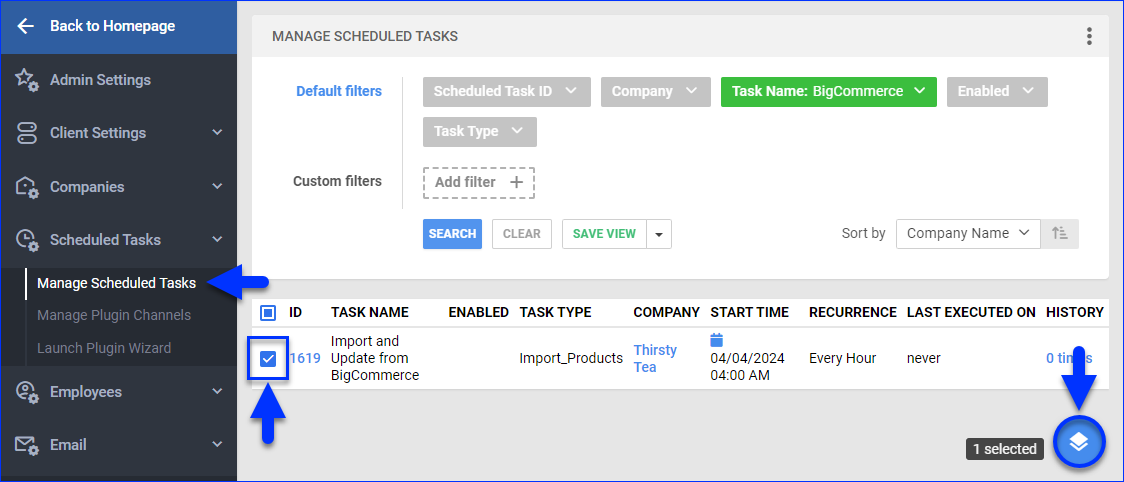
- Alternatively, you can click the Execute task icon in the General panel on the task’s page.
