Overview
Shopify is an all-in-one eCommerce platform that allows you to set up an online store. Our Shopify Account Integration allows you to seamlessly upload your product inventory and create new listings on your Shopify store directly from your Sellercloud account.
You can access your inventory data from Sellercloud and update your Shopify store in real time. Product changes can be pushed either manually or automatically. You can edit and update your listings from the Product Properties Page.
Prepare a Product for Shopify
Before posting a product to Shopify, make sure it’s Shopify-ready. The only required attribute to post to Shopify is the Title. You can configure the Custom Title field or leave it blank. If left empty, Sellercloud will use the Product Name as the title. Additionally, to enable the available inventory to upload, ensure the product is Website Enabled on the Website Properties page. Failure to do so will result in an inventory of zero uploaded for that product.
To prepare a product for Shopify:
- Go to Catalog > Manage Catalog > Select a product.
- On the Product Details page, go to Toolbox > Website Properties > Edit.
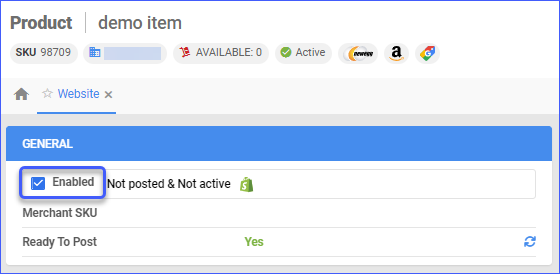
- In the General panel, select Enabled > Save.
Post a Product on Shopify
You can post products individually or in bulk.
When posting products, Sellercloud sends the value in the Site Cost field as the product cost. Changing the cost will not result in an automatic update on your website – you must post the product again to update the cost. If you prefer to exclude the Product Cost from being posted on Shopify, you can disable the Client Setting Shopify Enable Update Product Site Cost.
The Tax Class is only sent to Shopify with the Post to Website action. You can add Tax Class options in Settings > Client Settings > Tax Classes.
Individually
To post products individually, navigate to:
- Catalog > Manage Catalog > Find your product.
- Toolbox > Website Properties > Action Menu > Post to Website.

In Bulk
To post multiple products, navigate to:
- Catalog > Manage Catalog > Select your products
- Open the Actions Menu > Launch on Channel > Select Website from the dropdown menu.

Import Listings from Shopify
Sellercloud’s integration with Shopify also allows you to import your Active Listings and create local SKUs based on them. There are three possible ways to do so:
- Via the automated service, which compares your active listings to your local catalog and creates new SKUs.
- Via a manual listings download through the established API connection.
- Via a Shopify Product Import plugin.
The dedicated Import Shopify Listings section explains each option and how to configure your account and take advantage of each feature.
Manage Shopify Variations
You can post Variation Products from Sellercloud to Shopify. Set up the variation in Sellercloud and post the Matrix Parent. Shopify supports variations with up to 3 dimensions.
- One-dimension matrix – Set an image for each of the children from the Image Manager.
- Two or more dimensions – For example, Color and Size:
- Go to the parent > Toolbox > Variations > Primary Dimension Images.
- You need the images to be attached to the Color dimension. Select Edit and Change Primary Dimension.
- Set an image per color variation.
When there are multiple Variation Dimensions set with N-Matrix Specific Images defined, those will be sent. If the Client Setting Shopify Matrix Images: Use Dimension Based is enabled and there are no N-Matrix Images or only one dimension, the Default Image and Supplemental Images from the variation child will be sent. If the setting is disabled, Sellercloud will send N-Matrix Images from the matrix parent if defined. Otherwise, we will send the Default Gallery Image from the variation child.
If a Matrix is posted on Shopify, performing the action Post to Website on one of the Variation children will break the Matrix relationship on Shopify. The client setting Allow posting variation child as independent listing on Shopify must be enabled in order to list and update Variation Children independently. If disabled, you can only list and update the Matrix Parent.
Shopify Product Visibility
You can control item visibility on different Shopify channels from Sellercloud. To do this, you must first download the available sales channels connected to your Shopify store:
- Navigate to Settings > Companies > Manage Companies and open the required company.
- From the Toolbox, select Sellercloud Integrated Website > Shopify Publications.
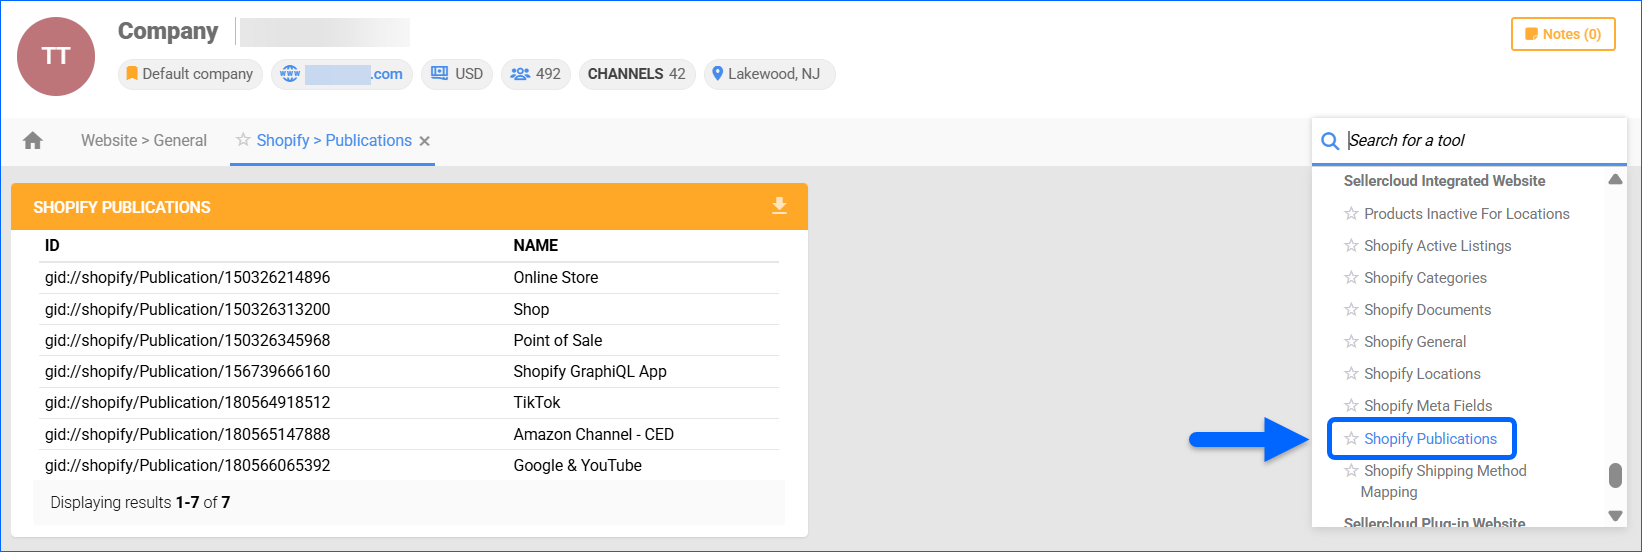
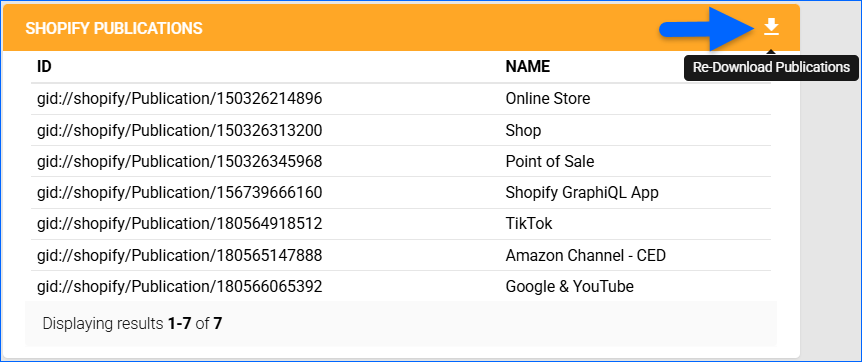
- Click the Re-Download Publications icon in the panel header.
Once you retrieve your Shopify sales channels, you can seamlessly manage your products’ visibility on them:
- Navigate to Catalog > Manage Catalog and open a product.
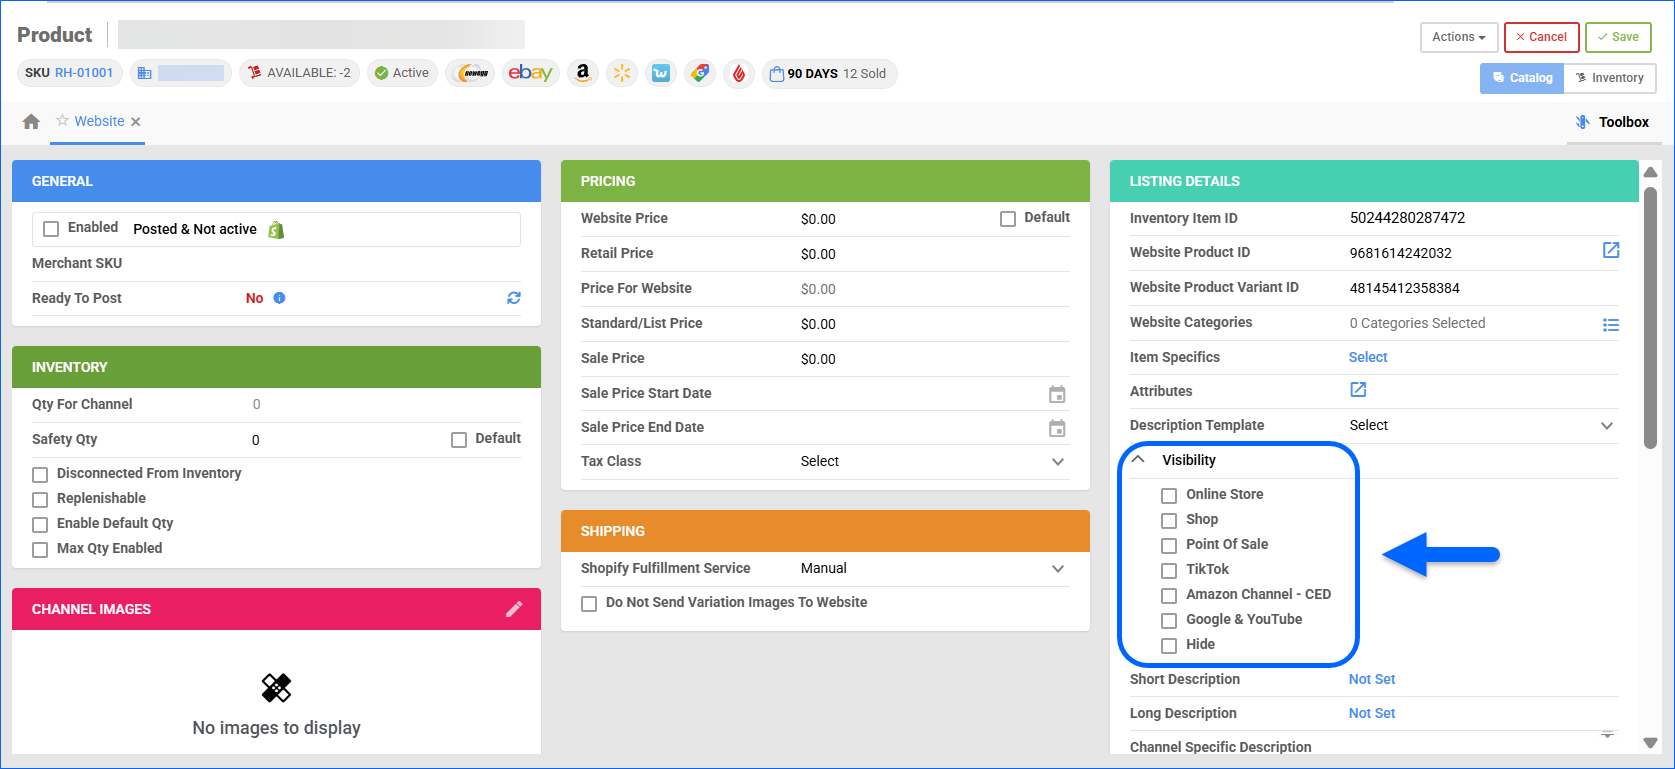
- From the Toolbox, select Website Properties.
- Click Edit on the top right.
- In the Listing Details Panel, click Visibility and choose on which Shopify channels to display your product, or Hide it completely.
- Once done, click Save.
Update Shopify Listings
Sellercloud automatically updates product prices and inventory regularly. The feeds include products with a price or quantity discrepancy between the Sellercloud values and the information we receive from the Active Listings report, ensuring accurate and consistent information. You can also select the needed products and update them manually.
If you’ve created a product directly on Shopify and then imported it into Sellercloud, ensure that the Track Inventory option is enabled in the Inventory Policy dropdown for that product in Shopify. This option is enabled automatically when posting a product through Sellercloud.
Automatically
To set up automatic product updates:
- Go to Settings > Companies > Manage Companies > Select a company.
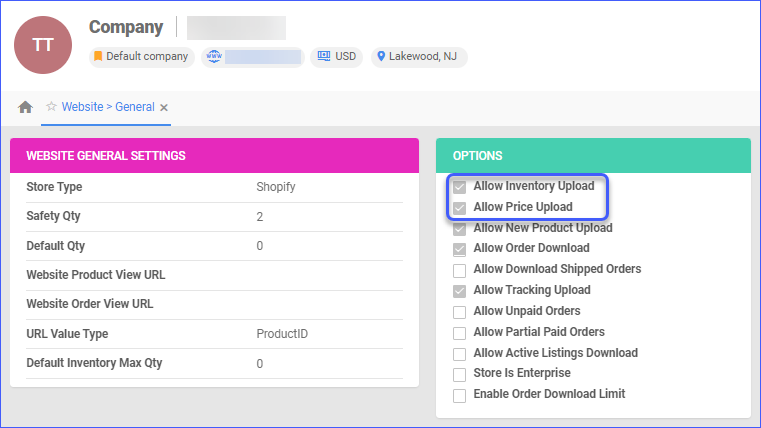
- In Toolbox, select Website > General > Edit.
- In the Options panel, select Allow Inventory/Price Upload.
Manually
To update products individually:
- Go to Catalog > Manage Catalog > Select a product.
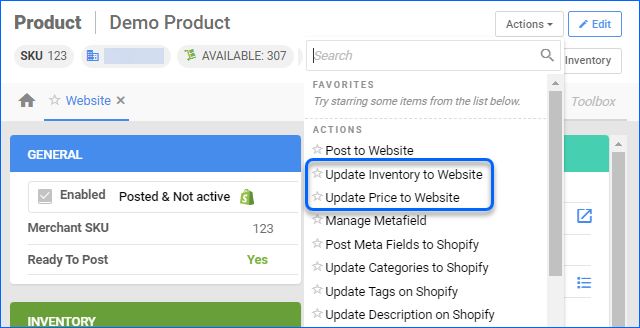
- In Toolbox, select Website Properties.
- Click Actions > Update Inventory/Price to Website.
To update multiple products:
- Go to Catalog > Manage Catalog > Select products.
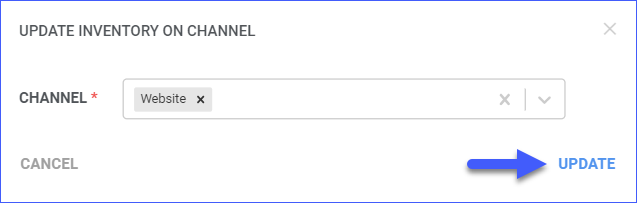
- Click the Action button > Update Inventory/Price on Channel.
- Choose Website from the dropdown menu > Update.
Related Client Settings
You can access the Client Settings by navigating to Settings > Client Settings > General Client Settings.
- Enable Filtered products for Shopify price upload
- This setting refers to the ability to upload a list of prices from Shopify to your store. It allows you to filter products according to certain criteria (for example, tags, product type, etc.) before uploading the prices. This allows you to make sure that only certain products have the prices you want to upload.
- Send EAN or GTIN to Shopify if UPC is empty
- This setting refers to the product identifiers that are used to differentiate products in the Shopify store. If a product does not have a UPC (Universal Product Code), this setting will tell Shopify to use the EAN (European Article Number) or GTIN (Global Trade Item Number) instead. This will ensure that the product is properly identified and can be tracked in the store.
- Allow posting variation child as independent listing on Shopify
- This setting allows a variation of a product (such as a different size or color) to be listed as a separate item on Shopify. This means that each variation of a product will have its own unique listing instead of being grouped together with the other variations on one listing.
- Exclude Unmapped locations from Inventory updates for Shopify
- This setting means that Shopify Locations not mapped to a Warehouse in Sellercloud will not be included in inventory feeds sent to the website.
- Shopify revise matrix parent images when revising regular images
- This setting allows Shopify to automatically update the main images associated with a product’s variant combinations (e.g., size, color) when the regular image of the product is revised. This ensures that customers can quickly and easily identify the product they are looking for when browsing the store.
- Send Brand As Vendor To Shopify
- This setting is used to configure Sellercloud to send the Brand Name of the vendor in the Shopify orders. This allows the Shopify orders to be identified by both the Vendor Name and the Brand Name. This setting is especially helpful if the Vendor Name and Brand Name are different.
- Shopify Matrix Images: Use Dimension Based
- This setting controls which variation product images are sent to Shopify.
Overview
Shopify is an all-in-one eCommerce platform that allows you to set up an online store. Our Shopify Account Integration allows you to seamlessly upload your product inventory and create new listings on your Shopify store directly from your Sellercloud account.
You can access your inventory data from Sellercloud and update your Shopify store in real time. Product changes can be pushed either manually or automatically. You can edit and update your listings from the Product Properties Page.
Prepare a Product for Shopify
Before you post a product to Shopify, make sure it’s Shopify-ready. The only required attribute to post to Shopify is the Title. You can configure the Custom Title field or leave it empty, in which case Sellercloud will use the Product Name. The product must be Web Enabled on the Website Properties page for the available inventory to upload; otherwise, an inventory of zero will upload for that product.
To prepare a product, navigate to:
- Inventory > Manage Inventory > Select a product.
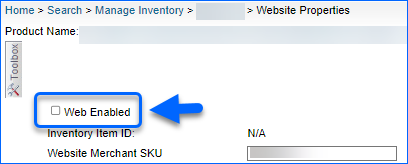
- On the Product Details page, go to Toolbox > Website Properties.
- Check Web Enabled and Save.
Post a Product on Shopify
You can post products individually or in bulk.
When posting products, Sellercloud sends the value in the Site Cost field as the product cost. Note that changing the cost will not result in an automatic update on your website – you must post the product again to update the cost.
Alternatively, if you prefer to exclude the Product Cost from being posted on Shopify, you can disable the Client Setting Shopify Enable Update Product Site Cost.
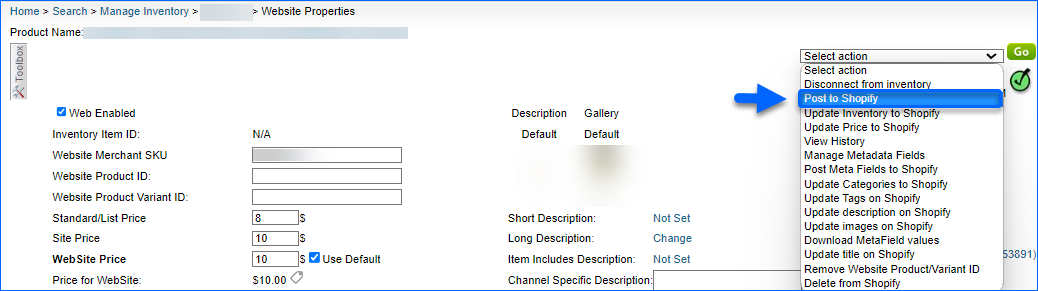
Individually
To post a product individually, navigate to:
- Inventory > Manage Inventory > Find your product.
- Toolbox > Website Properties > Select Action menu > Post to Shopify.
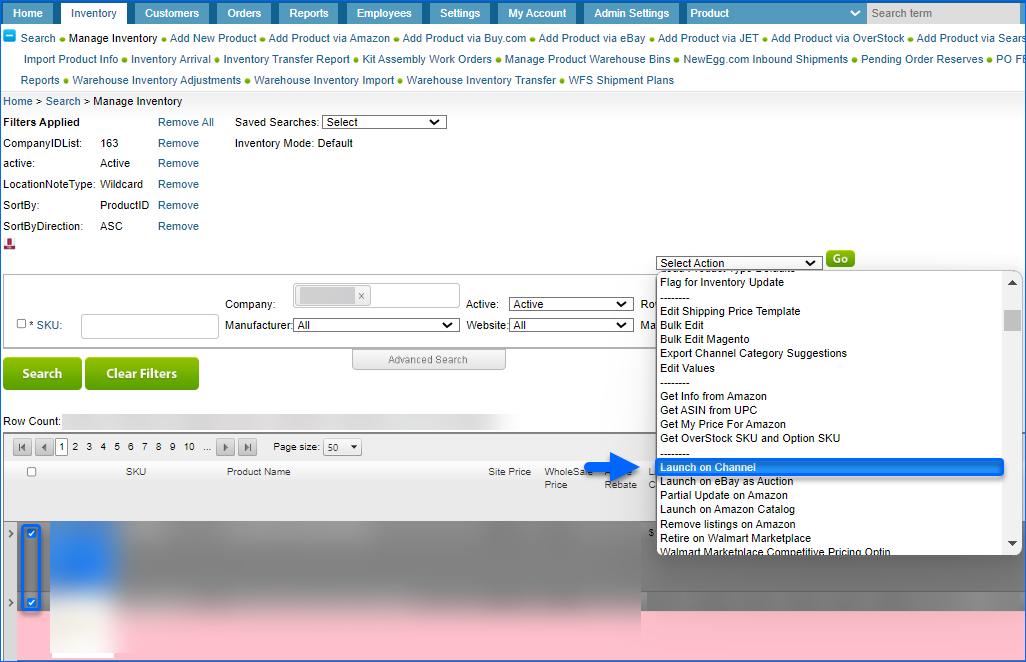
In Bulk
To post multiple products, navigate to:
- Inventory > Manage Inventory > Select your products.
- Open the Select Action menu > Launch on Channel and click Go.
- On the next page select Website from the Channel dropdown menu > Continue.
Manage Shopify Variations
You can post Variation Products from Sellercloud to Shopify. Set up the variation in Sellercloud and post the Matrix Parent. Shopify supports variations with up to 3 dimensions.
- One-dimension matrix – Set an image for each of the children from the Image Manager.
- Two or more dimensions – For example, Color and Size:
- Go to the parent > Toolbox > N-Matrix > Matrix General.
- Choose the dimensions to add to this product or add a new dimension > Click Continue.
- Adjust the ProductID and Inventory level.
- Set an image per color variation and then Save.
When there are multiple Variation Dimensions set with N-Matrix Specific Images defined, those will be sent. If the Client Setting Shopify Matrix Images: Use Dimension Based is enabled and there are no N-Matrix Images or only one dimension, the Default Image and Supplemental Images from the variation child will be sent. If the setting is disabled, Sellercloud will send N-Matrix Images from the matrix parent if defined; otherwise, we will send the Default Gallery Image from the variation child.
If a Matrix is posted on Shopify, performing the action Post to Website on one of the Variation children will break the Matrix relationship on Shopify. The client setting Allow posting variation child as independent listing on Shopify provides you with some control over what actions you can perform when it comes to variations:
- When Enabled, you can list and update Variation Children to Shopify independently.
- When Disabled, you can only list and update the Matrix Parent. This ensures that the Matrix relationship on Shopify is not broken.
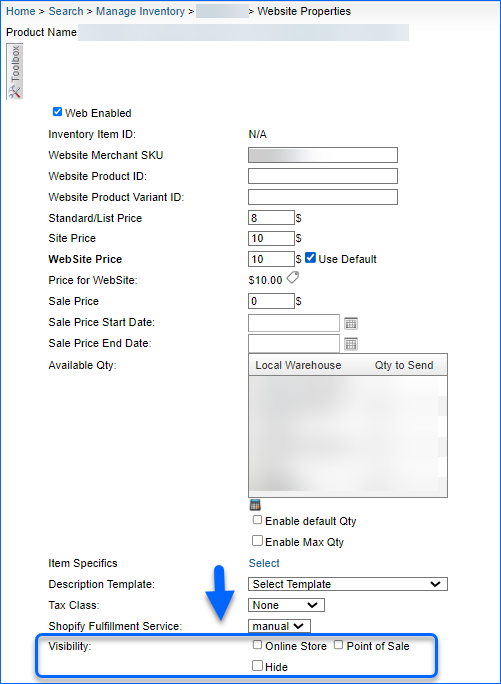
Shopify Product Visibility
You can control item visibility on different Shopify channels from Sellercloud. To do so, navigate to:
- Inventory > Open a Product.
- Toolbox > Website Properties.
- Visibility > Choose between Online Store, Point of Sale or Hide.
You can also select visibility for both the Online Store and Point of Sale, or Hide the listing.
Update Shopify Listings
Inventory and pricing changes are automatically updated on a regular basis. The only products that are included in the automatic feed are those with inventory and pricing values that differ from the values on their Shopify active listing. You can also select the needed products and update them manually.
If you’ve created a product directly on Shopify and then imported it into Sellercloud, ensure that the Track Inventory option is enabled in the Inventory Policy dropdown for that product in Shopify. This option is enabled automatically when posting a product through Sellercloud.
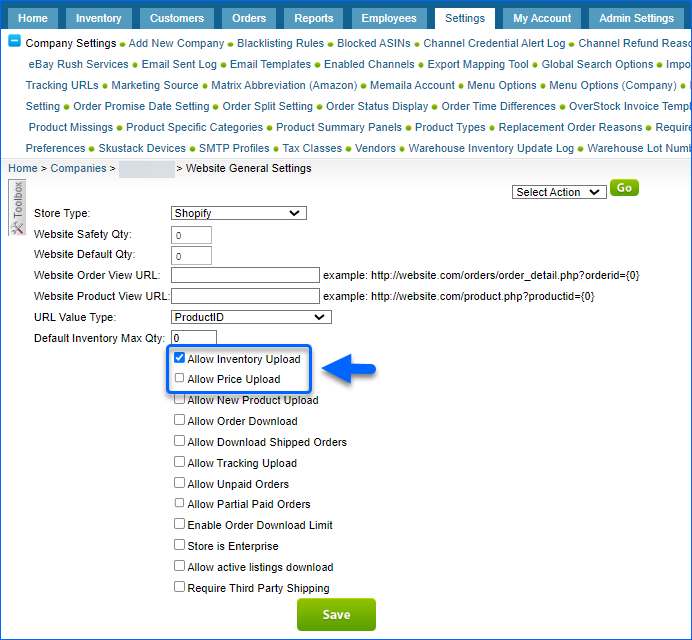
Automatically
- Go to Settings > Companies > Select a company.
- In Toolbox, select Website > General.
- Select Allow Inventory/Price Upload.
Manually
To update products individually:
- Go to Inventory > Manage Inventory > Select a product.
- In Toolbox, select Website Properties.
- Click Select action > Update Inventory to Shopify > Go.
 To update multiple products:
- Go to Inventory > Manage Inventory > Select products.
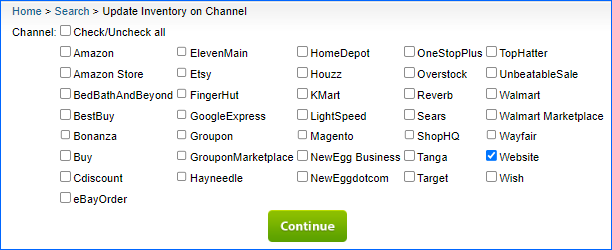
- Click Select Action > Update Inventory on Channel > Go.
- Check Website and click Continue.
Related Settings
To access the Client Settings, navigate to Settings > Client Settings > General Client Settings.
- Enable Filtered products for Shopify prices upload
- This setting refers to the ability to upload a list of prices from Shopify to your store. It allows you to filter products according to certain criteria (for example, tags, product type, etc.) before uploading the prices. This allows you to make sure that only certain products have the prices you want to upload.
- Send EAN or GTIN to Shopify if UPC is empty
- This setting refers to the product identifiers that are used to differentiate products in the Shopify store. If a product does not have a UPC (Universal Product Code), this setting will tell Shopify to use the EAN (European Article Number) or GTIN (Global Trade Item Number) instead. This will ensure that the product is properly identified and can be tracked in the store.
- Allow posting variation child as independent listing on Shopify
- This setting allows a variation of a product (such as a different size or color) to be listed as a separate item on Shopify. This means that each variation of a product will have its own unique listing instead of being grouped together with the other variations on one listing.
- Exclude Unmapped locations from Inventory updates for Shopify
- This setting means that Shopify Locations not mapped to a Warehouse in Sellercloud will not be included in inventory feeds sent to the website.
- Shopify revises matrix parent images when revising regular images
- This setting allows Shopify to automatically update the main images associated with a product’s variant combinations (e.g., size, color) when the regular image of the product is revised. This ensures that customers can quickly and easily identify the product they are looking for when browsing the store.
- Send Brand As Vendor To Shopify
- This setting is used to configure Sellercloud to send the Brand Name of the vendor in the Shopify orders. This allows the Shopify orders to be identified by both the Vendor Name and the Brand Name. This setting is especially helpful if the Vendor Name and Brand Name are different.
- Shopify Matrix Images: Use Dimension Based
- This setting controls which variation product images are posted to Shopify.