Overview
Shopify Locations is a feature that allows you to manage and track inventory across multiple physical locations. It helps you to fulfill orders from the closest or most appropriate location, track inventory levels, and manage stock transfers between locations. It’s especially useful if you have a brick-and-mortar presence as well as an online store.
This article explains how to set up and download Shopify Locations in Sellercloud. Shopify requires inventory tracking and inventory updates to include a Location ID , so Sellercloud has an easy-to-use feature to download them and send them to your desired warehouses.
Prerequisites
First, you must create and configure Shopify locations on your site. Then, you can download them into Sellercloud. Follow these instructions to set up your locations in Shopify.
After you integrate Sellercloud with your Shopify site and create your Shopify Locations, you should download them into Sellercloud.
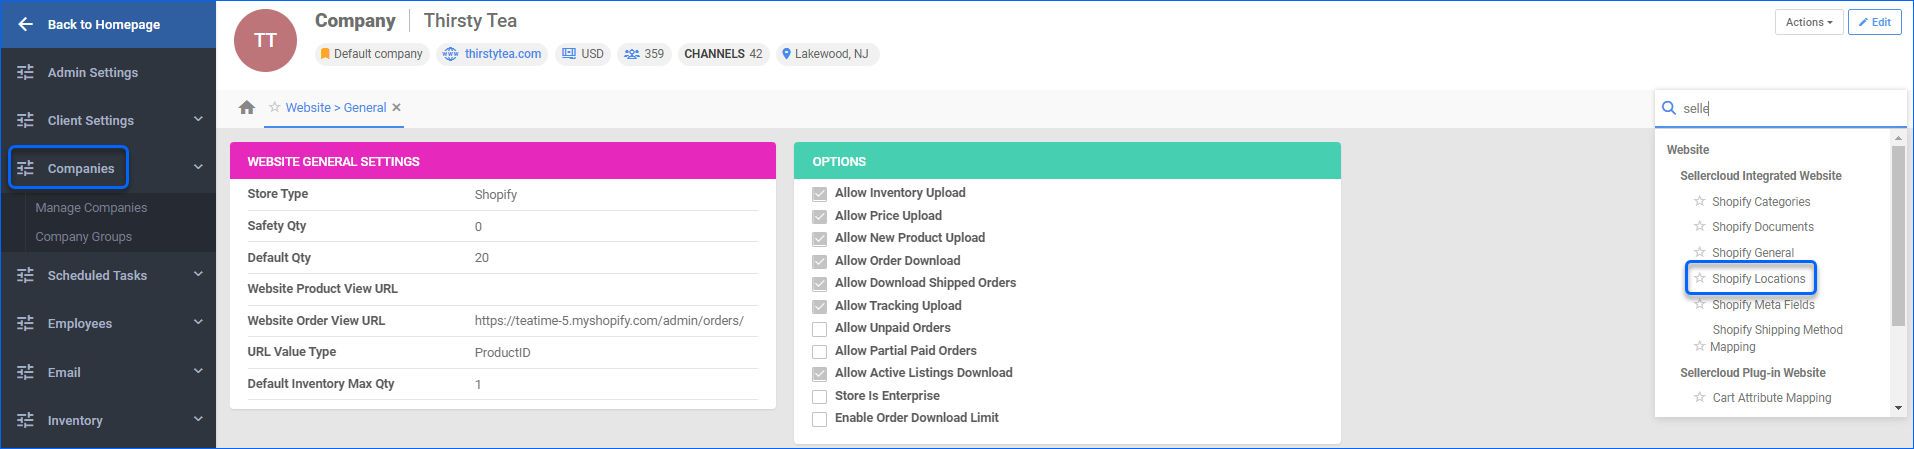
Note that you will need to enable the setting Enable Shopify Locations in Sellerclud before the setup. You can access it by navigating to Settings > Company Settings > Website > Sellercloud Integrated Website > Shopify General.
Download Shopify Locations
The Shopify locations can be downloaded into Sellercloud in a few simple steps. Following the initial import, you can also view your current Shopify Locations and update/re-download them into Sellercloud as necessary by using the same path.
- Go to Settings > Companies > Manage Companies.
- Open a company > Toolbox > Website > Sellercloud Integrated website > Shopify Locations.
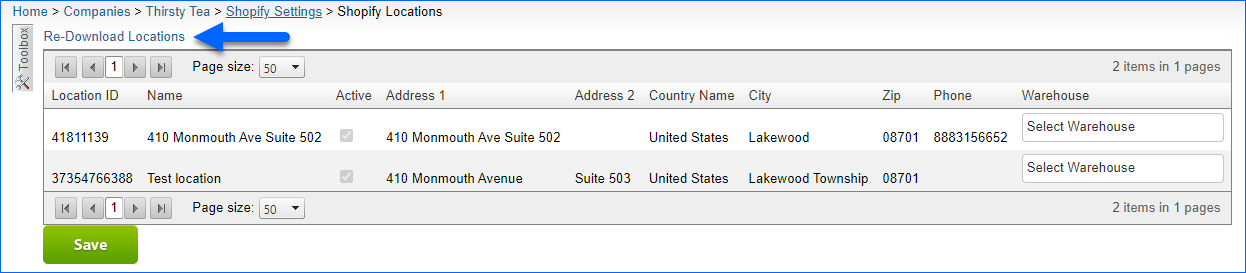
- Click the arrow icon to Re-Download Locations.
- If the Shopify locations are downloaded successfully, you will see a message show up on your screen.

Map Locations to Sellercloud Warehouses
Once you configure your Shopify Locations, each of them must be mapped to a warehouse in Sellercloud. This mapping will determine which warehouse’s available inventory is sent for which location and prevent errors when updating inventory or tracking information.
The IDs of your Shopify locations will be visible in Sellercloud after their initial import. You can view the imported Shopify Locations and update/re-download them into Sellercloud as necessary.
To map Shopify Locations to your Sellercloud Warehouses:
- Navigate to Settings > Companies > Open a Company.
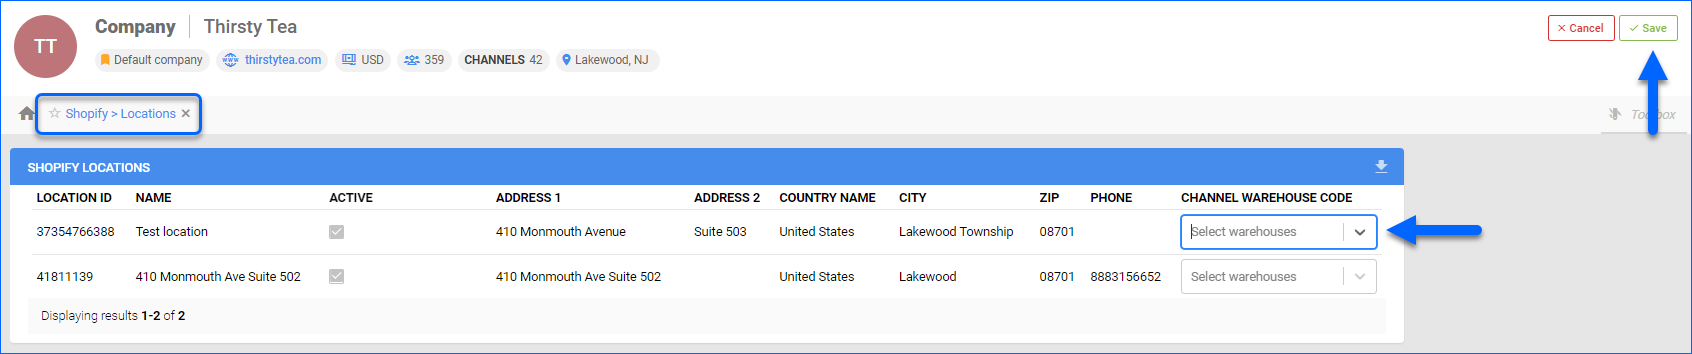
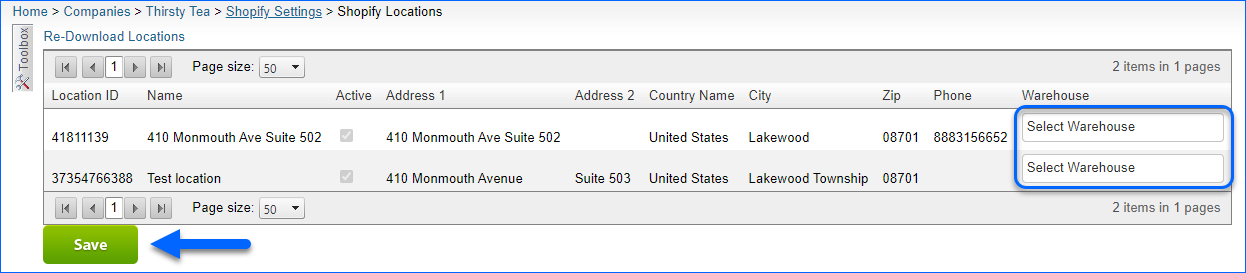
- Toolbox > Sellercloud Integrated Website > Shopify Locations > Click Edit.
- In the Channel Warehouse Code dropdown, choose your desired warehouse selection.
- Click Save.
We recommend mapping your locations 1:1 with your Sellercloud warehouses. However, it is possible to add multiple warehouses to the same location. In such cases, we will send the combined available quantity for that Location ID.
Ship From Warehouse
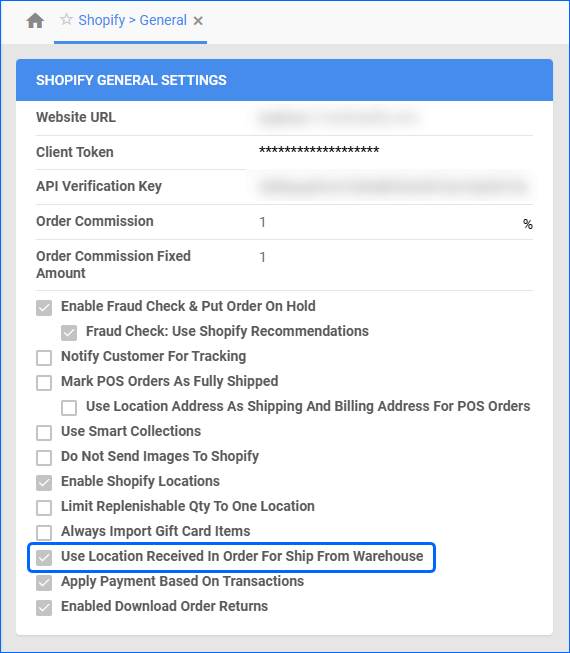
The Shopify Location Mapping is also relevant when importing orders from your Website. This is mainly controlled by the Use Location Received In Order For Ship From Warehouse setting on the Shopify General Settings page in your integrated company:
- When the setting is disabled:
- Fully Shipped orders are always assigned the Ship From Warehouse mapped to the Location ID we receive from Shopify.
- Unshipped orders are not affected by the Location ID received with the order.
- When the setting is enabled we will assign the local warehouse mapped to the Location ID received for all Shopify orders.
Replenishable Products
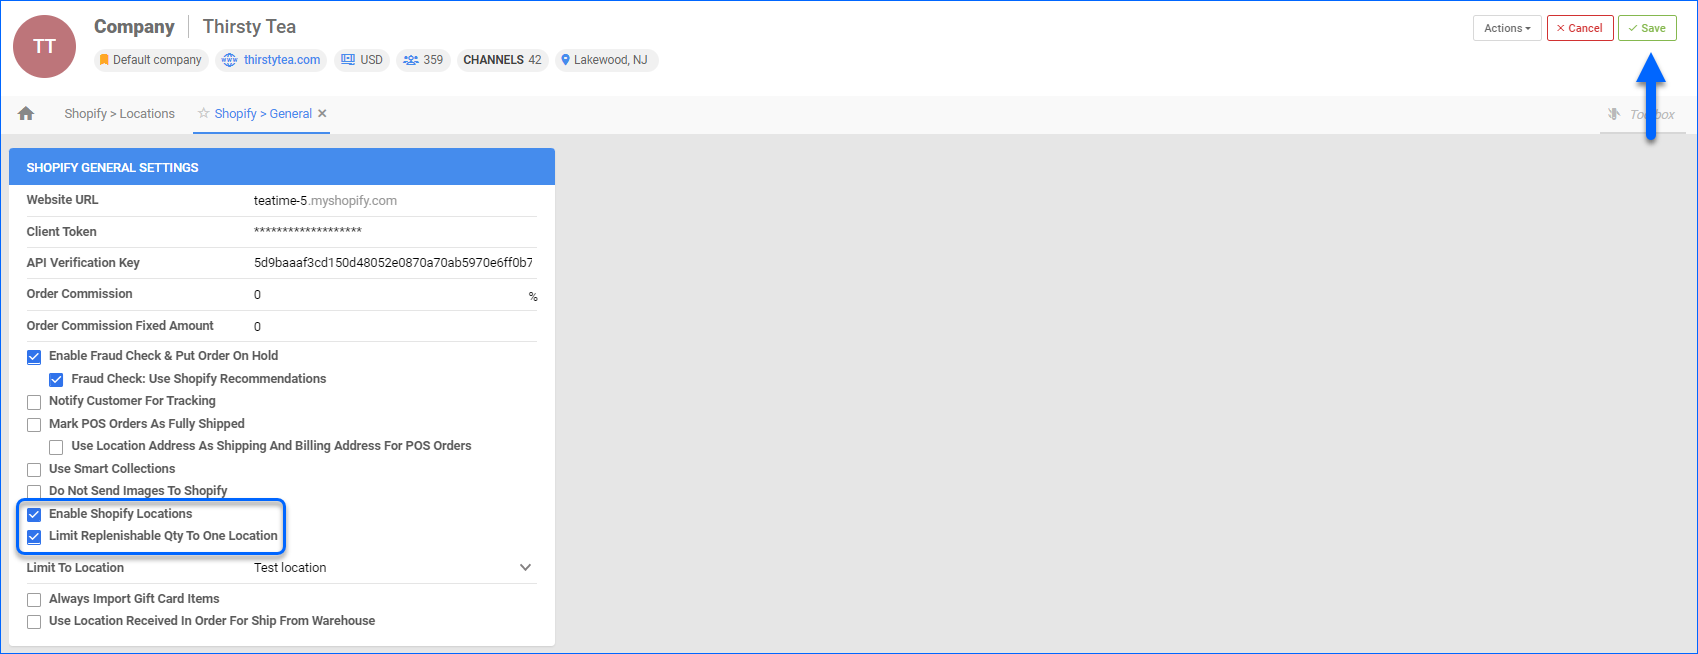
Sellercloud supports sending inventory updates for replenishable products to Shopify. However, you need to make sure you have the correct setup for this to be a seamless workflow. If you have Replenishable products in your Catalog, make sure you enable the setting Limit replenishable qty to one location along with Use Shopify Locations. This is necessary because Replenishable Inventory is not linked to a specific Warehouse, so without the setting, there will be no Location ID in the inventory feed, and Shopify will reject it.
- Navigate to Settings > Company Settings > Choose a Company.
- Toolbox > Website > Sellercloud Integrated website > Shopify General.
- Click Edit.
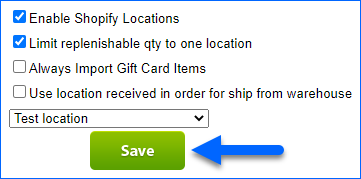
- Enable the setting Limit replenishable qty to one location.
- Choose a value in the Limit to Location dropdown.
- Click Save.
Overview
Shopify Locations is a feature that allows you to manage and track inventory across multiple physical locations. It helps you to fulfill orders from the closest or most appropriate location, track inventory levels, and manage stock transfers between locations. It’s especially useful if you have a brick-and-mortar presence as well as an online store.
This article explains how to set up and download Shopify Locations in Sellercloud. Shopify requires inventory tracking and inventory updates to include a Location ID , so Sellercloud has an easy-to-use feature to download them and send them to your desired warehouses.
Prerequisites
After you integrate Sellercloud with your Shopify site and create your Shopify Locations, you should download them into Sellercloud.
Download Shopify Locations
The Shopify locations can be downloaded into Sellercloud in a few simple steps. Following the initial import, you can also view your current Shopify Locations and update/re-download them into Sellercloud as necessary by using the same path.
- Go to Settings > Company Settings.
- Open a company > Toolbox > Website > Sellercloud Integrated website > Shopify Locations.
- Click the arrow icon to Re-Download Locations.
Map Locations to Sellercloud Warehouses
Once you configure your Shopify Locations, each of them must be mapped to a warehouse in Sellercloud. This mapping will determine which warehouse’s available inventory is sent for which location and prevent errors when updating inventory or tracking information.
The IDs of your Shopify locations will be visible in Sellercloud after their initial import. You can view the imported Shopify Locations and update/re-download them into Sellercloud as necessary.
To map Shopify Locations to your Sellercloud Warehouses:
- Navigate to Settings > Open a Company.
- Toolbox > Sellercloud Integrated Website > Shopify Locations.
- In the Channel Warehouse Code dropdown, choose your desired warehouse selection.
- Click Save.
We recommend mapping your locations 1:1 with your Sellercloud warehouses. However, it is possible to add multiple warehouses to the same location. In such cases, we will send the combined available quantity for that Location ID.
Replenishable Products
Sellercloud supports sending inventory updates for replenishable products to Shopify. However, you need to make sure you have the correct setup for this to be a seamless workflow. If you have Replenishable products in your Catalog, make sure you enable the setting Limit replenishable qty to one location along with Use Shopify Locations. This is necessary because Replenishable Inventory is not linked to a specific Warehouse, so without the setting, there will be no Location ID in the inventory feed, and Shopify will reject it.
- Navigate to Settings > Company Settings > Choose a Company.
- Toolbox > Website > Sellercloud Integrated website > Shopify General.