Overview
Shopify is an all-in-one eCommerce platform that allows you to easily set up an online store and create product listings. Integrating Shopify with Sellercloud lets you publish and update your listings, download orders, upload tracking information, and more, all from a single platform.
Seamlessly manage Shopify Locations, set up Shopify Webhooks, assign Collections to the products in your catalog, and configure your Shopify Account Settings to automate key processes.
Integrate with Shopify
Sellercloud is integrated with Shopify via API. Follow the steps below to connect to your Shopify store.
- Go to Settings > Companies > Manage Companies > Open a Company.
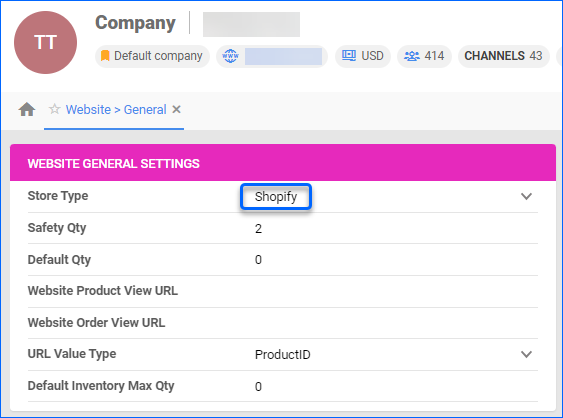
- From the Toolbox, select Website > General > Edit.
- In the Store Type dropdown field, select Shopify > Click Save.
- Return to Toolbox > Sellercloud Integrated Website > Shopify General > Click Edit.
- Copy the unique Shopify website URL from your Shopify admin portal’s Domains page, and enter it into the Website URL. Do NOT enter the suffix “.myshopify.com” – that is already provided by default.
- (Optional) Populate your API Verification Key, obtained from Shopify. Required for the Shopify Webhooks configuration.
- Ensure that Enable Shopify Locations is checked > Click Save.
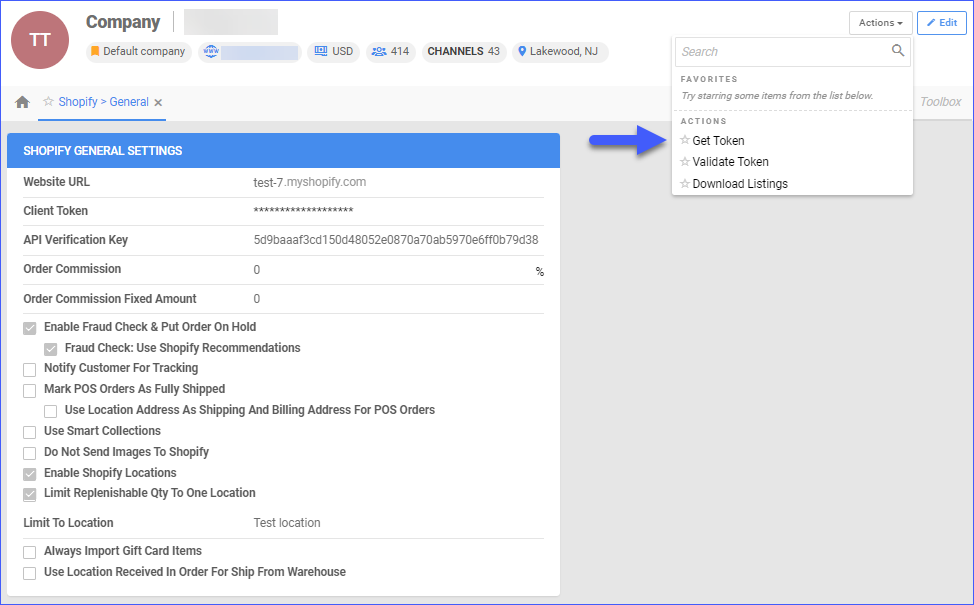
- Go to the Action menu > Click Get Token.
- The Client Token will be automatically populated once the above-mentioned action is performed. For a comprehensive overview of the Shopify Account Settings and their intended purposes, refer to the Shopify Account Settings Configuration article.
When connecting a Shopify store with Sellercloud, it’s recommended to also set up a Shopify Webhook. Webhooks serve as a valuable tool for fetching data triggered by specific events, enhancing the efficiency of your integration workflows.
Shopify Locations
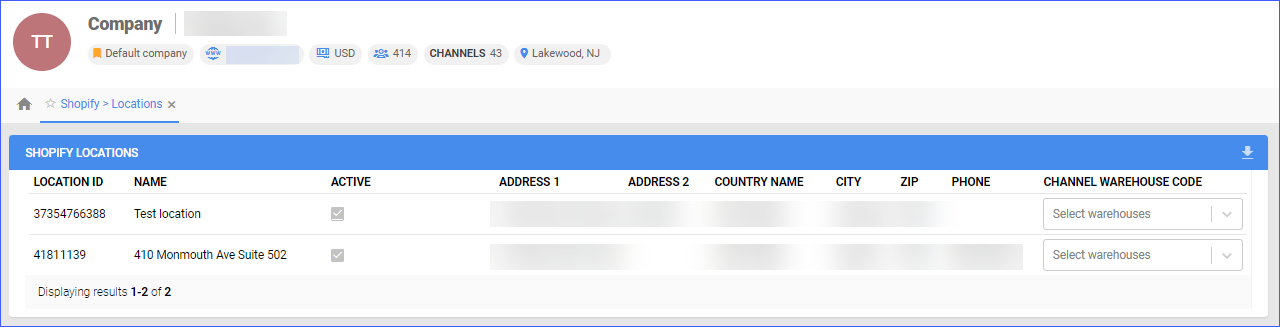
Shopify Locations is a useful feature for overseeing inventory at various physical sites. After setting up your Shopify Locations, the next step is to map them to your Sellercloud Warehouses.
If a warehouse is configured as Unsellable and you don’t want the inventory sent to Shopify, don’t map it to a Shopify Location. If you do map an Unsellable warehouse, we will send its quantity to Shopify as if it were Sellable.
To manage your Shopify Locations:
- Navigate to Settings > Companies > Open a Company.
- Toolbox > Sellercloud Integrated Website > Shopify Locations.
Shopify Active Listings
Your Shopify-integrated company also has a dedicated page for all your current active listings. To locate it, navigate to the company’s Toolbox > Shopify Active Listings. The grid information displays Shopify Item ID, Inventory ID, and more. You can filter through them and retire listings directly by clicking on the Bin Icon on the right.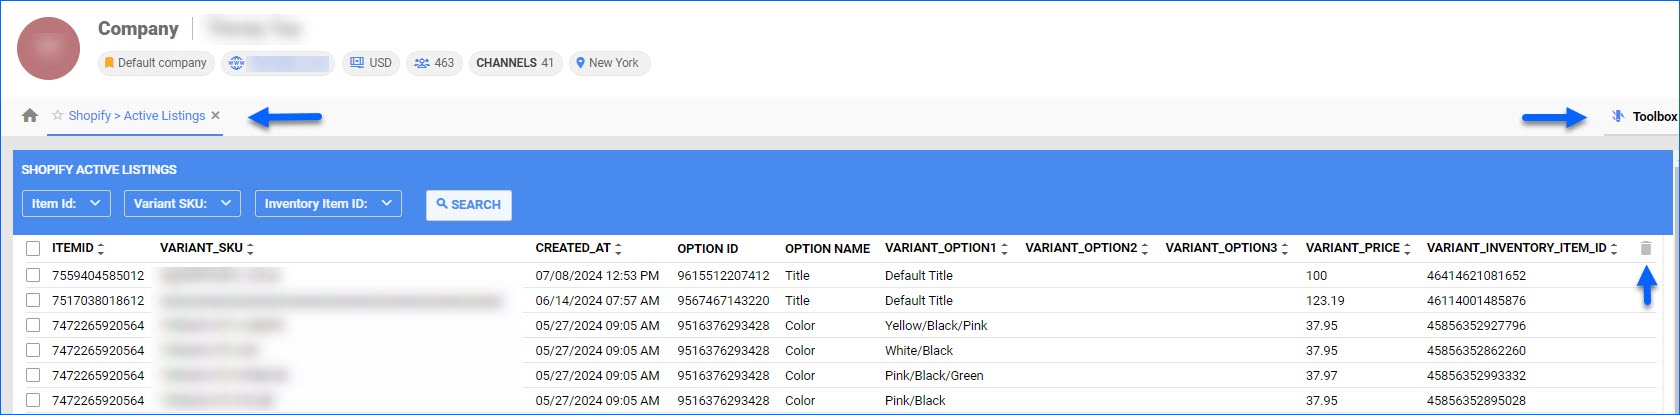
Active Listings are pulled regularly based on the Website General Setting called Allow Active Listings Download. If disabled, Sellercloud will not request active listings from Shopify.
Import Products from Shopify
When posting a new product through Sellercloud, an API call is automatically made to retrieve the Website Product/Variant ID. Similarly, when you import products from Shopify into Sellercloud, the IDs are also automatically downloaded. This ensures that all product data, including inventory and pricing information, is accurately tracked between the two platforms. If you already have listings on Shopify, it is essential to perform an initial import into Sellercloud to synchronize inventory and prices.
There are two ways to import your Shopify catalog into Sellercloud – automatically, or manually by downloading active listings and importing them via a plugin.
Download Shopify Listings Automatically
Sellercloud can periodically download your Active Listings from Shopify, compare them to your local Catalog, and create SKUs for the ones that are missing. This service is able to accurately create Variation and Kit relationships based on your Shopify product configuration.
To enable the automatic listing download:
- Go to Settings > Companies > Open your Shopify-integrated Company.
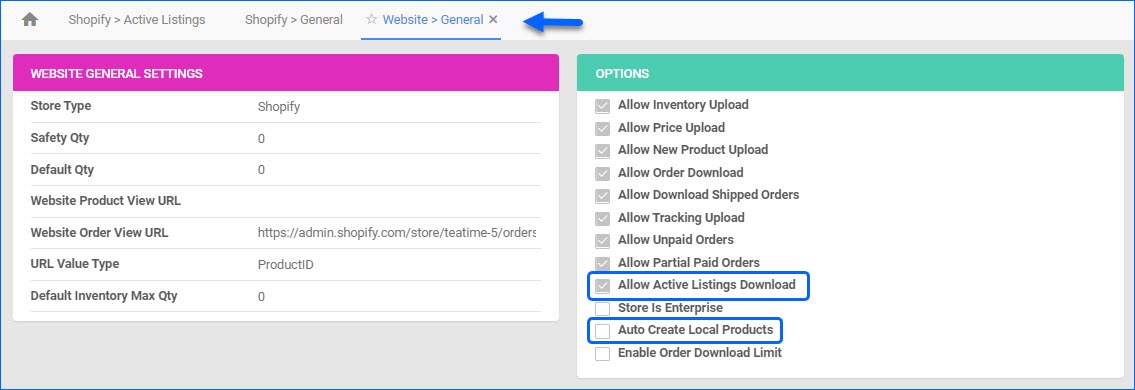
- From the Toolbox, go to Website > General.
- Click Edit and enable:
- Allow Active Listings Download
- Auto Create Local Products
- Click Save.
The service runs once daily outside of working hours to prevent server slowness. If any new listings are detected, they will be created as new SKUs via a Queued Job.
Download Shopify Listings Manually
Alternatively, you can manually download your active listings from Shopify and import them via the Shopify Product Import plugin.
To manually download your Shopify listings:
- Go to Settings > Companies > Manage Companies and select a Company.
- Open the Toolbox and find Sellercloud Integrated Website > Shopify General.
- Click the Actions menu and select Download Listings.
A Queued Job will be generated to execute the task. Once completed, you can download the output file and import it into Sellercloud via the Shopify Product Import Plugin as described below.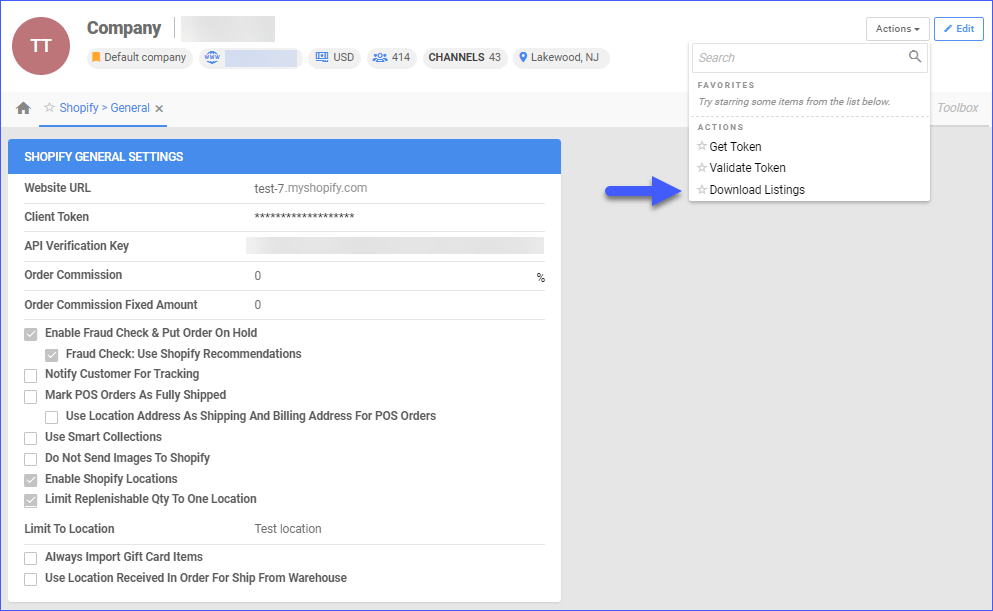
Shopify Product Import Plugin
This plugin is specifically designed to import products from an Excel file using Shopify’s distinct format. It checks for matching WebsiteProductID and WebsiteProductVariantID to update existing products. If a product does not exist in Sellercloud or doesn’t match on Shopify, the plugin will add it using all data provided by Shopify.
The plugin also handles Variation Products. Matrix children (variations like sizes or colors) are identified by their unique WebsiteProductID. The plugin matches them to a matrix parent using WebsiteProductID or ProductID. If no parent matches, a new one is created based on the common ProductID of the children. This process ensures organized product variations in your Shopify store.
Prior to importing your listings into Sellercloud, ensure that the Track Inventory option in the Inventory Policy dropdown is enabled for these products in Shopify.
To import your downloaded Shopify listings:
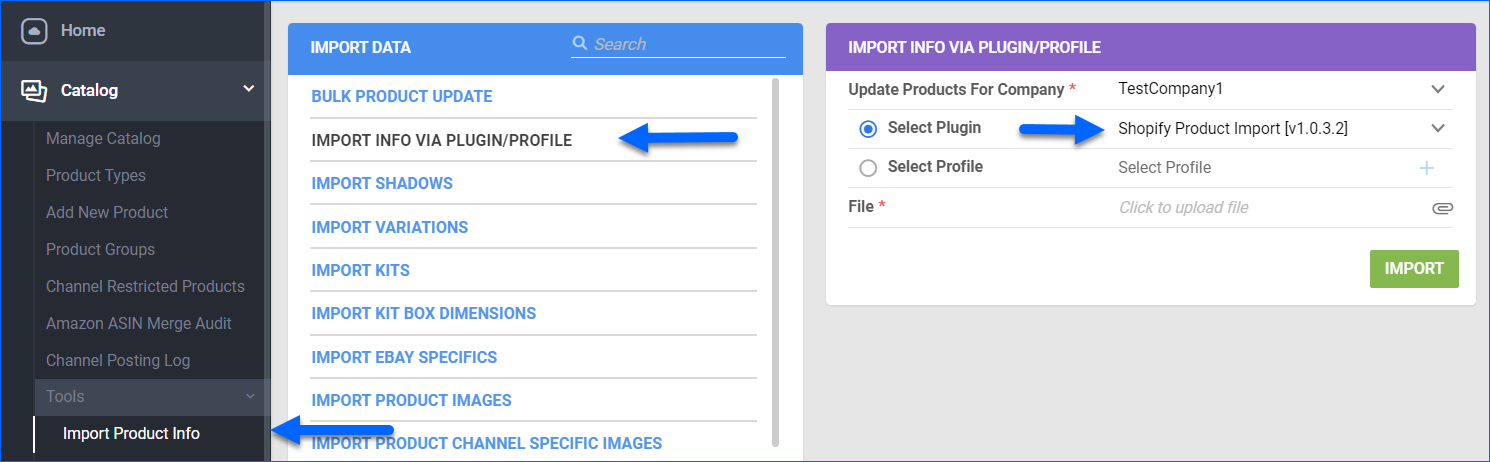
- Go to Catalog > Import Product Info > Import Info via Plugin/Profile.
- In the Select Plugin field, choose Shopify Product Import.
- Click the paperclip icon to upload the previously downloaded file.
- Click Import.