Overview
Once you Integrate Newegg Business, you can easily upload your product inventory, as well as create and manage your Newegg listings directly from your Sellercloud account. You can push updates either manually or automatically. Before posting or updating a product on Newegg Business, you must enter the minimum information required by the channel.
See Newegg Business Product Properties for more details on updating products for Newegg Business.
Prepare a Product for Newegg Business
To prepare the product for posting on Newegg Business:
- Go to the Product Details Page.
- Click Toolbox and select NewEgg Business Properties.
- Click Edit.
- Check the Ready To Post field in the General panel – it will tell you what is left to do before you can post the product on Newegg Business.
- Once the product is ready to post, check the NewEggBiz Enabled box.
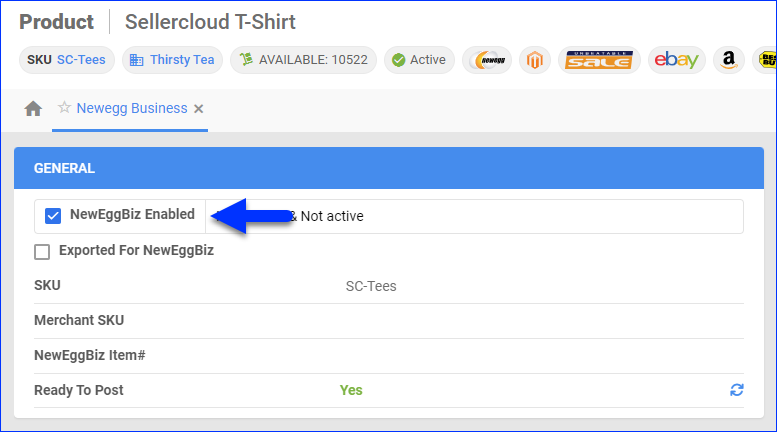
- Click Save.
Post a Product on Newegg Business
You can post product listings from Sellercloud to Newegg Business individually or in bulk.
Individually
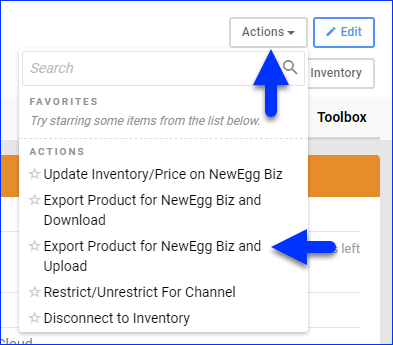
To post a single product:
- Go to the Product Details Page.
- Click Toolbox and select NewEgg Business Properties.
- Click Actions, and select Export Product for NewEgg Biz and Upload.
In Bulk
To post multiple products:
- Go to Catalog > Manage Catalog.
- Select the products you want to update.
- Click the Actions icon in the bottom-right corner, and select Launch on Channel.
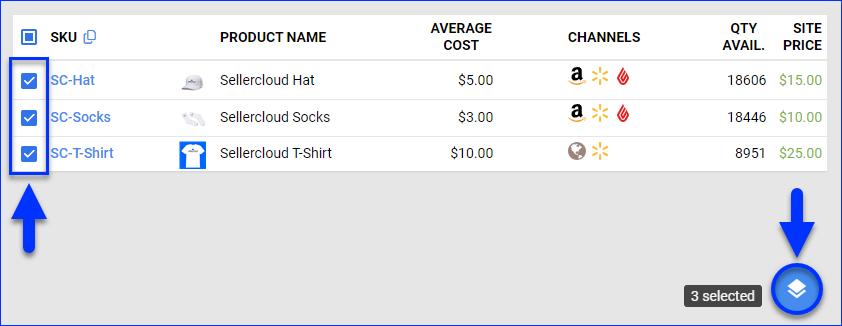
- Select NewEgg Business and click Launch.
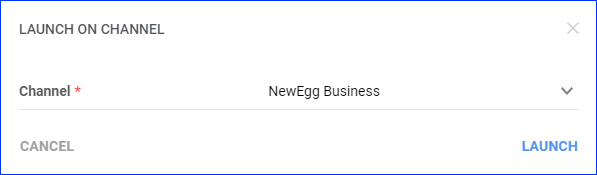
- The task will be linked to a Queued Job. Once processed, the update will be sent to the NewEgg Business site.
Update Newegg Business Listings
You can push product information from Sellercloud to Newegg Business manually or automatically.
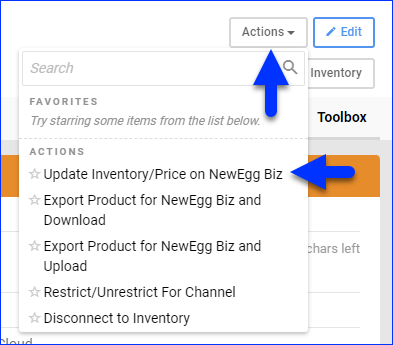
Manually
To update a single listing manually:
- Go to the Product Details Page.
- Click Toolbox and select NewEgg Business Properties.
- Click Actions, and select Update Inventory/Price on NewEgg Biz.
Automatically
To initiate regular automatic listing updates:
- Go to Company Settings.
- Click Toolbox and select NewEgg Biz > General Settings.
- Click Edit.
- In the Controls panel, check the Enable Inventory Upload box.
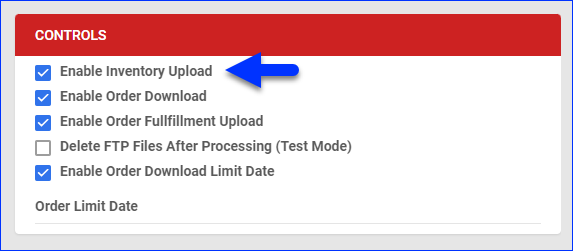
- Click Save.
Volume Discounts
A volume discount is a decrease in the price of a product based on the ordered quantity. This type of discount offers an incentive for customers to purchase larger quantities. This is how volume discounts appear on Newegg:
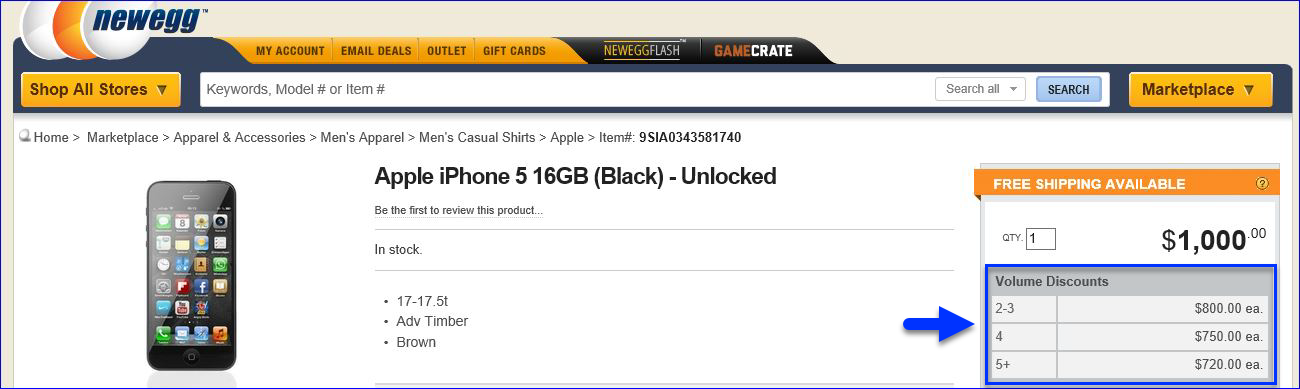
Keep these details in mind:
- It can take some time for Newegg to process the updates.
- The volume discount will not be available if an ongoing promotion’s price is less than the Volume Discount 1 price.
- Volume discounts are only available when shipping to the United States.
- You can add volume discounts individually or in bulk.
Individually
To add volume discounts individually:
- Go to the Product Details Page.
- Click Toolbox and select Newegg Business Properties.
- Click Edit.
- Check Enable Volume Discount in the Pricing panel.
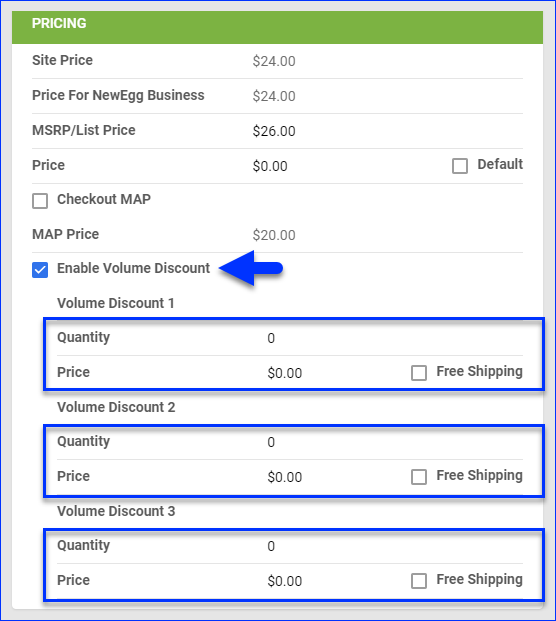
- Under Volume Discount 1, 2, and 3, enter quantities that can be purchased at the discount price in the Quantity fields. Each tier includes purchases until the quantity at the next tier is reached.
- Set the discount Price.
- Optionally, check the box to offer Free Shipping.
- Click Save.
In Bulk
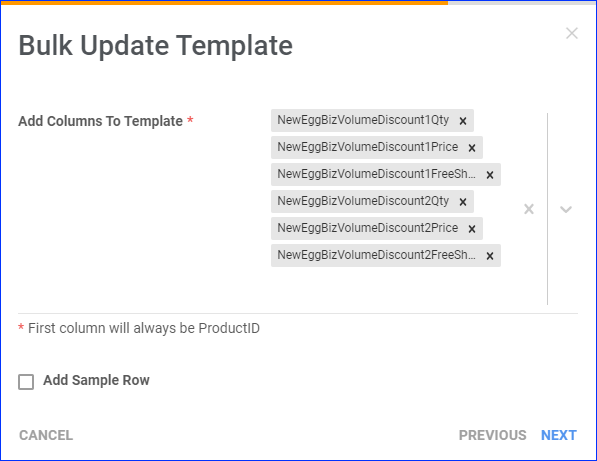
To add volume discounts to multiple products at once, follow the steps to Bulk-Update Products and use these columns in the template:
- NewEggBizVolumeDiscount1Qty
- NewEggBizVolumeDiscount1Price
- NewEggBizVolumeDiscount1FreeShipping
- NewEggBizVolumeDiscount2Qty
- NewEggBizVolumeDiscount2Price
- NewEggBizVolumeDiscount2FreeShipping
- NewEggBizVolumeDiscount3Qty
- NewEggBizVolumeDiscount3Price
- NewEggBizVolumeDiscount3FreeShipping