Overview
The Shipment Box Defaults feature in Sellercloud allows you to create pre-set configurations for the boxes used to prepare your items for shipping to FBA Fulfillment Centers. These defaults are available in Step 4: Boxing of the FBA Inbound Shipment Wizard and help you streamline the process by eliminating the need to manually input all the details for each box.
FBA Shipment Box Defaults
On the Shipment Box Defaults page, you can create new default options, view and edit existing ones, and delete them when they are no longer needed.
Create
To create a new FBA Shipment Box Default:
- Navigate to Inventory > Amazon Inbound Shipments > Shipment Box Defaults.
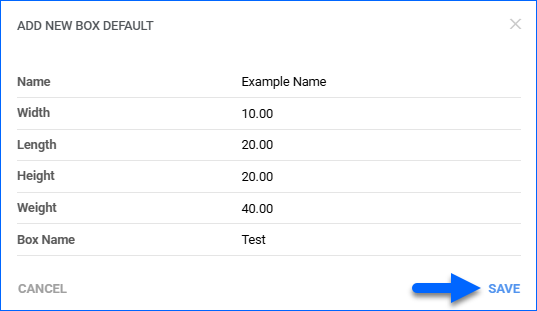
- In the Shipments Box Defaults panel header, click the + icon.

- Fill in the details in the pop-up modal:
- The new Shipment Box Default will be added to the panel.
Manage
You can return to the Shipment Box Defaults page at any time to adjust the details of your existing box profiles or delete them when they are no longer necessary:
- Edit – On the panel header, click the pencil icon. Update the details in the pop-up modal and click Save.
- Delete – On the panel header, click the trash icon and confirm your choice. You can also delete Box Defaults in bulk by selecting the rows and clicking the trash icon in the grid header.
Use Shipment Box Defaults
Once you have set up your Box Defaults, you can use them every time you are preparing an FBA Inbound Shipment.
- Access Step:4 Boxing of the FBA Shipment Wizard:
- From Inventory > FBA Inbound Shipments > Create New Shipment or
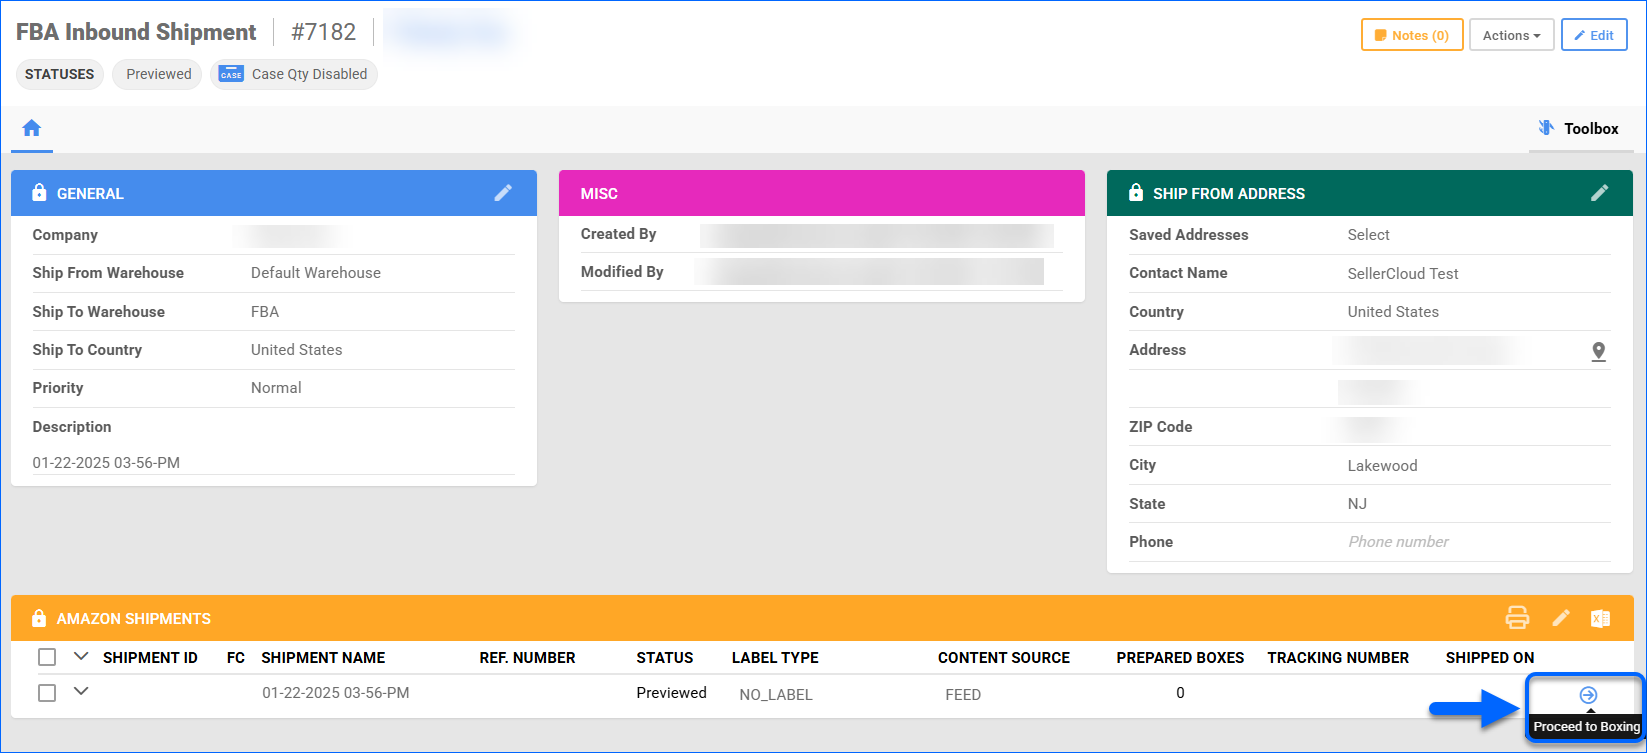
- From the FBA Shipment Details page, click the Go to Wizard button or the Proceed to Boxing button, depending on which stage of the FBA Shipment you have reached.

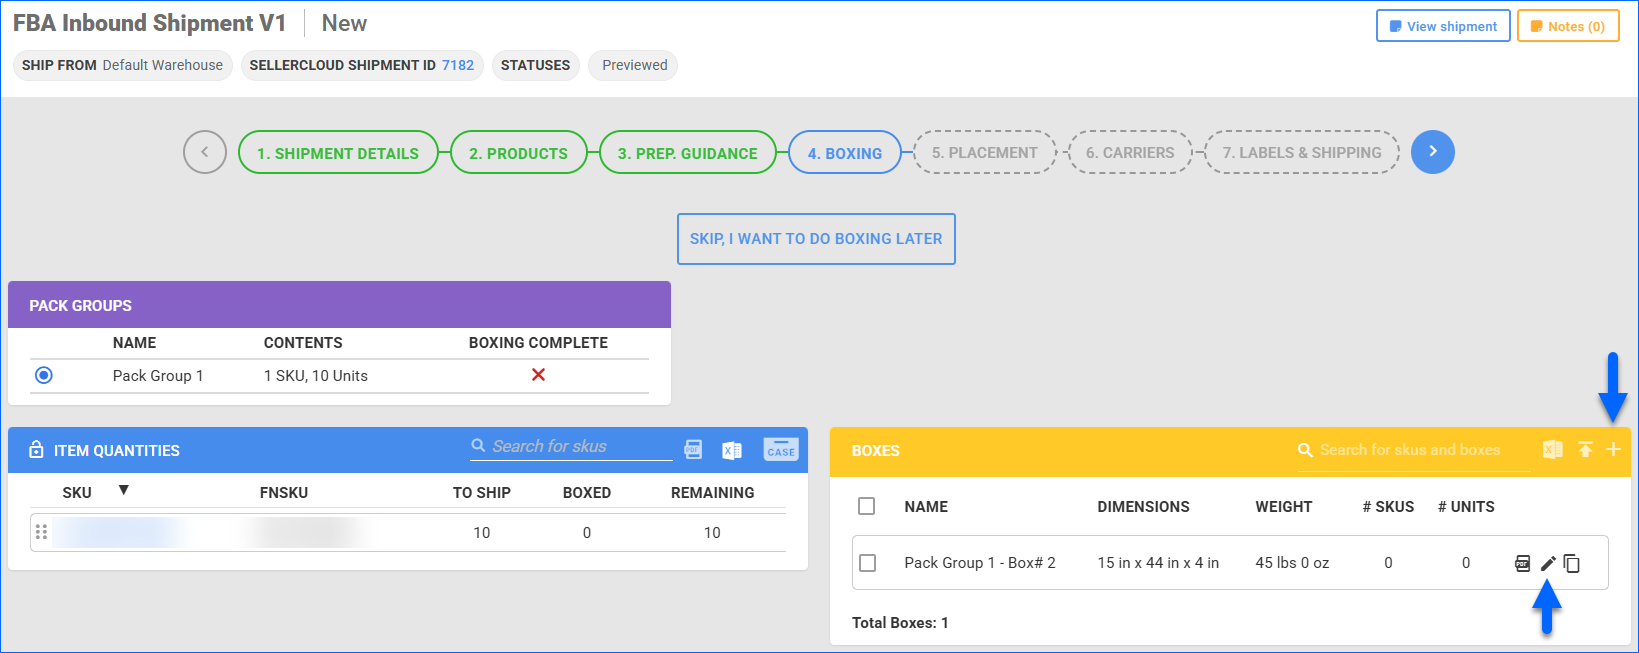
- In the Boxes tab, go to the Boxes panel and click the pencil icon to edit an existing box or the + icon to add a new one.

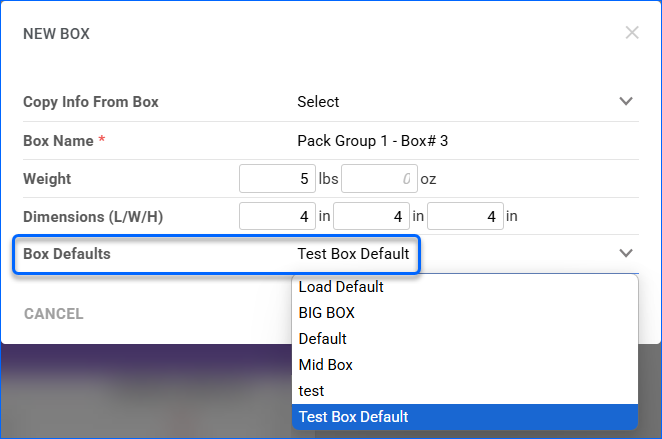
- In the pop-up modal, locate the Box Defaults field and choose the corresponding option from the dropdown list.

- Once selected, the modal will reload, and the Defaults will be populated in the corresponding fields.
- Click Save/Create.

