Overview
FBA Inbound Shipments are a key part of ensuring your stock remains replenished in Amazon’s fulfillment centers at all times. You can create, process, and fulfill your FBA Shipments from Sellercloud by following the workflow described below.
For more information on how to prepare your account, refer to the FBA – Getting Started article.
Prerequisites
Before you can start sending your inventory to Amazon Fulfillment Centers, you must complete the following requirements:
- Enroll in the FBA program.
- Configure Warehouses and Products for FBA.
- Enable the FBA workflow in Sellercloud.
FBA Inbound Shipment Wizard
The FBA Inbound Shipment Wizard is our user-friendly tool for processing shipments. It guides you through the entire workflow in seven tabs:
FBA Inbound Shipments Workflow
The sections below outline the typical life cycle of an FBA Inbound Shipment in Sellercloud.
Create a Shipment
Sellercloud offers several ways to create a new FBA Inbound Shipment:
- From Inventory > Amazon Inbound Shipments > Create New FBA Inbound Shipment.
- From Inventory > Amazon Inbound Shipments > Manage FBA Shipments page, where you can click the green + icon to add a new shipment.
- From a Purchase Order. This is part of the dropshipping workflow, which allows you to Link a PO to an FBA Inbound Shipment so that the vendor ships the items directly to the FBA fulfillment center.
- Import shipment from Amazon.
First, configure the fields in Step 1: Shipment Details:
- Company – This is the company from which we will pull the API credentials to send the shipment information to Amazon.
- Description – By default, this will be the date and time of creating the new shipment. You can also edit this later.
- Ship From Warehouse – This should be a type Normal warehouse from which we will reserve and later deduct the inventory you are sending to Amazon.
- Interim Warehouse – This should be the Interim warehouse where the inventory will be kept until Amazon confirms they have received the Shipment.
- Ship to Warehouse – This should be a type FBA warehouse where the inventory will be received. Corresponds to an Amazon Fulfillment Center.
- Box Content – Determines how the Shipment’s box contents will be communicated to Amazon. Select 2D-BARCODE, FEED, or NONE.

Once you finalize the first step, a new FBA Inbound Shipment will be created locally in Sellercloud. It will have a status Saved and will not be sent to Amazon yet. At this stage, you can still make any changes to the Shipment and its contents. Once the Shipment reaches Amazon, limitations will apply.
Add Products
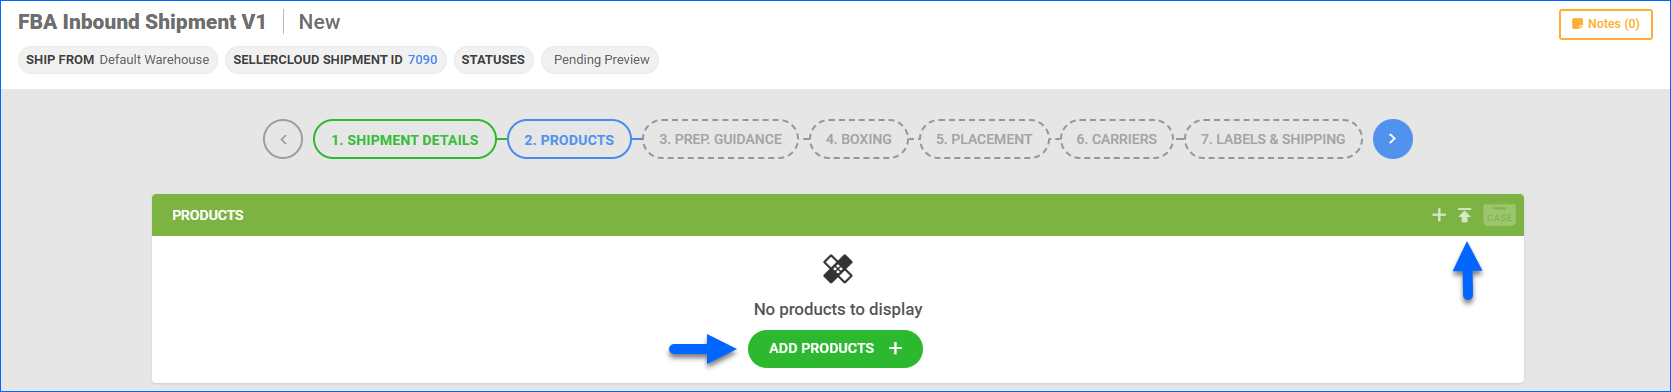
In Step 2: Products, add the products and quantities you intend to send to an Amazon Fulfillment Center.
To be able to add products to FBA Shipments, your SKUs must be listed on Seller Central and meet the following requirements in Sellercloud:
- Amazon-Enabled
- Fulfilled by Amazon
- FNSKU
- If you are sending Kit Products, ensure they are configured as Independent.
Click Add Products or Upload via file to add SKUs and quantities to your Shipment. This can be referred to as the Shipment Plan, as Amazon may split up your SKUs into several shipments.
 During this step, you can enable Case Quantity Mode.
You can also adjust the products and their quantities from the FBA Inbound Shipment Details page. However, this is only possible while the shipment status is Saved.
Prepare the Shipment
This section outlines the Prep. Guidance and Boxing steps of the FBA creation wizard.
In Step 3: Prep. Guidance, you can review the product information and any special instructions received from Amazon related to packaging and labels. During this stage, you can still return to the previous tab and edit the products and their quantities.

Here, you can also print product labels and revise dimensions if you have made any manual adjustments. The Label Owner and Prep Owner fields allow you to configure who is responsible for printing and applying product labels and completing the Prep. Requirements.
When sending an item to FBA fulfillment centers for the first time, you must ensure they have the necessary Prep. Requirements. You can configure those by clicking the pencil icon in the relevant row. This will open a pop-up modal where you can set the Category and Prep Type. They will be sent to Amazon when you click Next Step in the shipment wizard. Alternatively, you can update them directly in Seller Central, and we will retrieve them via API.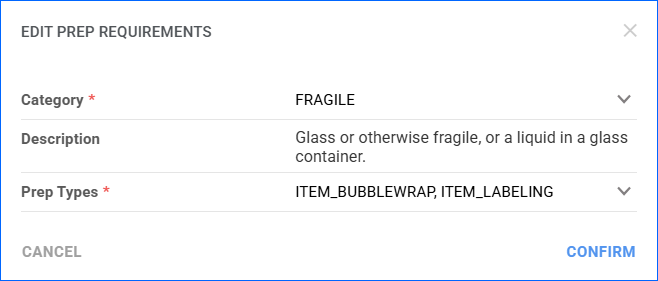
Once you move to Step 4: Boxing, the FBA Inbound Shipment is sent to Amazon for confirmation, and the status becomes Previewed. You will no longer be able to adjust the products or their quantities. If you need to update this information, you must cancel the current Shipment and create a new one.
The Boxing tab lets you create boxes, add products to them, and print labels. You can also view your Pack Groups, determined by Amazon, which affect how you prepare your boxes. Items within a Pack Group can be packed together, but one box cannot contain SKUs from two different groups.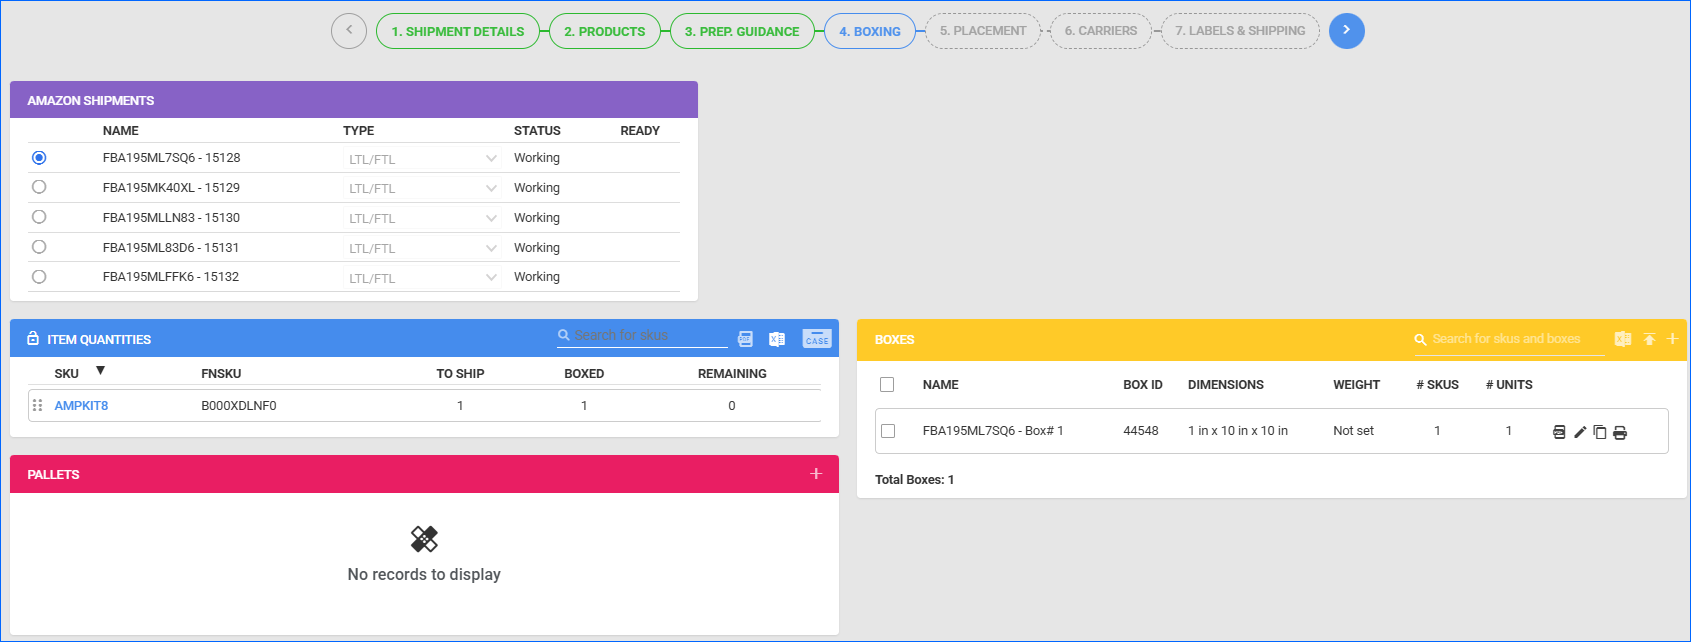
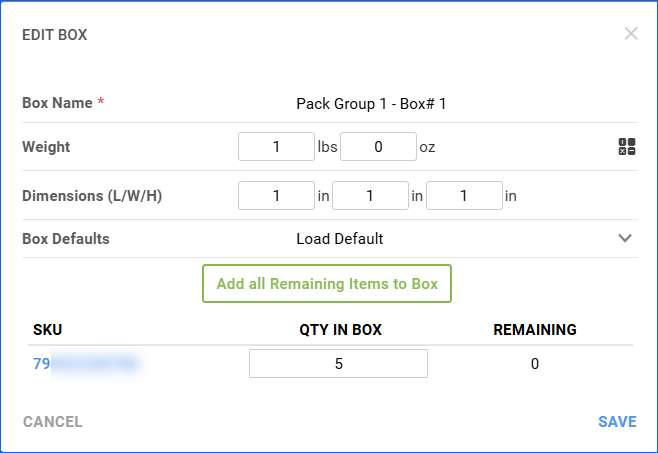
Click on a Pack Group to view the items in that group. To add a product to a box, you can drag and drop the SKU from the Item Quantities panel or click the pencil icon on a specific box. The latter allows you to make additional changes, such as adjusting the shipping dimensions, recalculating the weight, and adding all remaining unboxed units to the current box.
 Once you’ve boxed all the Pack Groups, click Next step. We will send the box information to Amazon and retrieve Placement options and fee estimates. You can go back to the Boxing step to adjust your boxes before you confirm the Placement Option, but once you have reached Step 4, Amazon does not allow adjusting products and quantities.
Box Later
The Skip, I Want To Do Boxing Later button on Step 4: Boxing allows you to view and select Placement Options before preparing boxes. When you click it, you will be redirected to the next step of the Creation Wizard, where you can see the suggested shipments and fulfillment centers. Once you select an option, you will be prompted to return to Step 4 and prepare your Boxes and Pallets. Clicking next will redirect you to Step 6: Carriers, where the Shipping Type will be pre-selected as LTL/FTL. 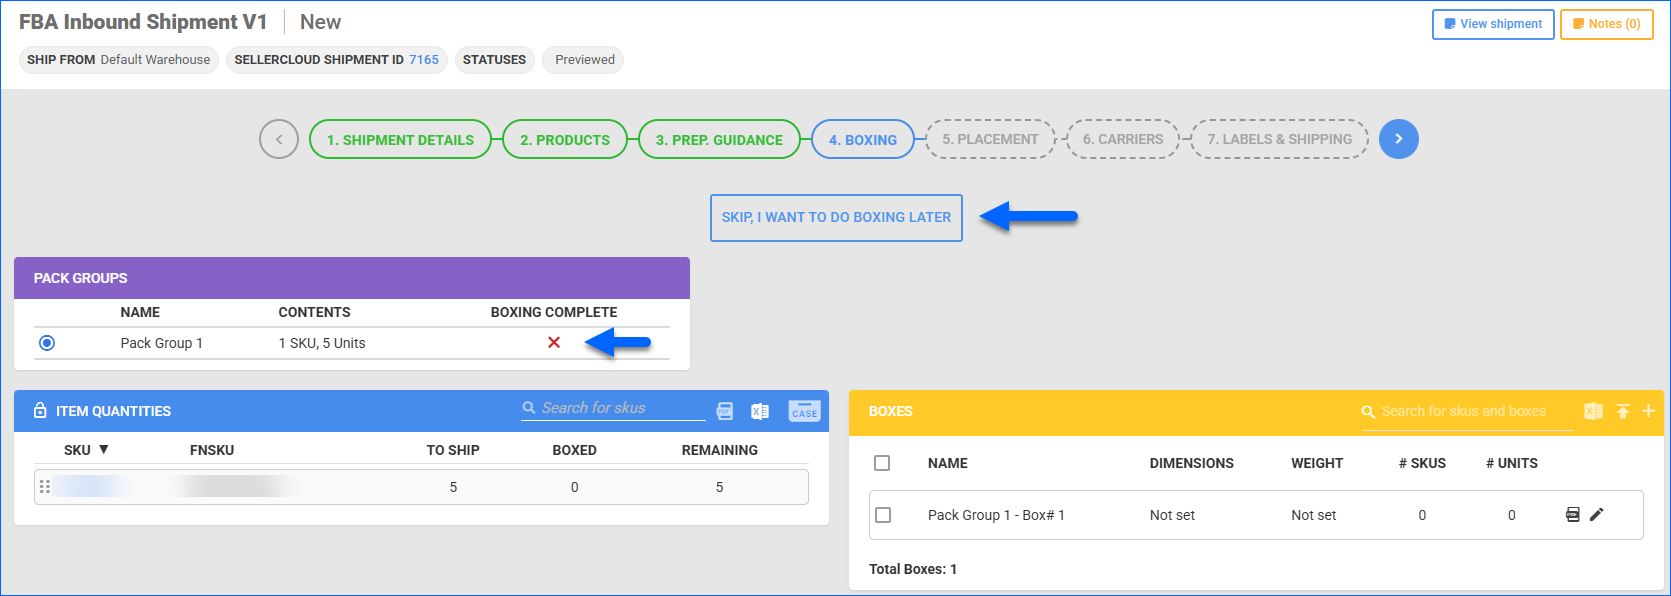
Placement Options
Amazon determines Placement Options based on the Box Contents you have prepared. Each option describes the destination FCs to which your items can be sent. You can view the fees and shipment splits associated with each Placement option here.
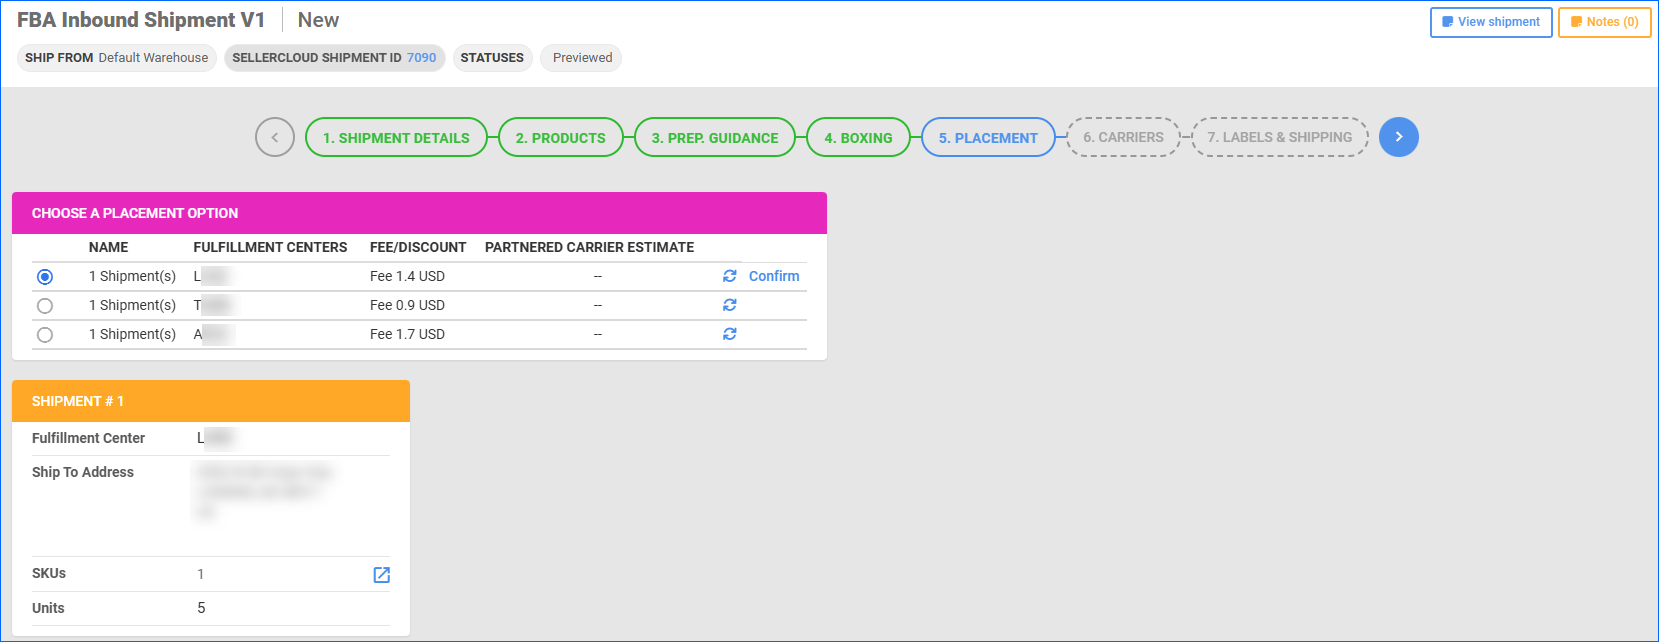 This workflow allows you to choose between different sets of Fulfillment Centers, but you cannot change how the boxes are distributed. If needed, you can still go back to Step 4 to modify your box contents and then regenerate new placement options.
Once you have chosen the preferred placement for each Shipment, click Confirm. This action will create the Amazon Shipments and retrieve the Shipment IDs. The Shipment’s status will be updated to Working.
Amazon does not allow shipping only some Shipments once Placement Options are confirmed. If you prefer to drop one or more of the Shipments, you must cancel the whole plan and create a new one.
Carriers and Shipping
This section outlines the Carriers and Labels & Shipping steps of the FBA creation wizard.
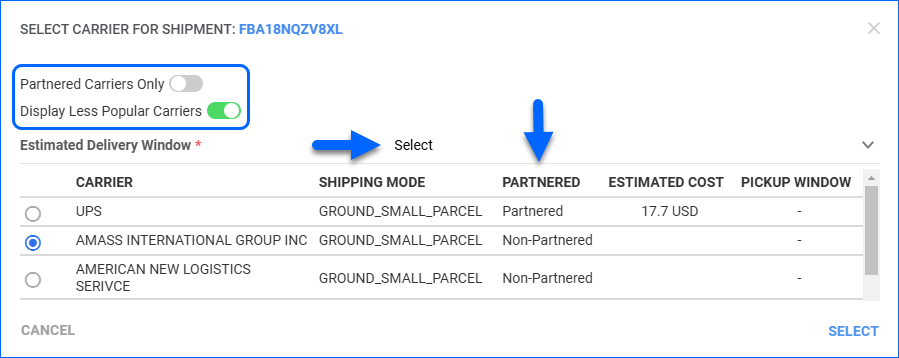
In Step 6 – Carriers, you can review the Items, Boxes, and Amazon Shipments. By default, the Shipping Type will be set to Small Parcel, but you can change it to LTL and enter pallet and freight information. Enter a Ship Ready date for each Shipment. If everything is correct, click Get Carrier Options in the Amazon Shipments panel header. We will fetch carrier options and fees for all shipments. Click Choose Carrier next to an Amazon Shipment to review and select an option.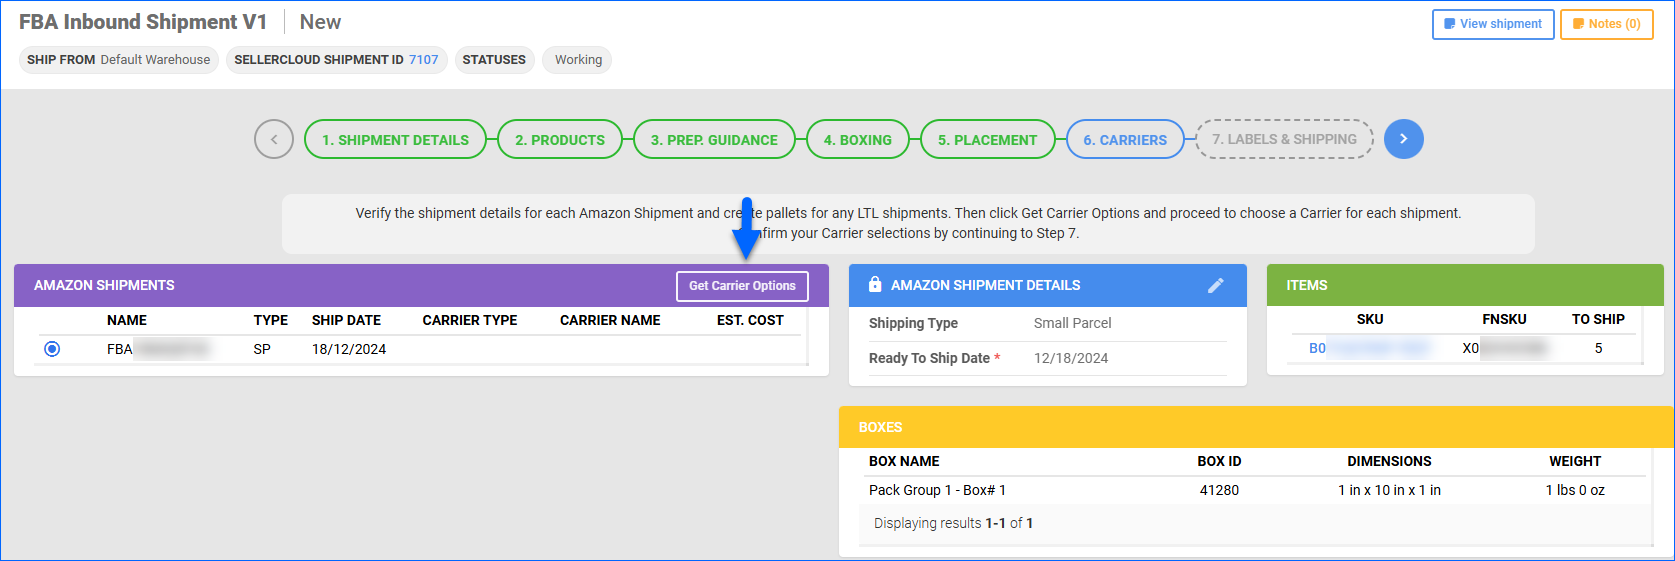 In the pop-up modal, you can filter the available options. If you select a non-partnered carrier, you must provide an Estimated Delivery Window. Once you have chosen a carrier, click Select.
 You must select a carrier and service for all shipments within a plan. Amazon does not allow partial shipping.
In the FBA Shipment wizard, the Amazon Shipments panel will be updated to display the selected carrier and estimated cost for each Shipment. To reverse the selections, click on the rotating arrows icon. This will allow you to modify your shipment details, fetch carrier information again, and choose different options. When done, click Next Step.
In Step 7 – Labels & Shipping, you can print Box and Pallet labels. Click on the printer icon to download all the necessary labels in PDF format. For non-partner carriers, supply the necessary tracking information. Click the Flag button to complete the Shipment and set its status to Shipped.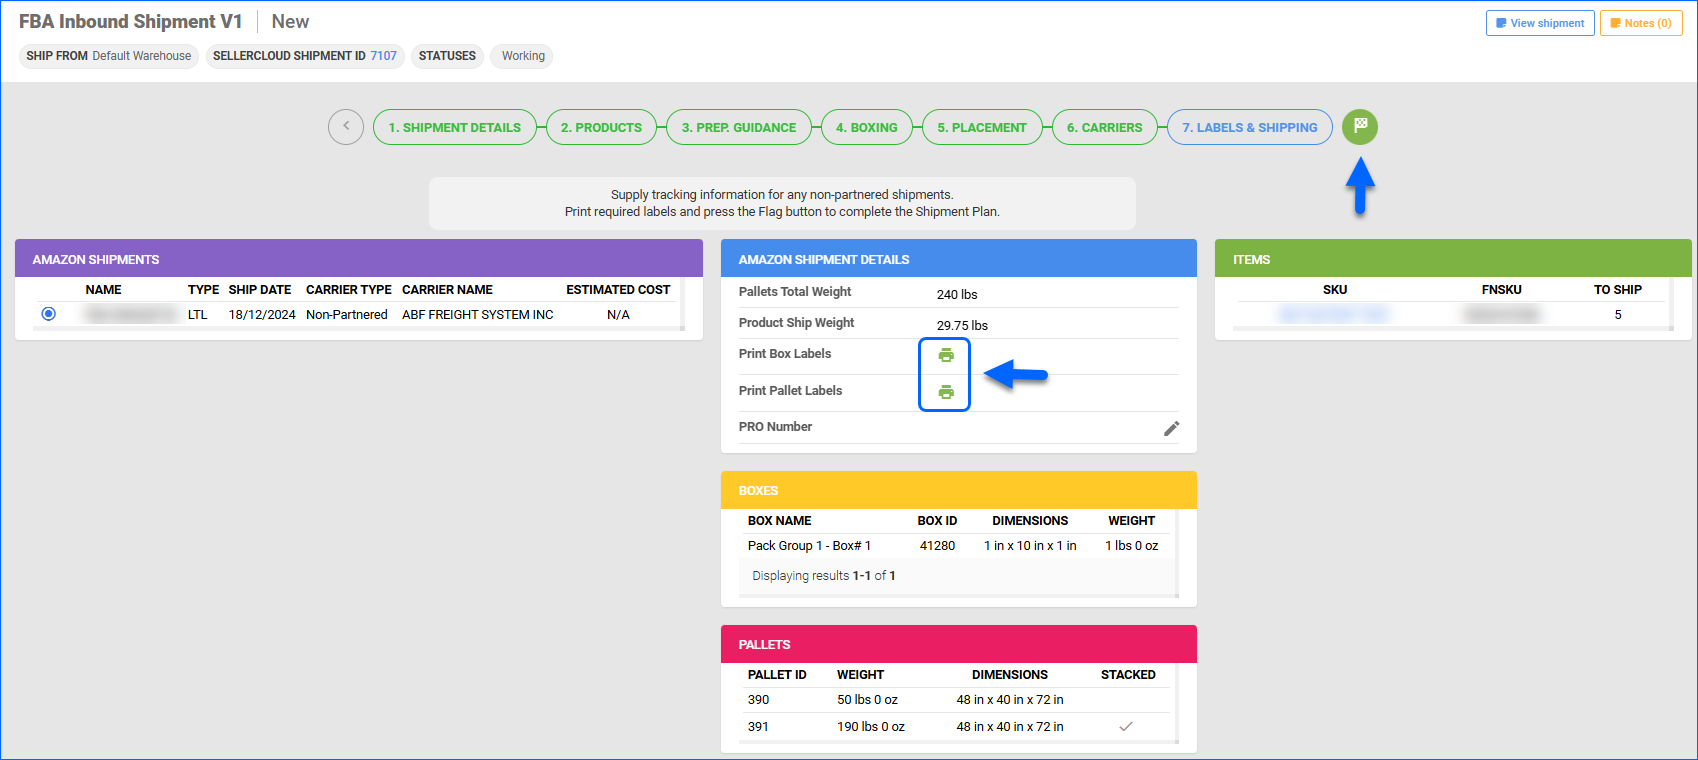 Once you have moved on to Step 7, the Carrier selection is confirmed, and you can no longer change it.
LTL Shipments
If you plan to ship your items LTL/FTL, you can configure the Shipping Type in the Amazon Shipment Details panel of the Placements tab. Then, you can regenerate the Carrier options. While providing Declared Value and Freight Class is not required, we recommend filling in the fields to use a partner carrier.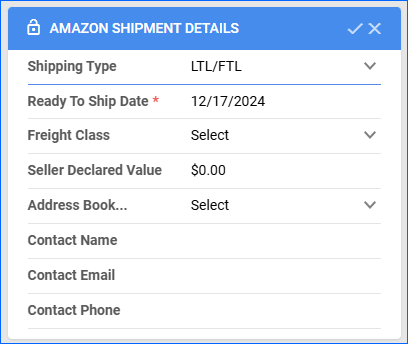 Then, click the + icon in the Pallets panel header to add a new Pallet. In the pop-up modal, fill in the dimension and click Create.
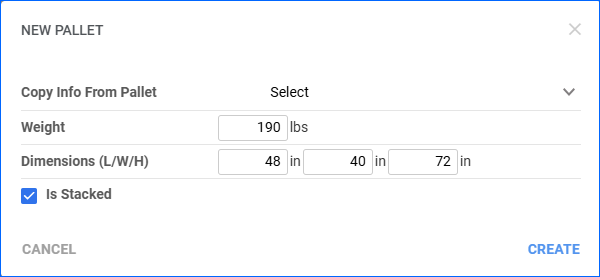 After configuring the necessary Pallets, select a Carrier Option and click Next step to proceed to the Labels & Shipping tab.
Received by Amazon
Amazon will notify us via API when they have started receiving the items from your FBA Inbound Shipment. During this period, the internal Shipment will have the status Receiving, and you will no longer be able to edit any item quantities in Sellercloud or Seller Central. We will retrieve the received quantities and deduct the units from the Interim warehouse.
Manage FBA Inbound Shipments
You can view all your existing FBA Inbound Shipments on the Manage FBA Shipments page. You can also toggle between the FBA Details page and the Shipment creation wizard anytime during the process.
- Click the View Shipment button at the top of the page while in the creation wizard.

- Click the Go to Creation wizard in the FBA Inbound Shipment Details page while it has the status Saved.

After the Shipment’s status has been updated to Previewed, you can return to the Wizard by clicking the Proceed to… button in the Amazon Shipments panel.
Delete FBA Inbound Shipments
To delete FBA Inbound Shipments:
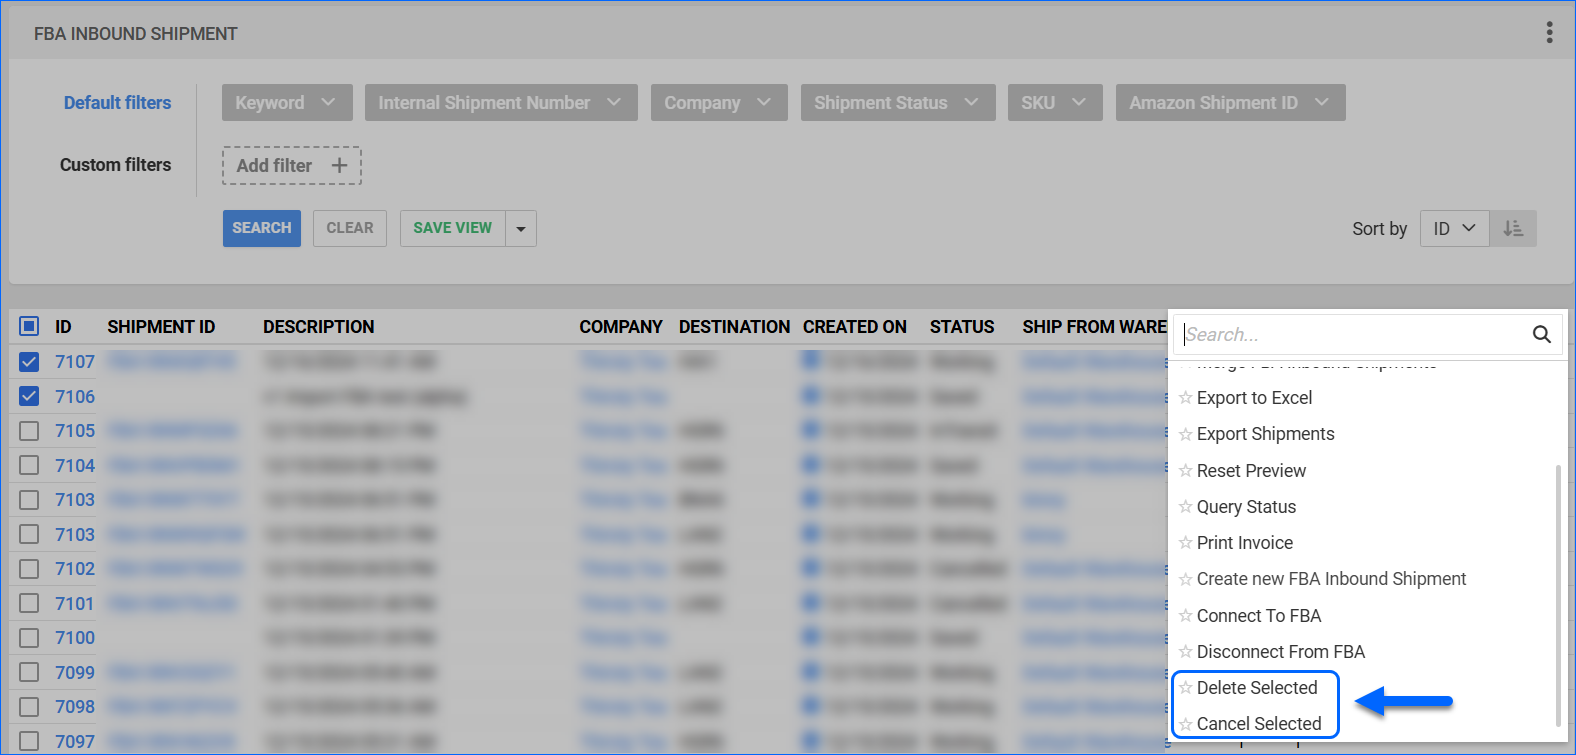
- Navigate to Inventory > FBA Inbound Shipment > Manage FBA Shipments.
- Search and select the Shipment from the results grid.
- From the Actions menu > click Delete Selected.
To cancel an FBA Inbound Shipment on Amazon, use the Cancel Selected action.
Additional Settings
The following is not an exhaustive list of all FBA-related client settings. For more information, see our FBA – General Channel Client Settings article.
- Enable Validate Inventory For FBA And WFS Shipments – If enabled, we will check whether you have sufficient inventory across all warehouses when you try to add a product to an FBA Inbound Shipment. If we do not find any available quantity, we will return an error message. This setting can help you optimize your inventory tracking, and the recommended status is Enabled.
- Default FBA and WFS Ship From Warehouse – If you select a warehouse from the dropdown of this setting, we will assign it as the default Ship From Warehouse for any new FBA Inbound Shipment you create and use it as a reference point for your available inventory.
- Default FBA Shipment Interim Warehouse – If you select a warehouse from the dropdown of this setting, we will automatically assign it as the Interim Warehouse for any new FBA Inbound Shipment you create.
- Default FBA Shipment Content Source – If you choose a value from the dropdown of this setting, we will automatically assign this Content Source option for any new FBA Inbound Shipments in Sellercloud. You can choose between None, Feed, and 2D_Barcode. If you leave the value as Select…, you must manually assign the content source for each new Shipment.
- Auto Reserve When Adding Product To FBA And WFS Shipment – If enabled and you add a product to an FBA Inbound Shipment from a bin‑enabled warehouse, the system will automatically generate an Inventory Reserve. If inventory is fully reserved by existing shipments, adding products without available inventory requires disabling both this setting and Enable Validate Inventory For FBA Shipments setting (no inventory reserve will be created in such cases).
- Auto Reserve When Adding Kit Components To FBA And WFS Shipment – If enabled, when independent kits are added to an FBA shipment from bin‑enabled warehouses, the system will automatically reserve the required kit components quantities. If the kit parent has 0 available quantity, but component inventory still needs to be reserved, the Include Component Qty when Validating FBA and WFS Shipment Qty Client setting and the DoNotReserveKitParentIfComponentsAreReserved App setting must both be enabled. Contact Sellercloud Support to ensure that the App setting is enabled on your server.
- Enable Case Quantity For New FBA Shipments – If enabled, you must enter a Case Quantity for each product in new FBA Inbound Shipments. You can set a default case quantity to automate your workflow.
Attachments: