Check out a short tour of shipping an order through ShipBridge!
Overview
ShipBridge is a robust Sellercloud solution for shipping orders. You can easily ship orders in any way that’s convenient for you. This article provides an overview of the main ShipBridge functionality, including:
- Shipping and printing labels
- Preprinting invoices
- Scanning before shipping
- Batch printing
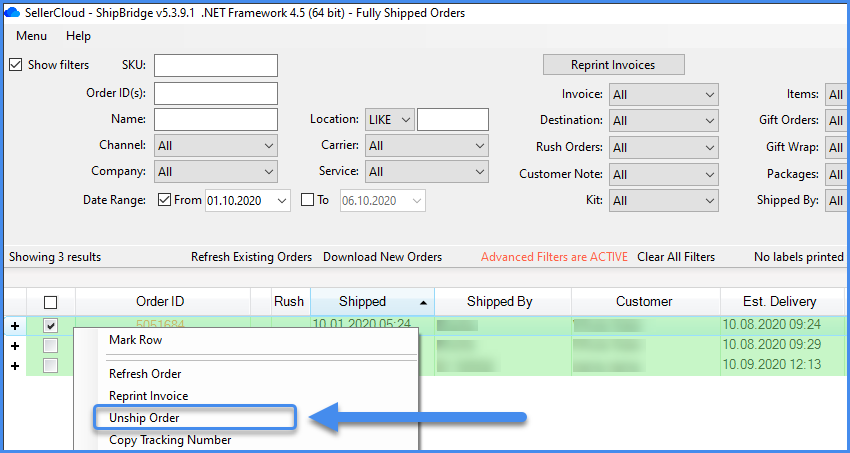
If you make a mistake, don’t worry! With ShipBridge, you can always unship orders.
Ship an order through ShipBridge
Follow these easy steps to ship an order:
- Import orders into ShipBridge.
- Select the order from the grid.
- Click the Ship and Print Labels button.

- A shipping label and postage will generate according to the predetermined specifications set in the Options Menu. By default, an invoice/packing slip will also print out. You can set invoices to print on the same printer as the label or on a different printer. Read how to configure packing slips here.
- You can also pre-print an invoice before printing the label by selecting an order and clicking Preprint Invoices.

- Use the Scan and Ship button to require the shipper to scan each order item before shipping.

- You can select multiple orders for label printing simultaneously through batch printing.

- When the label is printed, the order’s status in Sellercloud is changed to Shipped. All shipping information, including the tracking number, shipper’s name, location, and time of shipping, are saved to the order in Sellercloud. The profit and loss tab will update with the shipping cost.
Unship an order through ShipBridge
If the order was shipped by mistake, you can unship it. Just follow these easy steps:
- Locate the order in the Fully shipped tab.
- Select the order.
- Click Unship Orders.
