Overview
Amazon Warehousing and Distribution (AWD) is a third-party logistics (3PL) solution offered by Amazon that enables you to store, manage, and distribute your inventory across multiple sales channels. Unlike Fulfillment by Amazon (FBA), which focuses primarily on fulfilling Amazon customer orders, AWD is designed to provide broader inventory management capabilities, such as bulk storage and replenishment to FBA.
Supported Features
The following features are currently supported through your Sellercloud account:
- You can create and process AWD Shipments directly from Sellercloud, allowing you to send eligible inventory to the AWD network.
- If you prefer to process shipments in Seller Central, you can import them into Sellercloud to ensure accurate inventory levels.
- Automatic AWD inventory import, for viewing and reporting purposes.
Prerequisites
Before you can start sending your inventory to AWD facilities, you must meet the following requirements:
- The EnableAWDWorkflow App Setting must be enabled. Contact Sellercloud Support if you do not see the AWD-related settings in your account.
- Have an active Amazon Account Integration.
- Enroll in the Amazon Warehousing and Distribution (AWD) program.
Then, in Sellercloud:
- Go to the Amazon General Settings page of your integrated company.
- Click Edit and check the Enable AWD Workflow box. Click Save.
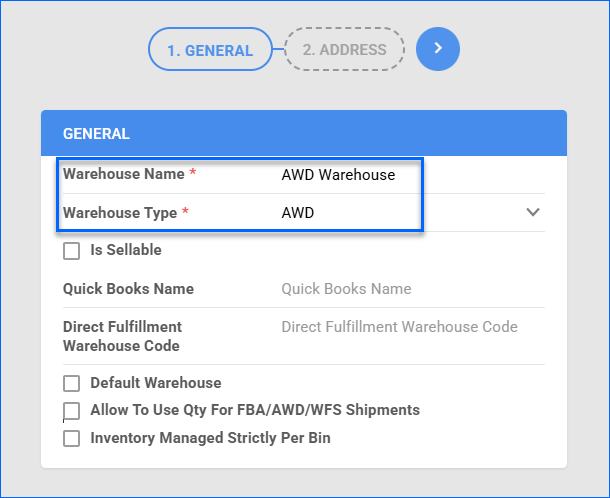
- Then, create an AWD Warehouse:
- Go to Inventory > Warehouses > Manage Warehouses.
- Click the green + icon in the bottom right.
- Fill in the Warehouse Name and select Warehouse Type: AWD.
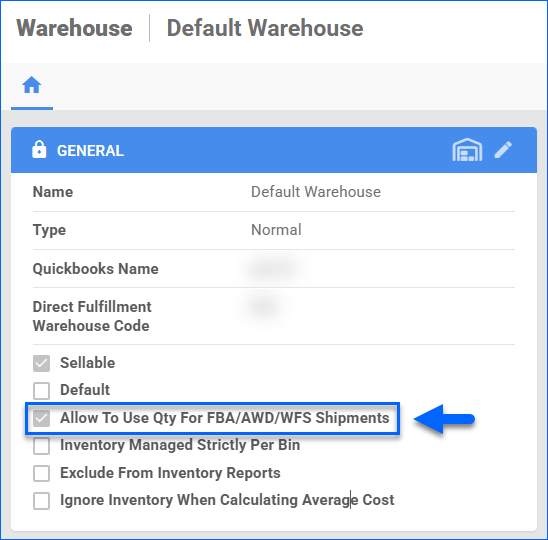
- The next step is to configure your local warehouse for AWD.
- Go to Inventory > Warehouses > Manage Warehouses.
- Open a Normal type warehouse from which you will be shipping to AWD.
- Click Edit and check Allow to use qty for FBA/AWD/WFS Shipments.
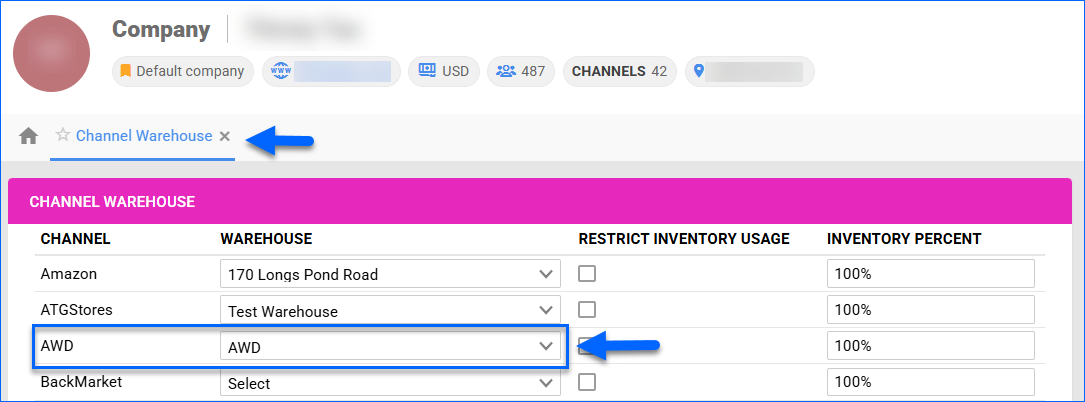
- Lastly, to ensure AWD inventory is imported correctly:
- Go to Settings > Manage Companies > open the integrated company.
- From the Toolbox, go to Channel Warehouse and click Edit.
- Locate Channel AWD in the list and select your new AWD Type warehouse from the dropdown.
- Click Save.
AWD Shipments Workflow
To create a new AWD Shipment in Sellercloud:
- Go to Inventory > Amazon Inbound Shipments.
- Then, click Create New AWD Inbound Shipment.
This will take you to the AWD Inbound Shipment Creation Wizard. The sections below outline each step and the available actions.
Shipment Details
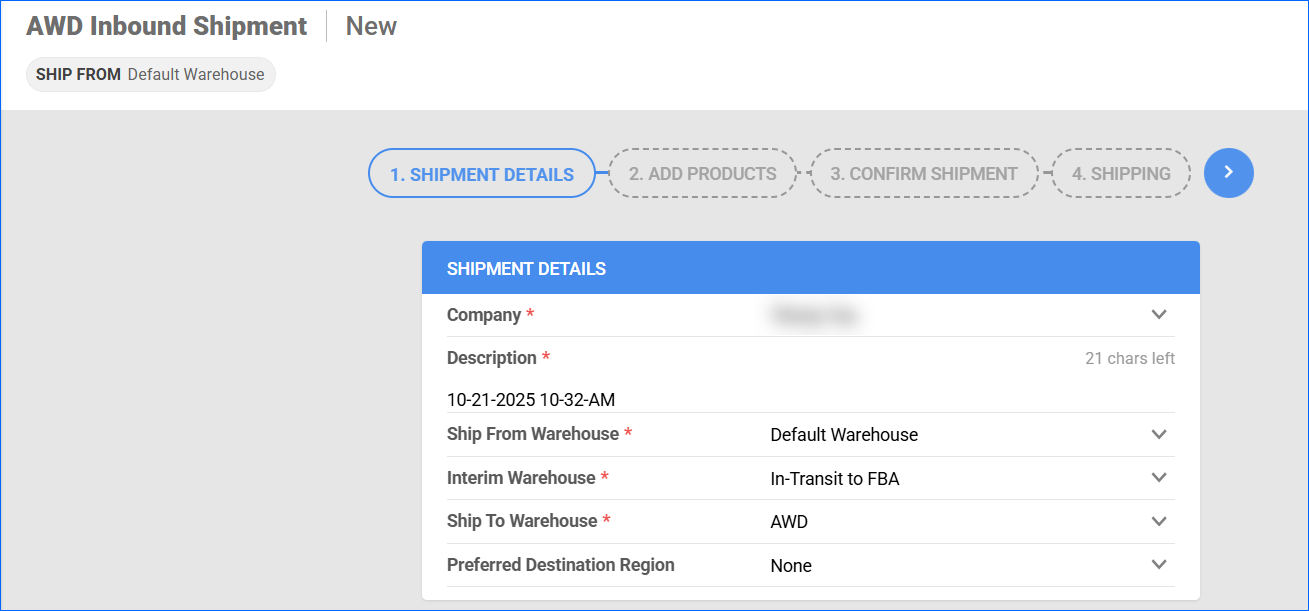
The first step is to fill in the general Shipment Details:
- Company – Only Companies that are enabled for AWD will be available in this dropdown.
- Description – Auto-populated with the date and time of creation. You can manually edit this field with a custom description.
- Ship From Warehouse – Select a Normal warehouse from which you will ship your products. This will also determine the Ship From Address for the shipment.
- Interim Warehouse – Select the warehouse where quantities will be held while they are in transit.
- Ship To Warehouse – Select your AWD Type warehouse.
- (Optional) Preferred Destination Region – You can choose from None, US-East, US-SouthCentral, US-SouthEast, and US-West.
 After you have filled in the details, click the blue arrow to proceed to the next step.
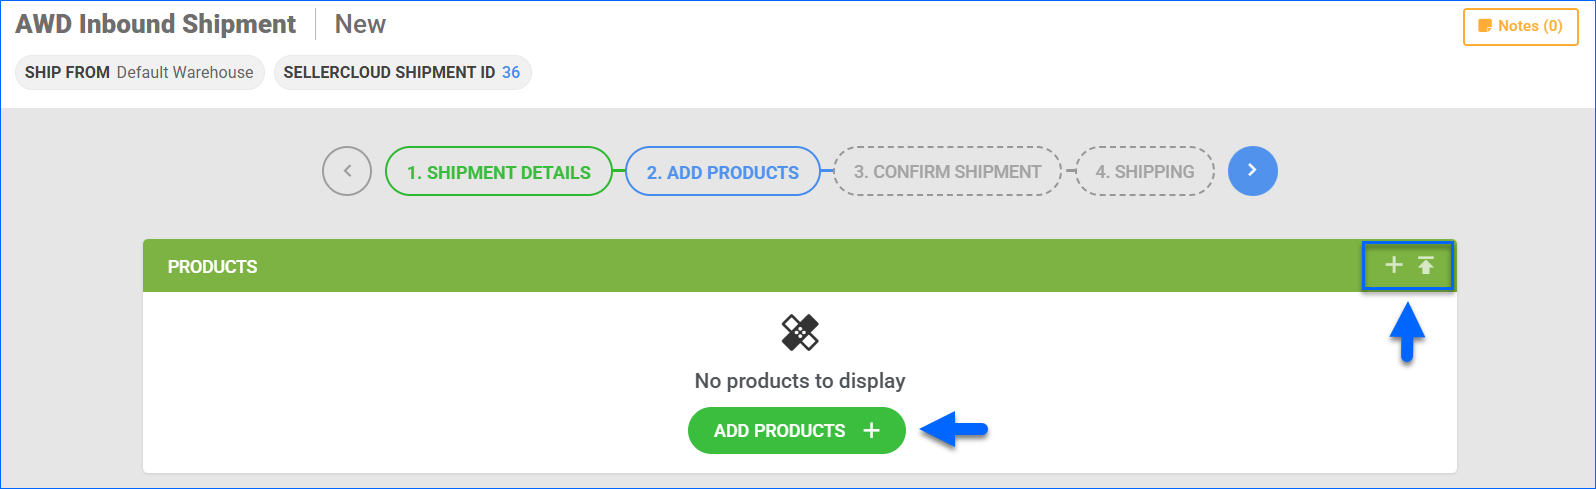
Add Products
In Step 2 of the wizard, you can add the products and their quantities. You can add individual SKUs or import them via file upload.
 Once you have added the SKUs, you can edit:
- Qty to Ship – how many units you are sending to AWD.
- Qty per Case – how many units you will pack in a case.
- Expiration Date – If the product is configured as Expirable, you must provide this information for the shipment.
We auto-populate the Qty per Case and Box Dimensions based on the existing Product Case Quantity configuration. If the quantities you want to ship are not a multiple of the product’s default Case Quantity, you may have to manually adjust to the nearest valid multiple. For example, if the Case Quantity is 5 and you want to send 8, edit the Qty per Case field to 1, 2, 4, or 8.
You can update the Prep Category, Prep Owner, and Label Owner for each product individually, or click the corresponding icon to manage them in bulk for all the products in the Shipment.
Additionally, during this step, you can print all the necessary Product Labels by clicking the corresponding icon in the panel header or next to a specific line item.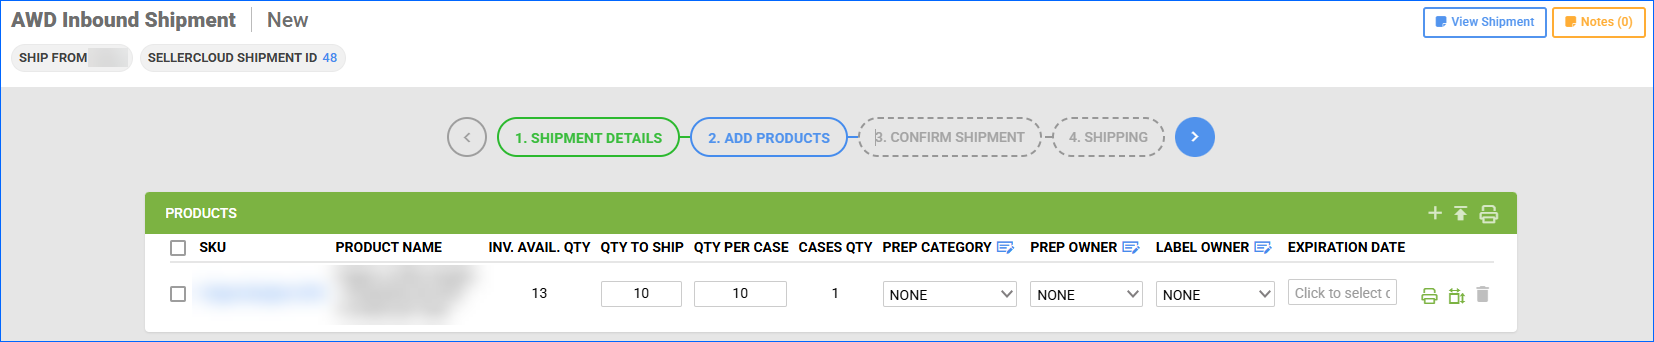
Once you have added all the products, click the blue arrow to move on to the next step. This is the point at which we will send the information to Amazon and retrieve destination details.
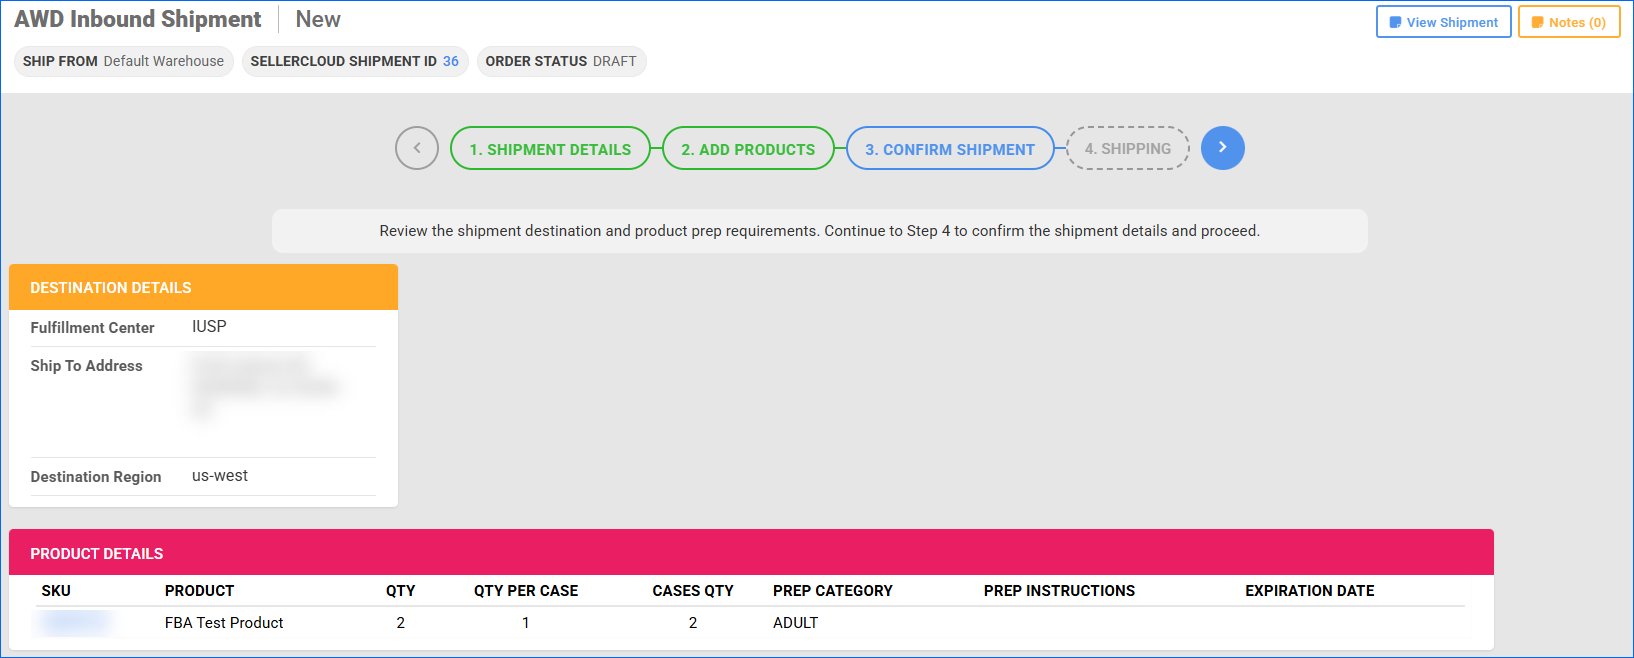
Confirm Shipment
In Step 3, you can review the products and destination details. Ensure everything is correct and click the blue arrow to proceed. At this point, you can still go back to steps 1 and 2 to adjust the Ship From Warehouse and the products. Once you confirm the shipment, you will no longer be able to make edits.
Shipping
In Step 4, you can finalize the shipping information. By default, the Shipment Type will be set to Small Parcel, but you can manually change it to LTL/FTL.
The Boxes panel displays the case information you provided during Step 2. Each box name is automatically generated to include the SKU of the product it contains.
After confirming all the information is correct, you can proceed with adding tracking. For LTL/FTL Shipments, you can add one Tracking Number for the whole Shipment in the Shipping Details panel. For Small Parcel, click the Enter Tracking Numbers button in the blue panel header. 
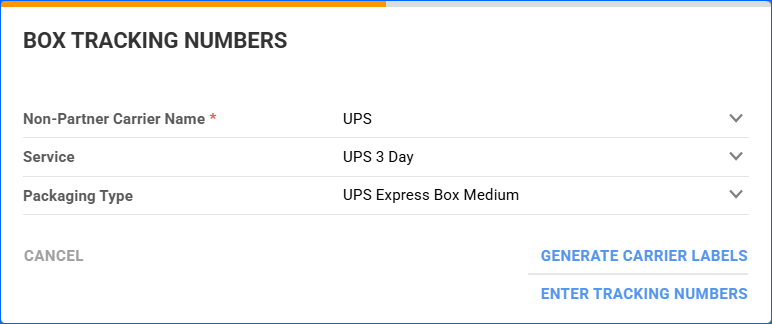
In the pop-up modal, select the Carrier, Service, and Package Type. Then, you can click:
- Generate Carrier Labels to create the labels and pull tracking directly from the carrier.
This option is only available for carriers you have integrated with via the Shipping API Settings page in the same company.
- Enter Tracking Numbers to manually add tracking for each box.
When you finalize the Shipping Details, click the green Flag button to complete the AWD Inbound Shipment.
Import AWD Shipment
If you prefer to create and process AWD Inbound Shipments in Seller Central, you can then import them into Sellercloud to keep accurate records. This is necessary if you want to ship your products using an Amazon Partnered Carrier.
To import an AWD Shipment:
- Go to Inventory > Amazon Inbound Shipments.
- Click Import AWD Inbound Shipment.
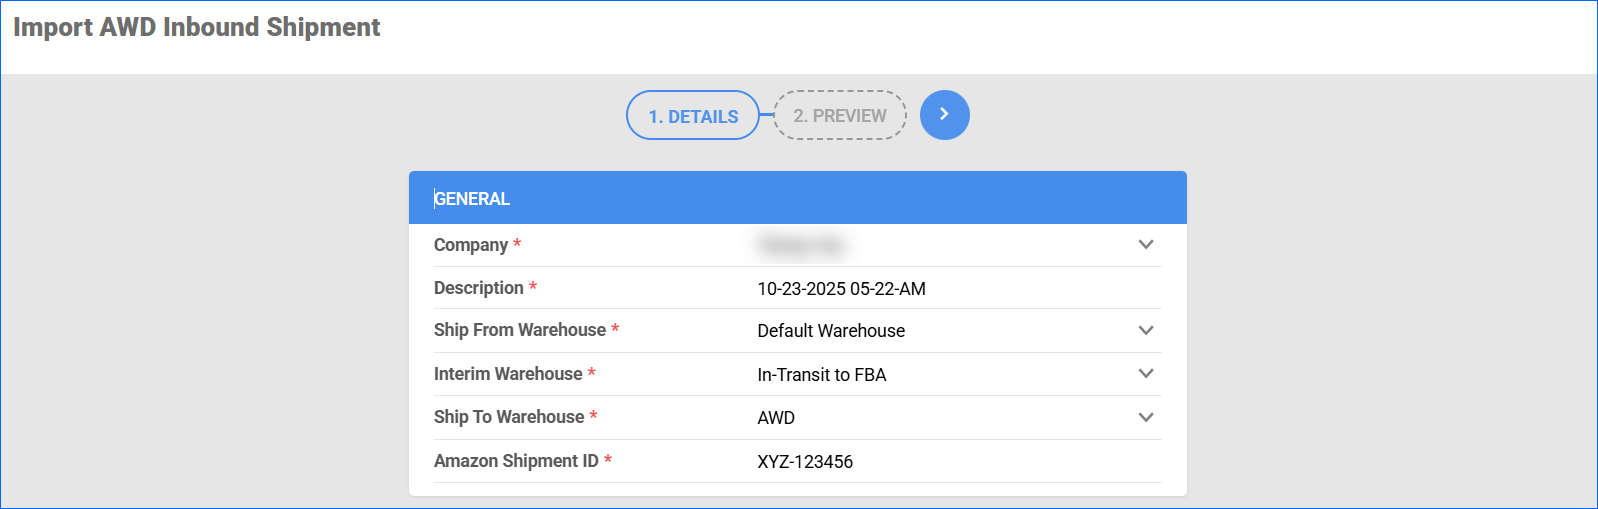
- Fill in the details:
- Company – Determines which Amazon credentials will be used.
- Description – Auto-populated with the date and time of creation. You can manually edit this field with a custom description.
- Ship From Warehouse – Select a Normal warehouse from which you want to deduct inventory.
- Interim Warehouse – Select the warehouse where quantities will be held while they are in transit.
- Ship To Warehouse – Select your AWD Type warehouse.
- Amazon Shipment ID – The Shipment ID from Seller Central.
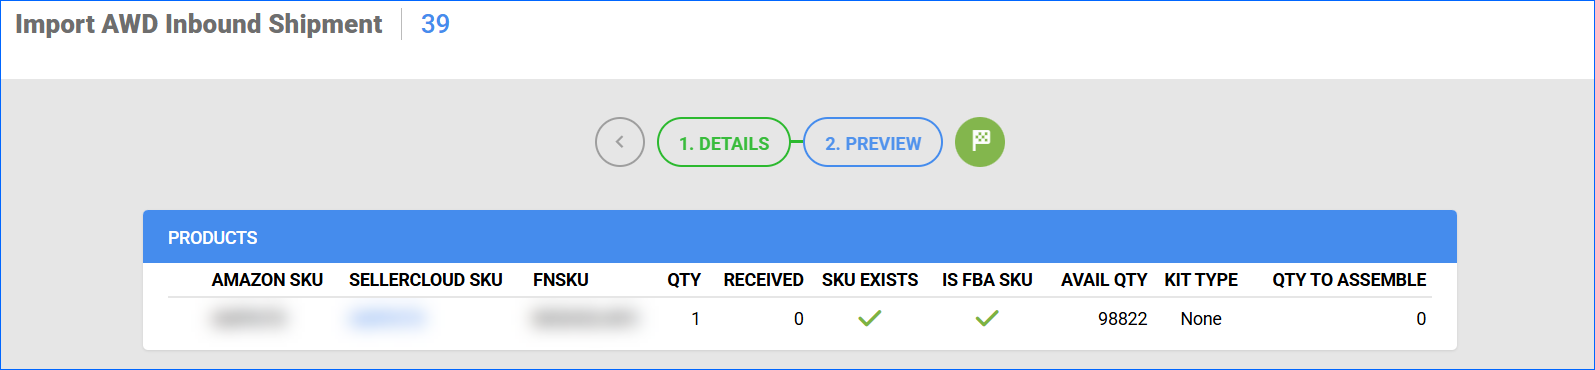
- Click the blue arrow button to proceed to the next page.
- Verify the product information and click the green flag button to complete the import.
Key points to keep in mind:
- If you create the Shipment in Seller Central, you will not be able to update the details and process it via Sellercloud. You can, however, use the Query Inbound Shipment Status and Query Inbound Order actions on the Shipment Details page to pull updated information, or wait for the automated service, which periodically queries Amazon.
- You cannot import a Shipment if its status on Amazon is Cancelled or Expired.
- If you are importing a Completed Shipment into a Bin-Enabled warehouse, we will automatically set the status to Created. This will allow you to pick the necessary quantities. Then, we will query the status and update it in Sellercloud.
API Limitations
Certain AWD features available in Seller Central are not currently accessible through Sellercloud. This is due to the limited functionality supported by Amazon’s current AWD API. As Amazon continues to expand its API coverage, we will also add support for these features.
- Shipping in Sellercloud is only possible via Non-Partnered Carriers.
- If a Shipment is created in Seller Central and imported into Sellercloud, we cannot send any updates via the API. It must be processed and shipped in Amazon.
- We can’t create Multi-Channel Distribution Orders via API.
- We can only send one tracking number per Shipment, even if it is Small Parcel and shipped in multiple boxes.