Overview
In Sellercloud, Warehouse Bins can represent both physical locations inside a warehouse and system-defined virtual product holding areas used in specific workflows. Bins segment warehouse inventory for picking, put away, receiving, and fulfillment workflows.
By default, new warehouses do not include bins. To use bins, you must enable and then create them in each warehouse. When you enable bins for a warehouse:
- Each bin can hold various quantities of one or more products.
- Each product unit is placed in a specific bin and can only be in one bin at a time.
- Inventory changes such as receiving, adjustments, and transfers are managed at the bin level.
- Warehouse workers use Skustack devices for picking, receiving, bin-to-bin transfers, assembling or disassembling kits, and physical audits.
- Additional features such as bin refill reports and printable bin labels, as well as workflows like Lot Number and Expiration Tracking, become available.
Enable Bins
To enable bins for a warehouse:
- Go to Inventory > Warehouses > Manage Warehouses.
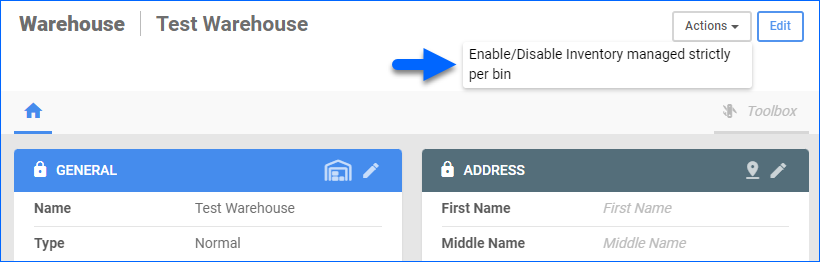
- Find and click the warehouse.
- Click Actions and select Enable/Disable Inventory managed strictly per bin.
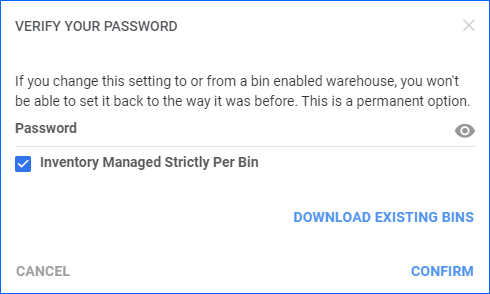
- Optionally, you can click Download Existing Bins to download a spreadsheet with existing bins and products.
- Check Inventory Managed Strictly Per Bin.
This is a permanent option; you can’t undo it. We recommend opening a ticket with Sellercloud Support before making any updates here. This setting will remove all inventory from the warehouse. In addition, Kits in bin-enabled warehouses cannot be assembled or disassembled from the Sellercloud interface.
- Enter your password and click Confirm.
- Next, Create Bins.
Create Bins
You can create bins:
- From Sellercloud, either individually or in bulk.
- From a Skustack Device.
- From the Skustack Admin Portal.
Individually
To create a new bin from Sellercloud:
- Go to Inventory > Warehouses > Manage Warehouse Bins.
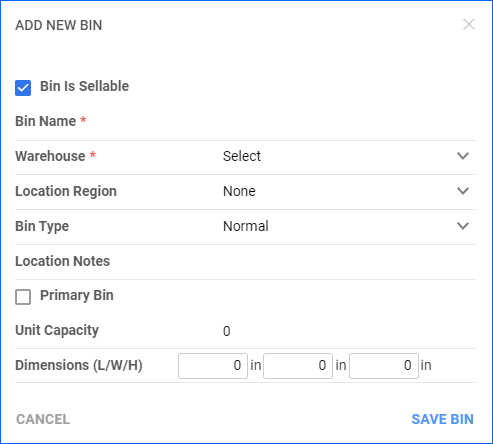
- Click the Add New Bin icon.

- Complete the following details:
- Bin Is Sellable – Mark the bin as Sellable, which means the inventory counts toward the available inventory for sale, or Non-Sellable to exclude inventory from this calculation.
- Bin Name – Enter the name of the bin. You can name your bins alphanumerically, but avoid spaces in the name – instead, use dashes (-) or underscores (_).
- Warehouse – Select the warehouse where you want to add the new bin.
- Location Region – Choose the Location. Locations are physical areas or sections designated for specific purposes such as storage, packing, shipping, or receiving. Locations can be differentiated based on various factors such as product type, size, weight, or demand.
- Bin Type – Refer to the Bin Types list for a definition of each bin type.
- Location Notes – Add notes or warnings about the location.
- Primary Bin – Designate it as a Primary bin you regularly use for daily operations. Keep this box unchecked to create a secondary bin. For example, bins used for overflow or excess inventory should be left unmarked to help distinguish them from primary storage locations.
- Unit Capacity – Specify the number of product units that can fit in this bin.
- Dimensions – Enter the bin’s physical dimensions in inches.
In Bulk
To create multiple bins by uploading a spreadsheet to Sellercloud:
- Go to Inventory > Warehouses > Manage Warehouse Bins.
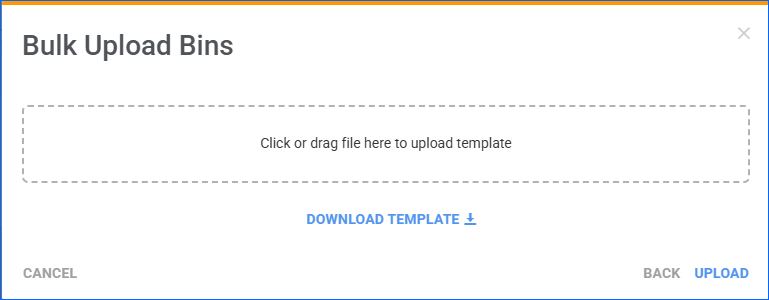
- Click the Actions menu in the bottom-right corner and select Bulk Upload Bins.

- In the pop-up dialog, choose Create New Bins and click Next.
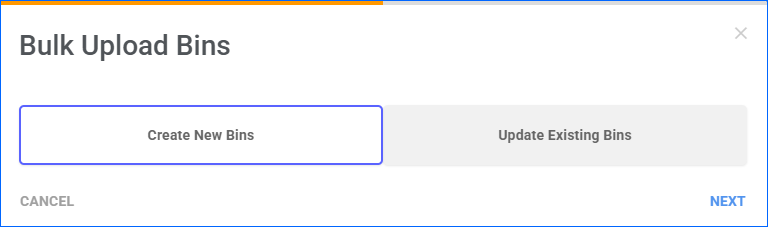
- Click Download Template.
- Fill out the spreadsheet file with your bin information:
- BinName – The name of the bin.
- WarehouseName – The Name of the warehouse where you want to create the bin.
- WarehouseID – The ID of the warehouse where you want to create the bin.
- Sellable – Set to True for inventory in this bin to be Sellable. If you set it to False, any inventory in this bin will not be included in the available inventory for sale.
- IsPrimary – Set to True if this bin is a designated bin you regularly use for daily operations.
- BinType – The bin’s operational role (e.g., Normal). Other possible types include Picking, PutAway, Receiving, etc. Each affects behavior in workflows like picking or replenishment. See Bin Types for details.
- LocationType – The classification of the location, either Known or Unknown.
- LocationRegion – The sub-area or section of the warehouse, often used to organize warehouse zones by function.
- UnitCapacity – The maximum number of units that can physically be stored in the bin.
- LocationNotes – Notes related to the bin (e.g., “This bin contains hazardous materials.”).
- Width – The bin’s width.
- Height – The bin’s height.
- Length – The bin’s length.
- UnitOfLength – Specify the unit of measurement used for the bin’s Width, Height, and Length. Enter IN for inches or CM for centimeters.
- Return to the pop-up and Upload your completed file.
- When the Queued Job finishes, you will receive a Notification.
Bin Types
Each bin can be one of the following types:
- Normal – Regular bins that store inventory.
- Receiving – When Receiving POs or RMAs, the items go to the Receiving bin before being transferred into your regular storage bins.
- PutAway – When creating a putaway list, all the products are transferred into the PutAway bin and then transferred out when put away.
- Picking – When an item is Picked from a bin, it is automatically transferred to a Picking bin. Each warehouse has a unique Picking bin created automatically by the system.
The Picking bin is Sellable because the inventory moved there is still available for fulfillment until shipment. This ensures accurate inventory counts during the picking and shipping process. If it were Non-Sellable, that would cause inaccuracies and even false shortages or stockouts.
- Assemble – Can be selected when assembling a kit with Skustack to put the items into. When you assemble the kit, it deducts from that bin.
- DisAssemble – When disassembling a kit with Skustack, you can choose a DisAssemble bin to put the items into.
To assemble or disassemble in bin-enabled warehouses, use Skustack. Only warehouses without bins can be selected in the Sellercloud user interface.
- Temp – Temp bins are generally used for inventory in transition to somewhere else, such as a temporary location for products being prepared for an FBA Shipment. In addition, when assembling kits, if you don’t specify where they should go, they go to the Temp bin.
Manage Bins
You can manage some aspects of your warehouse bins directly from Sellercloud. However, we recommend using the Skustack Admin Portal.
To manage bins:
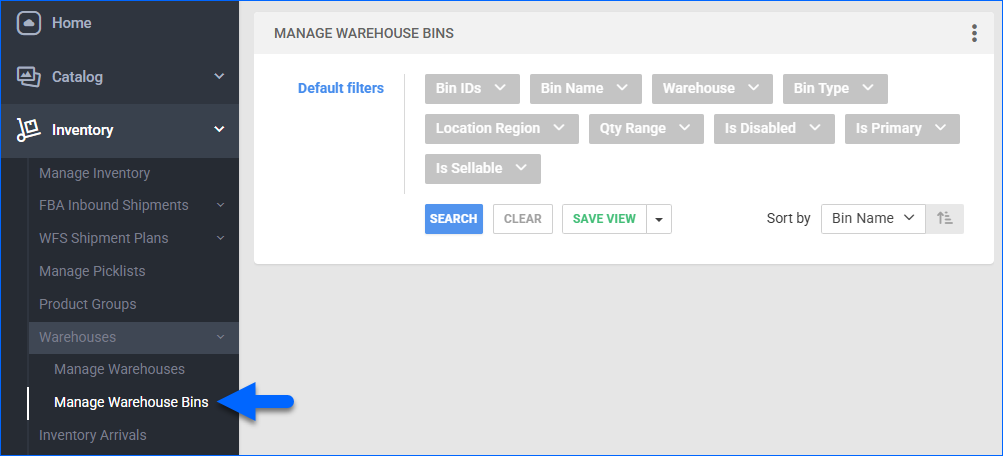
- Open the Manage Warehouse Bins page:
- Either go to Inventory > Warehouses > Manage Warehouse Bins;
- Or go to a Warehouse Details page and click the Manage Bins icon at the top of the Details panel.
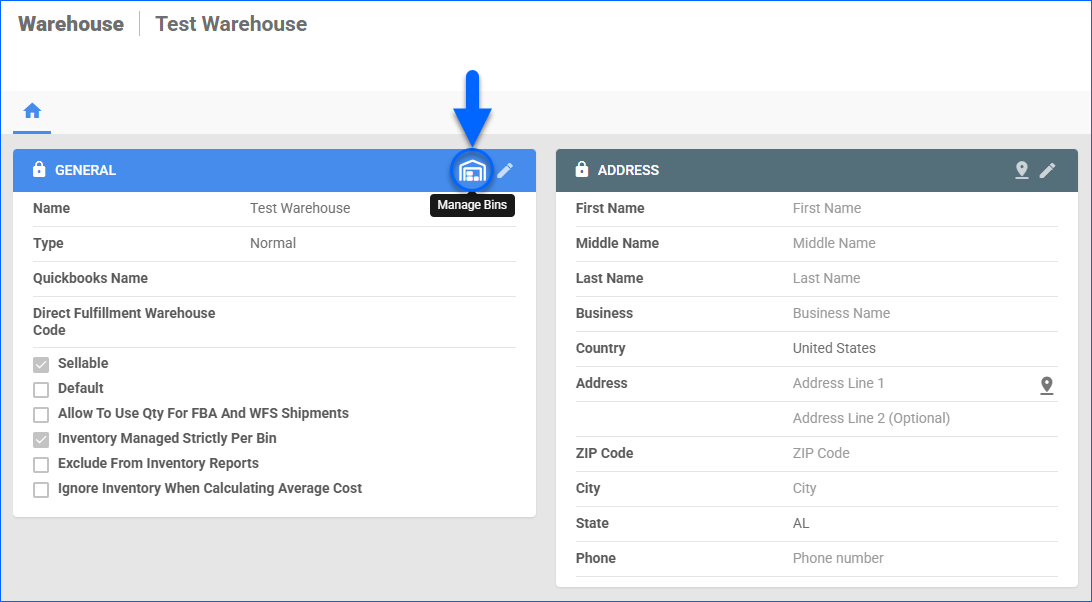
- Either go to Inventory > Warehouses > Manage Warehouse Bins;
- You can use these Default filters to see only specific bins:
- Bin IDs – Search for one or more specific Bin IDs (the unique system-generated identifiers for each bin). Use this when you know the exact bin ID or are auditing specific bin entries.
- Bin Name – Filter bins by their assigned names.
- Warehouse – See only bins associated with the selected warehouse(s).
- Bin Type – Filter by Bin Type.
- Location Region – See only bins located within a specific warehouse region.
- Qty Range – Search bins where the total inventory falls within a specific range (e.g., between 0 and 100). Useful for identifying overstocked, understocked, or empty bins.
- Is Disabled – Show bins that are Enabled (actively used in warehouse operations) or Disabled (hidden and not usable until re-enabled).
- Is Primary – Show bins based on whether they are Primary or not.
- Is Sellable – Show bins based on whether they are Sellable or not.
- Click Search. You can click Save View to repeat a search later.
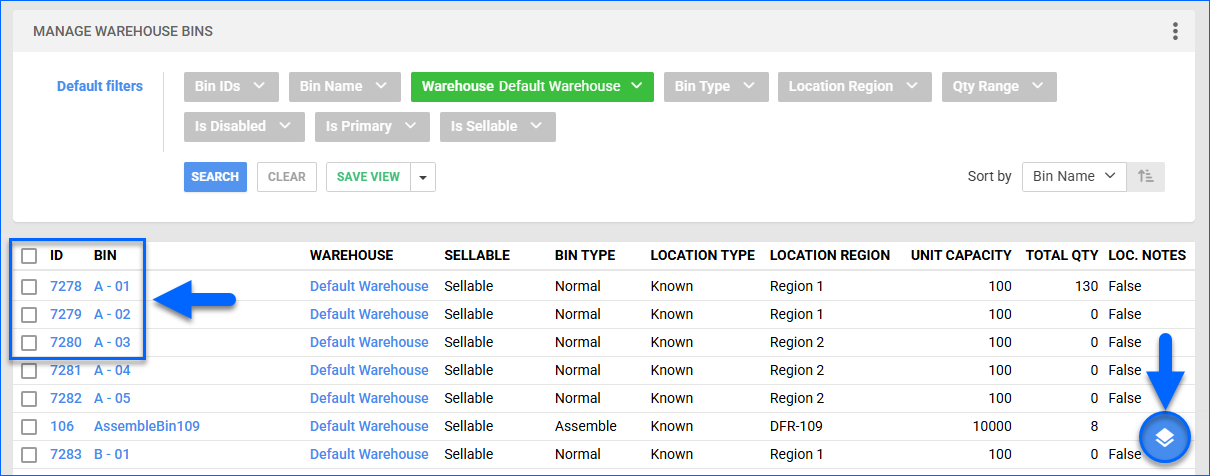
- The page displays a grid with all bins matching your search. To add, remove, or reorder columns in the grid, click the three dots at the top right and select Customize Columns.
- Click the Actions action to perform bin-related actions. Some actions are available immediately, while others require selecting specific bins from the grid.
- Click on a Bin ID or Name from the results grid to open the Bin Details page.
Bin Details Page
Clicking the links under BIN or ID on the Manage Warehouse Bins page opens the Bin Details page.
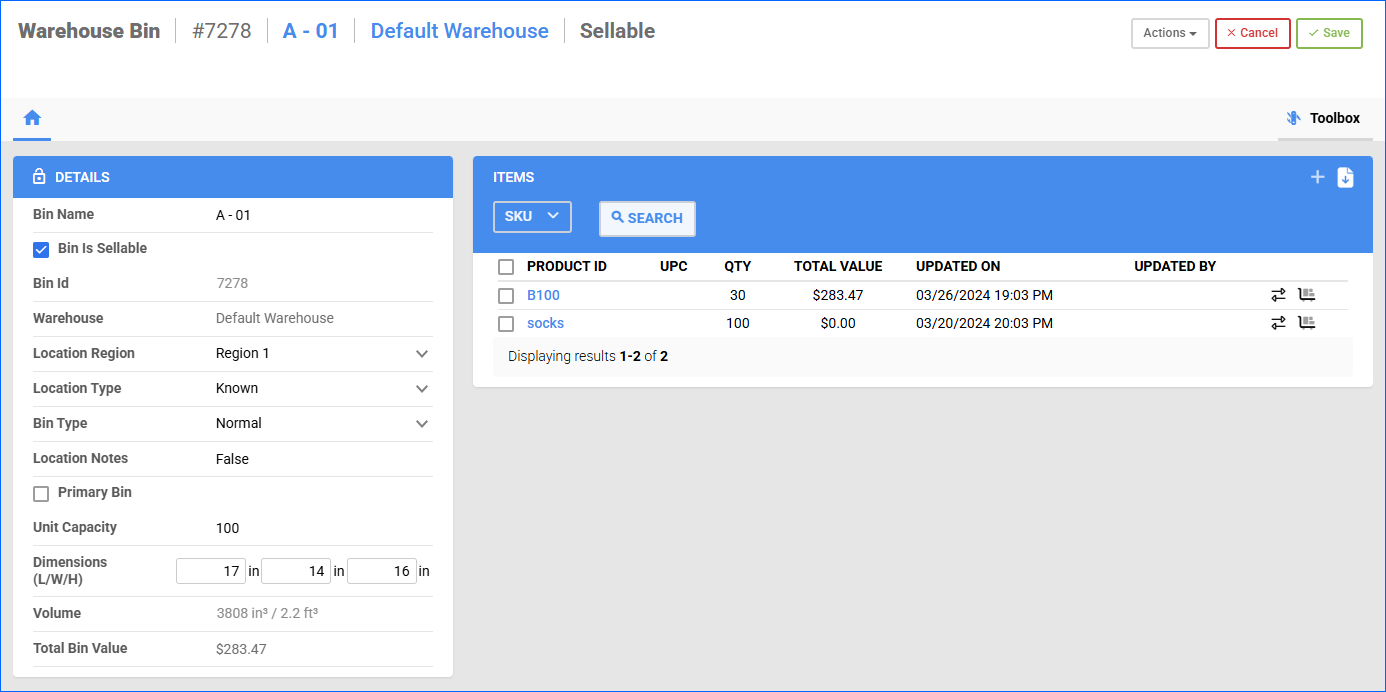
The Bin Details page features two panels: Details and Items, an Action button, and Toolbox tabs.
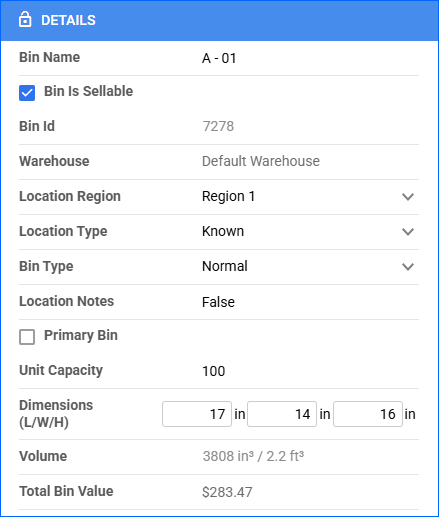
Details Panel
The Details panel provides information about the warehouse.
- Bin Name – The name of the bin.
- Bin Is Sellable – Whether inventory in this bin is considered Sellable. If unchecked, the quantity will not contribute to the available inventory for sale.
- Bin ID – System-generated unique ID used for backend tracking and reporting.
- Warehouse – The warehouse this bin belongs to.
- Location Region – The sub-area or section of the warehouse, often used to organize warehouse zones by function.
- Location Type – The classification of the location, either Known or Unknown.
- Bin Type – The bin’s operational role (e.g., Normal). Other possible types include Picking, PutAway, Receiving, etc. Each affects behavior in workflows like picking or replenishment. See Bin Types for details.
- Location Notes – Enter text to describe the bin’s contents, restrictions, or warnings (e.g., “This bin contains hazardous materials.”).
- Primary Bin – Indicates whether this bin is a designated bin you regularly use for daily operations.
- Unit Capacity – Indicates the maximum number of units that can physically be stored in the bin.
- Dimensions (L/W/H) – The physical dimensions of the bin in inches.
- Volume – The total cubic volume, auto-calculated based on the Dimensions.
- Total Bin Value – The total value of all items stored in the bin.
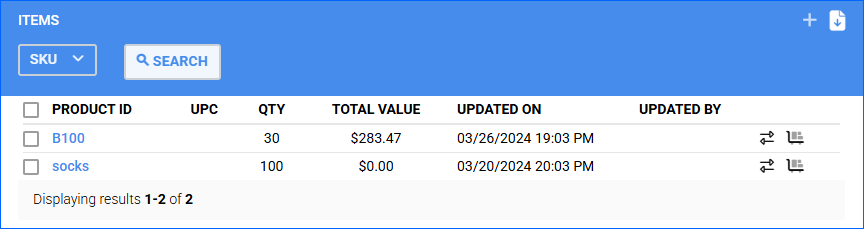
Items Panel
The Items panel displays all SKUs and their quantities in the bin.
- Product ID – The SKU of the product stored in this bin. Each line represents a different SKU.
- UPC – The product’s Universal Product Code (UPC).
- Qty – The current quantity of the SKU in this bin. Includes both positive and negative values.
- Total Value – The total monetary value of that quantity of the SKU in this bin.
- Updated On – The timestamp of the most recent inventory update affecting that SKU in this bin.
- Updated By – The user or system account responsible for the last update.
To the right of each product are two icons granting access to these actions:
- Transfer – Move product units to another bin in the warehouse.
You can also perform a bin-to-bin transfer from the Product Details Page.
- Adjust – Increase or decrease a product’s inventory quantity in the bin by an exact value. Enter a negative number to reduce the number of units.
You can also bulk Import Bin Adjustments from a spreadsheet.
At the top right of the Items panel, there are icons for these actions:
- Add products – Enter a SKU and the Quantity to add to the bin.
- Export all items – Export all items in the bin to a spreadsheet.
- Export selected items – Export only the selected items in the bin to a spreadsheet.
You can also Export Bins in bulk from the Manage Warehouse Bins page.
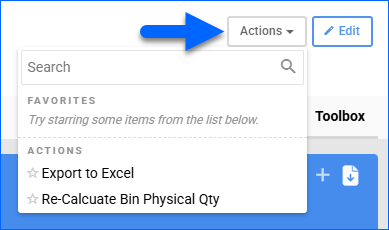
Actions
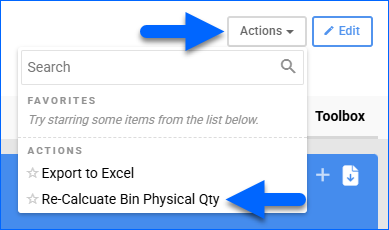
The Actions menu offers these options:
- Re-Calculate Bin Physical Qty – Force a recalculation of the bin’s physical quantity. This is usually the first troubleshooting step in case of an inventory discrepancy or when you have adjusted it by deleting an order or FBA shipment.
- Export to Excel – Download an Excel file with the bin’s general information.
Toolbox
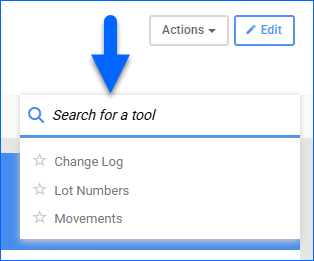
The Toolbox offers further insights:
- Change Log – A history of all changes made to the bin details page, including the user responsible for each change and the corresponding timestamp.
- Lot Numbers – Available when the Lot Number and Expiration Tracking workflow is enabled. It displays all current lot numbers in the respective bin and allows you to export them.
- Movements – Historical records of inventory movements in and out of the bin. Each entry displays the date, movement type, SKU, quantity, reason for the movement, the user who initiated it, and other details.
Bulk Update Bins
To save time when modifying bins, you can bulk-upload data from a spreadsheet.
To bulk-update bins:
- Go to Inventory > Warehouses > Manage Warehouse Bins.
- Click the Actions menu in the bottom-right corner and select Bulk Upload Bins.
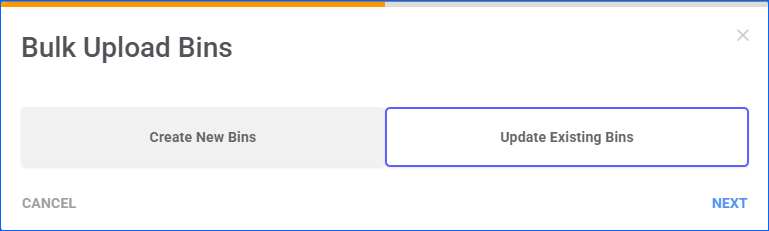
- In the pop-up dialog, choose Update Existing Bins and click Next.
- Click Download Template.
- Fill out the spreadsheet template with your bin information:
- BinID – The bin’s unique identifier. You can find it on the Manage Warehouse Bins Page or the Bin Details Page.
- BinName – The Name of the bin.
- WarehouseName – The Name of the warehouse the bin belongs to.
- WarehouseID – The ID of the warehouse the bin belongs to.
- Sellable – Indicates whether inventory in the bin is considered Sellable. If False, the quantity will not contribute to the available inventory for sale.
- IsPrimary – Indicates whether the bin is a designated bin you regularly use for daily operations.
- BinType – The bin’s operational role (e.g., Normal). Other possible types include Picking, PutAway, Receiving, etc. Each affects behavior in workflows like picking or replenishment. See Bin Types for details.
- LocationType – The classification of the location, either Known or Unknown.
- LocationRegion – The sub-area or section of the warehouse, often used to organize warehouse zones by function.
- UnitCapacity – The maximum number of units that can physically be stored in the bin.
- LocationNotes – Notes related to the bin.
- Width – The bin’s width.
- Height – The bin’s height.
- Length – The bin’s length.
- UnitOfLength – The unit of measurement used for the bin’s Width, Height, and Length. Either IN for inches or CM for centimeters.
- Return to the pop-up and Upload your completed file.
- When the Queued Job finishes, you will receive a Notification.
Export Bins
To export bins:
- Go to Inventory > Warehouses > Manage Warehouse Bins.
- Click the Actions menu and select:
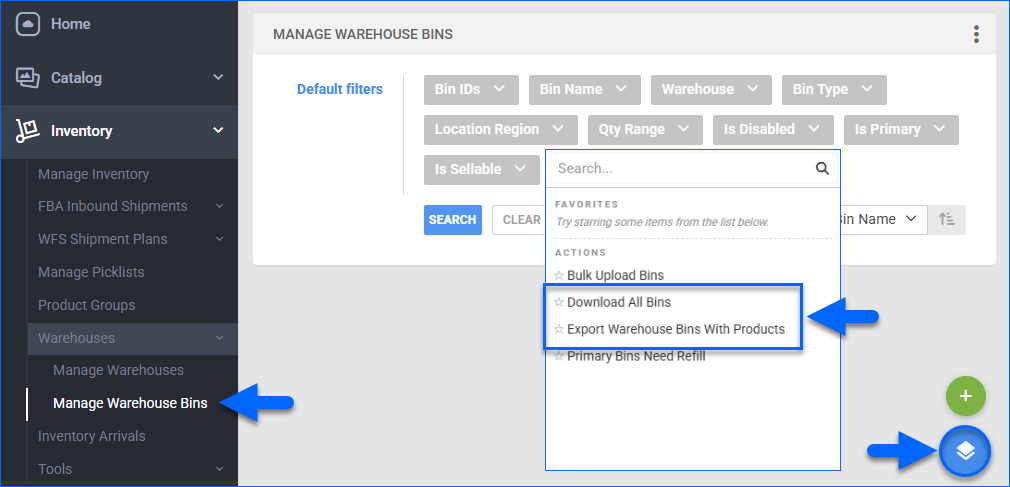
- Download All Bins – Download an Excel file with all your existing Bins to your device. The exported columns are:
- Bin ID – The bin’s unique identifier.
- Bin Name – The Name of the bin.
- Warehouse Name – The Name of the warehouse the bin belongs to.
- Warehouse ID – The ID of the warehouse the bin belongs to.
- Sellable – Indicates whether inventory in the bin is considered Sellable. If False, the quantity will not contribute to the available inventory for sale.
- Is Primary – Indicates whether the bin is a designated bin you regularly use for daily operations.
- Bin Type – The bin’s operational role (e.g., Normal). Other possible types include Picking, PutAway, Receiving, etc. Each affects behavior in workflows like picking or replenishment. See Bin Types for details.
- Location Type – The classification of the location, either Known or Unknown.
- Location Region – The sub-area or section of the warehouse, often used to organize warehouse zones by function.
- Unit Capacity – The maximum number of units that can physically fit in the bin.
- Total Qty – The total amount of product units stored in the bin.
- Location Notes – Notes related to the bin.
- Export Warehouse Bins With Products – Choose a specific warehouse, and you can further narrow down the exported results by selecting specific products. The file columns are:
- Warehouse Name – The Name of the warehouse the bin belongs to.
- Bin Name – The Name of the bin.
- Product ID – The product’s SKU.
- Product Name – The product’s Name.
- Qty Available – The quantity of the product that is currently available in the bin.
- Total Value – The total value of all items stored in the bin.
- Last Updated On – The most recent date and time when any change was made to the inventory of that product in the specific bin.
- Location Notes – Notes related to the bin.
- Download All Bins – Download an Excel file with all your existing Bins to your device. The exported columns are:
Identify Bins to Refill
To identify bins marked as Primary that are showing negative inventory and need a refill:
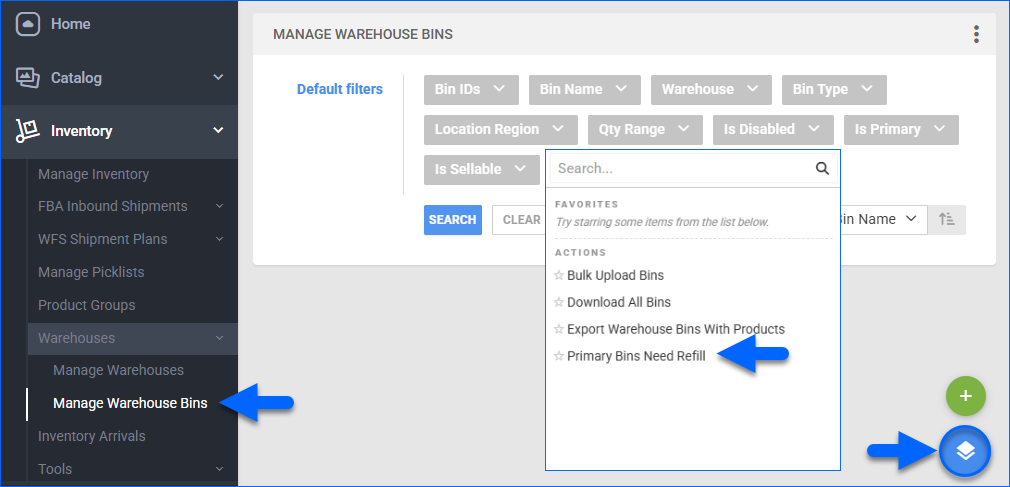
- Go to Inventory > Warehouses > Manage Warehouse Bins.
- Click the Actions menu and select Primary Bins Need Refill.
- On the new page, select a bin-enabled warehouse from the Select Warehouse menu.
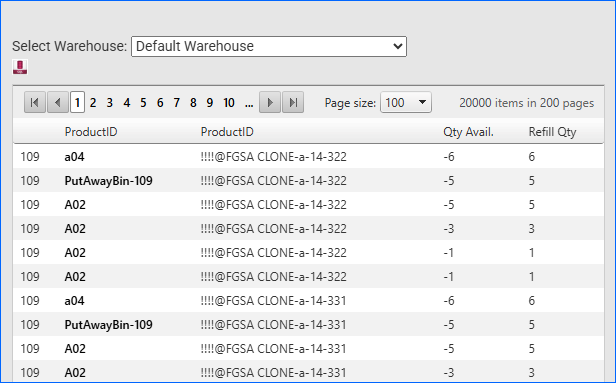
- The grid will display all Primary bins with negative inventory (e.g., -10). For each listed product, you will see:
- The bin it’s currently in.
- The negative quantity.
- The quantity needed to bring the bin back to zero.
- Use this information to transfer inventory into the appropriate bins or adjust them to correct the stock levels.
Recalculate Bins
Recalculating bins manually ensures that the physical quantity in each bin properly reflects the current inventory state. This is the first step in troubleshooting and resolving inventory discrepancies, especially after actions such as unshipping or deleting an order or FBA shipment, or making manual inventory adjustments.
To recalculate a single bin:
- Go to Inventory > Warehouses > Manage Warehouse Bins.
- Use the filters if needed and click Search.
- Locate the bin you want to recalculate and click the Bin ID or Bin Name to open the Bin Details Page.
- Click Actions > Recalculate Bin Physical Qty.
To recalculate multiple bins:
- Go to Inventory > Warehouses > Manage Warehouse Bins.
- Use the filters if needed and click Search.
- Select one or more bins using the checkboxes.
- Click the Actions menu at the bottom right.
- Select Recalculate Bin Physical Qty from the dropdown.
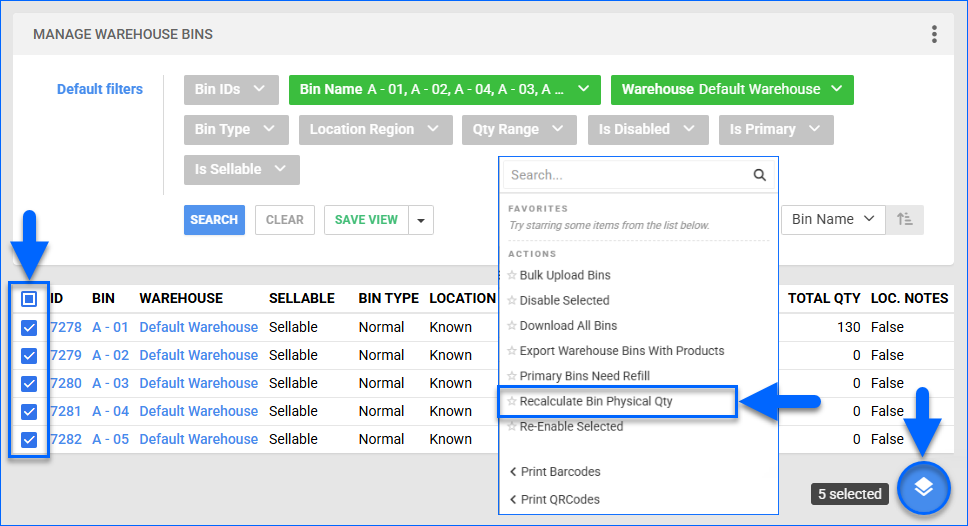
- Confirm the action.
Print Bin Labels
You can generate and print PDF files with barcode or QR code labels for your warehouse bins directly from the Manage Warehouse Bins page. These labels can help streamline bin identification and scanning during warehouse operations.
To print bin labels with barcodes or QR codes:
- Go to Inventory > Warehouses > Manage Warehouse Bins.
- Use the filters if needed and click Search to load the bin results.
- Use the checkboxes to select one or more bins from the grid.
- Click the Actions menu at the bottom right.
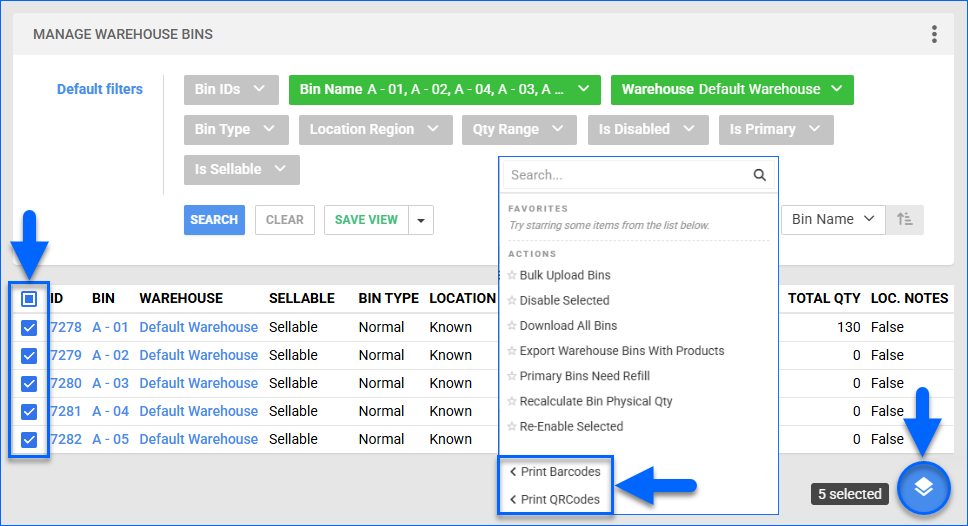
- Choose one of the following print options:
- Print Barcodes > Using Bin Names: One barcode per page, labeled with the bin name.
- Print Barcodes > Per Bin: Multiple barcodes per page, along with their names (typically up to 39, depending on layout).
- Print Barcodes > Per Bin (30 Per Page): Limits the page to 30 barcodes for improved readability.
- Print QR Codes > Using Bin Name: One QR code per page, generated from the bin name.
- A PDF file will be generated and downloaded for printing.
Disable or Re-Enable Bins
Disabling or re-enabling bins works as follows:
- You can disable specific warehouse bins. Disabled bins will not be usable or appear in any related options in Sellercloud or Shipbridge.
- You can re-enable disabled bins at any time, and they will be usable again immediately.
- You can’t disable a bin if it currently has a quantity of any product – to disable the bin, clear it out first by moving the amount to Another Bin or Warehouse.
Related Client Settings
The following Client Settings related to warehouse bins are available:
- Enable Warehouse Bin (WMS) – Allows you to enable warehouse bins.
- Enforce Bins on Selected Warehouses – Allows you to enable and enforce bin management for your warehouses.
- Create New Bin For Each PO Received – When you receive a PO, a new bin is created in the selected warehouse, and the products are added to it.