Overview
The BigCommerce Account Integration allows you to easily upload your product inventory and create listings on your BigCommerce website from your Sellercloud account. This article explains how to manage your products for BigCommerce and update your listings.
Ready a Product for BigCommerce
Before you can list a product and start sending regular updates, you first need to make sure the SKU is Ready for BigCommerce. Below you can find some key information that needs to be configured. Navigate to Catalog > Manage Catalog > open a Product > Toolbox > Website Properties. Hover over the Ready to Post section to see which required fields are missing. Alternatively, you can Export Channel Missing Info from the Manage Catalog Page for multiple products.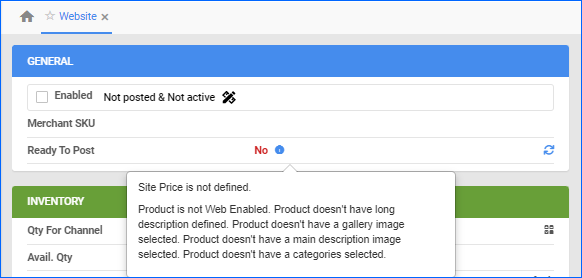
Website Properties
The following fields on the Product Website Properties page are mandatory for listing on BigCommerce. Click Edit to configure:
- Web Enabled – check the box to enable Sellercloud to send automatic Inventory and Price updates for the product.
- Long Description – in the Listing Details panel. Click Change to configure. If empty, Sellercloud will use the Long Description from the Product Properties page.
- Gallery Default Image – in the Channel Images panel. Upload an image and click on it to configure it as Gallery Default.
- Description Default Image – in the Channel Images panel. Upload an image and click on it to configure it as Description Default.
- Categories – refer to the section below.
- Price – If the Enable List Price company website cart setting is enabled, you must provide a List Price different than 0 to successfully post or update a product on BigCommerce.
Categories
You need categories to post products to BigCommerce. BigCommerce provides default ones, but the customer typically creates their unique categories.
Once you create categories on Big Commerce, the next step is to download them in Sellercloud:
- Navigate to the Company Settings of your BigCommerce integrated company.
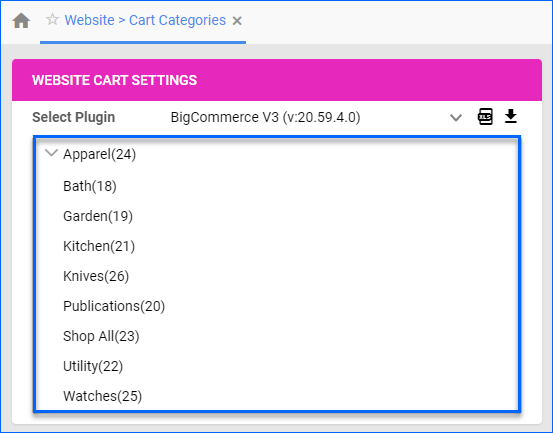
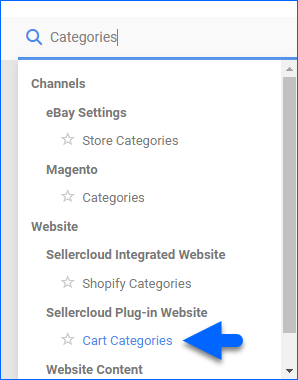
- Click Toolbox and select Website > Sellercloud Plug-In Website > Cart Categories.
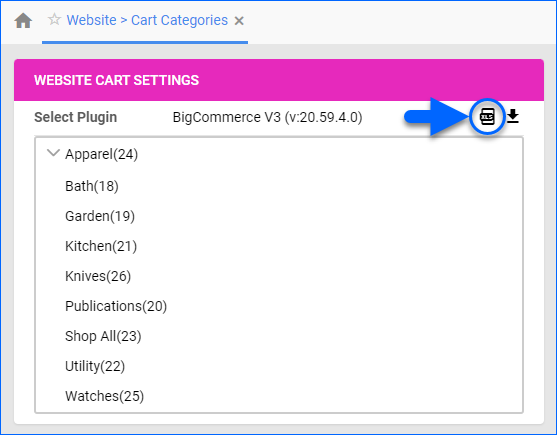
- The BigCommerce plugin should be selected by default.
- Click the Re-Download Categories icon.

- Refresh the page, and the categories should appear. You can now select categories per product by going to the Website properties page.
To update a single product’s categories:
- Open a product in Sellercloud.
- Click Toolbox and select Channels > Website Properties.
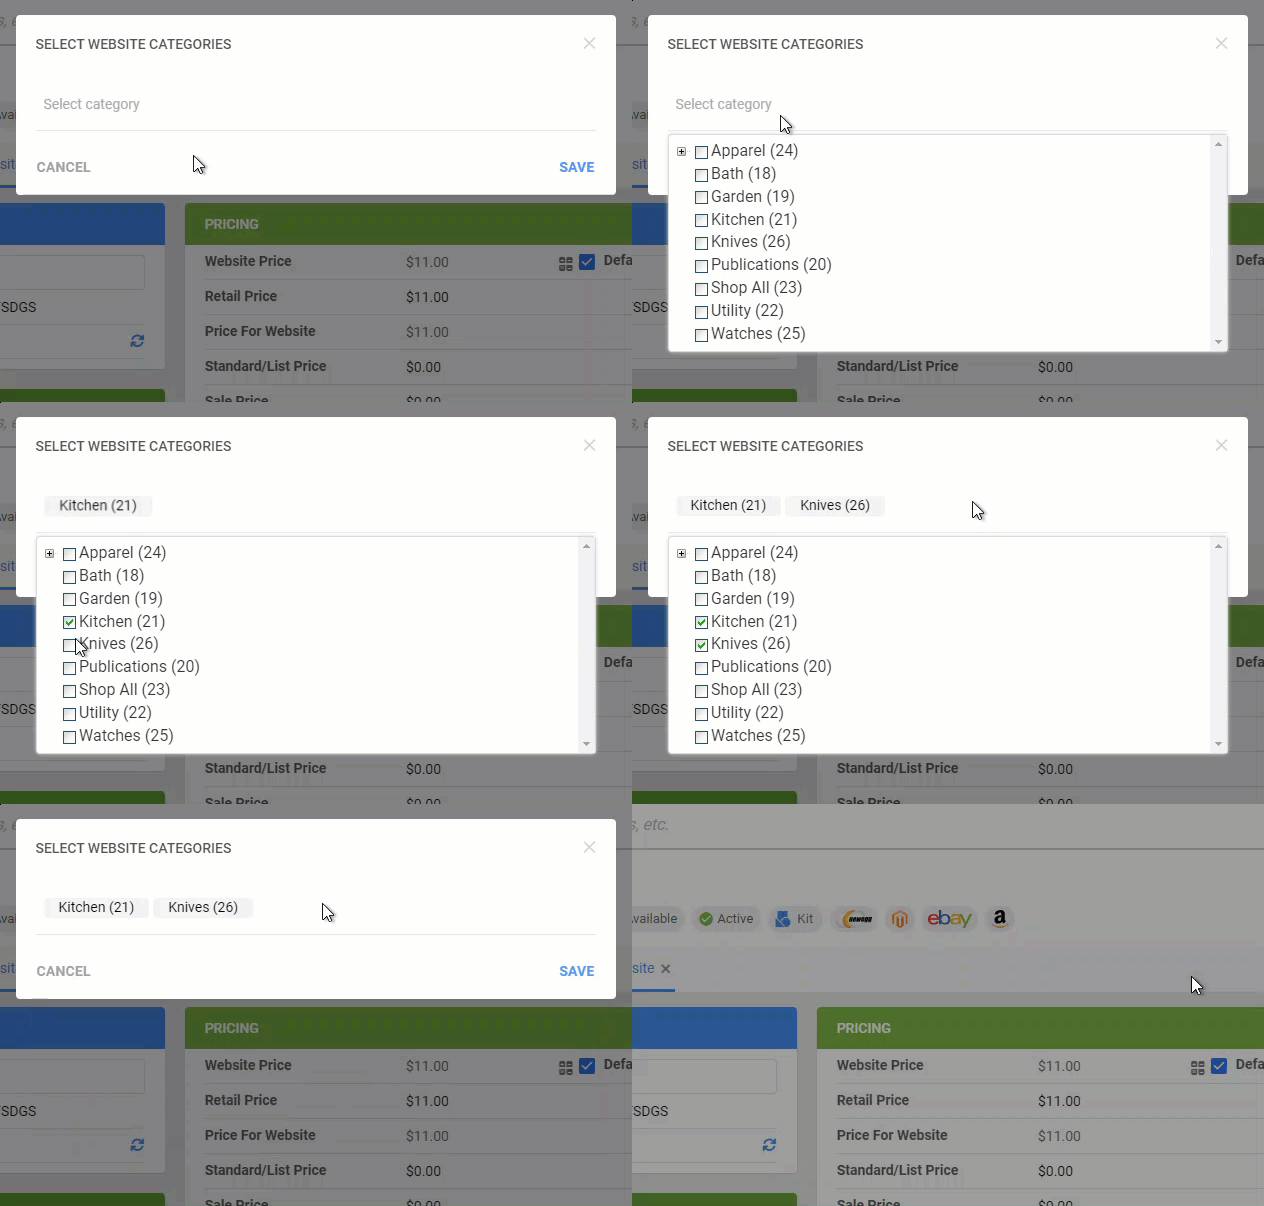
- Click the Select Website Categories icon in the Listing Details section.

- Select categories and click Save.
To bulk update categories:
- Navigate to your Company Settings.
- Click Toolbox and select Website > Sellercloud Plug-In Website > Cart Categories.
- The BigCommerce plugin should be selected by default.
- Click the Export Categories icon.
- The file template will have five columns:
- PluginID
- CompanyID – The numerical code of the Selllercloud company associated with BigCommerce.
- CategoryID – This column contains the numerical code of the category.
- CategoryName – This column contains the name of the category.
- ParentID – The numerical code of the parent category. For example, if you have a category tree Accessories > Bags, then Accessories is the parent category, and Bags is the child category.

- Follow the steps to bulk update products using the column header Categories. Copy and paste the numerical code from the template’s CategoryID column into the Categories column on the bulk update file.
Variations
Synchronizing Variation Products correctly between Sellercloud and BigCommerce is crucial for inventory updates to work properly. You must have a matching setup on both platforms.
To ensure accurate inventory updates of Variation products from Sellercloud to BigCommerce:
- If the product already exists as a Variation on BigCommerce:
- First, create a matching Variation product in Sellercloud.
- Then, make sure to correctly map the Website Product ID and Website Product Variant ID of the Parent and each variation to exactly match the setup on BigCommerce. You can find these fields on the Product Website Properties Page or update them in bulk with a file import.
- If the product doesn’t exist on BigCommerce yet:
- In this case, you don’t need to create it on BigCommerce manually.
- First, create the product in Sellercloud as a Variation.
- Then post the Variation Parent product from Sellercloud to BigCommerce.
You can read our dedicated article for more information about Posting Variations to BigCommerce.
Post Products
Once your SKUs are Ready for BigCommerce, Follow the steps below to post them to your Website:
Post a Single Product
To post a single product:
- Open a product in Sellercloud.
- Click Toolbox and select Channels > Website Properties.
- Click Actions and select Post to Website.
Post Multiple Products
To post multiple products:
- Go to Catalog > Manage Catalog.
- Check the boxes to the left of products to select them.
- Click the Action icon on the bottom right and select Launch on Channel.
- Select Website and click Launch.
Update Products on BigCommerce
You can update the BigCommece listing information manually and automatically.
Manually
To manually update a single product:
- Go to Catalog > Manage Catalog > Open a product
- Navigate to the Toolbox > Website Properties > Actions menu > Choose one of the following actions:
- Update Inventory to Website.
- Update Price to Website.
- Update Listing Part to Website.
To manually update several products:
- Go to Catalog > Manage Catalog > Select your products > Action menu > Update Inventory on Channel.
- In the newly open window, select Website > Select the products > Update.
Automatically
The automatic BigCommerce inventory and price update is controlled by company settings. When enabled, Sellercloud will periodically send updates.
- Go to Settings > Companies > Manage Companies > Select a Company.
- Open Website General Settings > Edit > Check Enable Inventory Upload and Enable Price Upload.
- Click Save.
Use Custom Fields on BigCommerce
You can enter custom fields in Sellercloud and have them appear on your BigCommerce website. To set up custom fields:
- Navigate to your Company Settings.
- Click Toolbox and select Website > Sellercloud Plug-In Website > Cart General.
- Check the Enable Custom Column Update For Products box.
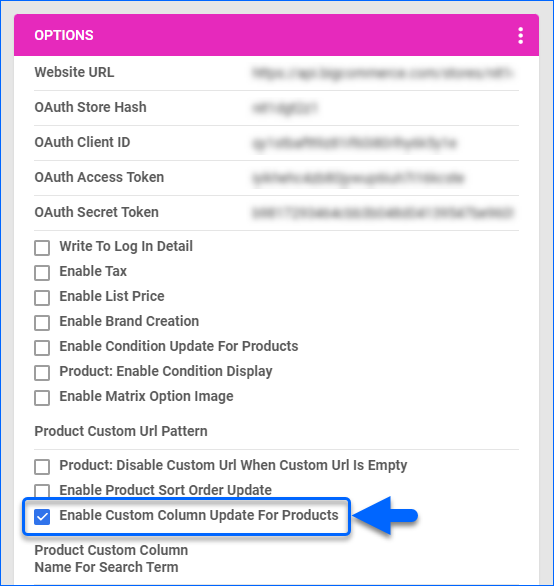
- Create Custom Columns on your server to match the fields on your BigCommerce website.
- Go to Settings > Products > Custom Columns and check the Send to Website box next to each custom column.
Product Availability
Setting a product’s Availability for BigCommerce allows you to control if a product is available for purchase to customers. You can allow purchases, take pre-orders, or disable purchasing altogether. Learn more about this and related features on the BigCommerce Help Center.
Your products’ availability for BigCommerce needs to first be configured on the Company Settings > Website > Sellercloud Plug-In Website > Cart General page.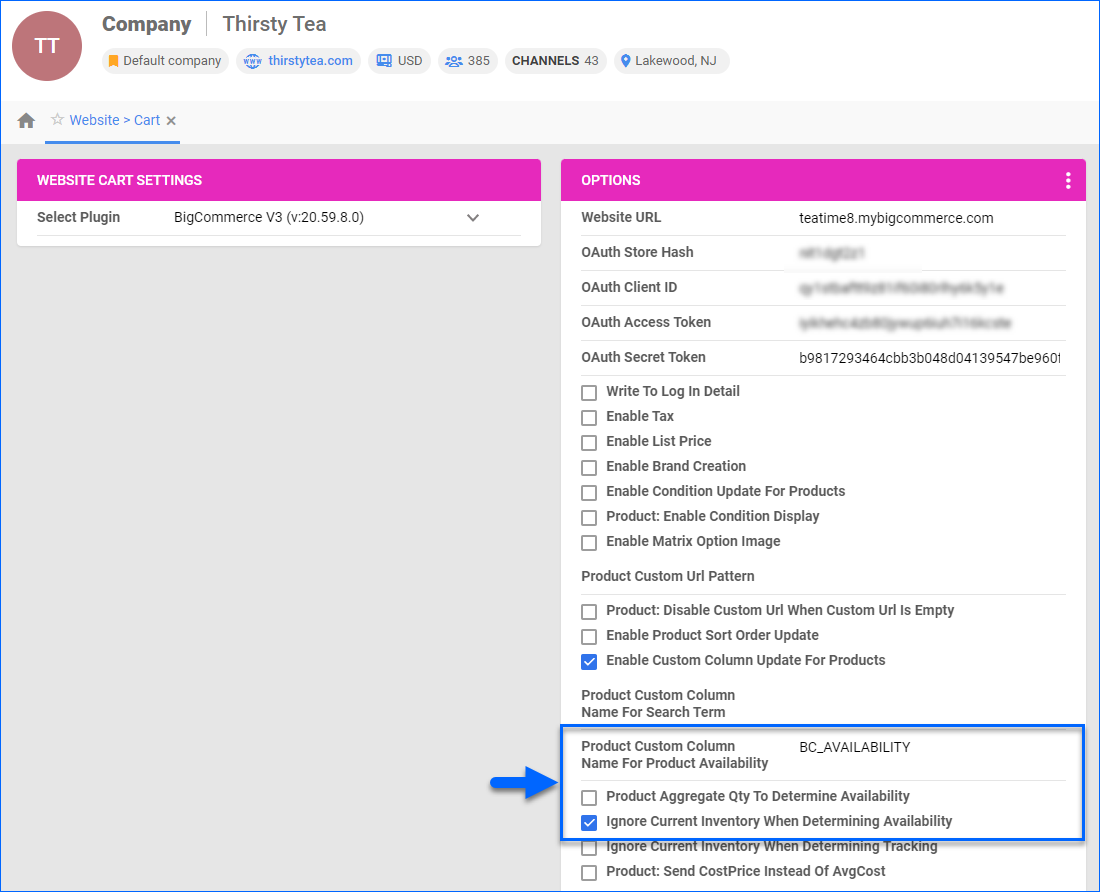 There are three settings that control Product Availability:
- Product Aggregate Qty To Determine Availability
- When enabled, the product available quantity will determine what purchasability status will be sent to BigCommerce.
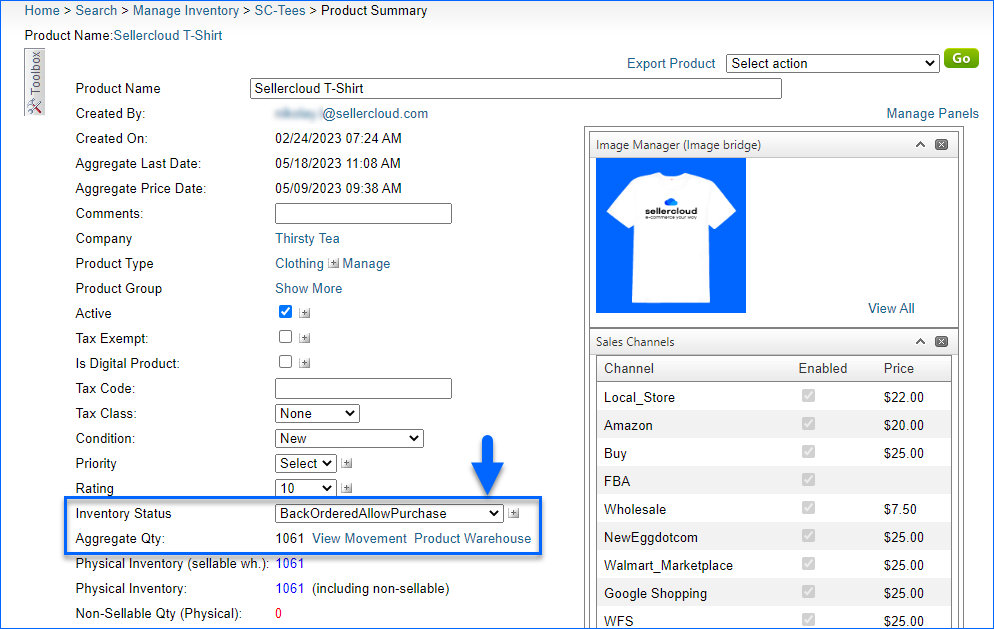
- When disabled, the current Inventory Status (field is only available in Sellercloud’s Alpha user interface) determines the availability. If the inventory Status is NotAvailable or BackOrderedDoNotAllowPurchase, or Disabled, Sellercloud will send the availability status DISABLED.
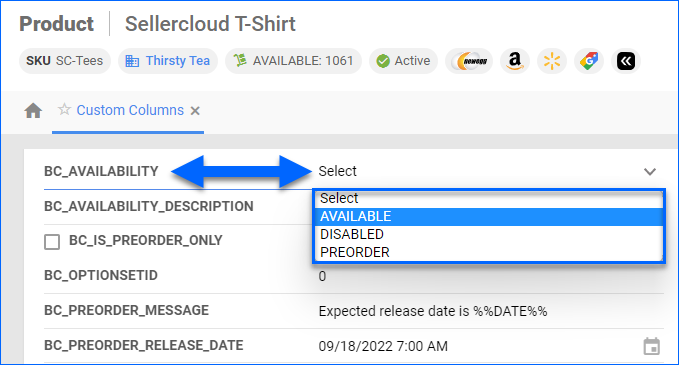
- Product Custom Column Name For Product Availability – here, you can select a Custom Product Column, which will determine the Availability status of your SKUs. We recommend selecting BC_AVAILABILITY.
- The column defined here will determine the Availability status sent to BigCommerce. Select AVAILABLE, DISABLED, or PREORDER on the product.
- This will not work if the Inventory Status of the product is Disabled.
- If the wrong column is selected here, or if there is no defined value, Sellercloud will apply the logic from the above point.
- Ignore Current Inventory When Determining Availability
- When enabled, Sellercloud will ignore the product’s Inventory Status altogether and always apply the selected value in BC_AVAILABILITY.
The Product Inventory Status mentioned in the above settings definitions is only available in the Alpha Interface. You can access it by clicking on the App-Switcher button at the top right corner of the screen and selecting Switch to original design. From there, go to Inventory > Manage Inventory > Search for and open an SKU.
Additional Product Settings
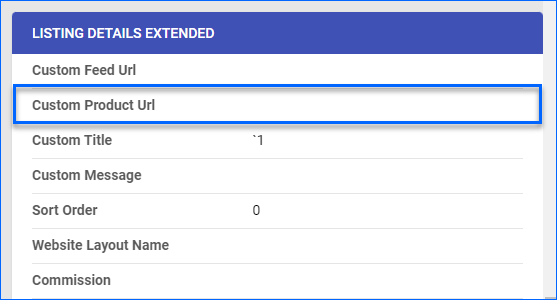
Products added under a BigCommerce company include the Custom Product URL field. This field sets the product’s BigCommerce URL. Sellercloud will use the ProductID (SKU) if this field is blank. Possible values include:
- SKU
- PRODUCT NAME
- SKU/PRODUCT NAME
- UPC
Example URLs: sitename.com/SKU, sitename.com/ProductName, sitename.com/UPC, etc.
To set the custom product URL:
- Go to a product’s details page.
- Click Toolbox and select Channels > Website Properties.
- Click Edit.
- In the Listing Details Extended section, enter an exact value into the Custom Product URL field – not simply the words SKU, PRODUCTNAME, etc., but rather the actual SKU, the product’s name, or UPC.
- Click Save.
