Overview
Sellercloud’s Cdiscount Account Integration lets you manage your Cdiscount orders directly from the Sellercloud interface. It lets you seamlessly download orders and update their fulfillment status.
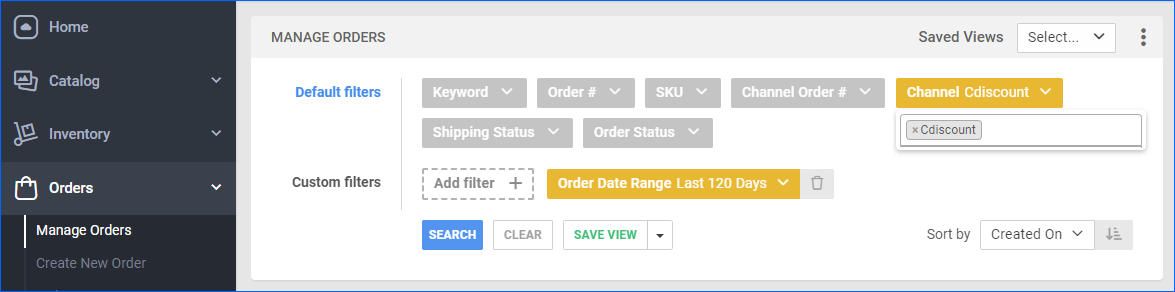
Cdiscount orders will be downloaded under the Cdiscount channel, and on the Manage Orders Page, you can find them by selecting Cdiscount from the Channel filter.
Download Orders and Upload Tracking
You can download Cdiscount orders to Sellercloud automatically or manually.
Automatically
To download Cdiscount orders and send tracking information automatically:
- Go to Company Settings.
- Click Toolbox and select Cdiscount > General Settings.
- Click Edit.
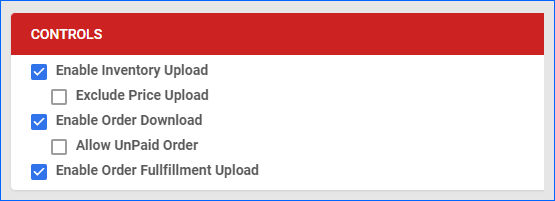
- Check Enable Order Download.
- Optionally, check Allow UnPaid Order to allow Sellercloud to download unpaid orders from Cdiscount.
- Check Enable Order Fullfillment Upload.
- Click Save.
Manually
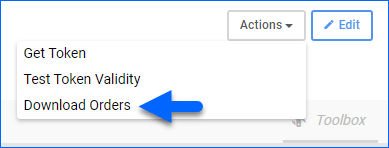
To download Cdiscount orders manually:
- Go to Company Settings.
- Click Toolbox and select Cdiscount > General Settings.
- Click Actions and select Download Orders.
Manage Cdiscount Orders
You can only cancel a Cdiscount order before it is marked Ship Confirmed. If it is already Ship Confirmed, you must issue a refund. If the item is being returned to your warehouse, use the RMA process instead.
Cancel Cdiscount Orders
To cancel a Cdiscount order internally:
- Go to the Order Details Page.
- Click Actions.
- Select Set Cancelled Internally.

Refund Cdiscount Orders
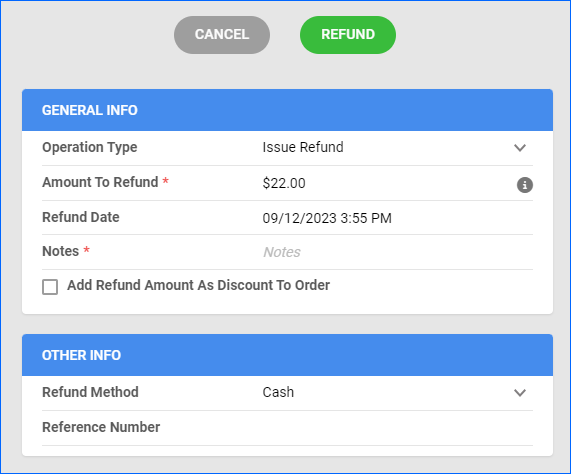
Cdiscount order refunds can’t be issued from Sellercloud. You can issue a refund internally to maintain accurate Order Profit & Loss records.
To issue an internal refund:
- Go to an Order Details Page.
- Click Actions and select Issue Refund. The option will appear after a payment has been applied to an order.
- In the Operation Type field, select the payment method applied.
- In the Amount To Refund field, enter the total amount. This defaults to the total paid amount.
- Select the Refund Date when the operation will be logged. This defaults to the current date.
- In the Notes field, briefly explain why the payment is being refunded.
- Optionally, select the Refund Method and enter a Reference Number.
- Click the Refund button.
Configure PDF Invoices
You can configure invoices for your BigCommerce orders. PDF Invoices contain information about your orders and the products they include. You can print invoices with any specific requirements if needed. You can also select between Standard Invoice, Channel Specific, Word to PDF, or a plugin.
- Go to Company Settings.
- Click Toolbox and select Invoice Settings.
- Click Per channel preferences.
- Find Cdiscount in the list and select your preference.
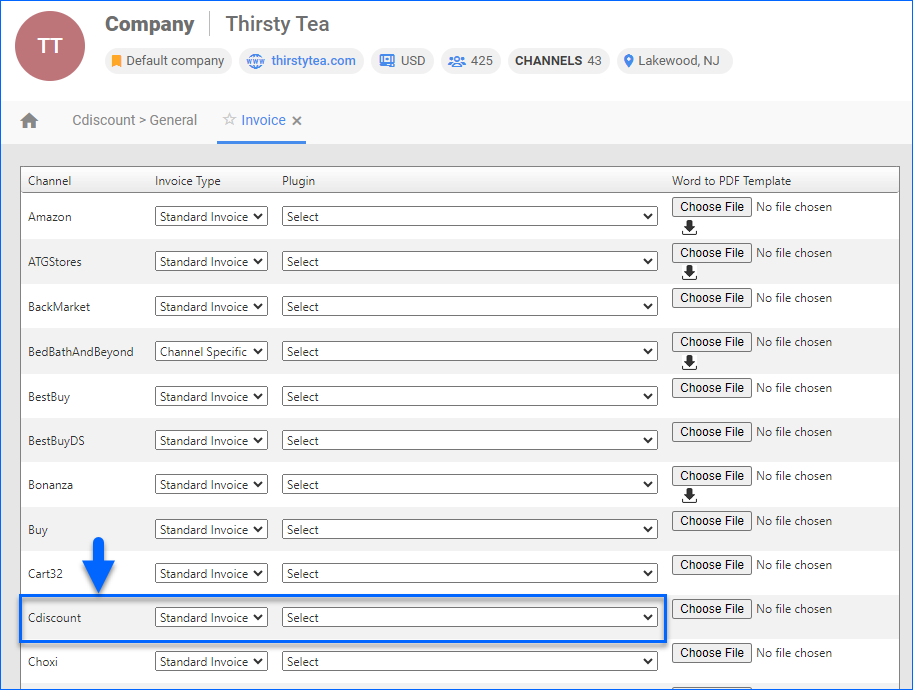
- Click Save.