Overview
Faire is an online wholesale marketplace connecting retailers with independent brands and artisans. It allows retailers to discover and purchase unique products from a variety of categories, including home decor, fashion, beauty, and more. Retailers can order online and get flexible payment terms and free returns.
Integrating Faire into your Sellercloud account allows you to seamlessly import orders, upload tracking information, and ensure your Faire store is always up-to-date with the latest inventory data. The integration works through API, transmitting information between the two services via plugins and Scheduled Tasks.
If necessary, you can open a ticket with Sellercloud Support to request additional customizations or other plugins for this integration. Any such modifications will be billable.
Prerequisites
Before you can integrate Faire with Sellercloud, you must complete the following requirements.
- A dedicated Company.
- Custom Company Settings.
- Saved Views to target specific products and orders.
- Scheduled Tasks to run the plugins automatically.
Once configured, you can manage all integrations created through the wizard on the Manage Plugin Channels page. The workflow outlined below describes the manual configuration process, which does not create a plugin channel on the Manage Plugin Channels page.
Faire Support
To integrate with Faire, you must obtain your unique API key:
- Register Sellercloud as an application in the Faire Development Portal.
- After completing the registration, you will receive a unique alphanumeric App ID, which must be emailed to [email protected] along with your request for an API key.
See Managing Integrations on Faire for more information.
Sellercloud Support
Open a ticket with Sellercloud Support and request that the following plugins be installed on your server:
- Faire API Order Import Plugin – Imports orders from Faire to Sellercloud.
- Faire API Order Tracking Export – Exports tracking information from Sellercloud to Faire.
- Faire API – Product Inventory Export Plugin – Exports inventory information from Sellercloud to Faire.
Custom Company Settings
Create the following Custom Company Settings on the company created for the integration:
- FaireAPIKey – Enter your API key to connect Sellercloud to Faire.
- (Optional) FaireAPIUseTestAPI – Set to True to enable the sandbox API or False for production. The default is False.
Changing this setting requires updating the FaireAPIKey, as sandbox and production services require different keys.
- (Optional) SetFaireOrdersOnHold – Set Faire orders On Hold when importing them to Sellercloud. Enter True or False. The default is False.
- (Optional) FaireAPIShippingCostPaddingPercent – Add a percentage increase to the Shipping Cost when sending tracking to Faire. The setting defaults to 0. Enter a whole number.
Custom Product Columns
Create the following Custom Product Columns:
- FaireMerchantSKU – The product’s Faire SKU. By default, Sellercloud matches products using this column, and if this fails, it matches by Sellercloud SKU. Set the Data Type to String.
- FaireSafetyQty – Apply Safety Quantities to products on Faire. The default is 0. Set the Data Type to Integer.
- (Optional) Faire_Enabled – Enable only specific products for Faire. Set to True for any products you want to send with the Inventory Export plugin. Set the Data Type to Boolean.
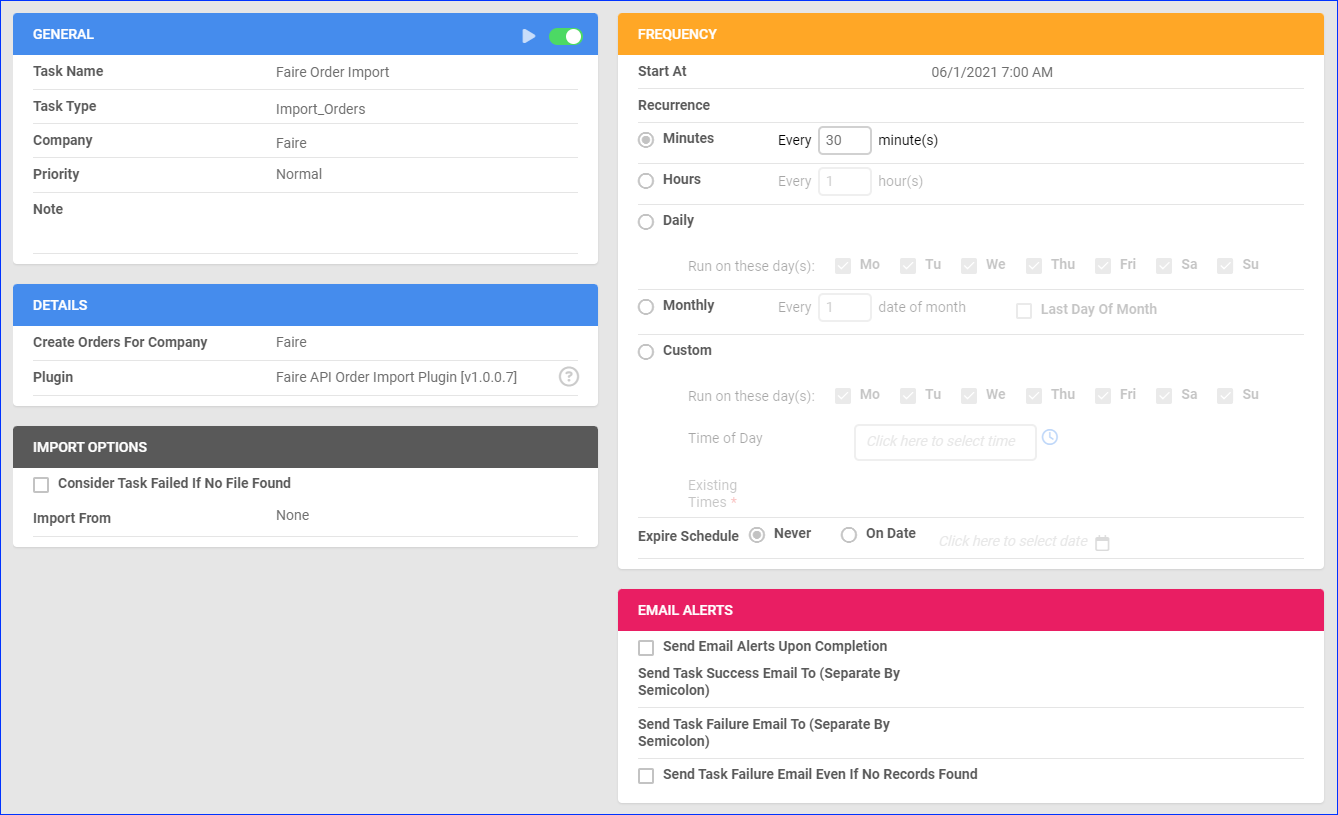
Order Import
The Faire API Order Import Plugin imports orders from Faire to Sellercloud.
Automate Order Import
To create a Scheduled Task that imports orders:
- Navigate to Settings > Scheduled Tasks > Manage Scheduled Tasks.
- Click the green + icon: Create New Scheduled Task.
- Complete as follows:
- Click Task Type and select Import Orders.
- Set the Task Name.
- Select the Company.
- Select the Start Time.
- Click Create, and the new Scheduled Task page will load on your screen.
- Click the Edit button at the top right corner.
- In the Details panel:
- Click Create Orders For Company and select the company designated for this integration.
- Click the Plugin menu and select Faire API Order Import Plugin.
- In the Import Options panel, set Import From to None.
- In the Frequency panel, specify the task frequency. For optimal performance, select a range between thirty minutes and one hour.
- In the General panel, click the Enable toggle button.
- Click Save.
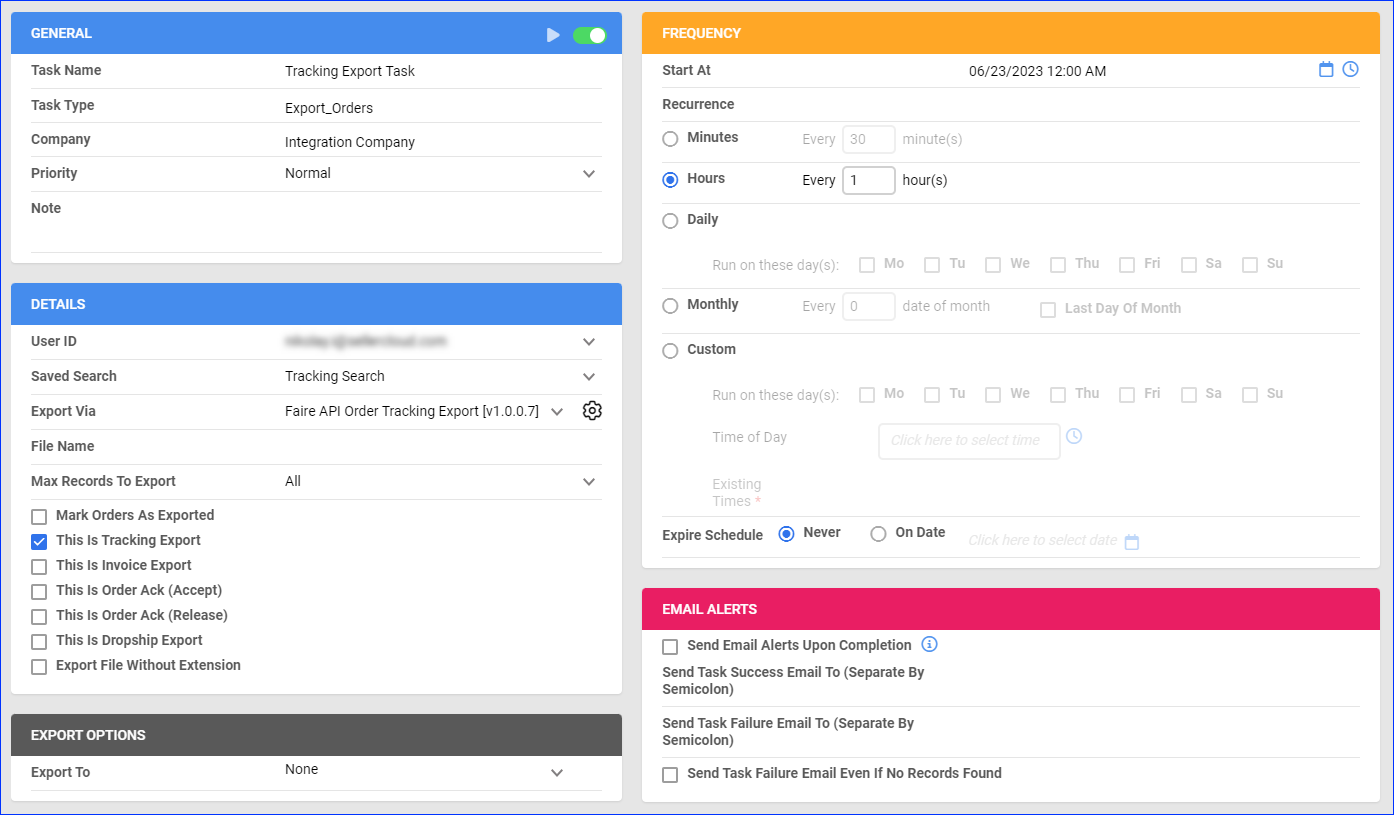
Tracking Export
The Faire API Order Tracking Export plugin sends tracking from Sellercloud to Faire.
Before you proceed, create a Saved Search for orders filtered by:
- Company – The company you created for the integration
- Order Status – InProcess Or Completed
- Shipping Status – FullyShipped
- Payment Status – Charged
- Tracking Uploaded – No
![]()
Automate Tracking Export
To create a Scheduled Task that exports order tracking:
- Navigate to Settings > Scheduled Tasks > Manage Scheduled Tasks.
- Click the green + icon: Create New Scheduled Task.
- Complete as follows:
- Click Task Type and select Export Orders.
- Set the Task Name.
- Select the Company.
- Select the Start Time.
- Click Create, and the new Scheduled Task page will load on your screen.
- Click the Edit button at the top right corner.
- In the Details panel:
- Click the User ID menu and select your ID.
- Click the Saved Search menu and select the saved search you created earlier.
- Click the Export Via menu and select Faire API Order Tracking Export.
- Check This Is Tracking Export.
- In the Export Options panel, set Export To to None.
- In the Frequency panel, specify the task frequency. For optimal performance, select a range between thirty minutes and one hour.
- In the General panel, click the Enable toggle button.
- Click Save.
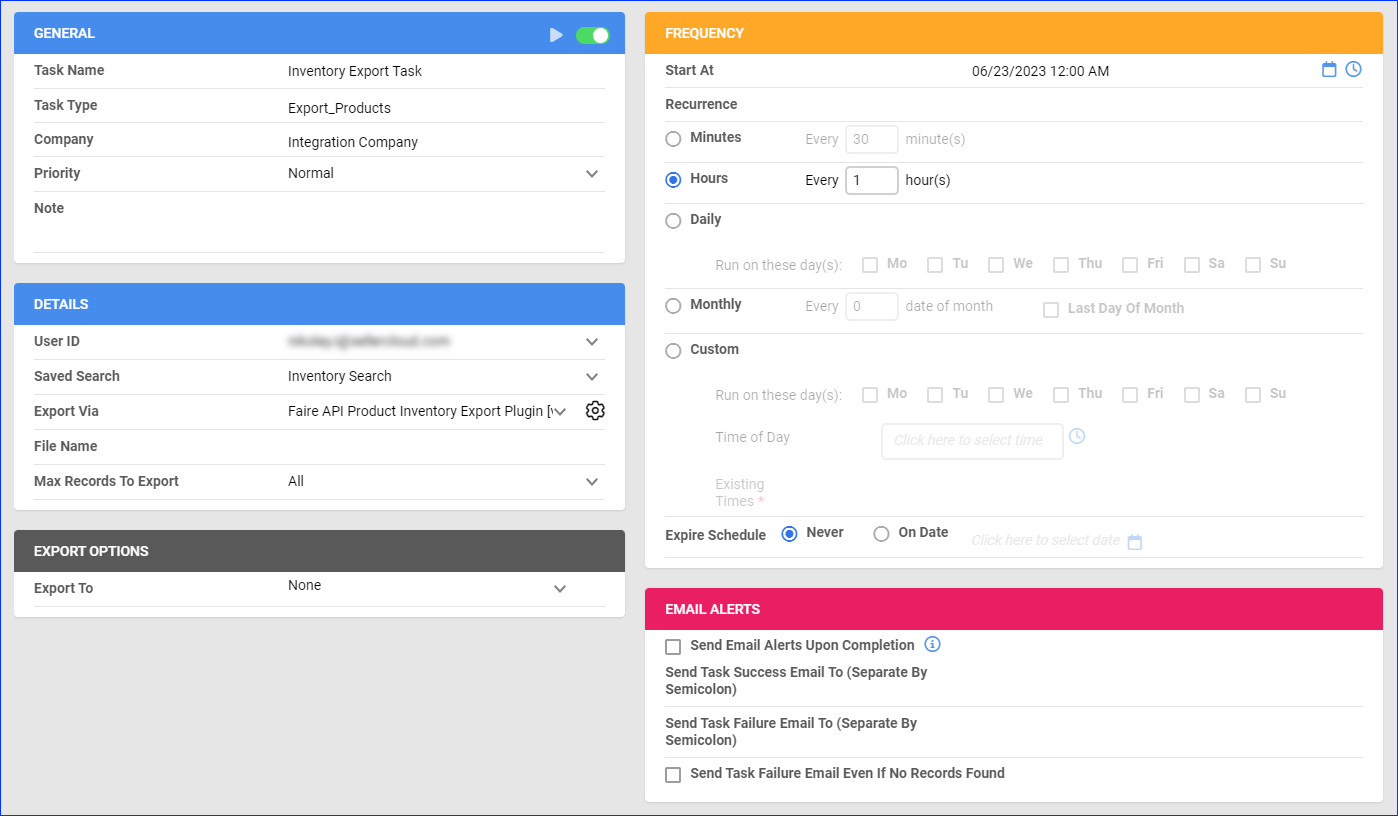
Inventory Export
The Faire API – Product Inventory Export Plugin sends your Sellercloud inventory quantities to Faire.
By default, Sellercloud matches products using the Custom Product Column FaireMerchantSKU, and if this fails, it matches by Sellercloud SKU.
Optionally, you can enable only specific products for Faire by setting their Faire_Enabled Custom Product Column to True:
- For one product at a time: go to the Product Details Page > click Toolbox and select Custom Columns > click Edit, update the Faire_Enabled column, and Save.
- For multiple products in bulk: follow the steps to Bulk Update Products and use the Faire_Enabled column – set it to True for all products you want to enable.

Unlike core integrations, plugin integrations don’t require products to be in the company with the scheduled tasks. The export will include the products you select with your Saved Search.
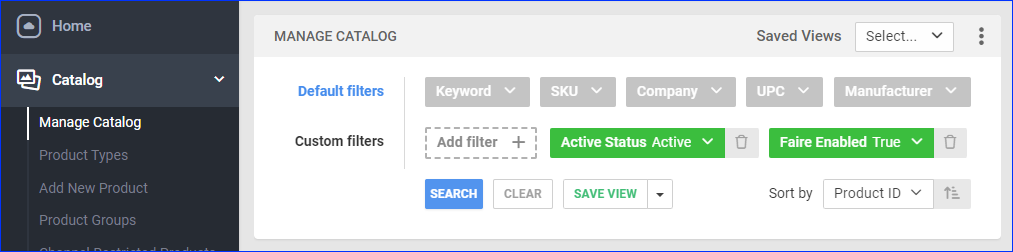
Next, create a Saved Search for products filtered by Faire_Enabled – True. Optionally, you can add more filters to the search to narrow down the export further.
Automate Inventory Export
To create a Scheduled Task that exports inventory:
- Navigate to Settings > Scheduled Tasks > Manage Scheduled Tasks.
- Click the green + icon: Create New Scheduled Task.
- Complete as follows:
- Click Task Type and select Export Products.
- Set the Task Name.
- Select the Company.
- Select the Start Time.
- Click Create, and the new Scheduled Task page will load on your screen.
- Click the Edit button at the top right corner.
- In the Details panel:
- Click the User ID menu and select your ID.
- Click the Saved Search menu and select the saved search you created earlier.
- Click the Export Via menu and select Faire API Product Inventory Export Plugin.
- In the Export Options panel, set Export To to None.
- In the Frequency panel, specify the task frequency. For optimal performance, select a range between thirty minutes and one hour.
- In the General panel, click the Enable toggle button.
- Click Save.