Overview
Flashpricer is an AI-powered solution that helps businesses automate and optimize their pricing decisions based on real-time data. It uses advanced algorithms to analyze market conditions, competition, and customer behavior to automatically adjust prices on Amazon and Walmart Marketplace.
The integration between Sellercloud and Flashpricer works via Export Mapping Profiles, Scheduled Tasks, and SFTP.
Prerequisites
For this integration, you must:
- Have an active account with Flashpricer.
- Open a ticket with Sellercloud Support to request an SFTP.
Next, create a Product Export Mapping Profile and a Saved View that will be set on a Scheduled Task.
Create Mapping Profiles
Create a profile using the Export Mapping Tool. Contact Flashpricer to obtain the template for the export.
- Navigate to Settings > Mapping Tools > Manage Export Mapping Profiles.
- Click the blue Actions icon in the bottom right corner > Create.
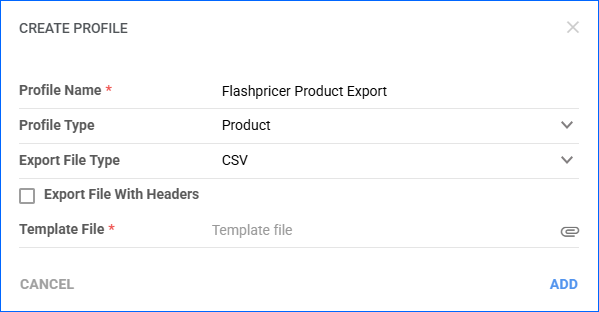
- On the creation wizard pop-up, fill in the required fields:
- Profile Name – for example, Flashpricer Product Export.
- Profile type – set it to Product
- Export File Type – set to CSV.
- Click Template File. Find and select the template from your device.
- Click Add.
Map Product Export Profile Fields
Sellecloud automatically sends regular product and cost feeds to Flashpricers through this profile.
- Navigate to Settings > Mapping Tools > Manage Export Mapping Profiles.
- Open the Flashpricer Product Export Profile.
- Click Edit.
- Map the following fields:
- SKU – map it to bvc_Product.ID.
- Cost – map it to bvc_Product.AverageCost.

Product Cost Export
To ensure seamless integration, you must automate the data transfer by creating a Scheduled Task.
This task type requires a Saved View with the following custom filters: Walmart Marketplace Statuses and/or Amazon Statuses, depending on which channels you your products are listed on.
Automate Product Export
To create the scheduled task that regularly exports product costs to Flashpricer:
- Navigate to Settings > Scheduled Tasks > Manage Scheduled Tasks.
- Click on the green + icon to create a new Scheduled Task.
- In the creation wizard pop-up, fill in:
- Company
- Task Type – set to Export Products.
- Task Name – for example, Flashpricer Product Export.
- Start Date – this is the date when the task will run automatically for the first time. However, If you enable the task at a later day, this date will be ignored.
- Click Create.

Next, go to the Scheduled Task to finish the configuration, and click Edit.
- In the Frequency Panel, you can set the task start time and recurrence.

- In the Details Panel:
- User ID – Select your username.
- Saved Search – Select the Product Saved View you created.
- Export Via – select Export Mapping Profile: Flashpricer Product Export.
- File Name – enter a file name. It must end with .csv

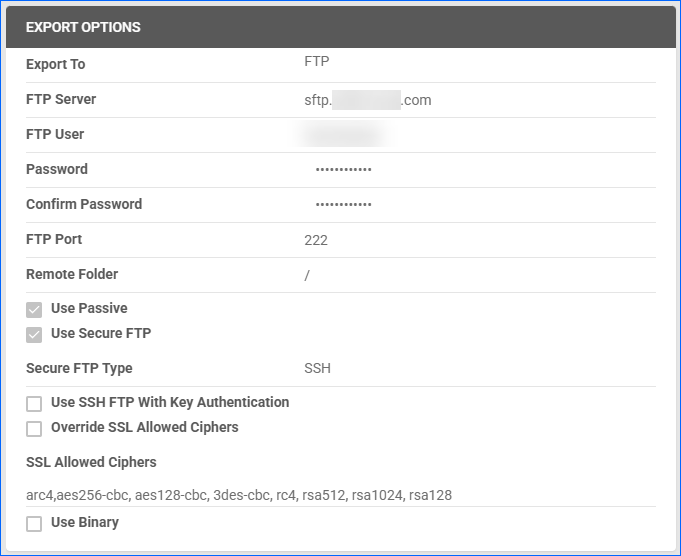
- In the Export Options Panel:
- Export to: Select FTP.
- Fill in the FTP credentials.
- Check Use Passive and Use Secure FTP.
- Select Secure FTP Type: SSH.
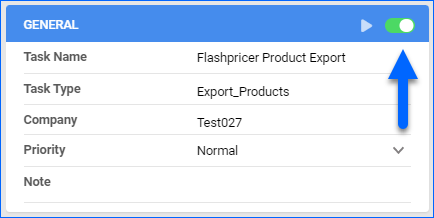
- In the General panel, click the toggle button to enable the task.
- Click Save.