Overview
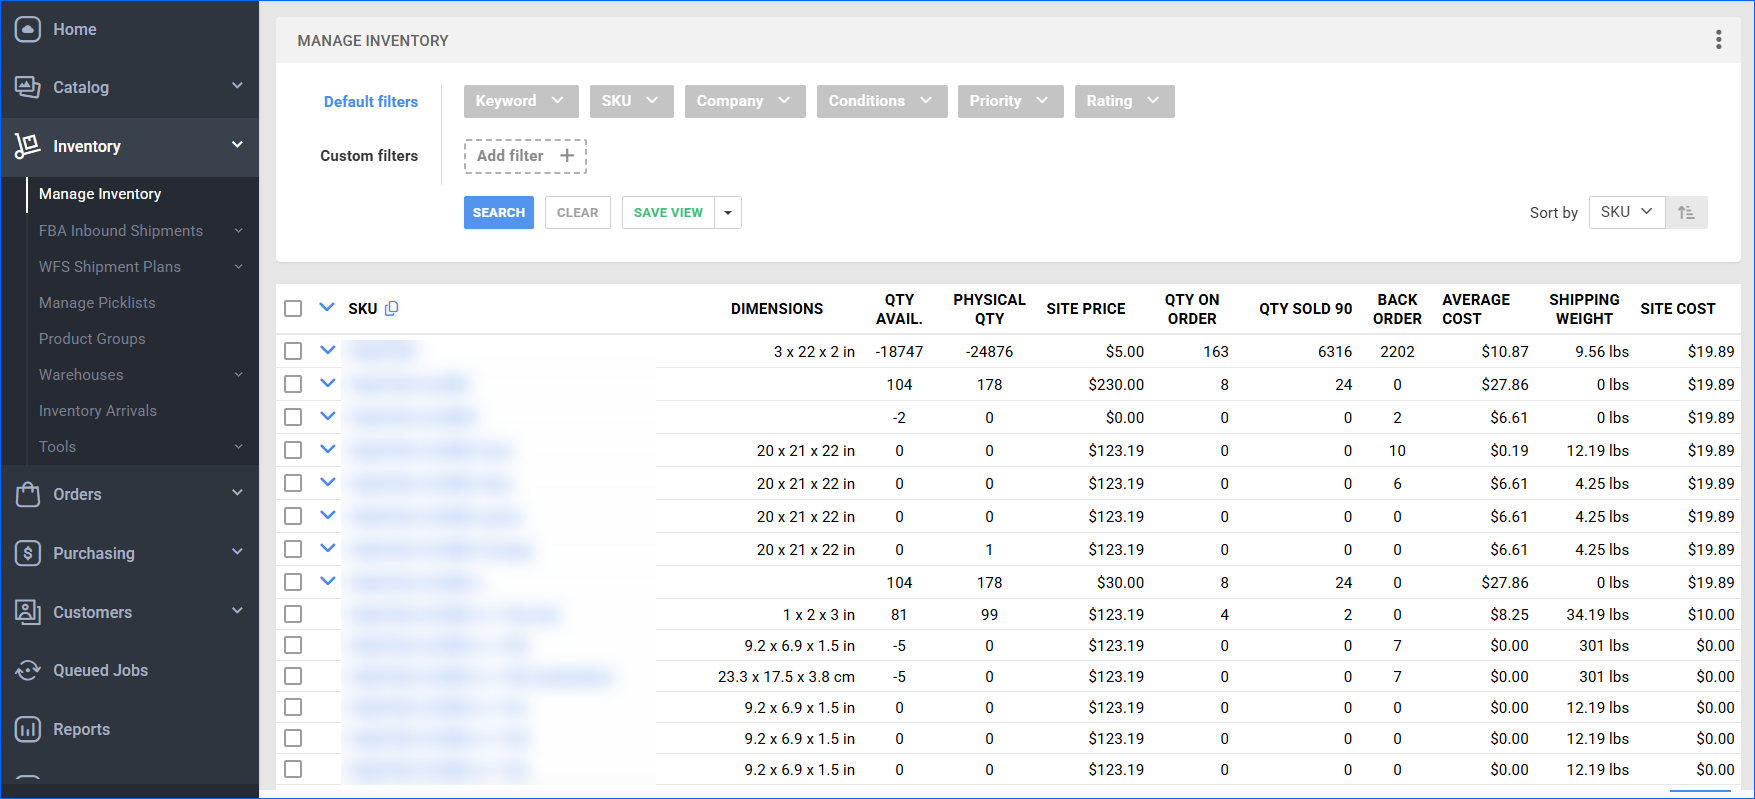
Welcome to your Manage Inventory page. The Manage Inventory page is a snapshot of all the products you currently have in your inventory. While seemingly similar to the Manage Catalog page, Manage Inventory focuses on inventory functions versus product properties and characteristics.
The grid features each product in your inventory organized in any way you choose. Similar to other features in Sellercloud, you can create custom columns to organize your inventory in a way that best suits your business needs. This way, the information you seek is always easily available.
Navigate the Manage Inventory page
Let’s explore some of the functions and features you will find on the Manage Inventory Page. To access, click Inventory > Manage Inventory.
You’ll see all your inventory listed in the grid. By clicking on the SKU, you can manually edit the inventory or related inventory functions of that product from the product’s details page. Clicking the blue arrow reveals a second level of columns. These are also able to be customized depending on your needs.
Search for Inventory
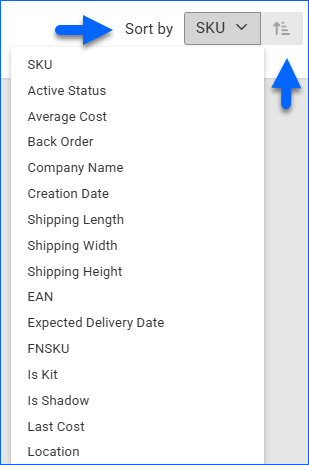
You can fully customize how you search for inventory on your Manage Inventory page. You can create filters, and columns, or choose how your information is sorted from top to bottom. Select Sort By and a dropdown will reveal various options to select. You can also choose how this information is sorted from top to bottom.
If you’re looking for a specific inventory item, you can use filters to narrow down your search. There are both default and custom filters to assist you in your search. To use the filters, click on one to reveal a dropdown search. Enter the associated Keyword, SKU, Company, etc. > Search. The grid will reflect these filters so you can find what you’re looking for.
These filters will be gray when not in use. Once you type in the dropdown and select your desired search, the box will turn yellow. After you’ve input your filters, clicking Search turns the boxes green to indicate they are in use.
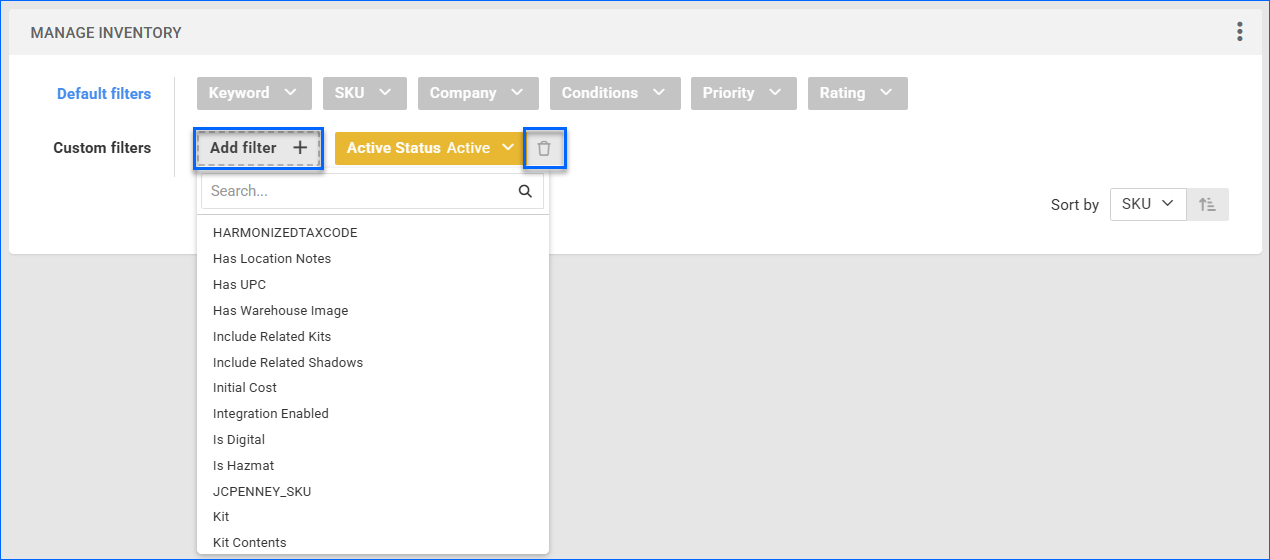
If these filters don’t produce the inventory item you’re searching for, try using Custom Filters. Clicking Add Filter reveals a dropdown of filter options. You can scroll or search to find your desired filter.
Clicking the filters adds them to your Custom Filters. Similar to the default filters, filters not in use will be gray, those with searches are yellow, and once you click Search they will be green. To delete any filters, click the trash icon.
Tip: To search by SKU list, use the SKU filter > Input and select multiple SKUs. If you have a spreadsheet with SKUs, you can copy and paste them into the SKU filter search engine.
Customize Columns
It’s easy to customize the columns in both Levels one and two of your Manage Inventory grid. Click the vertical ellipses > Customize Columns. You will see the option to control both columns for levels one and two. The trash icon deletes that column. To organize the order of the columns, simply drag and drop. To add a column, click Add Column.
This reveals a dropdown. Clicking the column adds it to your list. Once you’ve customized your columns, select Apply.
You can create multiple views for finding specific inventory with different custom columns. To do this, simply click Save View > Save view as > name it > Save. Next to the vertical ellipses will be a Saved Views dropdown. You can use this to switch between multiple saved views.
Action Menu
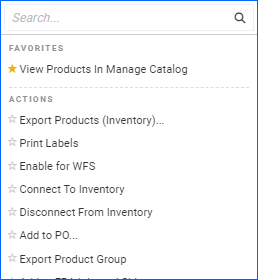
Select single or multiple inventory items to reveal a blue Action icon in the bottom right corner of the inventory grid. These functions are also available on each inventory item’s Product Details page. However, the Action menu allows you to use these functions for multiple inventory items without needing to jump back and forth between them. You can even display the same items directly into your Catalog with the Action View Products in Manage Catalog.
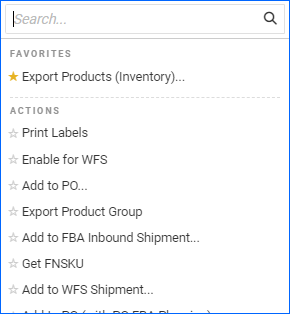
Click the Action icon to open a dropdown menu with various inventory function options. Use the search engine to find a desired function or scroll. To use a function, simply click it.
Export Product Inventory Information
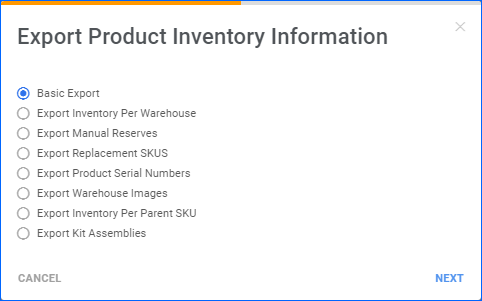
Sellercloud allows you to download various types of Inventory Exports:
- Select the desired inventory items > Open the Actions menu > Choose Export Products (Inventory)…
- Determine the desired Inventory Export type and click Next.
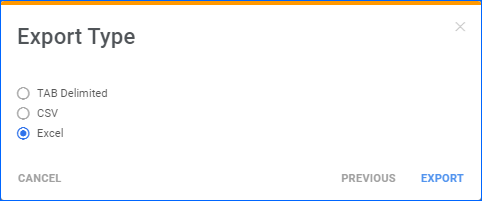
- Choose the needed file format – TAB determined, CSV, or Excel.
- Click Export. A Queued job will be created and can be reviewed on your Manage Queued Job page.
Overview
Welcome to your Manage Inventory page. The Manage Inventory page is a snapshot of all the products you currently have in your inventory.
The grid features each product in your inventory organized in any way you choose. Similar to other features in Sellercloud, you can create custom columns to organize your inventory in a way that best suits your business needs. This way, the information you seek is always easily available.
Manage Inventory Page
Let’s explore some of the functions and features you will find on the Manage Inventory Page. Here you have the flexibility to tailor the columns that are displayed according to your preferences by adjusting your Client Settings. Moreover, you can perform various actions on multiple items simultaneously. To do this, simply choose your desired product/s from the grid, open the Select Action menu, locate the action you want to perform and click GO.
Icons
Channels that are enabled in their settings pages will display as icons in the row. Clicking on the icon will open the properties page of that channel. Hovering over the icon will display listing information about the product.
- If the product is live on the channel, the icon will display in full color. The Amazon icon will display in black. For many channels, there will also be another icon link to the listing.
- If the product is not enabled or live, the icon will be grayed out. The Amazon icon will display in red when not enabled, and grayed out when enabled but not in active listings.
- Matrix, Shadow, and Kits relationships will display as icons on the right of the grid.
Color Coding
- If an item is disabled, the back color will be LightGray.
- If an item is discontinued, the back color will be Pink.
Search and View Inventory
View inventory by clicking the Inventory tab, and either click the Search button to show all inventory or use filters to obtain your search results.
Use the Advanced Search tab to search by numerous other variables.
To search multiple SKUs in bulk, follow these instructions.
Using wildcards
You can use a wildcard when you want to search for specific symbols that are placed anywhere in the ProductID (SKU):
- Enable the wildcard checkbox
- To search for SKUs with a set of characters anywhere in the SKU, put percent signs before and after; e.g., searching % will show “AB-123” and “12AB3” and “123-AB”
- To search for SKUs that start with specific characters, put a percent sign after; e.g., AB%- will show only “AB-123”
- To search for SKUs ending in specific characters, put the percent sign before, e.g., will show only “123-AB”
- In general, use % as placeholders for unknown characters, like AB%H% to search SKUs with the prefix AB and H anywhere in the SKU
Other search options
You can also choose to search by UPC or VendorSKU in bulk by following the directions above: Just choose the correct search type from the Search Using dropdown under the multi-line textbox.
Save an inventory search for future use by selecting Save Search from the Action menu after selecting filters or after selecting and searching.
Search by SKU List
On the Manage Inventory, you can search your product catalog by a list of multiple SKUs to bring up the exact list of items you would like to see. Follow these instructions to search for a list of SKUs.
- Navigate to the Manage Inventory page to search for your products.
- In the search filters, the filter “SKU” is a blue link. Click on this link, which will open a pop-up window.
- From the new window, click the link “Show/Hide textbox to paste the SKU list”. In this box, you can paste your SKUs and click Search SKUs. Be advised that while this text box may accept more than 1000 SKUs, it will only allow you to select the first 1000.
- A grid will appear showing all results. If any SKUs entered are not found, they will appear on the right of the text box. If searching for more than 25 SKUs, you will see a “Page Size” dropdown. You should adjust this to a value equal or higher than the number of records found for your search.
- Once you select a large enough value in Page Size, your page will refresh and this dropdown will disappear. You should then select the checkbox on the top left of the grid, which will allow you to select all the items on this page. You should not use the checkbox on the top right. As it notes, this is for exporting your list only (which can be done from the action menu). This checkbox will not select all your SKUs on all pages to search.
- Scroll to the bottom of the window and click Select. The window will close, and you can click Search to search the selected list of items.
Bulk-Import Shipping Preferences
You can save time by bulk-importing your shipping preferences for the quantity from the Manage Inventory page.
- Enable the client setting Enable Shipping Preferences for Qty.
- Go to the Manage Inventory Page > Select inventory.
- Go to the inventory Toolbox > Shipping Preferences > Preference for Qty.
- Download Template > Populate required fields > Save file.
- Go back to Preference for Qty > Click Choose File > Select correct file > Click Upload From File.
- Click Save Preferences.
- Optional: Skip steps 4-5 and manually input your preferences in the table below.