Overview
Product Inventory Reserves are a key factor in keeping accurate track of your inventory in Sellercloud, as well as preventing overselling. They are product quantities deducted from the aggregate inventory of your SKUs, while the items are still in your physical warehouse.
There are two types of inventory reserves in Sellercloud:
System-Generated Inventory Reserves, also referred to as Automatic Reserves, are generated by Sellercloud as a result of any process that involves shipping inventory out of a warehouse.
Manual Product Inventory Reserves – this is inventory that you can manually set aside for channels or customers. A manual reserve has a specified quantity and a custom active time period. Sellercloud will prioritize incoming orders’ inventory deductions from the reserved amount.
Automatic Inventory Reserves
Sellercloud generates Automatic Inventory Reserves for all planned inventory changes, where the movement is not instantaneous. Sales Orders are the most common example: whenever a paid order is created via a plugin, core integration, or manually, Sellercloud automatically deducts the ordered quantity from your Sellable Inventory while the physical quantity remains unchanged. This is done to ensure that we do not send the unshipped quantity to any sales channels. Order reserves are released when you ship the order or if you cancel, void, or delete the order, in which case the reserve is released back into the aggregate quantity.
The system creates system-generated reserves in several other cases:
- Pending Order Reserves – These are only available for Amazon, eBay, Magento, and Shopify. Pending order reserves are created when an order is authorized or charged on the sales channel before it is imported into Sellercloud.
- FBA Inbound Shipments – If you create FBA Inbound Shipments in Sellercloud to later export them to Amazon, the product quantities you add to the shipment will be reserved. This functionality is controlled by Client Settings.
- WFS Shipment Plans – Similar to FBA, adding products to a WFS Shipment Plan in Sellercloud can also reserve the planned quantities. Ensure the necessary Client Settings are enabled.
- Warehouse Inventory Transfers – This specific reserve type works by only temporarily changing the transferred quantity to unsellable. This ensures that inventory is not allocated to any orders or shipments while it is being moved. Once the transfer is completed, the inventory will become sellable again, but in the new warehouse.
- Credit Memos – Similar to sales orders, credit memos require you to ship inventory out of your warehouse. Adding products to this type of Purchase order will result in an automatic reserve.
Automated Inventory Reserves ensure dynamic updates to the available stock and, therefore, are crucial in preventing overselling. You can see all current reserves on the Inventory Movements page in the Product Details toolbox. This type of inventory reserve happens automatically for all paid and authorized orders. All reserves are held for 365 days, after which they are automatically released.
Unpaid Order Reserves
By default, if an order is Unpaid, inventory will not be reserved. However, there are a few exceptions to this rule:
- Wholesale Orders – If the Channel of a Sales Order is set to Wholesale, we will always reserve the inventory, regardless of the Payment Status.
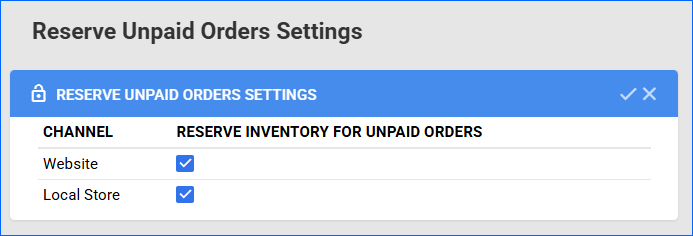
- Website (Shopify) and Local Store Orders – You can go to Settings > Orders > Reserve Unpaid Orders Settings and check the boxes for these two channels. This will ensure that if an order is created as Local Store or downloaded from Shopify as Unpaid, we will reserve the necessary quantities.
Manual Inventory Reserves
Manual Inventory Reserves are created specifically for a channel or a customer and have a pre-defined active time period. For the duration, the selected quantity is deducted from your overall sellable inventory. Once the designated time period concludes or the reserved quantity is depleted, the inventory reserve becomes inactive, and the quantity is returned to the overall inventory.
While the Reserve is active Sellercloud prioritizes its quantity for sales orders from the selected channel or to the specified customer.
If there already is an active Manual Inventory Reserve for a specific SKU, you can only create a new one if it differs by either Channel, Customer, or Warehouse. If the new reserve matches all conditions, you must instead edit or replace the one that is active.
Create Manual Inventory Reserves
With Sellercloud, you can create Individual and Bulk Inventory Reserves.
Individually
To reserve inventory of individual products:
- Navigate to Catalog > Manage Catalog and open your product.
- From the Toolbox, select Manual Reserves. From this page, you can also edit existing product reserves.
- Press Edit and then press the plus icon in the Manual Reserves panel.

- Complete the required fields and click Add.
- If you choose Channel for the Reserve Type, select the channel for which you are reserving. Orders coming in for that channel will first be deducted from the available reserve instead of the sellable inventory.
- If you chose Customer for the Reserve Type, enter the email of the customer for whom you are reserving the products. Orders for this customer will be deducted from the reserved quantity.
- Enter the product Quantity that you want to reserve.
- Choose the Warehouse from which the inventory should be reserved.
- Select Start and End Dates. When the duration is completed, the remaining reserved inventory will be released automatically.

In Bulk
You also have the option to create product reserves in bulk via a file import:
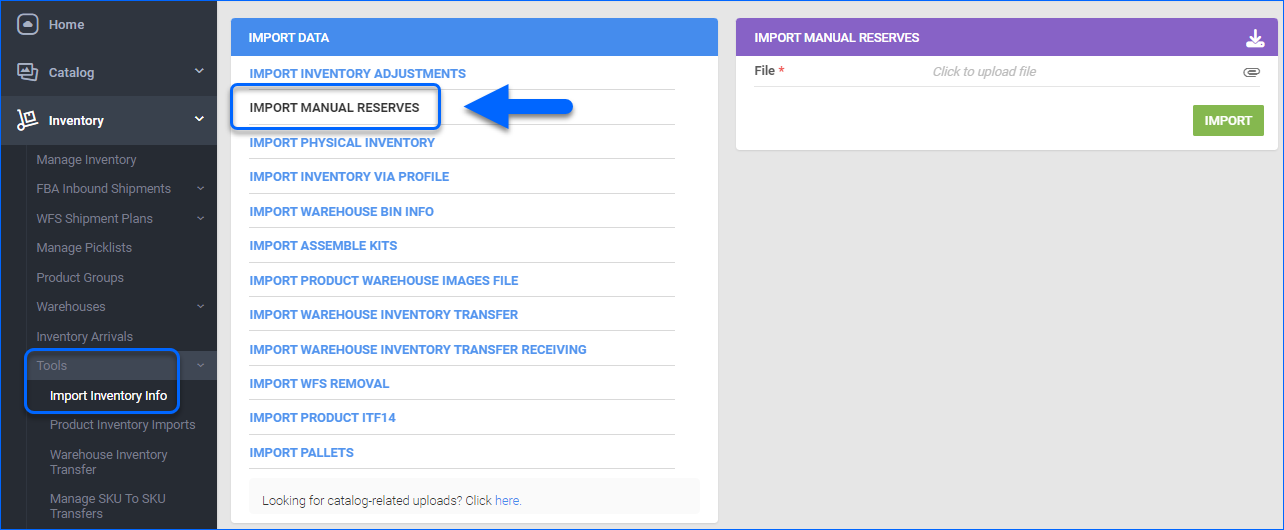
- Navigate to Inventory > Tools > Import Inventory Info and select Import Manual Reserves.
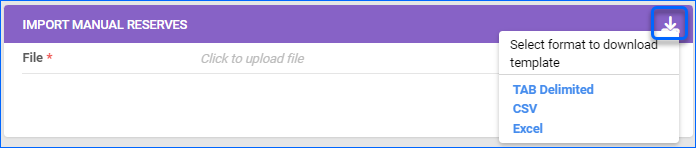
- Click on the Download icon and select the desired file format (either TAB Delimited, CSV, or Excel).
- Populate the template columns:
- ReserveID — Leave this field empty when creating a new reserve and the system will generate the new Reserve ID.
- ProductID (required) — The product for which you want to reserve inventory. Write the product ID in separate rows to create multiple reserve entries for the same SKU.
- WarehouseName (required) — The warehouse from which the inventory should be reserved.
- StartDate (required) — The date when the quantity will be put in reserve (MM/DD/YY).
- EndDate (required) — The date when the unused reserved quantity will return to the inventory (MM/DD/YY).
- ReserveType (required) — Enter 0 or Customer value for a customer reserve type and 1 or Channel for a channel reserve type. Based on this column, fill in either CustomerID (column G) or OrderSource (column H).
- CustomerID (required) — The customer for whom the reserved inventory is intended. Populate this field either with CustomerID or with the customer’s email address. Leave empty if the corresponding Reserve type is Channel.
- OrderSource (required) — The channel name for which you reserve the product. Leave empty if the corresponding Reserve type is Customer.
- Quantity (required) — The quantity amount to be reserved.
- _ACTION_ — Leave empty when creating a new reserve. If you want to delete an existing reserve, enter DELETE and a Reserve ID in the Reserve ID column.

- Navigate back to Import Manual Reserves, click on the File field to upload your template, and click Import.

A Queued job will be generated, from which you can monitor the status of the import. Once completed, the reserve will be created in Sellercloud.
Update Inventory Reserves
You can update existing Reserves individually from the Manual Reserves page, or in bulk via a file upload.
Individually
To update existing reserves from the product’s Manual Reserves page:
- Navigate to Catalog > Manage Catalog and select the needed product.
- From the Toolbox, choose Manual Reserves.

- Click on the Edit button and update the required field in the Manual Reserves panel:
- Channel – If the Reserve Type is Channel, use the dropdown menu to change the Channel.
- Warehouse – Select the warehouse from which the inventory should be reserved.
- Qty – Update the reserved inventory quantity.
- Start Date – The date when the quantity will be put in reserve.
- End Date – The date when the unused reserved quantity will return to the available inventory.
- Reserve Type – Select to reserve inventory for either Client or a Channel.
- Customer Name – If the Reserve Type is Client, enter the respective email address.

- Click the Delete icon on the far right next to a reserve to remove it. You can also delete multiple entries by selecting them and clicking the Delete icon in the panel’s top right corner.

In Bulk
You can also update one or several products’ reserves via a file import:
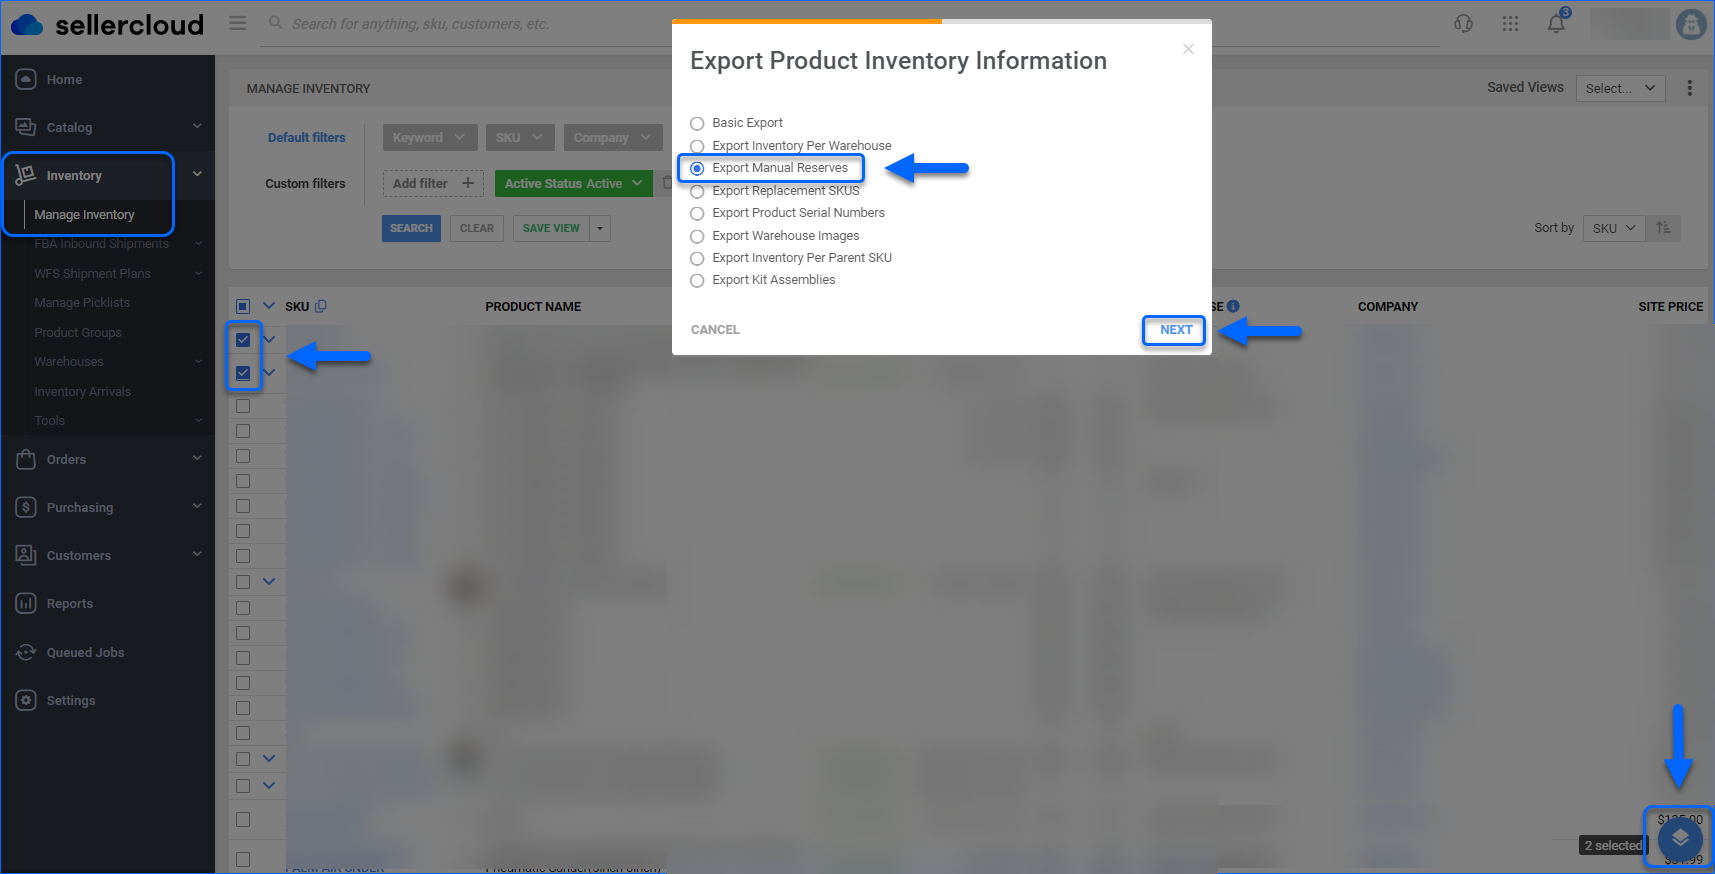
- Navigate to Inventory > Manage Inventory and select the desired products.
- Press the Action icon and select Export Products (Inventory).
- Check Export Manual Reserves and click Next.
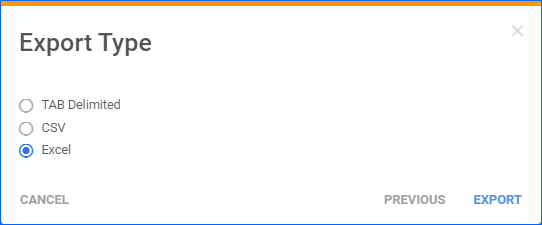
- Select the export file type (either TAB Delimited, CSV, or Excel) and click Export.
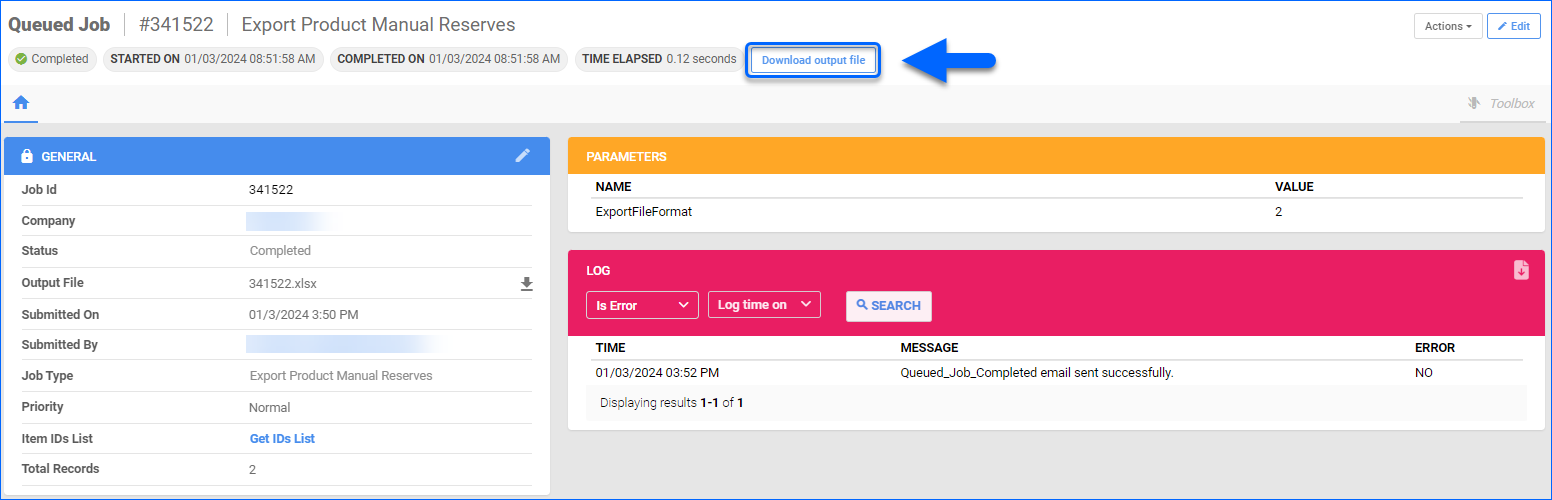
- A Queued job will be generated, from which you can monitor the status of the export. Once completed, open the finished job and click on the Download output file button.
- Open the downloaded file, change the Quantity as desired, and delete the RemainingReserved column.

- Once done, navigate to Inventory > Tools > Import Inventory Info and select Import Manual Reserves.
- Upload the saved file and click Import.
A Queued job will be generated, from which you can monitor the status of the import. Once completed, the reserve/s will be updated.
Schedule Reserves Export
For periodic reserves evaluations, you can schedule an export with existing product reserves:
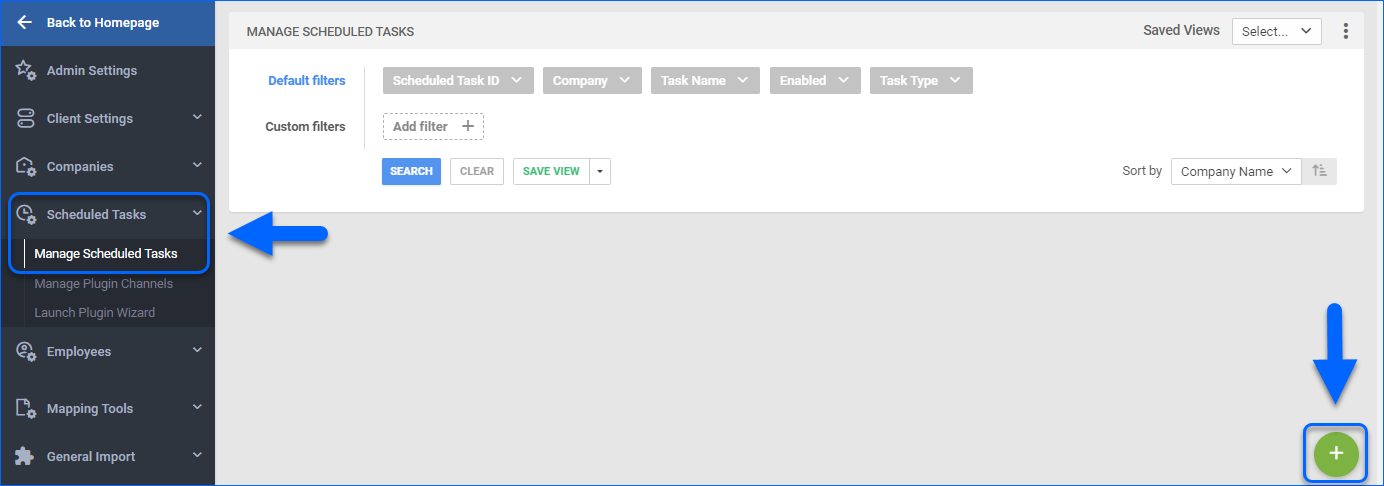
- Navigate to Settings > Schedule Tasks > Manage Schedule Tasks.
- Click on the + sign to create a new schedule task.
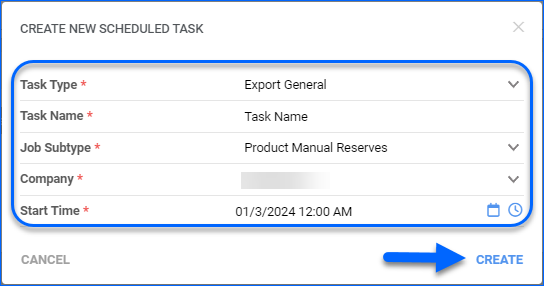
- In the Create New Schedule Task popup, populate the below details and click Create:
- Task Type – Select Export General from the dropdown.
- Task Name – Add a task title.
- Job Subtype – Select Product Manual Reserves from the dropdown.
- Company – Indicate for which company is the scheduled task.
- Start Time – Choose the task’s start time.
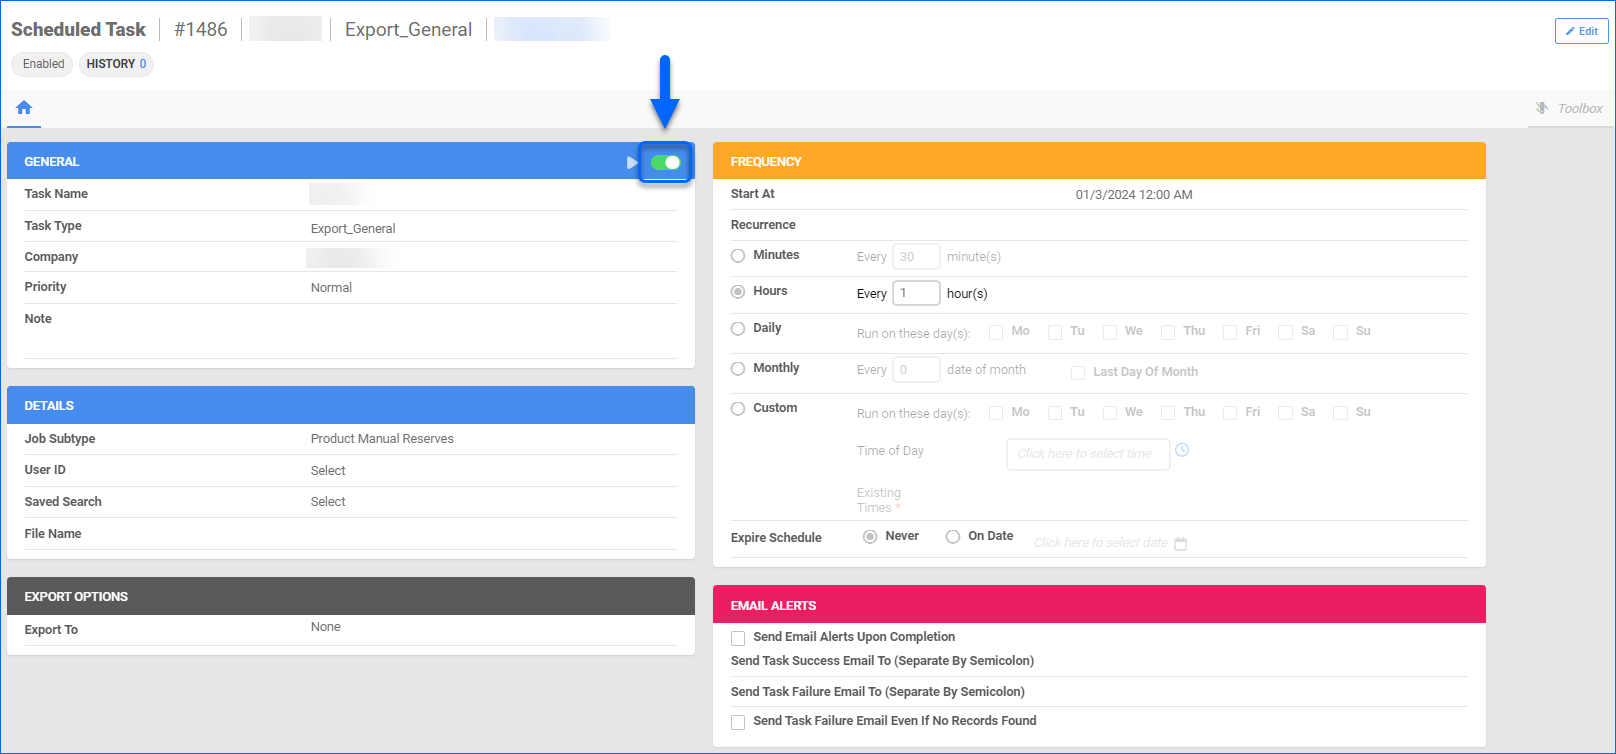
- A success message will appear with a hyperlink to the new scheduled task. Open the task and configure the details. Then, flip the toggle to Enable it.
Related Client Settings
Here is a list of related Client Settings:
- Enable Product Manual Reserve – When enabled, this setting allows you to create inventory reserves manually.
- Auto Reserve when adding Product to FBA and WFS Shipment – Enable this setting to allow the generation of Automatic Inventory Reserves, when adding products for FBA and WFS Shipments.
- Auto Reserve when adding kit components to FBA and WFS Shipment – Enable this setting to allow the generation of Automatic Inventory Reserves, when adding kit components for FBA and WFS Shipments.
- Enable Warehouse Inventory Transfer Request Reserves – When enabled, Sellercloud will reserve the inventory of products you have added to the request regardless of the transfer status.
- Enable Warehouse Inventory Transfer Request Reserves Exclude Pending Transfer Status – If enabled, Sellercloud will reserve the inventory of products you have added to the warehouse transfer for all statuses except for Pending. This setting requires Enable Warehouse Inventory Transfer Request Reserves to also be enabled.
- Download FBA Reserved Inventory Breakdown – If this setting and Always Consider FBA Total Supply Quantity are enabled, Sellercloud will download the FBA transfers and reserves from the FBA Manage Inventory report, include them in the physical quantity imported, then the reserved quantity will be deducted from your available inventory. Such FBA reserves and transfers in the Inventory Movement of a product.
To locate the above settings:
- Navigate to Settings > Client Settings > General Client Settings.
- Flip the Advanced settings toggle.
- Search for the respective setting and once configured, click Save.