Overview
Within Sellercloud’s intuitive user interface, you can effortlessly streamline different processes and operations. Take control of crucial aspects such as Login Information and Security Settings to efficiently manage your team’s passwords or configure Two-Factor Authentication (2FA) to heighten account security and prevent unauthorized access. Seamlessly navigate your Subscriptions and tailor your Account Appearance to suit your preferences. Easily generate login QR codes for yourself or other users, simplifying authentication and access control tasks.
Enjoy a seamless and secure experience that caters to your needs, ensuring hassle-free navigation within your Sellercloud account.
Account Settings
To access and configure your account settings:
- Click on the icon at the top right corner of the screen > Select Account.
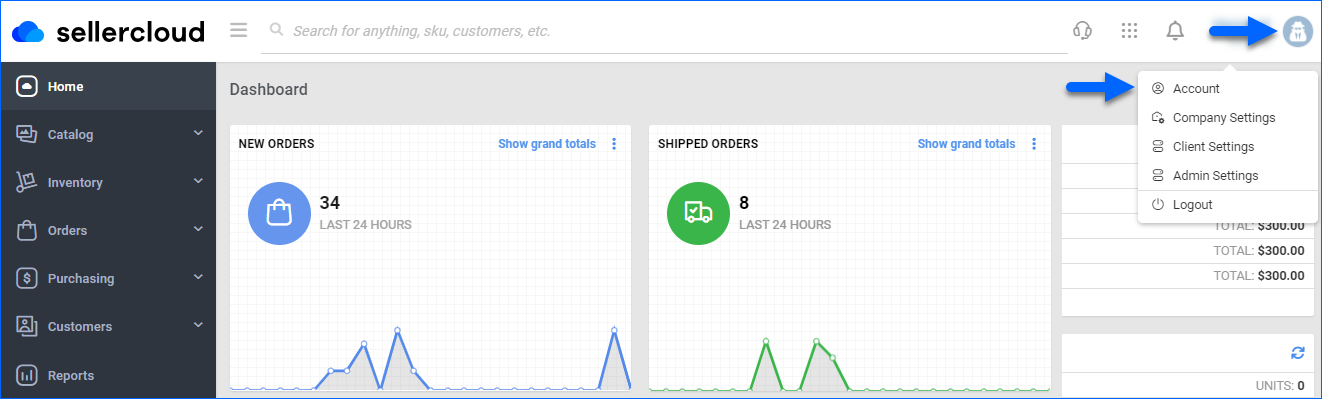
- You’ll be redirected to your Account Settings page, which contains three main options.
- General
- Billing Information
- Security
- Subscriptions
- Display
- From these pages, you can manage important Account Information.
General
In the General panel, you can edit your personal information, such as First and Last Name, Email Address, and Team Name. Additionally, it allows you to conveniently generate login QR codes for yourself or any other application users, making it easier to handle tasks related to user authentication and access control.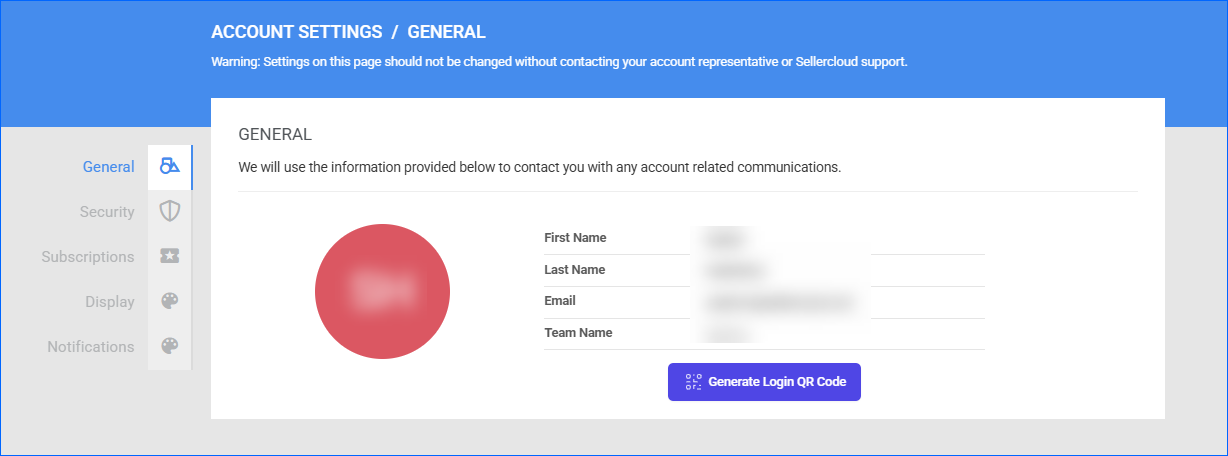
To generate a QR code:
- Click Generate Login QR Code.
- Choose whether you want to generate the code for yourself or someone else.
- Enter the required email address and password fields.
- Click Generate QR.
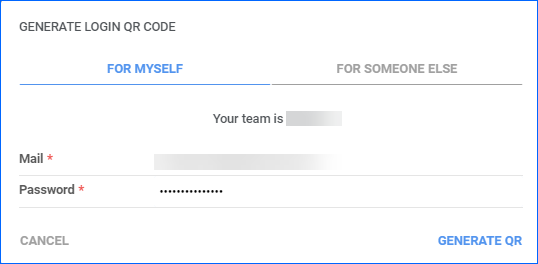
A PDF file containing your login credentials will be downloaded to your computer.
Security
In the Security tab, you can change your password and manage your two-factor verification options. You can choose from three verification options: Email, Google Authenticator App, and SMS.
As a Client Admin, you can also update other users’ passwords and verification options. Read more about Employee Permissions in our dedicated article.
- Log into your Client Admin account.
- Navigate to Settings > Employees > Manage Employees.
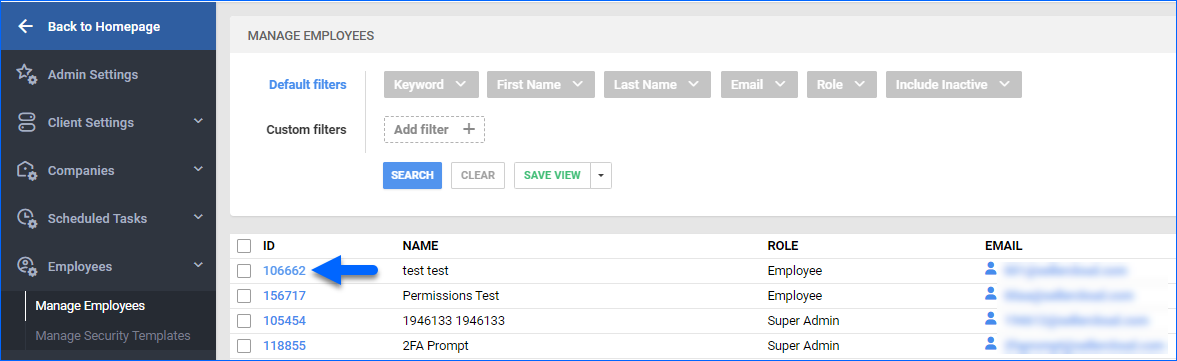
- Select a user. The General Information tab will pop up.
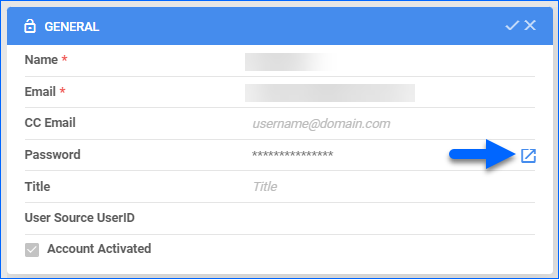
- Click Edit > Click the Change Password icon.
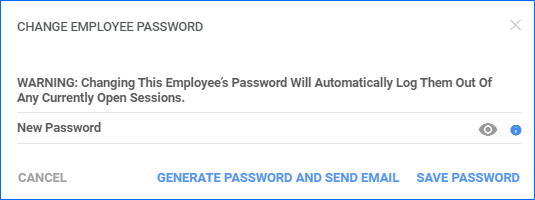
- The Change Employee Password window will display. Enter a new password in the New Password field > Save Password. Alternatively, you can select Generate Password and Send Email if you want to notify the user via email.
- Save your changes.
Subscriptions
Within the Subscriptions tab, you can both view and manage your subscriptions. This tab displays all Sellercloud-related products, such as Skustack, for which you have registered, and provides oversight of active companies and associated users.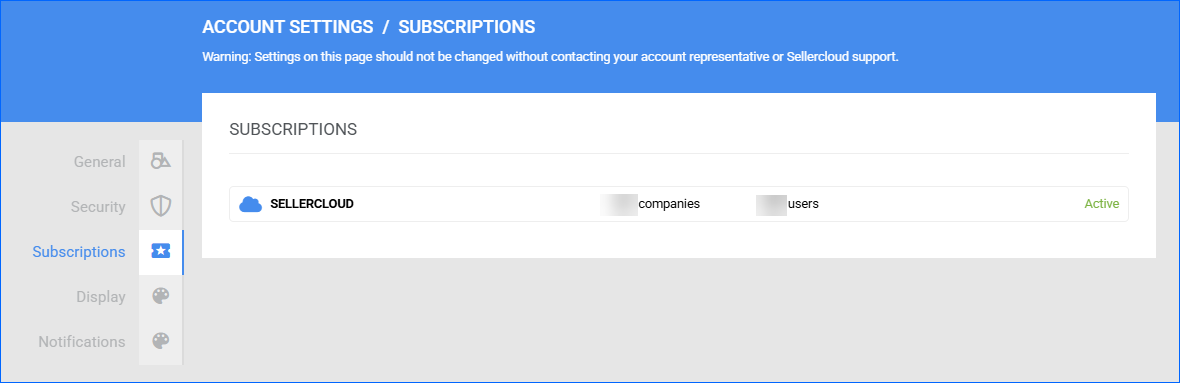
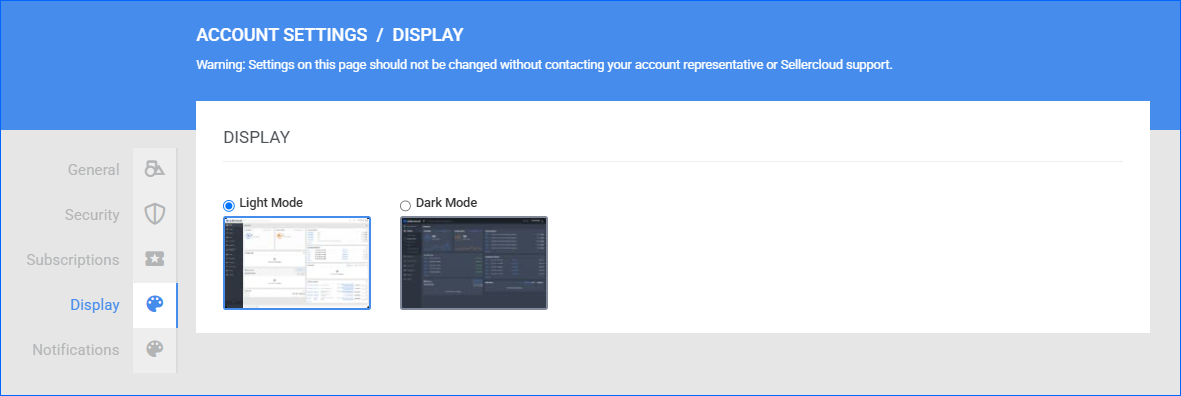
Display
Shape the visual and aesthetic experience of your Sellercloud interface. The Dark Mode feature lets you switch the standard color theme to a darker one, which helps reduce eye strain and gives the interface a sleek, modern look.
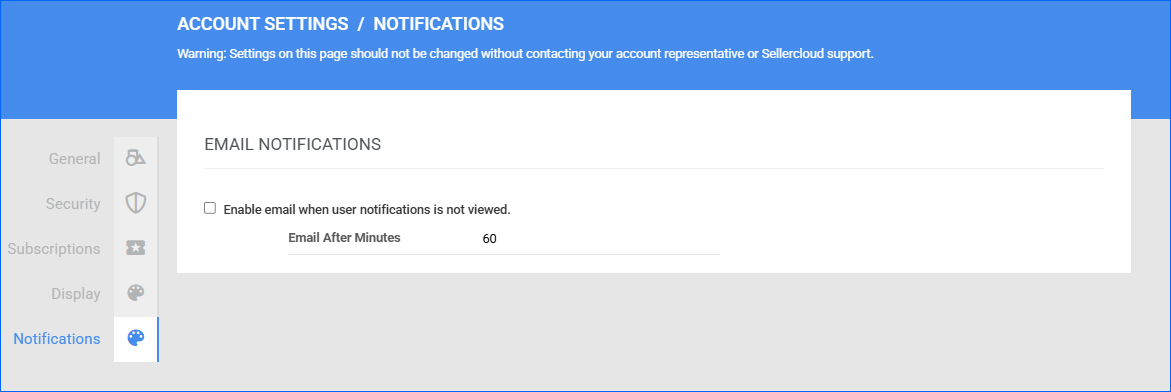
Notifications
User Notifications are available to view directly in the Delta interface. However, you can also receive them via email if you have not been able to open them in the specified amount of time.