Overview
Aliases are alternative identifiers assigned to products in Sellercloud. You can enter any desired value as an alias and then use that instead of the SKU when looking for a product.
Note the following details about product aliases:
- One product can have multiple Aliases.
- Multiple products cannot have the same alias.
- You cannot add aliases to Shadow Products, but you can add them to their parent products.
Use Cases
Product aliases can be used as alternate identifiers when searching for products in Skustack, Shipbridge, and Receivebridge. One way to use the product alias feature is to store outdated identifiers – for example, if the product’s SKU or an identifier, such as the UPC, changes, you can add the old one as an alias. In Sellercloud, you can also print Product Labels from aliases instead of using one of the default identifiers.
Skustack and Shipbridge support scanning aliases during picking and shipping. For example, you can scan products using aliases in Scan and Ship.
Add Aliases
You can add product aliases individually or in bulk.
Individually
To add an alias to a single product:
- Go to the Product Details Page.
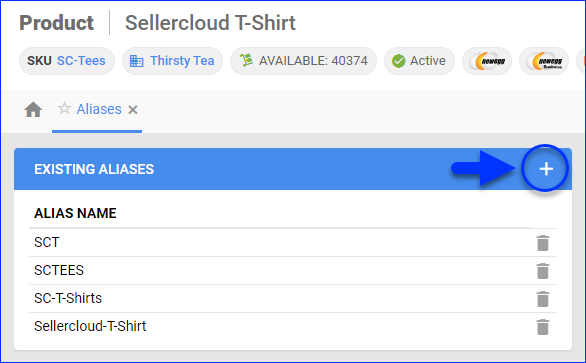
- Click Toolbox and select Aliases.
- Click the Plus icon.
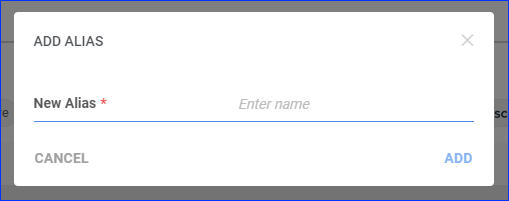
- Type the Alias.
- Click Add.
In Bulk
To add aliases in bulk:
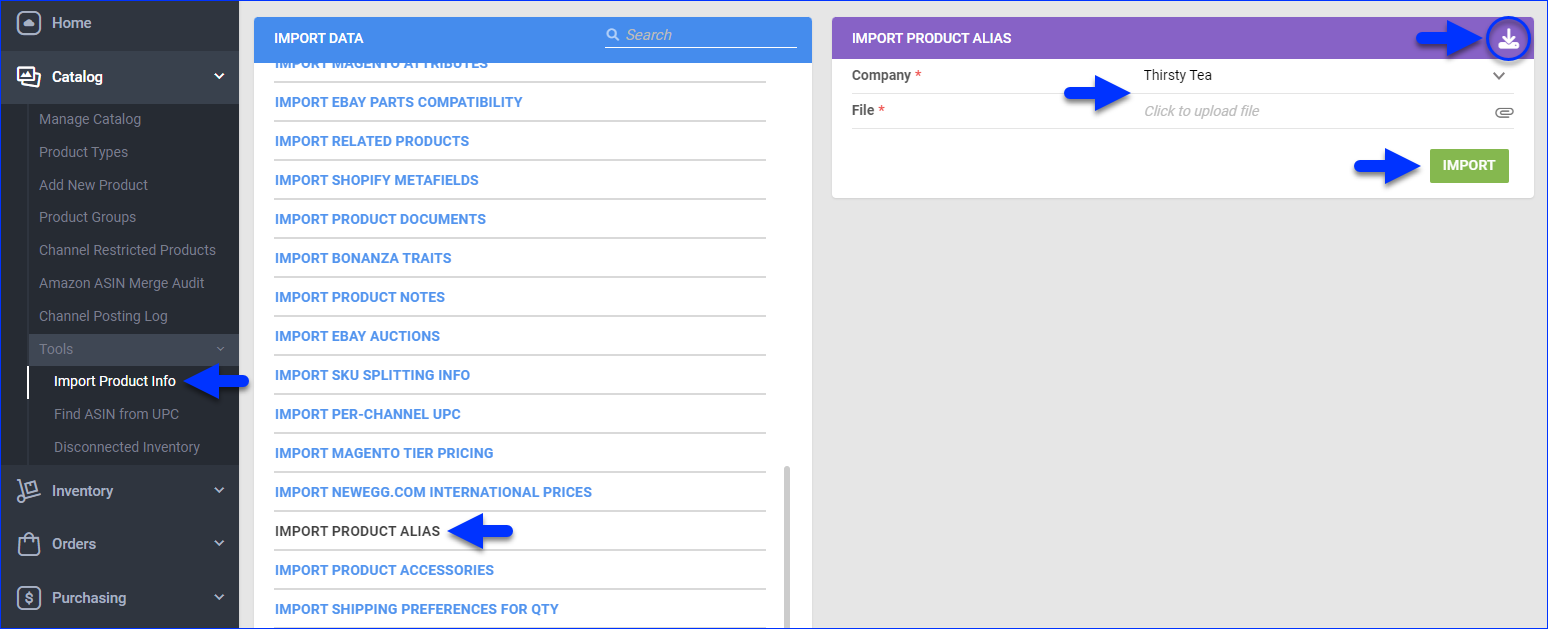
- Go to Catalog > Tools > Import Product Info and select Import Product Alias.
- Download the Template in Excel format.
- Fill in all Product Aliases you want to add.
- Save the template.
- Upload the template into Sellercloud.
- Click Import.
Automatically
To import aliases automatically:
- Go to Settings.
- Select Scheduled Tasks > Manage Scheduled Tasks.
- Click the + icon at the bottom to add a new task.
- Set the Task Type to Import General.
- Set the Job Subtype to Product Alias.
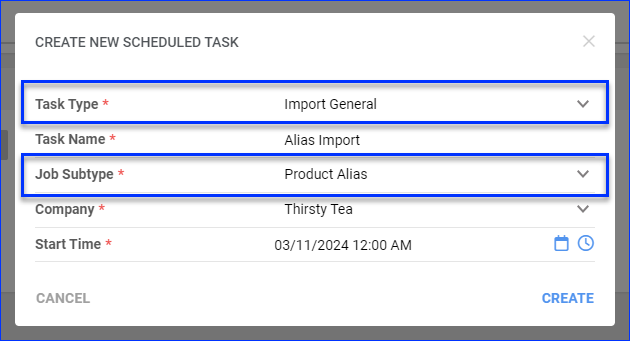
- Set up the rest of the Scheduled Task.
Search by Alias
To search for products by alias in Sellercloud:
- Use the Global Search bar at the top of any page, or;

- Go to Catalog > Manage Catalog and enter the alias into the Keyword filter.
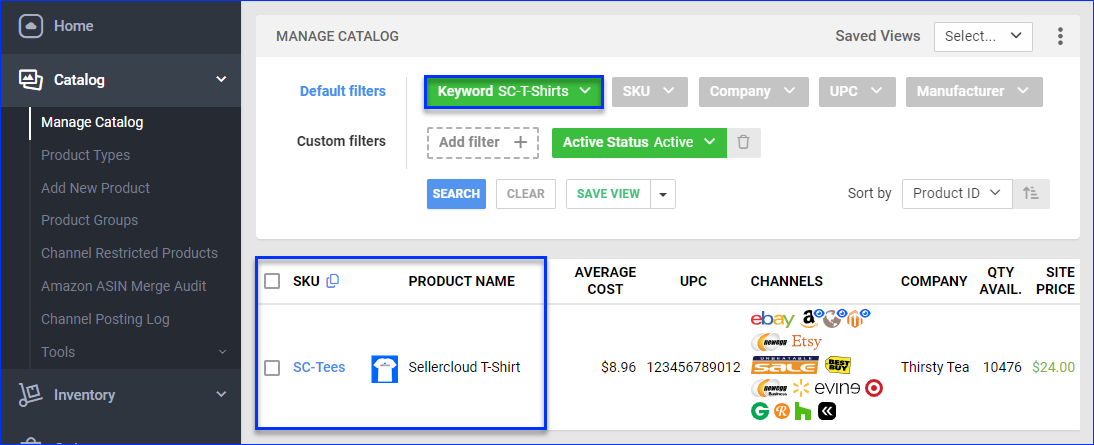
- Other pages in Sellercloud also allow you to search for products by alias.

Print Product Labels
To print product labels from an alias:
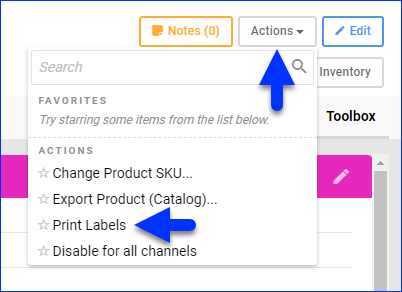
- Go to the Product Details Page.
- Click Actions and select Print Labels.
- Select Product Labels and then choose Alias.
- Select an alias from the Product Alias menu.
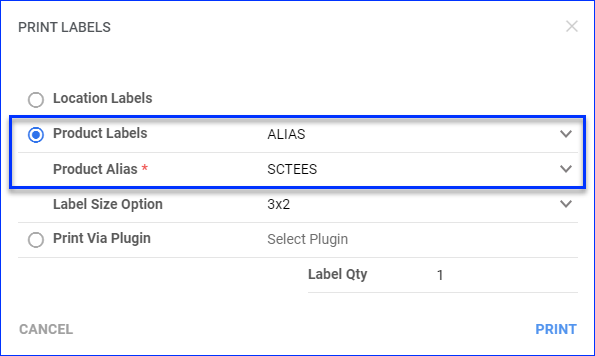
- Click Print.
Export Aliases
You can export product aliases manually on the Manage Catalog page or automatically with Scheduled Tasks.
Manually
To export aliases manually:
- Go to Catalog > Manage Catalog.
- Find and select products.
- Click Actions at the bottom right and select Export Products (Catalog).
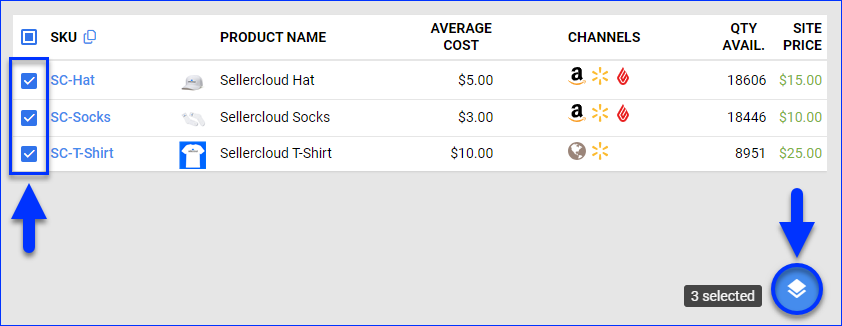
- Select Standard, and from the drop-down menu, select Aliases.
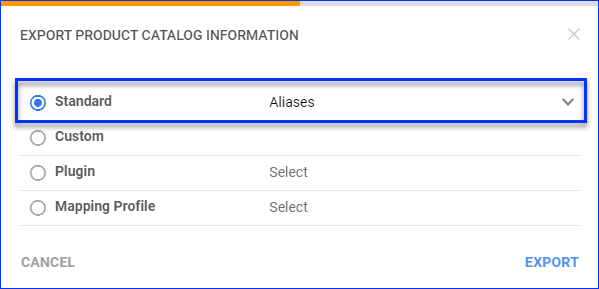
- Click Export, and a text file will be downloaded to your device.
Automatically
To export aliases automatically:
- Go to Settings.
- Select Scheduled Tasks > Manage Scheduled Tasks.
- Click the + icon at the bottom to add a new task.
- Set the Task Type to Export General.
- Set the Job Subtype to Product Alias.
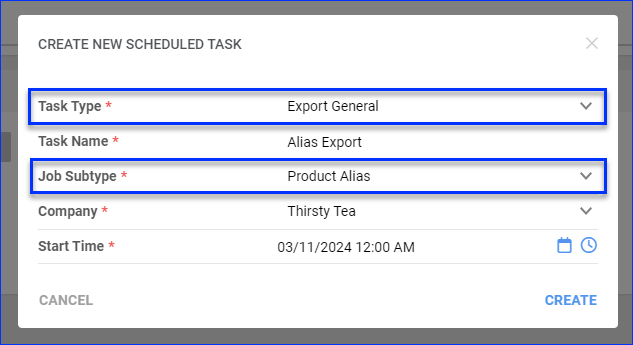
- Set up the rest of the Scheduled Task.
Overview
Aliases are alternative identifiers assigned to products in Sellercloud. You can enter any desired value as an alias and then use that instead of the SKU when looking for a product.
Note the following details about product aliases:
- One product can have multiple Aliases.
- Multiple products cannot have the same alias.
- You cannot add aliases to Shadow Products, but you can add them to their parent products.
Use Cases
Product aliases can be used as alternate identifiers when searching for products in Skustack, Shipbridge, and Receivebridge. One way to use the product alias feature is to store outdated identifiers – for example, if the product’s SKU or an identifier, such as the UPC, changes, you can add the old one as an alias. In Sellercloud, you can also print Product Labels from aliases instead of using one of the default identifiers.
Skustack and Shipbridge support scanning aliases during picking and shipping. For example, you can scan products using aliases in Scan and Ship.
Add Aliases
You can add product aliases individually or in bulk.
Individually
Once you choose a product, you can easily add as many Aliases as you want by following the steps below:
- Go to Inventory > Manage Inventory > search for and open a Product > Toolbox > Alias.
- Type in the Alias.
- Click on Add Files.

In Bulk
Add Aliases in bulk to multiple products by following these steps:
- Home > Search > Manage Inventory > Import Product Info > Import Product Alias.
- Download the Template in Excel format.
- Fill in all Product Aliases you want to add.
- Save the template.
- Upload the template into Sellercloud.
- Click Import.
